How do I Force Sync Messages to iCloud on Your iPhone (iOS 17.2).
iCloud has been the go-to cloud storage service for a lot of iPhone customers. It helps backup your information, and keep your messages secure within the cloud all of the whereas permitting you to entry your information from any device that may entry the net. Keeping your messages synced to iCloud is an effective way to protect conversations when switching gadgets, resetting your iPhone, or catching as much as an current dialog in your different iPhone.
However, beforehand syncing to iCloud was managed robotically, which frequently resulted in delays and missed latest messages in sure instances. Thankfully, with the newest iOS update, you’ll be able to manually pressure sync Messages to iCloud, which may simply assist you keep up to date with the newest conversations.
How do I pressure sync Messages to iCloud in your iPhone
Forcing a sync for Messages to iCloud is comparatively easy in your iPhone. Follow both information under that will help you together with the method.
REQUIREMENTS
- iOS 17.2 update put in in your iPhone
- iCloud enabled in your iPhone
SHORT GUIDE
- Open the Settings app > choose your Apple ID > iCloud > Show All > Messages in iCloud > Sync Now.
GIF GUIDE

STEP-BY-STEP GUIDE
Here’s a step-by-step information that will help you simply pressure sync Messages. Let’s get began!
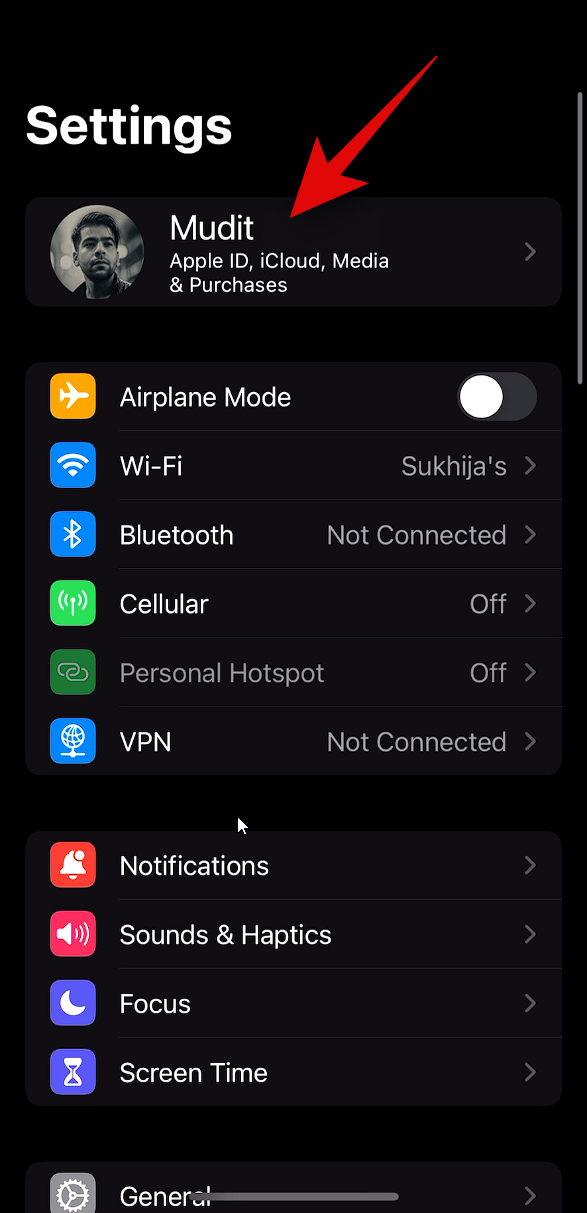
- Open the Settings app in your iPhone and faucet in your Apple ID on the prime.
-
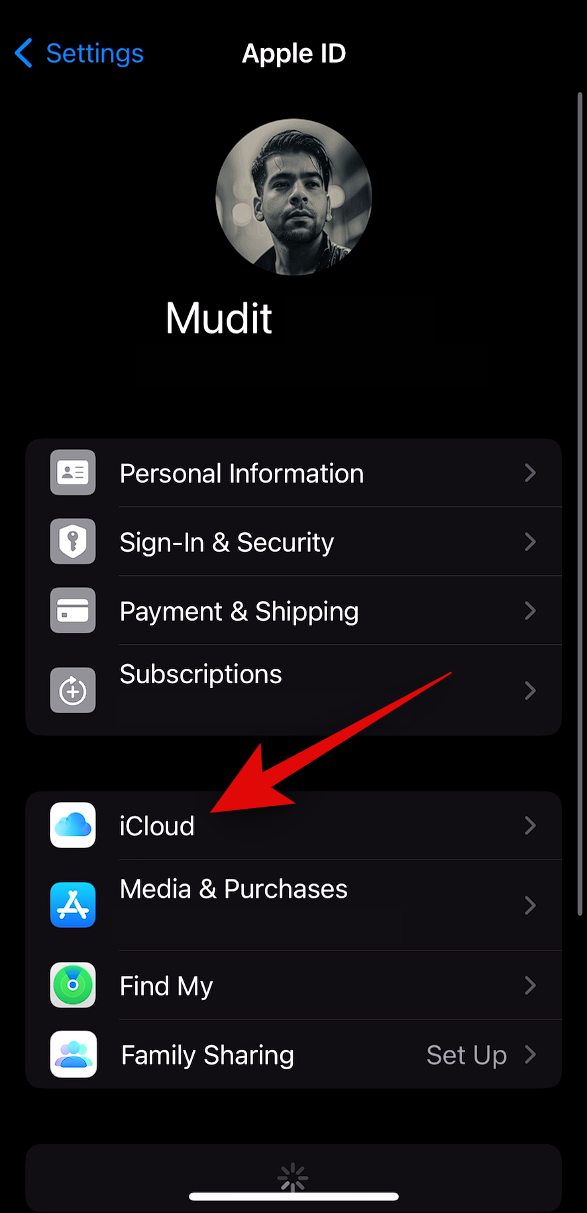
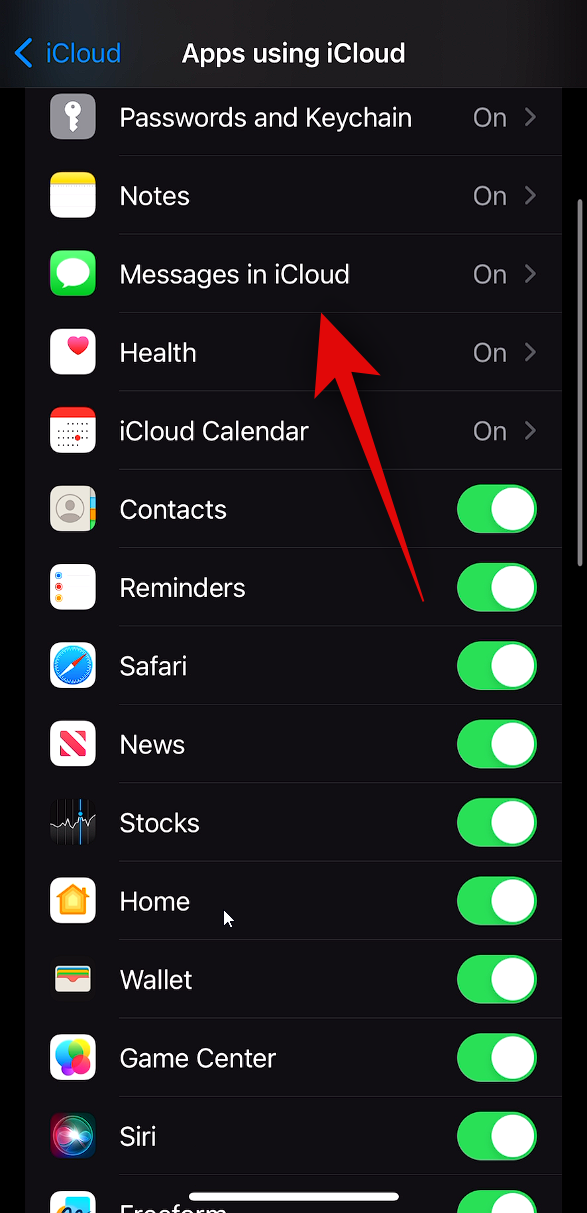
- Now faucet on iCloud, adopted by Show All beneath APPS USING ICLOUD.
-
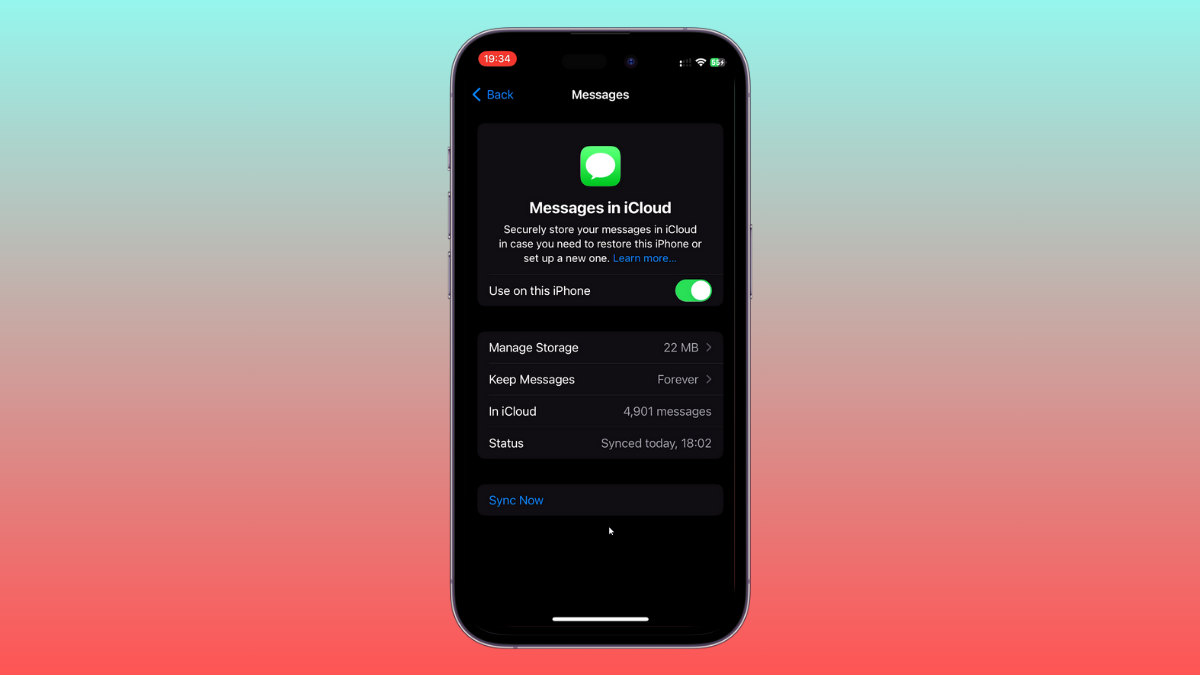
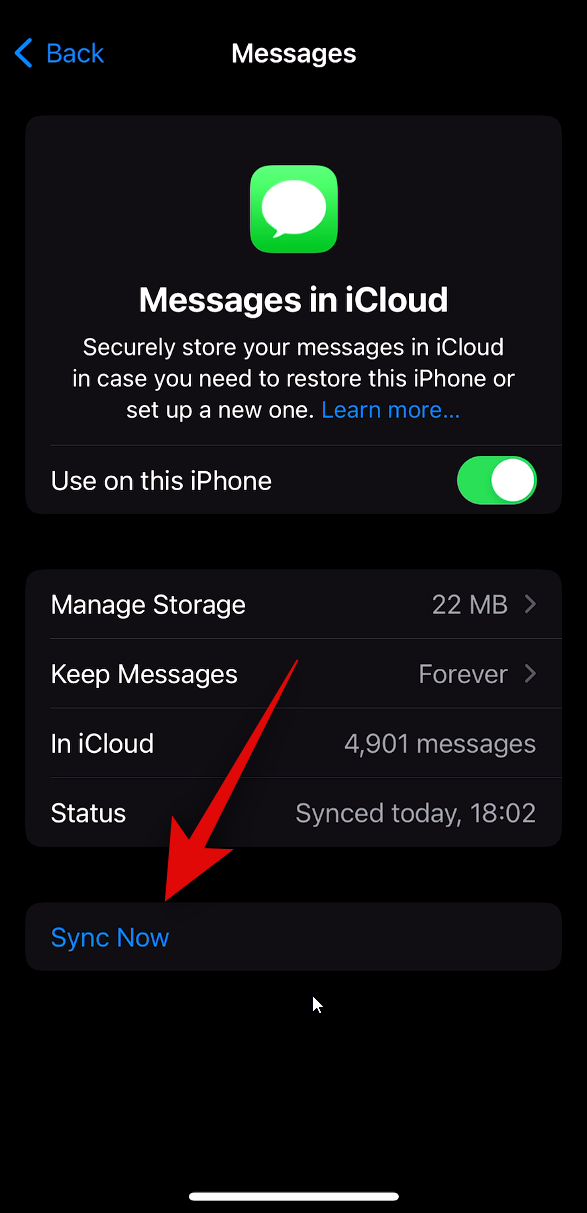
- Tap on Messages in iCloud after which faucet on Sync Now.
-
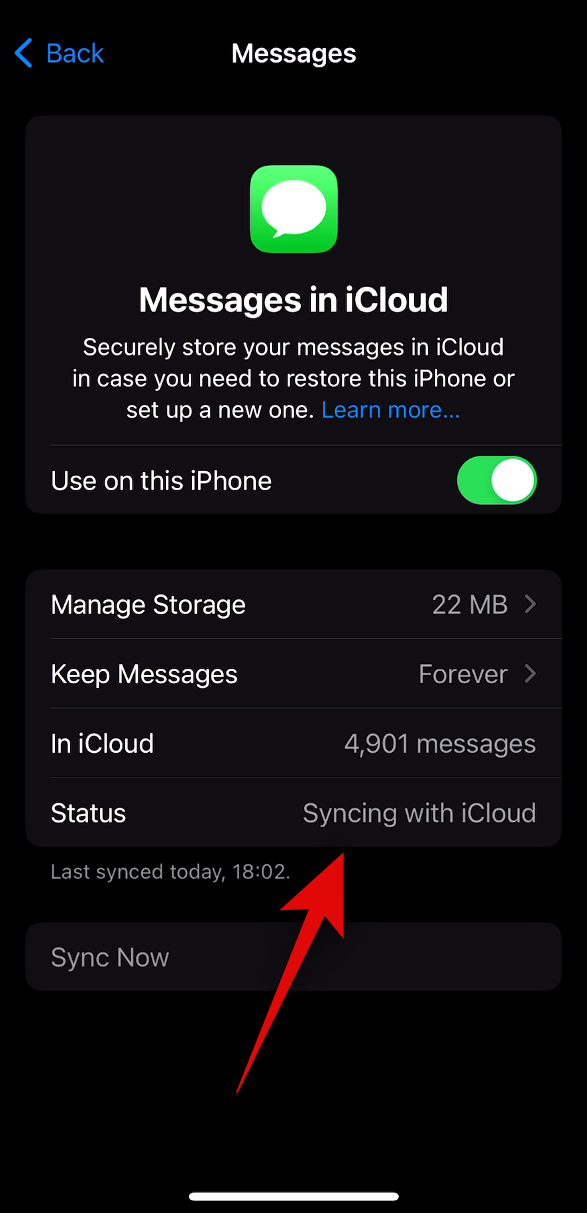
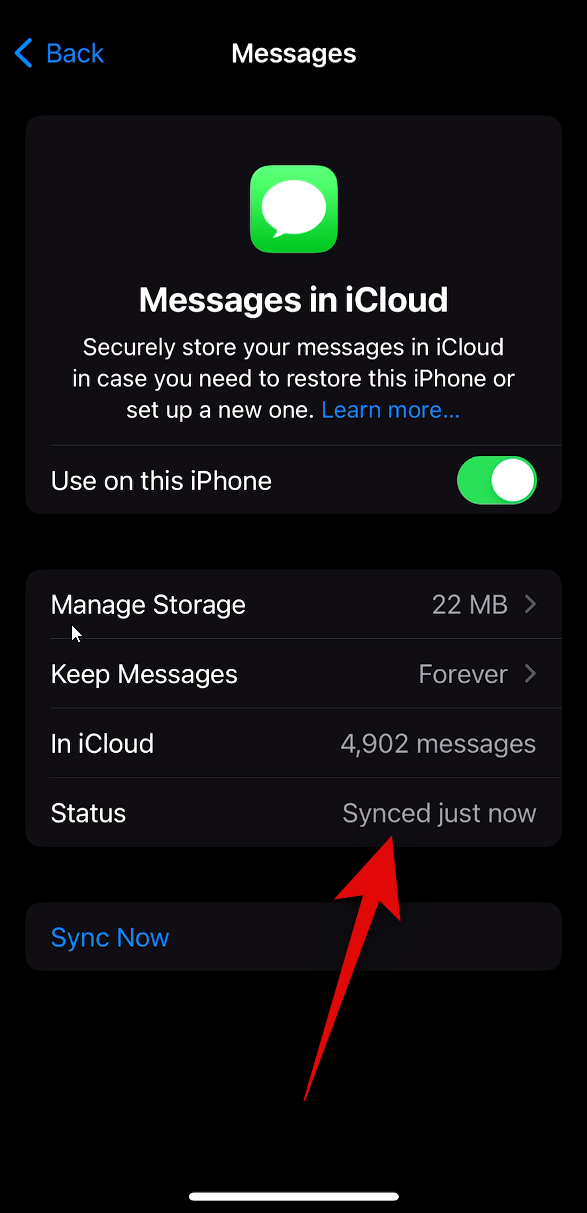
- The Messages will now start to sync and you’ll observe the progress beside Status. Once the method is accomplished, the Status ought to learn Synced simply now.
-


And that’s how one can pressure sync Messages to iCloud at any time when wanted.
We hope this submit helped you simply pressure sync messages to iCloud. If you face any points or have more questions, be happy to contact us using the feedback part under.
Check out more article on – How-To tutorial and latest highlights on – Technical News