How To Tell If Your Power Supply Is Bad?.
To inform in case your energy provide is dangerous, first conduct a soar begin check. It will present you if the ability provide truly activates. This is simply a primary check, although.
To completely confirm in case your PSU is dangerous, carry out a multimeter check as effectively. Grab a multimeter and measure the voltage in every of your ATX energy connector’s 24 pins.
If the measured voltage lies past the anticipated voltage vary, your PSU is flawed. Let’s get into the small print.
Signs Of a Faulty PSU
Before attending to the precise process, listed here are some primary indicators and signs that can make it easier to decide in case your PSU is failing.
These indicators often aren’t sufficient to make a conclusive prognosis. But in the event you discover them, it does imply {that a} correct PSU check is due. Begin with a jumpstart check, then proceed to the multimeter check.
Conduct a Jump Start Test
Alright! Here’s how to test your PSU well being with a soar begin check. You can observe the identical steps for testing all of the PSUs as of late since they’ve a standardized ATX pinout.
- Turn off your PSU and get it out of the PC case. Grab the 24-pin ATX energy connector and maintain it this fashion. The notch ought to lie on the correct aspect.

- Jumpstart the PSU. For this, take a bit of steel wire (ideally a paper clip). And use it to quick the PS_ON# pin (no. 16) and GND pin (no. 15 or 17). Keep the clip/wire hooked up to those pins. Make positive it isn’t unfastened.

- Turn your PSU on. The energy provide ought to activate and followers should rotate. Should the followers not spin, you’ve a foul energy provide.


Please be conscious that the followers may spin for some time and are available to a halt after a couple of seconds. This occurs as a result of your PSU has a zero-RPM or hybrid fan mode.
So, don’t but conclude that your PSU is dangerous. Use a multimeter and conduct a digital multimeter check (DMM) earlier than that. In reality, I counsel you to conduct the DMM check whether or not or not the followers spin.
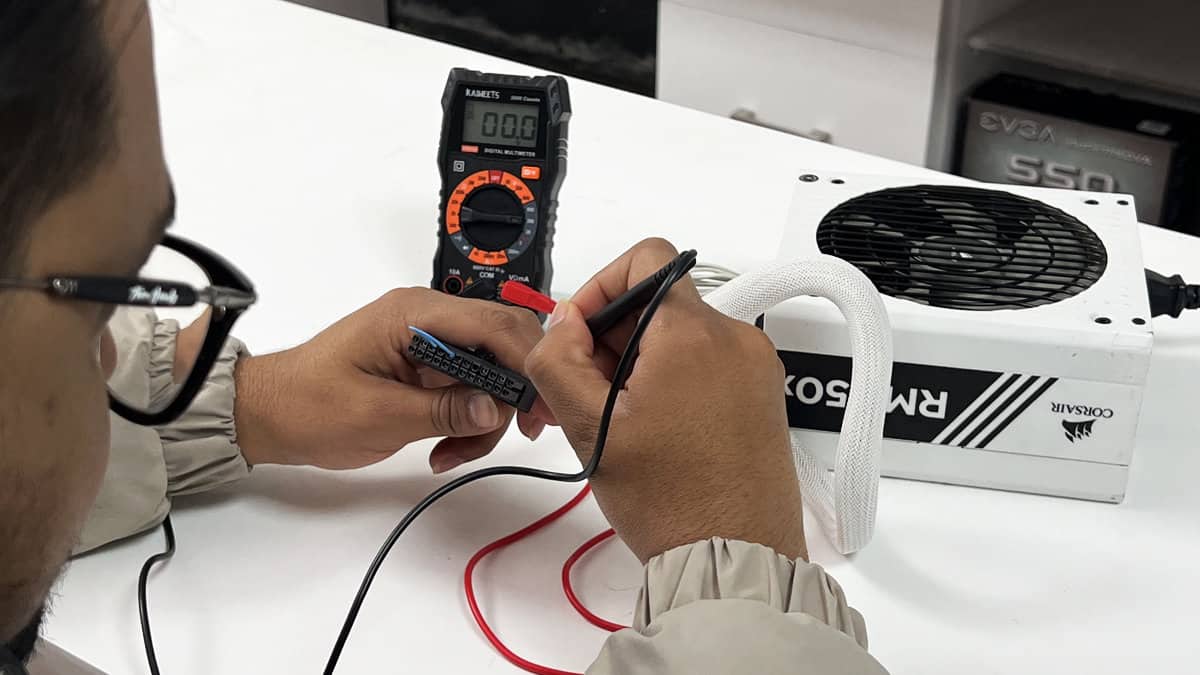
Test Your PSU Using a Multimeter
The multimeter check will assist you understand if each pin on the 24-pin energy connector provides the proper voltage to your PC.
To conduct this check, carry a multimeter and set it to measure DC voltage. Keep the clip/wire hooked up to the connector and test the readings on every of the 24 pins.
For instance, it’s best to get anyplace between +3.135V and +3.465V whereas testing a +3.3V pin. Similarly, it’s between +11.40V and +12.60V for a +12V pin.

The voltage ought to at all times lie between the tolerance limits. No discrepancies are bearable.
For detailed directions, view our information on safely testing a PSU.
If the PSU neither handed the soar check nor the DMM check, you’ll be able to conclude your PSU is defective.
Lightbulb Moment:
On my system with EVGA TremendousNova 650 G3 PSU and mini-ITX motherboard ASRock Fatal1ty AB350 Gaming-ITX/ac, the ability provide didn’t activate when linked to the system. But it labored like a appeal out of the PC case. It handed each the paperclip and DMM exams as effectively.
Later, I discovered that my motherboard had a brief circuit. To shield itself from harm, the PSU triggered the OverCurrentProtection characteristic and refused to show it on.
What I mainly imply right here is, a foul motherboard also can trigger a practical PSU to look dangerous. So, don’t soar to a conclusion till you conduct impartial exams to test the well-being of the PSU and motherboard.
Test Your Motherboard
Alright! Now that you’ve examined your energy provide and located the PSU to be wonderful, check your motherboard as effectively.
For that, reconnect the PSU to your system and switch it on. Start by checking if there are any orange LEDs or Debug LED/HEX codes glowing on the motherboard. Also, pay attention for any beep codes.
Additionally, strive turning in your pc from the motherboard by shorting the PW+ and PW- pins on the entrance panel header. If shorting the pins turns your PC on, you most likely have a foul entrance panel connector or the motherboard header.
While at it, additionally scrutinize your motherboard for any burnt components. Carefully examine if it has any bulged/cracked or leaking capacitors. Also, test if any onboard chips are damaged.
Similarly, search for bent/damaged CPU pins and motherboard headers. Examine seen damages too.
If both of the above-discussed circumstances holds true, your motherboard might be faulty/lifeless.
Do observe that testing/repairing the motherboard is a complicated course of and desires intensive {hardware} information. So, I like to recommend taking it to your vendor/restore heart for additional troubleshooting.
If you favor doing it by yourself, seek advice from our detailed information on testing a motherboard.
Check out more article on – How-To tutorial and latest highlights on – Technical News