How do I Create Archive Files (Natively) on Windows 11.
When it involves unarchiving recordsdata (or extracting them as it’s often referred to as) Windows 11 enjoys the power to take action for numerous compressed file codecs. But Microsoft is bettering Windows for archiving recordsdata too. Recent modifications have led to not simply a capability to compress recordsdata into codecs aside from ZIP, but in addition a complicated ‘Create Archive’ window to provide customers further archiving choices. Here’s all the things you might want to know to archive and compress recordsdata on Windows 11 with none third-party instruments.
How do I create TAR and 7z archives on Windows 11
The ultimate quarter of 2023 noticed Windows obtain the power to create 7z and TAR archives natively (aside from the already current ZIP). And now, a current update for Canary builds 26040 brings a brand new ‘Create Archive’ window the place customers will be capable to select further compression choices. Here’s how all these strategies work:
Compressing or archiving recordsdata from the Folder context menu remains to be the quickest technique. Here’s how you need to use it:
Select the recordsdata you wish to archive.
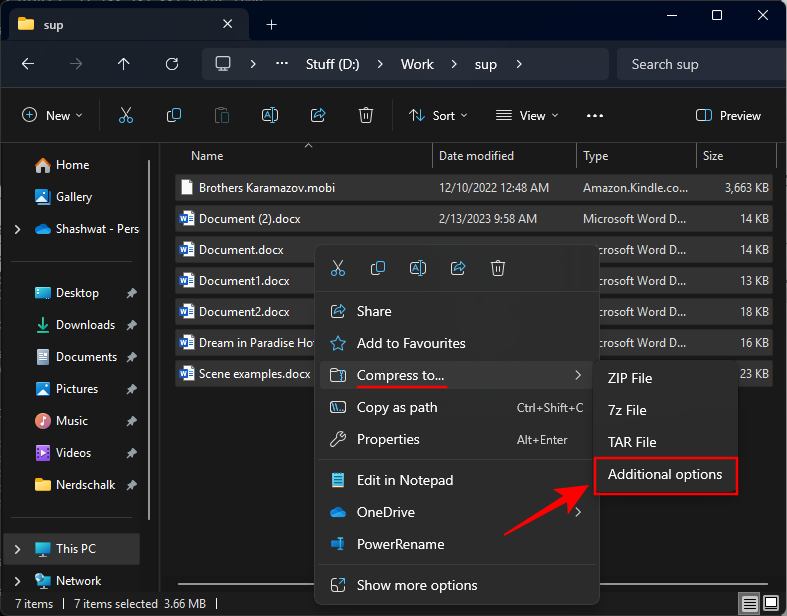
Right-click on them and hover over Compress to…
Then choose the archive format that you just wish to compress your recordsdata into.
Give the archive a reputation.
And identical to that, your recordsdata might be archived within the chosen format, no matter whether or not it’s ZIP, TAR, or 7z.
Method 2: Using the ‘Create Archive’ window
The ‘Create Archive’ window is a brand new addition to Windows (solely on Canary builds for now). Here’s how to make use of it:
- Select the recordsdata to archive, right-click on them, and choose Compress to > Additional choices.
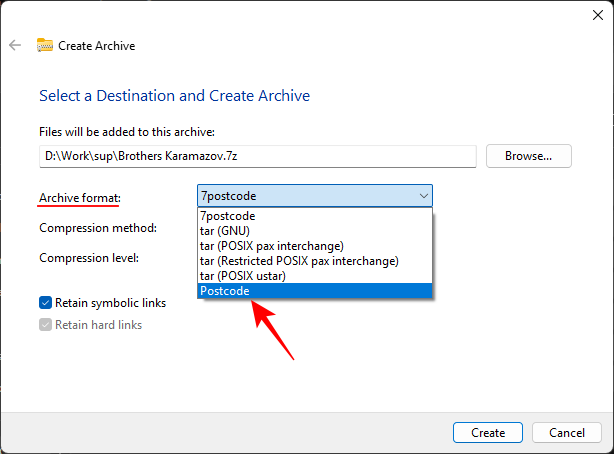
- In the ‘Create Archive’ window, give your file a reputation and select a location.

- Select the Archive format from the dropdown menu.

7postcode is 7z and Postcode is Zip. The relaxation are Tar. - Choose a Compression technique from the dropdown menu on your chosen archive format (these might be totally different for every format).

- If accessible, select a Compression degree by dragging the slider. ‘Faster’ compression will get the job carried out faster however received’t shrink the scale of the recordsdata an excessive amount of; a ‘Smaller’ compression will shrink the recordsdata however can take a while to complete creating.

- If accessible, select whether or not you wish to retain ‘symbolic links’ and ‘hard links’.

- Finally, click on Create.

- And your archive might be created along with your chosen preferences.

How do I create a ZIP archive on Windows 11
Since ZIP has loved deeper integration into Windows for fairly a while, it may be compressed natively in a number of methods. Here’s how:
Method 1: From the File Explorer
- Select the recordsdata you wish to zip, right-click on them, and choose Compress to > Zip file.

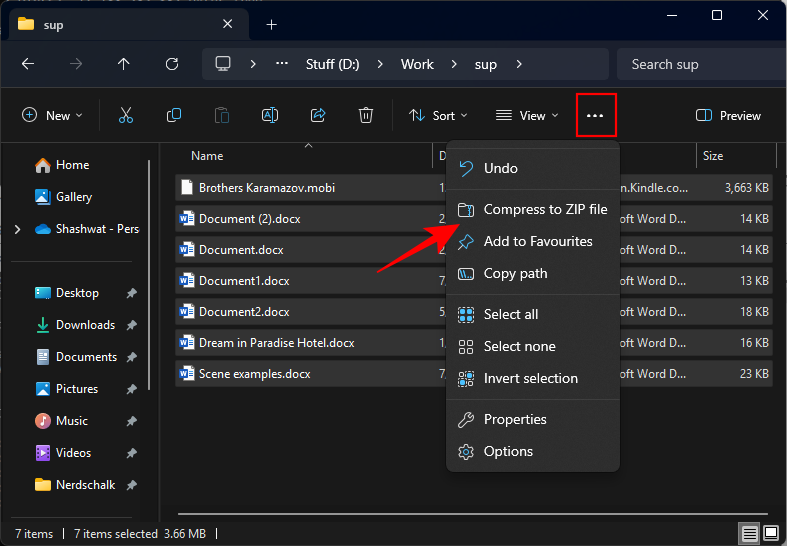
- Alternatively, click on on the three-dot icon in File Explorer’s toolbar, and choose Compress to ZIP file.
- You may create an empty ZIP folder by clicking on New > Compressed (zipped) folder.

- Then merely drag and drop your recordsdata into it.

Method 2: Using the Create Archive Window
With the ‘Create Archive’ compression wizard, you get more granular management over the compression technique and degree on your ZIP archive. Here’s how to make use of it:
- Select the recordsdata you wish to zip, right-click, and choose Compress to > Additional choices.

- From the ‘Archive’ dropdown menu, choose Postcode.
- Choose a ‘Compression method’.

Note: ‘Store’ permits you to solely put recordsdata in an archive file. To get compression degree choices, select ‘Deflate’. - Use the slider to find out the ‘Compression level’.

- Click Create.

Method 3: Using PowerShell
Here’s how to create ZIP archives using PowerShell:
- Open PowerShell.
- Type the next command:
Compress-Archive -Path C:SupplyFilePath* -Vacation spotPath C:Vacation spotFilePathZippedFile.zip
Make positive to alter the supply and vacation spot file path. The * tells the command immediate to zip all of the recordsdata inside that folder. - And identical to that your recordsdata might be archived right into a ZIP format.

Method 4: Using the Command Prompt
Here’s how to make use of the command immediate to create ZIP archives:
- Open the command immediate as administrator.
- Then change the listing with this command:
cd (folder_path)
Make positive to switch (folder) with the deal with of the folder that accommodates the recordsdata. - If you’re altering to a unique drive, you’ll want to incorporate ‘/d‘ after cd.

- Type dir and press Enter.

This will listing the recordsdata within the folder (listing). - Now sort the next command:
tar -a -c -f Compressed.zip *.FileExt
Change the title ‘Compressed’ to no matter you would like the filename of the zipped file to be. And ensure that to switch ‘FileExt’ with the extension of the recordsdata to zip. - If there are a number of file extensions that you just wish to zip, merely add them on the finish of the command, like so:
tar -a -c -f Compressed.zip *.FileExt *.FileExt(2) *.FileExt(3)
- If you solely wish to compress a single file, take away the * and enter the title of the file (with its file extension), like so:
tar -a -c -f Compressed.zip filename.FileExt
FAQ
Let’s think about a number of generally requested questions on creating archive recordsdata natively on Windows 11.
Which file codecs can Windows 11 archive natively?
Currently, you may create solely ZIP, TAR, and 7z archive recordsdata natively on Windows 11.
Can you archive recordsdata into RAR on Windows 11 natively?
No, RAR is just not one of many archive recordsdata that you would be able to create natively on Windows 11.
Can you create password-protected archive recordsdata on Windows 11 natively?
Unfortunately, regardless that Windows 11 permits you to create archives using a Compression Wizard, it doesn’t allow you to password-protect your recordsdata but. You’ll nonetheless have to make use of third-party choices to create password-protected archives.
We hope you had been in a position to archive recordsdata natively on Windows 11 using the totally different strategies given on this information. Until next time!
Check out more article on – How-To tutorial and latest highlights on – Technical News