How do I Automate Scraping LinkedIn Data into Your CRM.
Want to save lots of time by amassing knowledge from LinkedIn profiles with out lifting a finger? This information will train you the way to robotically scrape data from LinkedIn profiles, enter it into an internet kind, and ship it straight to your CRM. This means you possibly can keep monitor of necessary contacts with none handbook effort.
By the tip of this information, you’ll have an automatic bot that may:
- Visit any LinkedIn profile you select.
- Pick out the profile’s title and web site hyperlink.
- Transfer that knowledge to a ClickUp kind and submit it for you.
All the main points it gathers will probably be neatly saved in your ClickUp CRM account, prepared for while you want them.
What You’ll Need to Get Started
Before diving into the automated course of, be sure you have the next necessities prepared:
1. A LinkedIn Account
To view somebody’s LinkedIn profile, you could be logged into your individual LinkedIn account.
2. A ClickUp Form
You’ll want a ClickUp kind that’s open to the general public, that includes fields for the ‘Name’, ‘Website URL’, and a ‘Submit’ button. This is the place the scraped LinkedIn knowledge will go.
Related: How do I create a ClickUp kind.
3. Google Chrome and the Axiom.ai Extension
Axiom is the device the place we’ll construct our automation. With a free account, you get two hours of automation run time, which ought to be loads for our wants.
Start by downloading the Axiom.ai Chrome extension and making a free account.
Transferring Data from LinkedIn to a ClickUp Form
Start by opening the LinkedIn profile you’re occupied with on Chrome. Then, click on on the Axiom.io Chrome extension icon.
![Axiom Browser Extension Icon](https://assets.hongkiat.com/uploads/scrape-linkedin-to-form/preview/axiom-browser-extension.jpg)
Create a brand new automation by clicking “+ New Automation“, and title it “LinkedIn to ClickUp“.
![Setting Up New Automation](https://assets.hongkiat.com/uploads/scrape-linkedin-to-form/preview/new-automation.jpg)
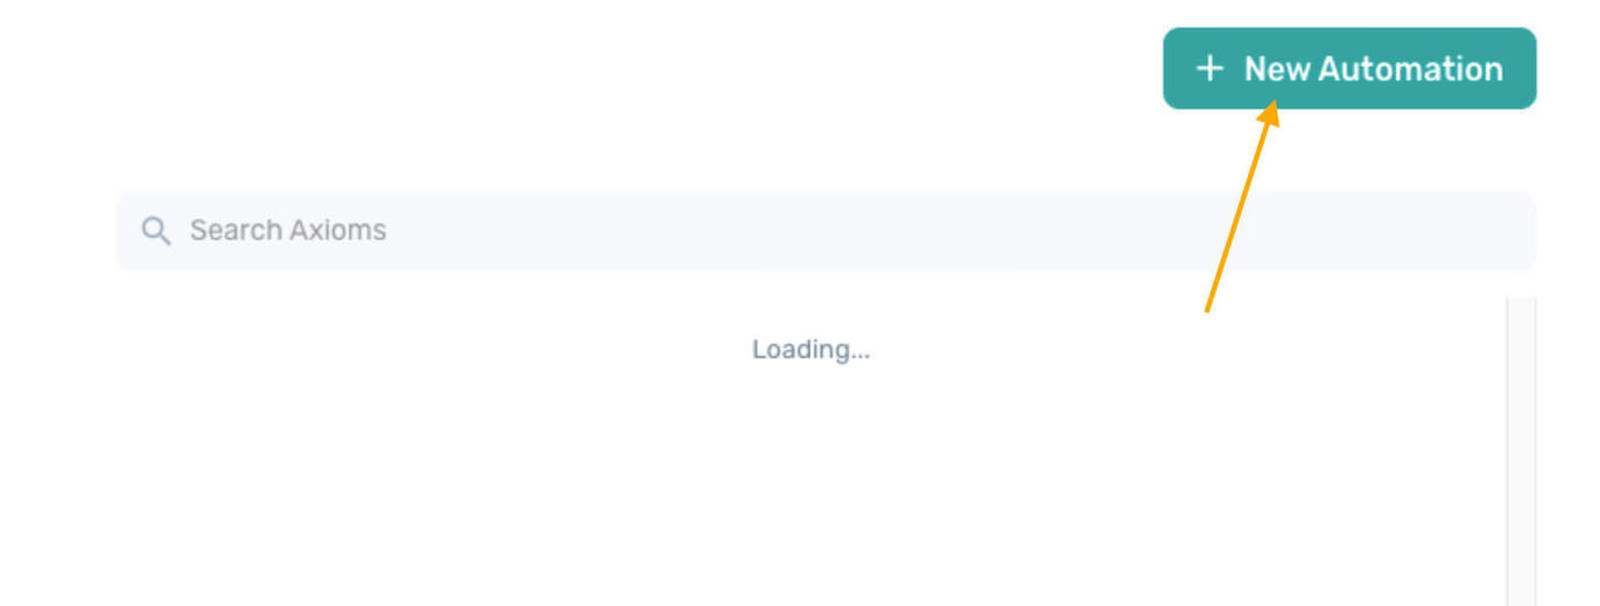
Step 1: Create a New Automation
Click “+ Create New Automation“.
![Creating a New Automation in Axiom](https://assets.hongkiat.com/uploads/scrape-linkedin-to-form/preview/create-new-automation.jpg)
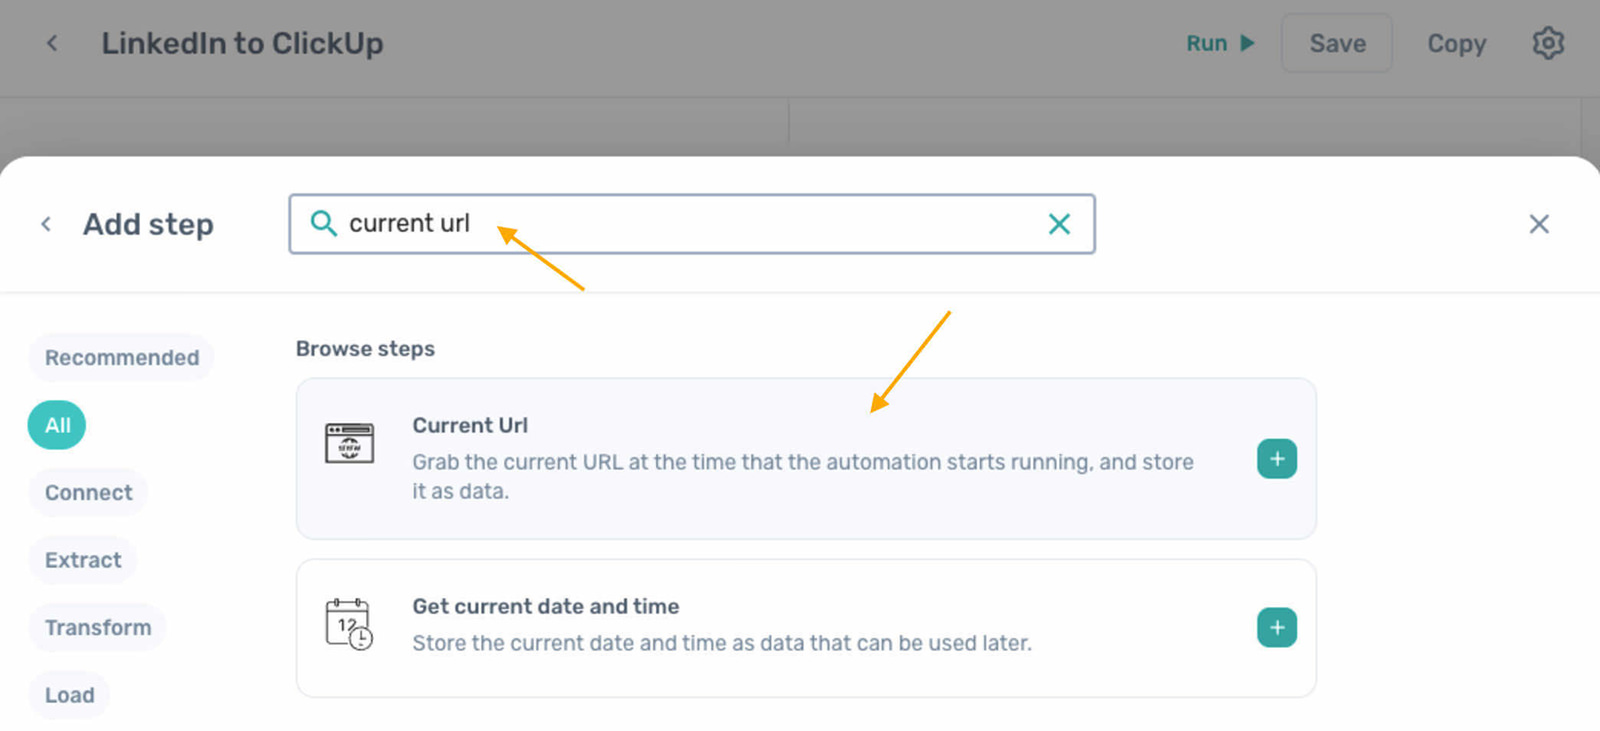
Next, within the ‘Add step’ part, search for “Current URL” and add the primary choice that seems.
![Selecting Current URL Option](https://assets.hongkiat.com/uploads/scrape-linkedin-to-form/preview/current-url-result.jpg)
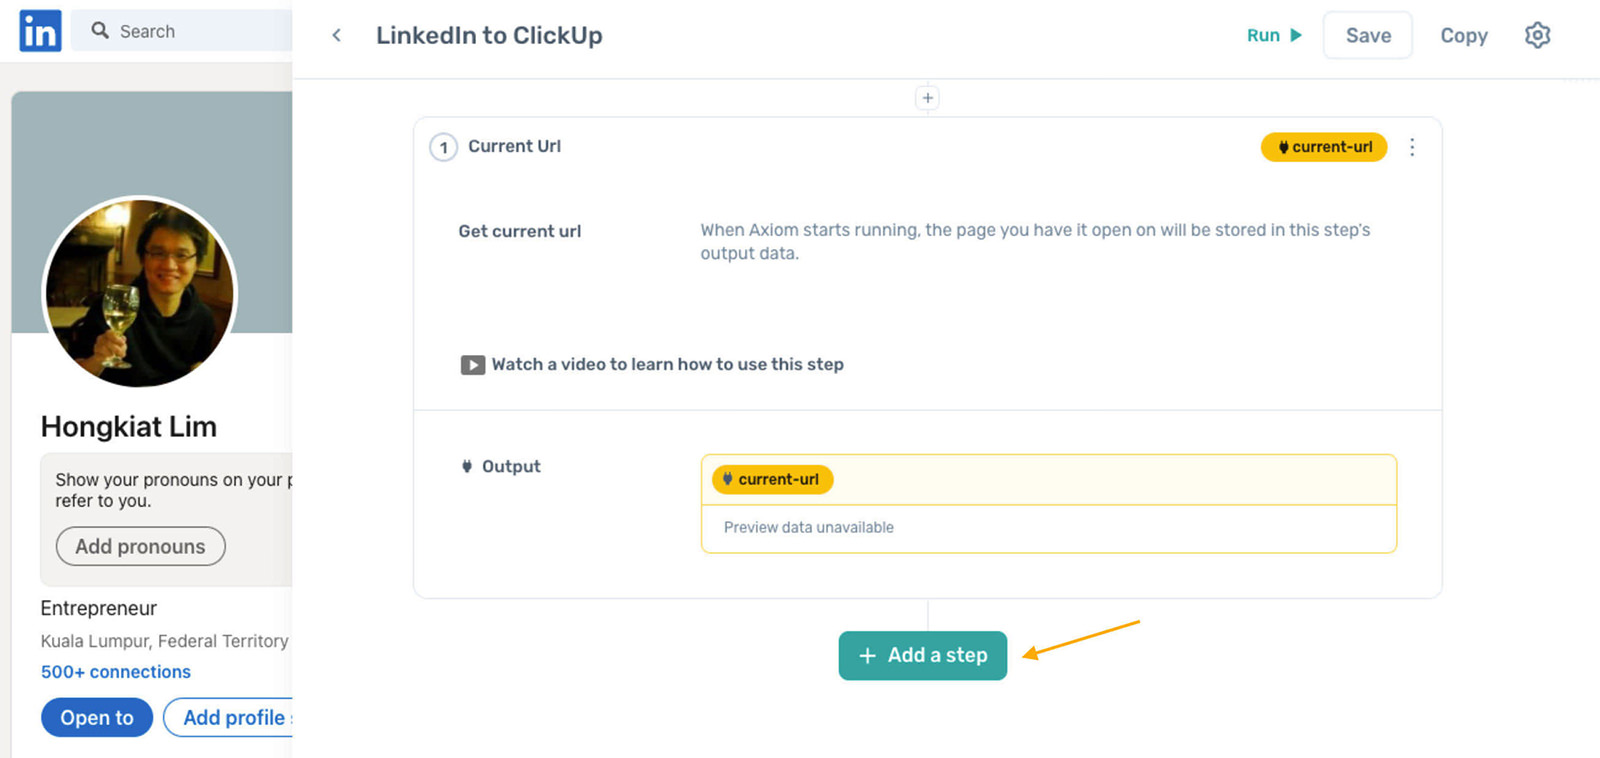
Step 2: Interacting with the Page
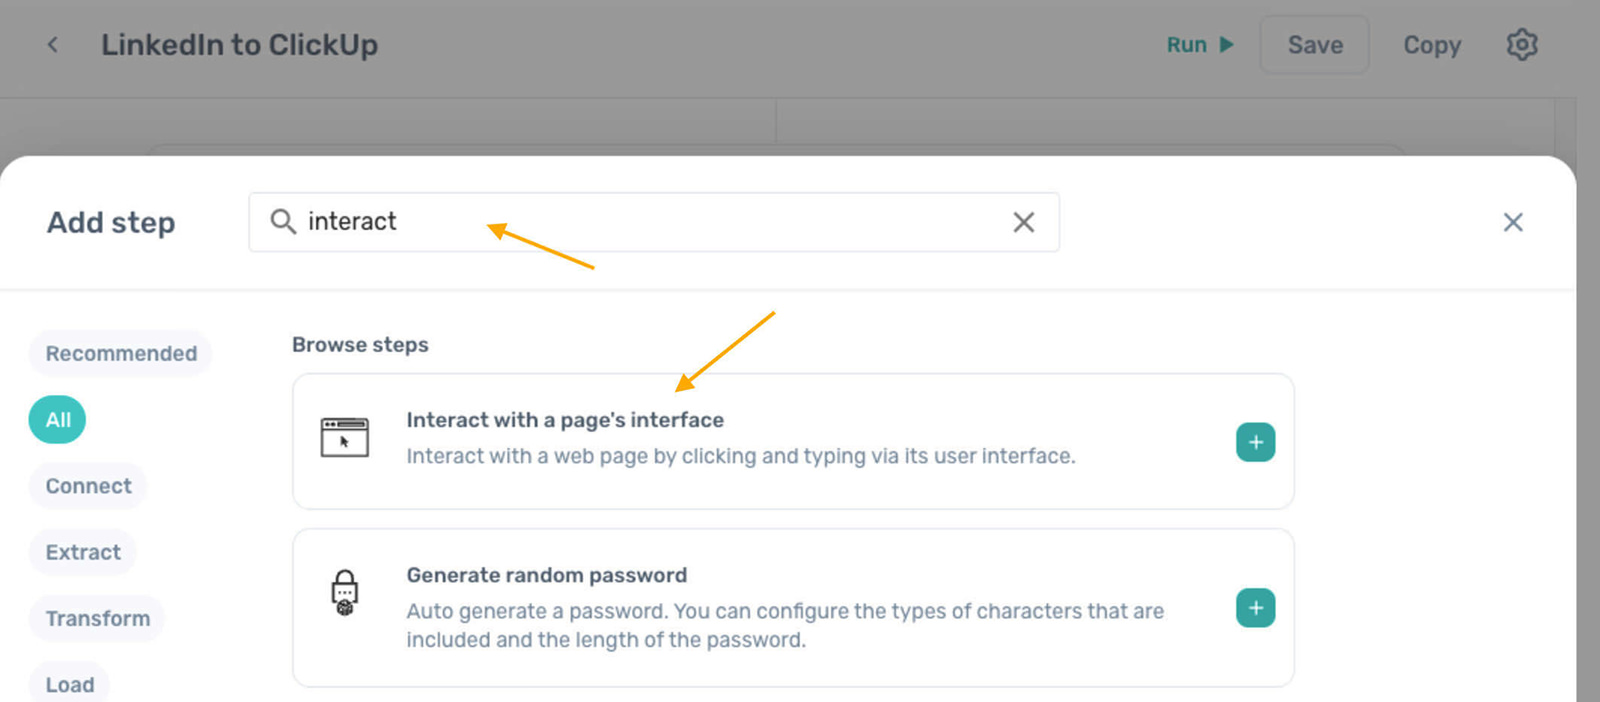
Add one other step by clicking “+ Add a step“.
![Adding a Second Step](https://assets.hongkiat.com/uploads/scrape-linkedin-to-form/preview/add-second-step.jpg)
Look up “Interact with a page’s interface” within the search bar, and make it the subsequent step in your automation.
![Interacting with Page Interface](https://assets.hongkiat.com/uploads/scrape-linkedin-to-form/preview/interact-with-page-interface.jpg)
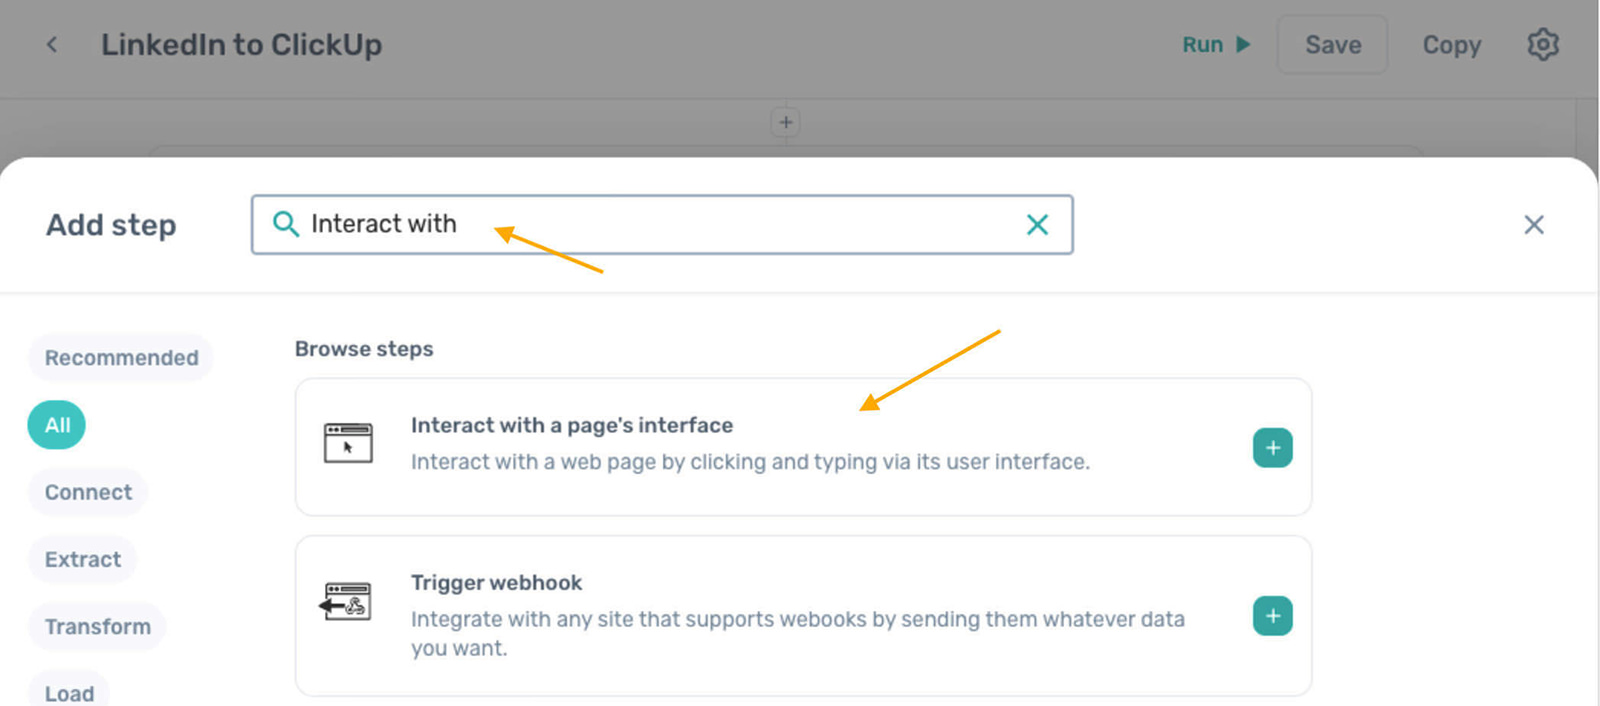
Choose “Insert Data” after which choose “[current-url]]” from the choices offered.
![Inserting Data from Current URL](https://assets.hongkiat.com/uploads/scrape-linkedin-to-form/preview/insert-data-current-url.jpg)
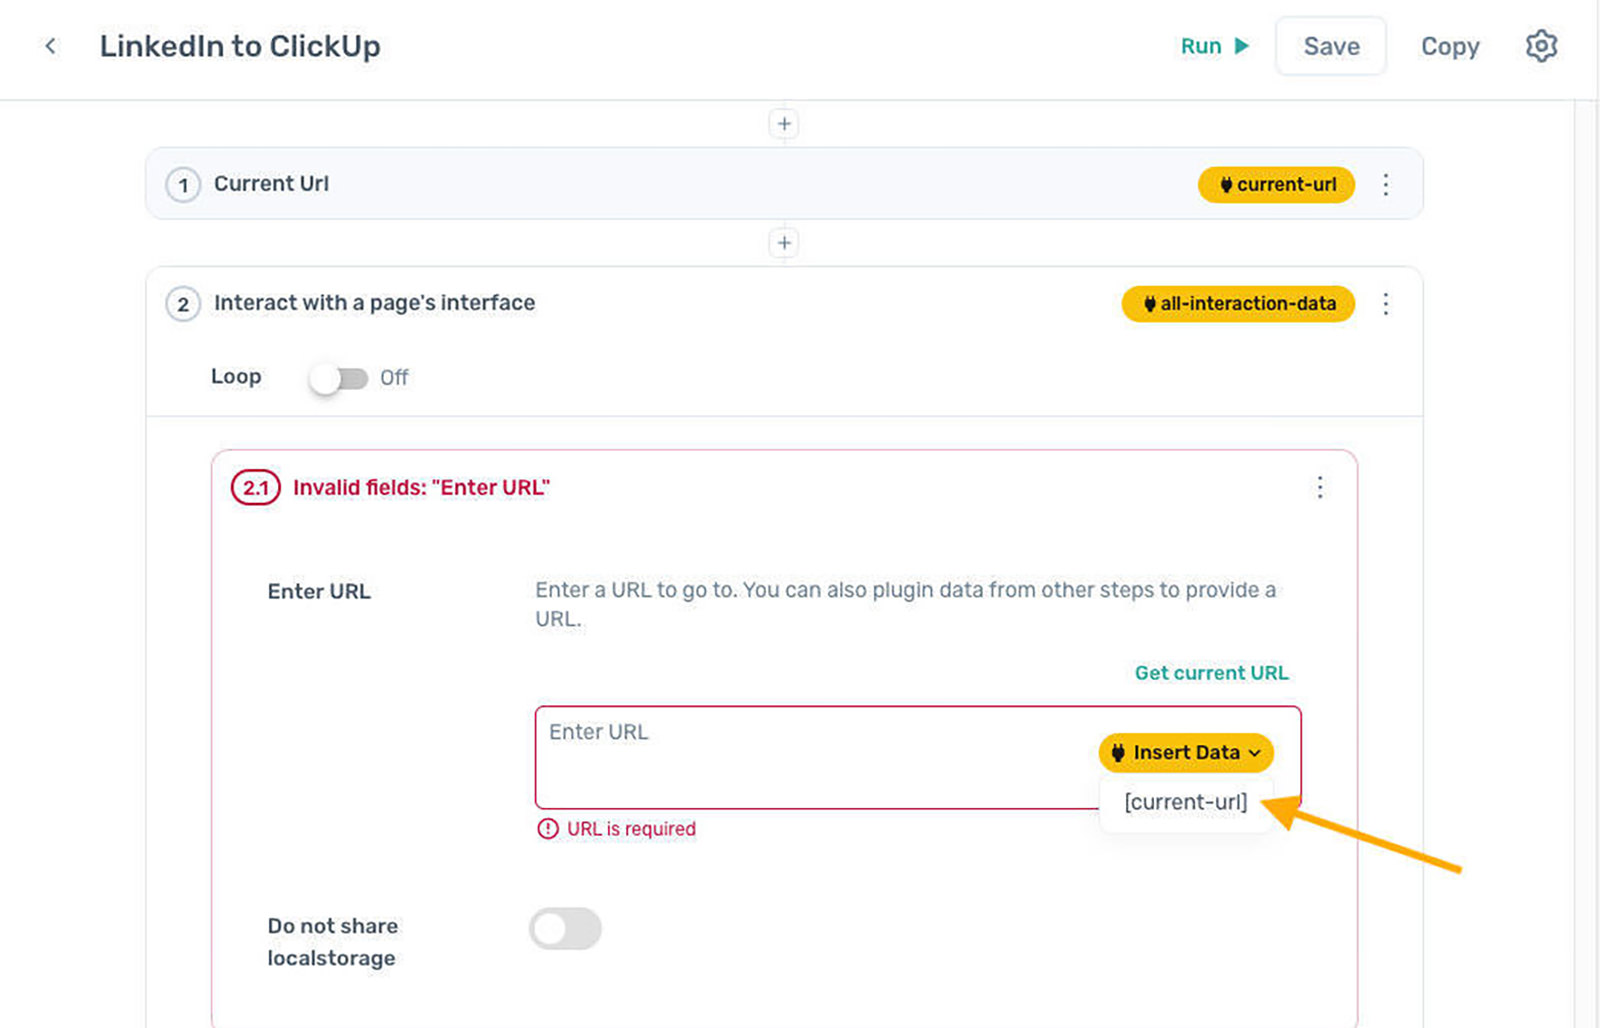
With the goal web page specified, we’re now prepared to inform the bot what knowledge to gather.
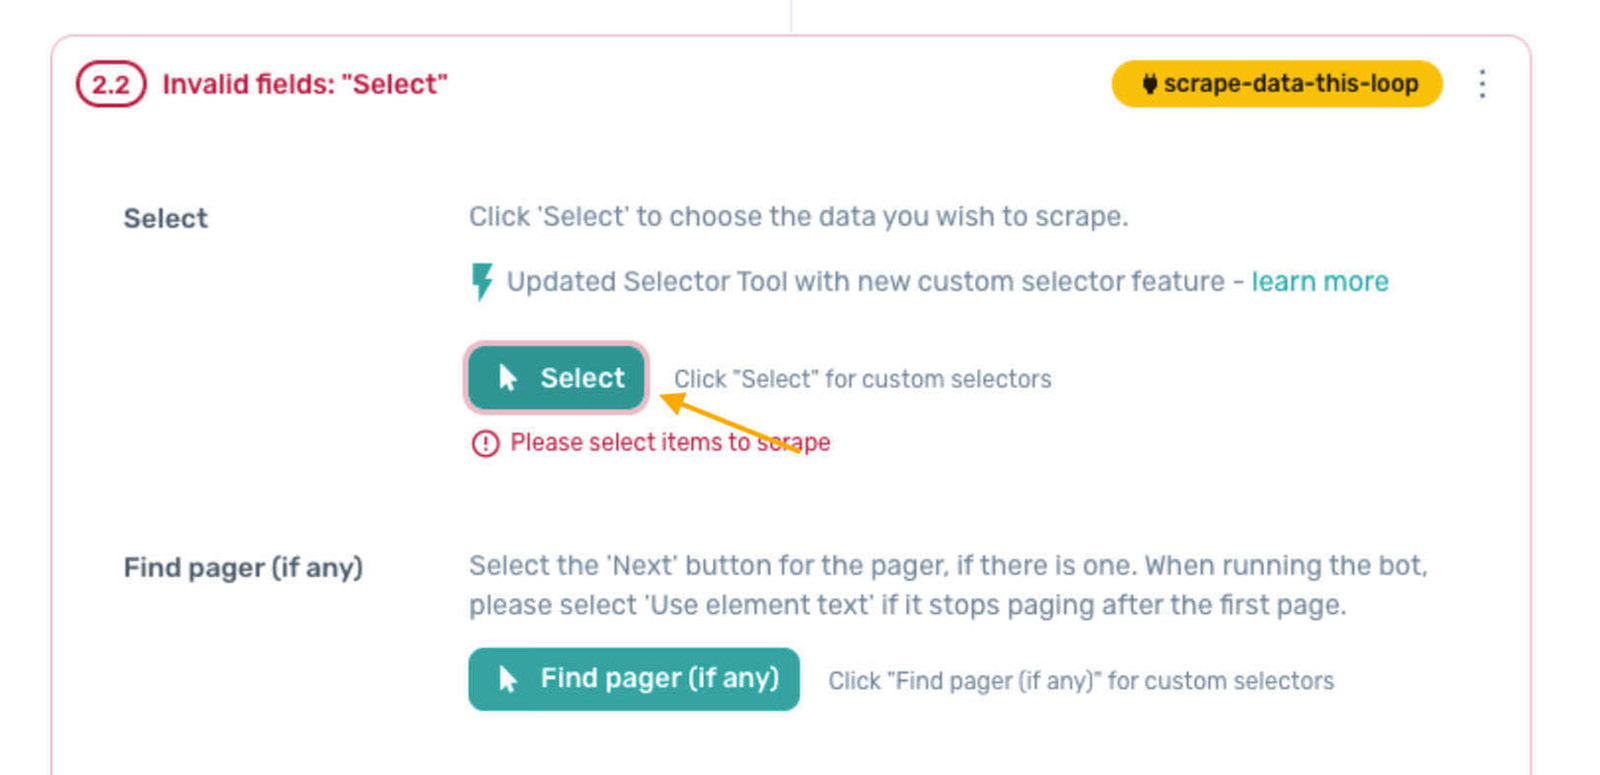
Step 2.2: Extracting the Data
Now, let’s add a sub-step. Click “+ Add a sub step“, seek for and add “Get knowledge from a webpage“.
![Getting Data from Webpage](https://assets.hongkiat.com/uploads/scrape-linkedin-to-form/preview/sub-step-get-data-from-a-webpage.jpg)
Hit the “Select” button to proceed.
![Select Button for Data Extraction](https://assets.hongkiat.com/uploads/scrape-linkedin-to-form/preview/2-2-select-button.jpg)
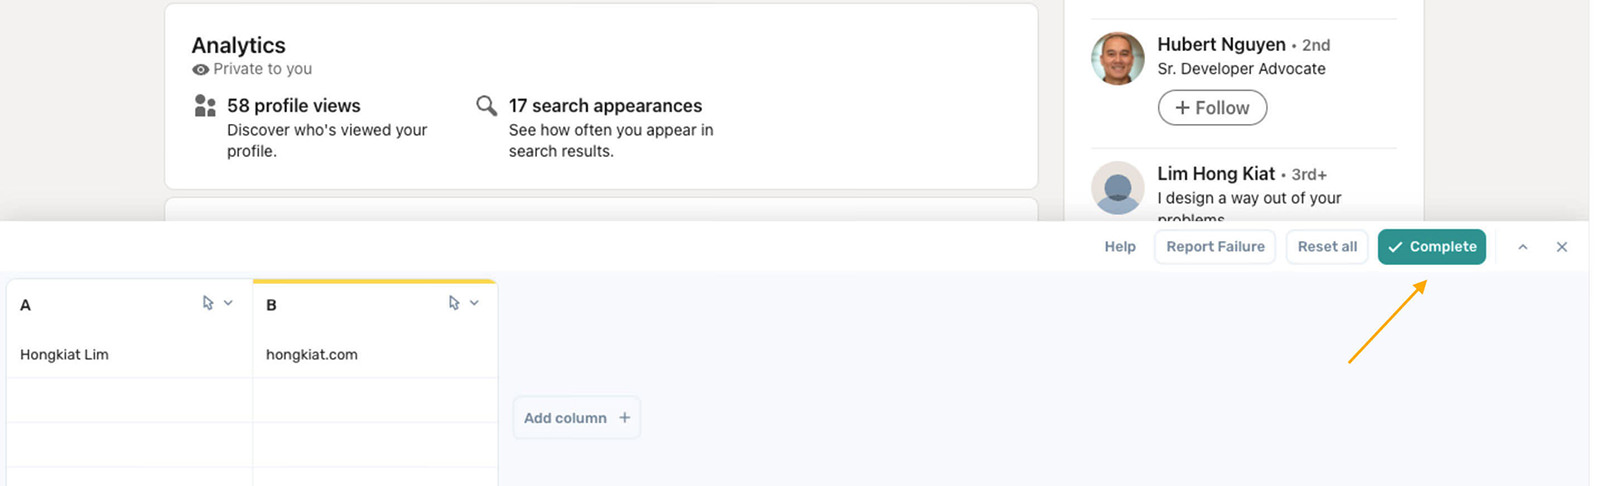
On the LinkedIn profile, click on on the title subject as soon as to pick it.
![Selecting Name on LinkedIn Profile](https://assets.hongkiat.com/uploads/scrape-linkedin-to-form/preview/linkedin-get-name.jpg)
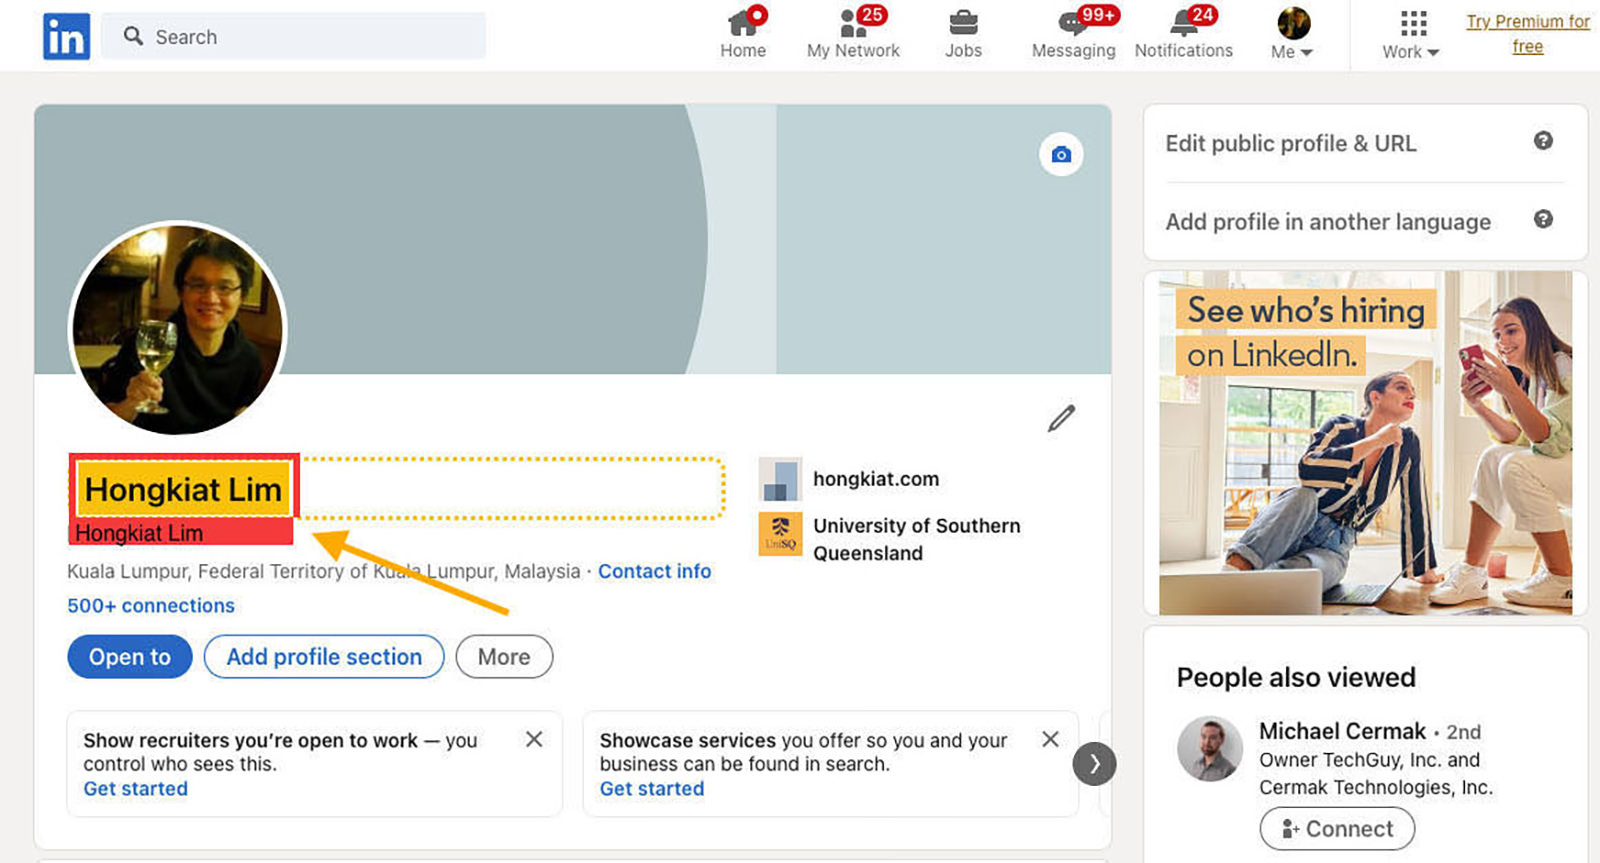
Scroll down and click on “Add column +“, then return to the profile to click on on the URL subject.
![Adding a New Column for URL](https://assets.hongkiat.com/uploads/scrape-linkedin-to-form/preview/add-column.jpg)
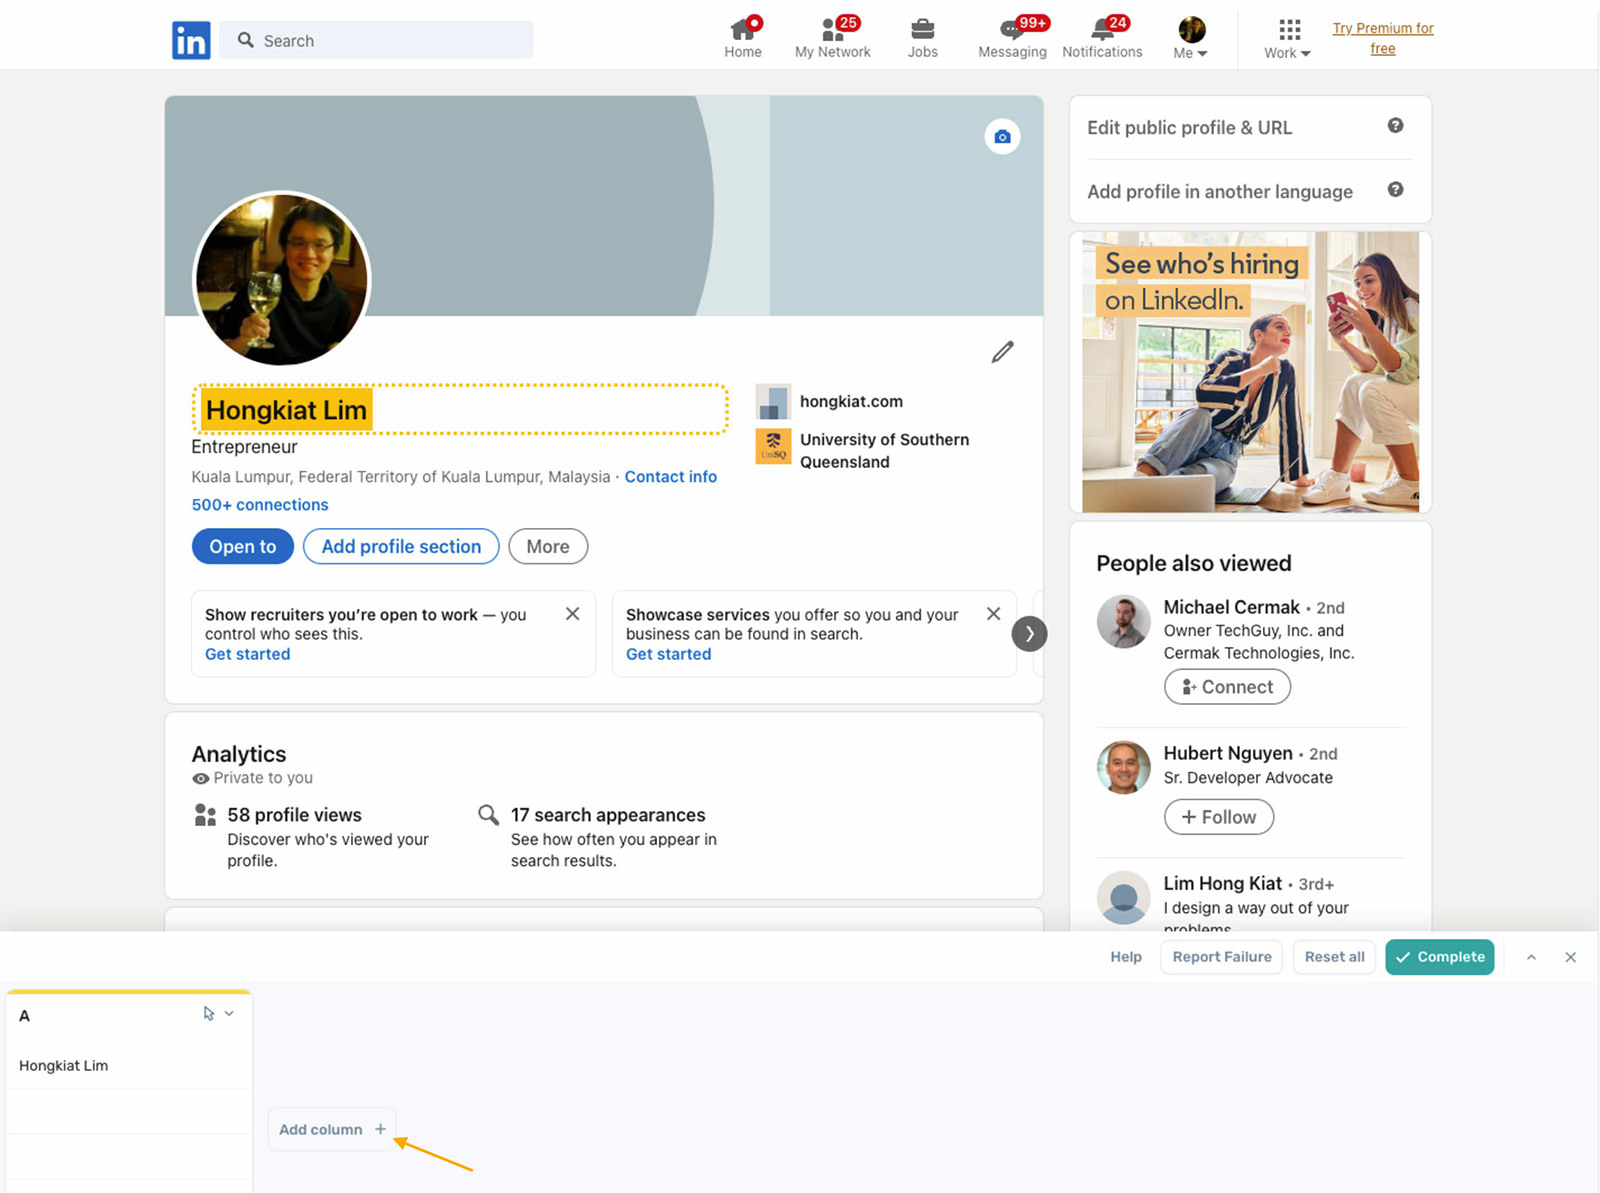
When you’ve completed choosing the info, click on the “Complete” button on the backside of the web page.
![Complete Button for Finishing Data Selection](https://assets.hongkiat.com/uploads/scrape-linkedin-to-form/preview/complete-button.jpg)
Step 3: Opening the ClickUp Form
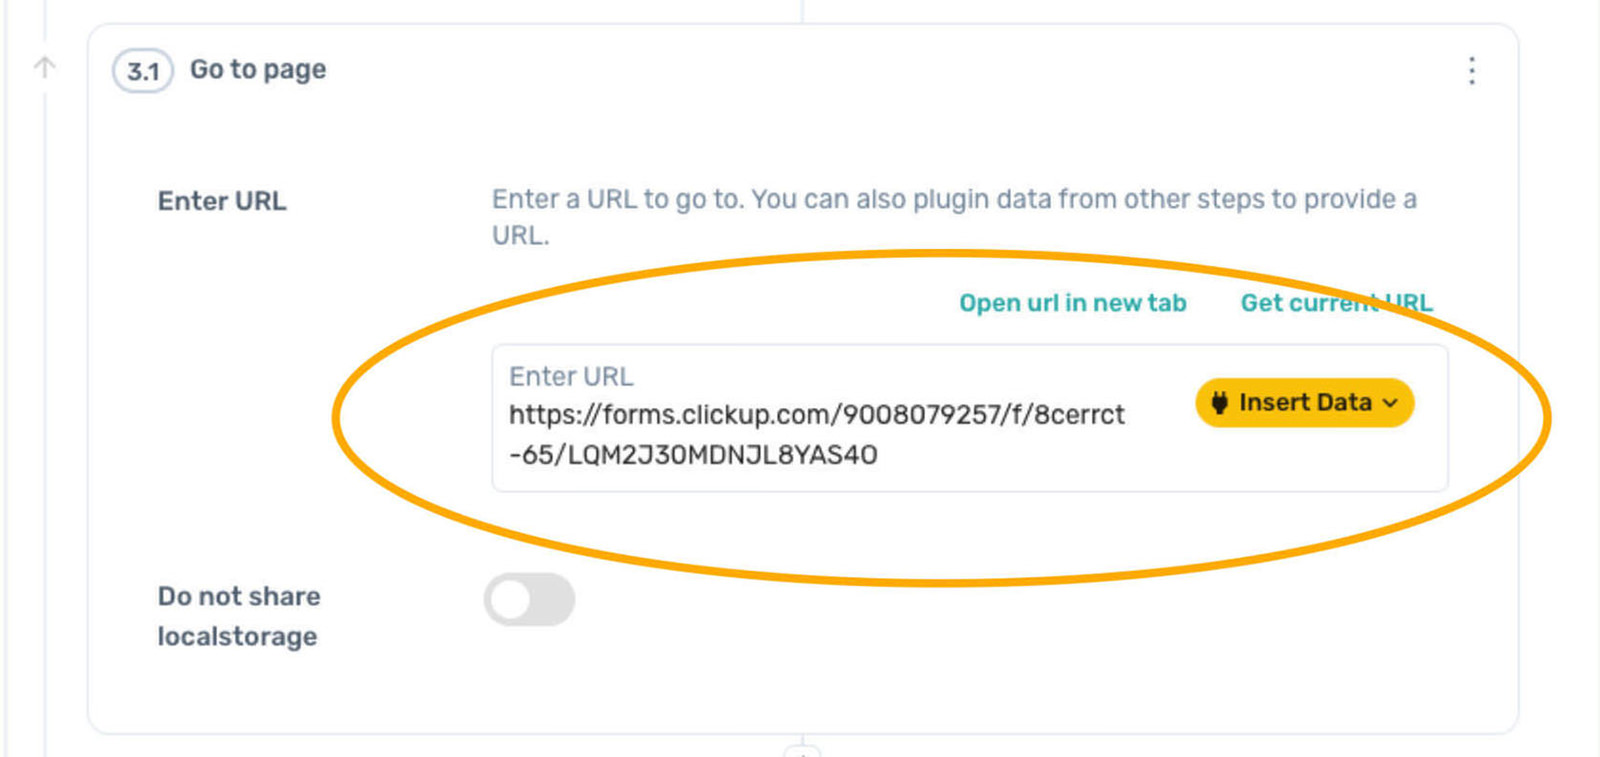
Continue by including a brand new step with “+ Add a step“. Search for “Interact with a page’s interface” once more.
![Interacting with Another Page Interface](https://assets.hongkiat.com/uploads/scrape-linkedin-to-form/preview/3-interfact-with-page-interface.jpg)
Fill within the ClickUp Form’s URL underneath “Enter URL” and choose “Open URL in new tab“.
![Opening ClickUp Form in New Tab](https://assets.hongkiat.com/uploads/scrape-linkedin-to-form/preview/clickup-form-new-tab.jpg)
After the ClickUp kind is open in a brand new tab, click on the Axiom.ai Chrome extension icon to maintain going.
![Resuming Automation from ClickUp Form](https://assets.hongkiat.com/uploads/scrape-linkedin-to-form/preview/resume-from-form.jpg)
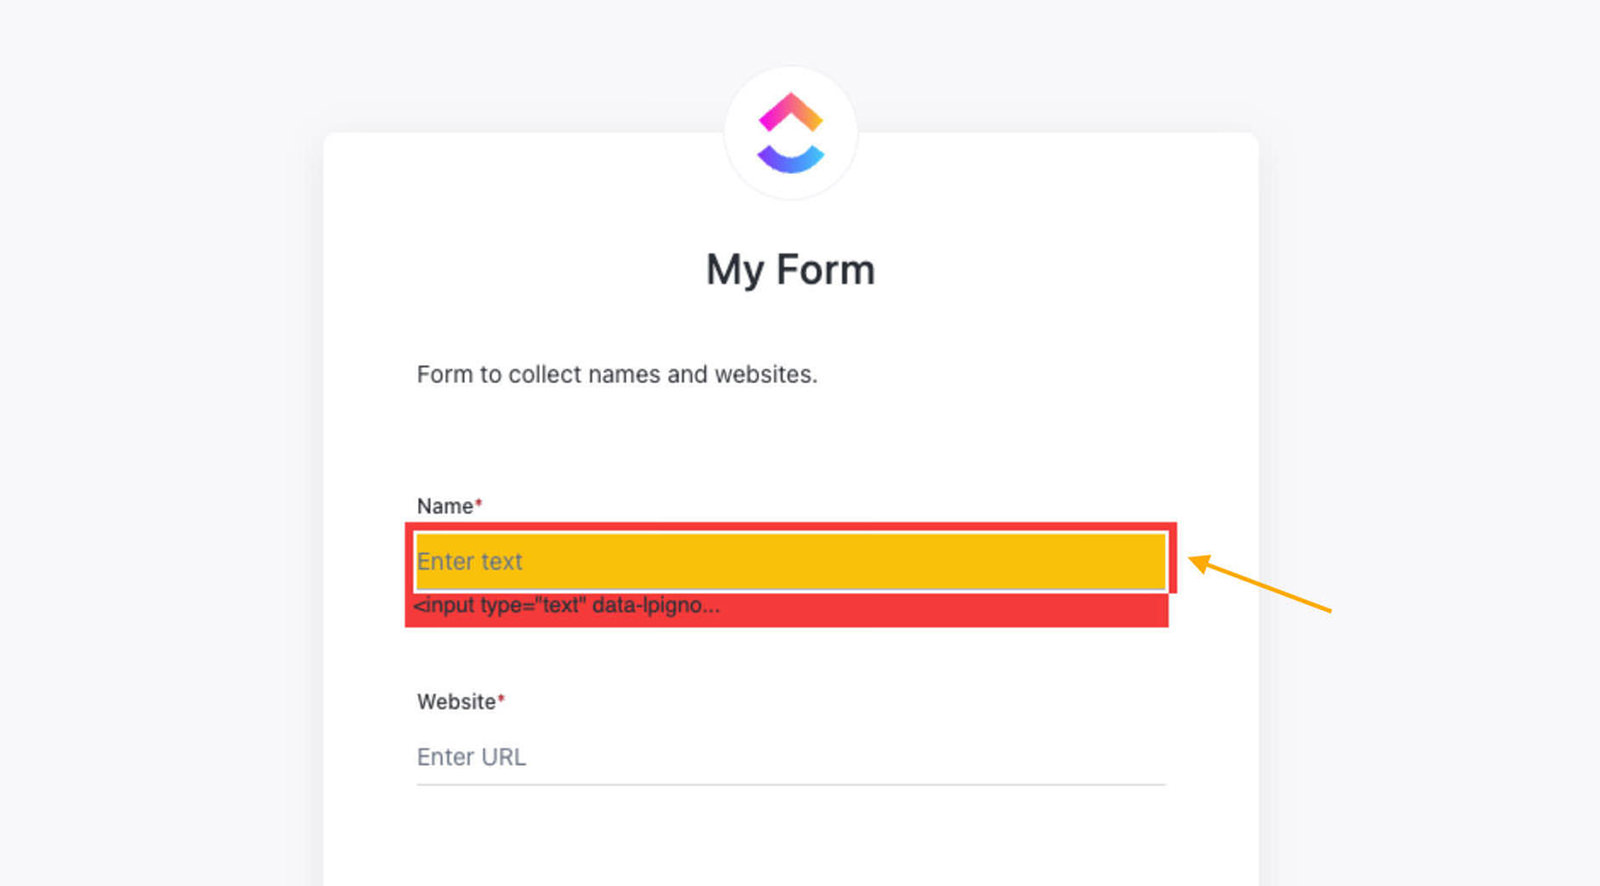
Step 3.2: Entering Name Data into Form
Add one other sub-step with “+ add a sub step“, seek for “Enter Text“.
For the “Select textual content subject“, hit the corresponding button, click on as soon as on the Name subject within the ClickUp kind, and finalize it with “Complete“.
![Selecting Name Field](https://assets.hongkiat.com/uploads/scrape-linkedin-to-form/preview/name-field-complete.jpg)
In the “Text” part, click on “Insert Data“, select “all-interaction-data…“.
![Selecting All Interaction Data](https://assets.hongkiat.com/uploads/scrape-linkedin-to-form/preview/all-interaction-data.jpg)
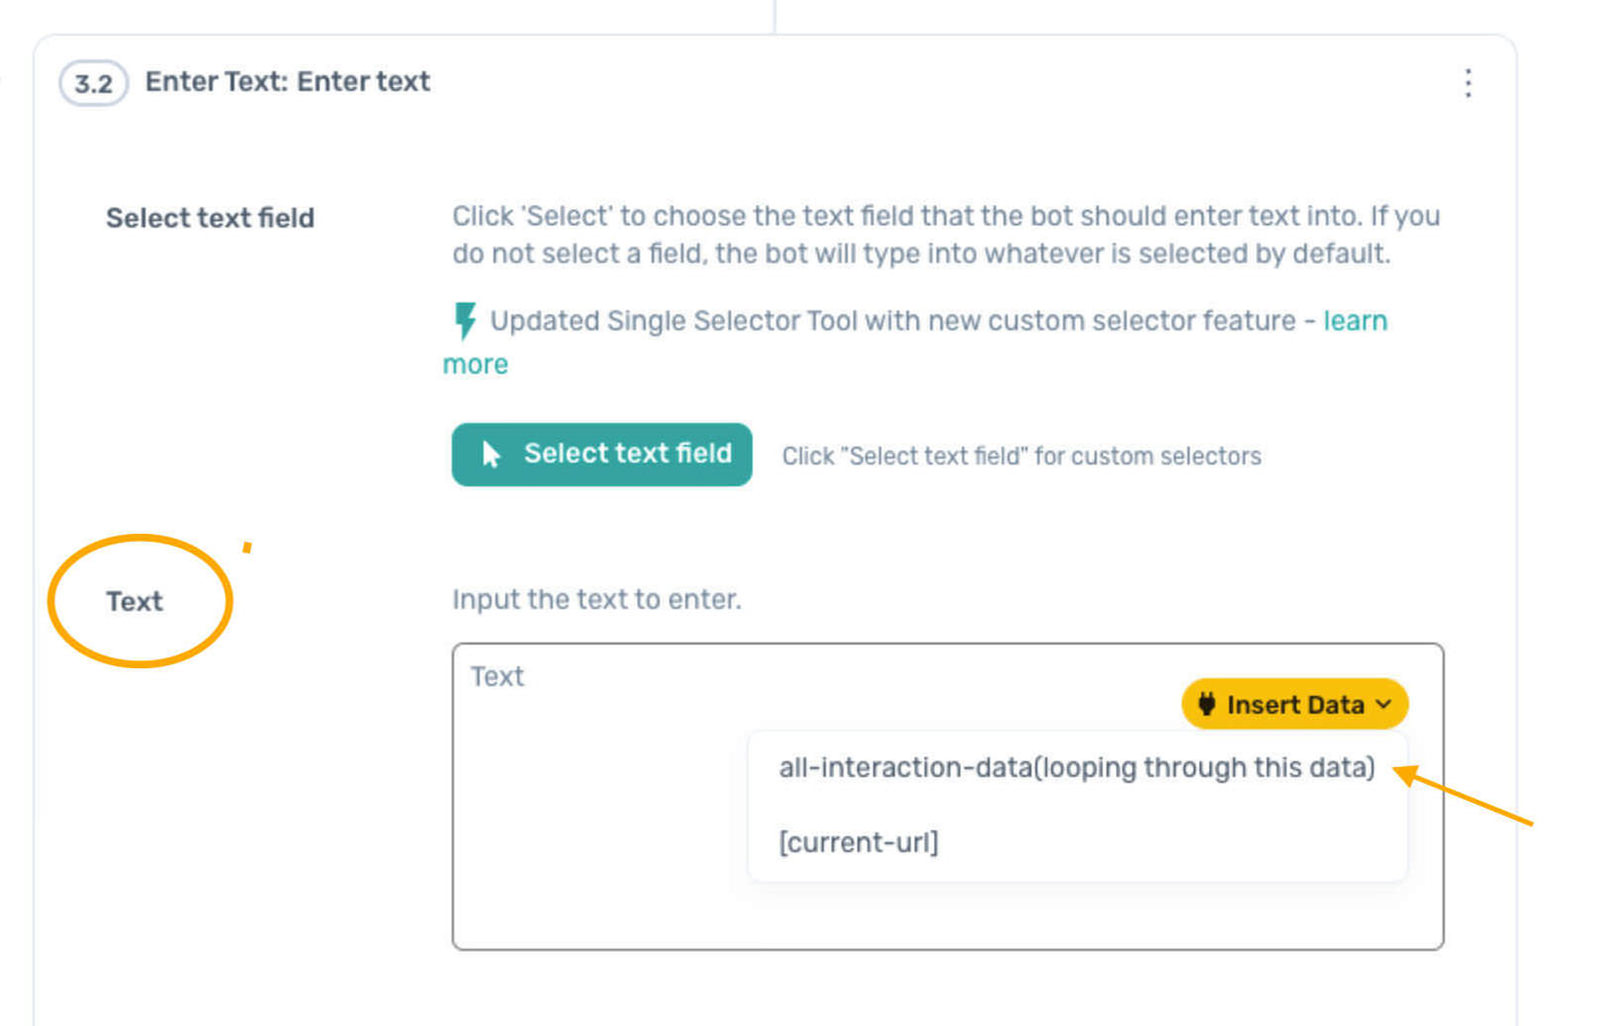
Pick Column A then click on “Save and shut“.
![Saving Column A Data](https://assets.hongkiat.com/uploads/scrape-linkedin-to-form/preview/column-a-save-close.jpg)
Step 3.3: Entering Website Data into Form
Again, click on “+ add a sub step” and add one other “Enter Text” step.
Click the “Select text field” button, however this time, click on as soon as on the Website subject within the ClickUp kind, after which hit “Complete“.
![Selecting Website Field](https://assets.hongkiat.com/uploads/scrape-linkedin-to-form/preview/website-field-complete.jpg)
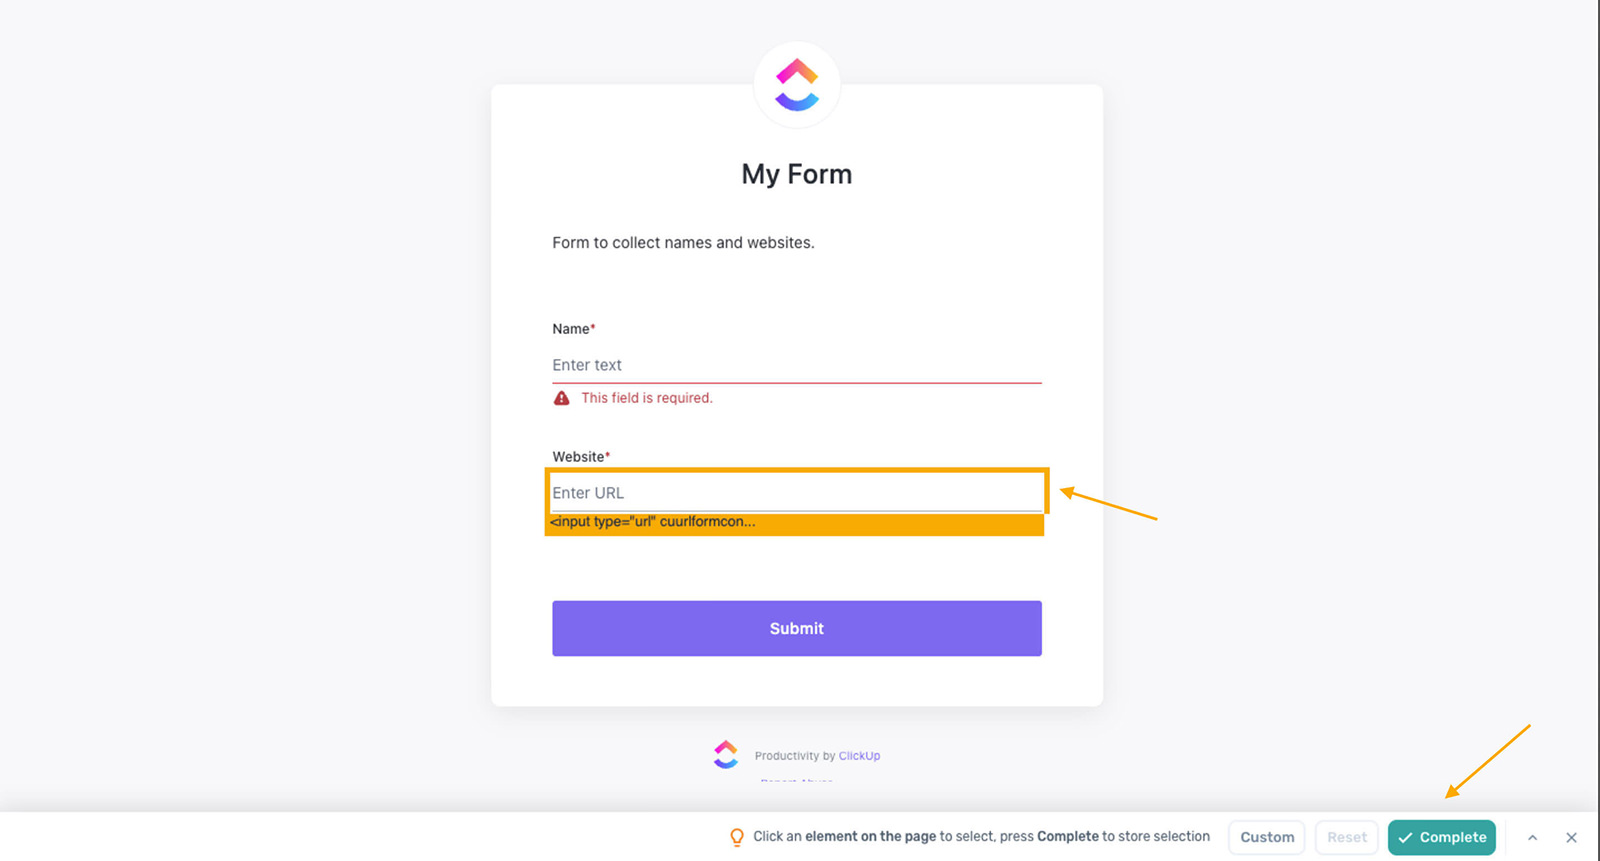
Under “Text“, hit “Insert Data“, choose “all-interaction-data…“, select Column B, after which click on “Save and shut“.
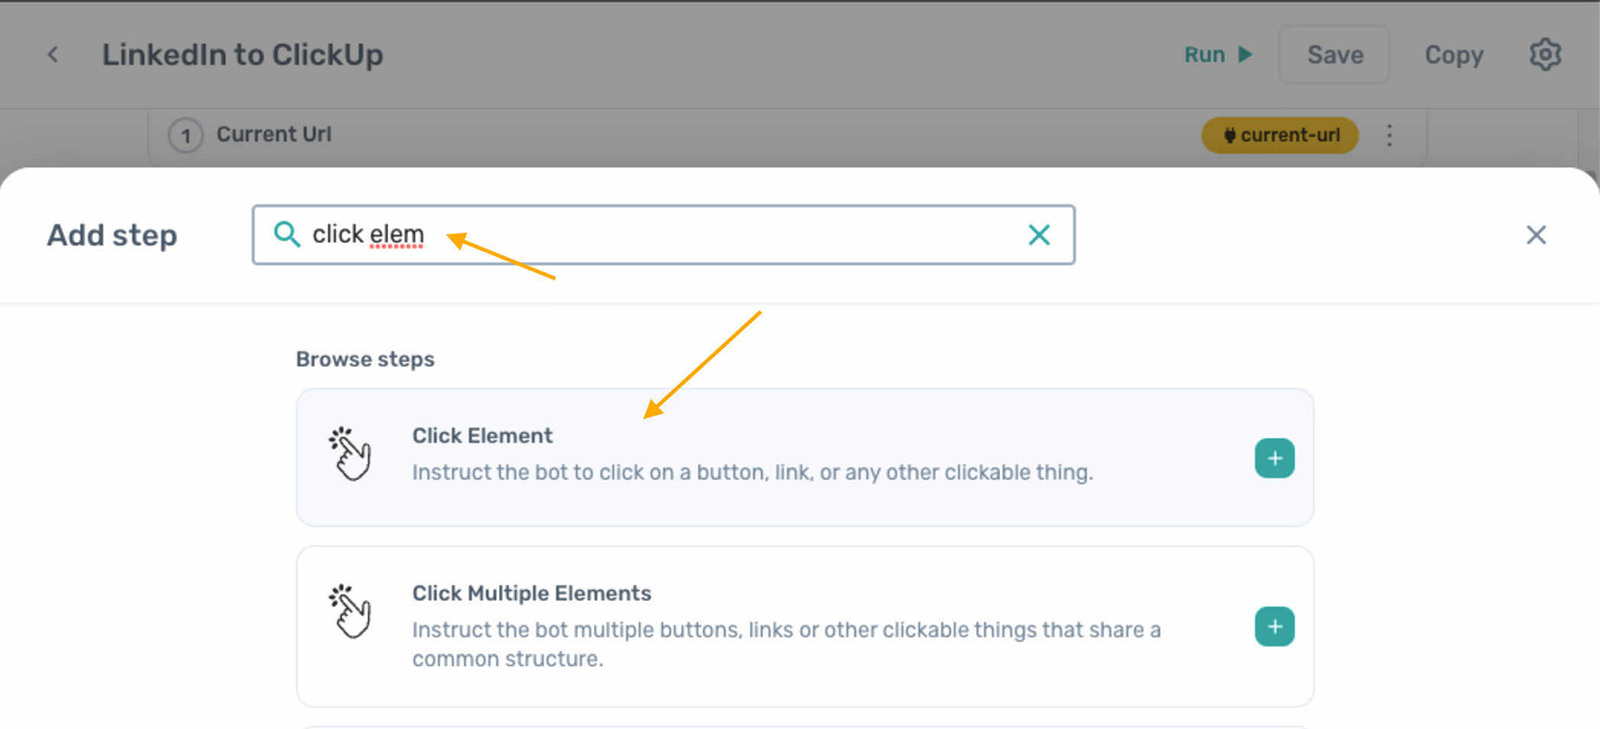
Step 3.4: Submitting the Form
To submit the shape, click on “+ add a sub step” and search for “Click Element“. Then click the “Select” button, select the Submit button on the ClickUp kind web page, and conclude with “Complete“.
![Clicking Submit Button Element](https://assets.hongkiat.com/uploads/scrape-linkedin-to-form/preview/click-element.jpg)
With the automation setup completed, it’s time to run a check to make sure the whole lot works easily.
Running a Test
To guarantee your automation works, open a LinkedIn profile in Chrome. Access the Axiom.ai extension, click on “Run” inside your “LinkedIn to ClickUp” automation and select “Run in cloud“.
![Initiating Run in Cloud Option](https://assets.hongkiat.com/uploads/scrape-linkedin-to-form/preview/run-in-cloud.jpg)
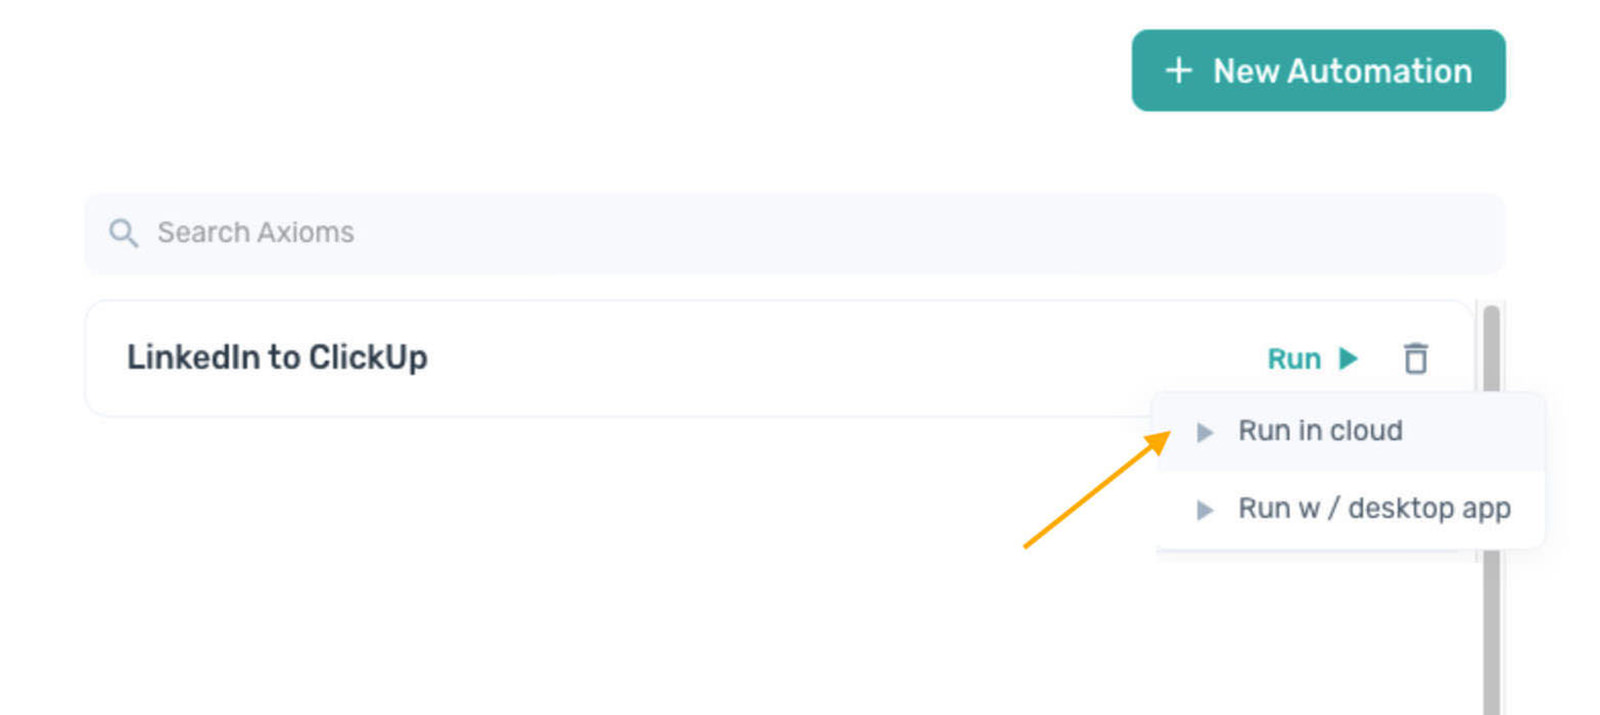
You may go for “Run w/ desktop app“, which requires putting in the Axiom desktop app.
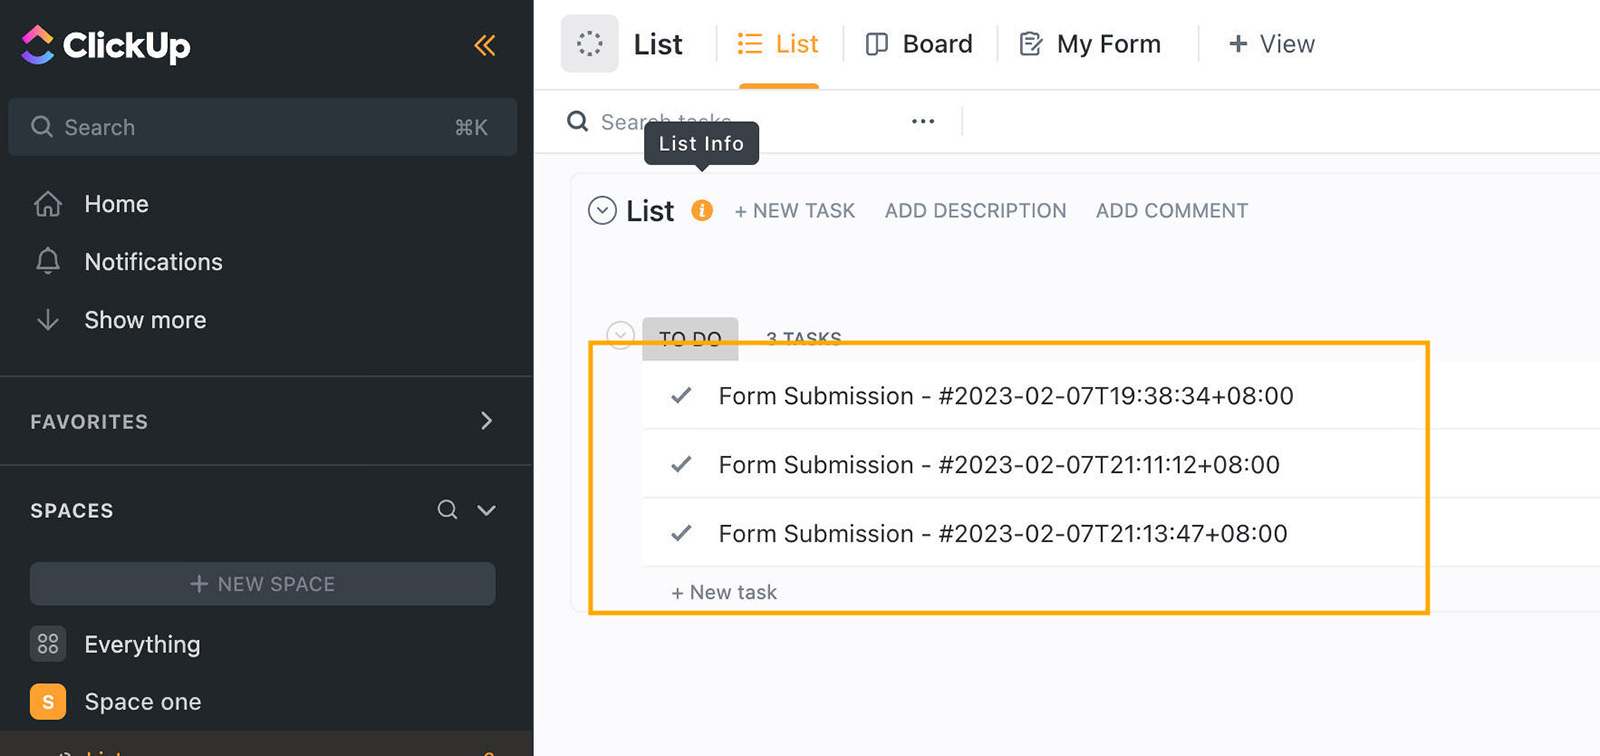
The automation will begin, and after completion, you’ll discover the scraped knowledge neatly saved in your ClickUp account.
![Data Successfully Collected in ClickUp](https://assets.hongkiat.com/uploads/scrape-linkedin-to-form/preview/clickup-result.jpg)
Check out more article on – How-To tutorial and latest highlights on – Technical News
Leave a Reply