
How To Save Google Photos to Computer [5 Methods].
Google Photos is definitely the most well-liked photograph storage app on Android gadgets. Its high-quality backups and sharing options make it the go-to app for a lot of. But since Google began monetizing the Photos app, it’s getting more durable for individuals to stay with this in any other case good photograph gallery app.
An straightforward different to maintain your photos backed up is to obtain or switch them to your PC. Of course, one might all the time save these photos instantly to 1’s cellphone. But as most PCs have bigger space for storing than smartphones (even with exterior storage), it’s higher to switch them to the PC. Here are all of the ways in which you are able to do so and have quick access to your photos and movies with out worrying in regards to the 15GB account storage restrict.
Ensure your Google Photos are being backed up
Most of the strategies described beneath require Google Photos backup providers to remain turned on. Even when you don’t have quite a lot of account space for storing left, be sure to have sufficient for the photos and movies that you simply wish to switch or obtain.
By default, the backup providers are turned on. But you would possibly wish to be sure that that’s truly the case as backup providers could be turned off when you’re working out of space for storing otherwise you’re in battery-saver mode. Here’s how to make sure Google Photos Back up & sync is turned on:
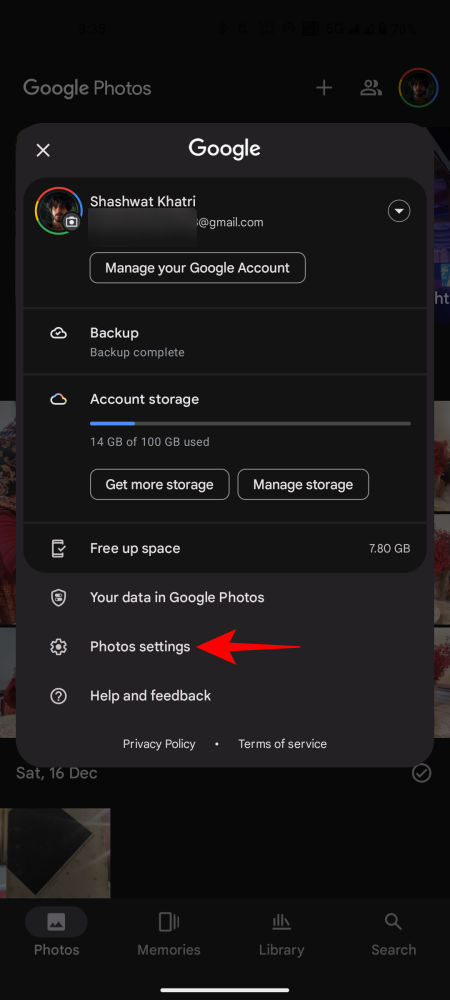
- Open the Google Photos app and faucet in your profile icon on the prime proper nook.
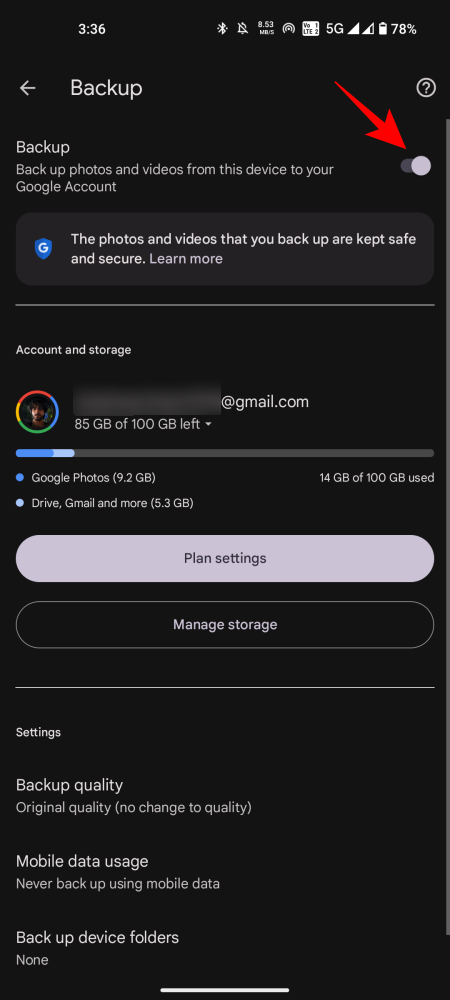
- Tap on Backup Photos settings > Backup and make sure the Backup choice is toggled On.
-
Method 1: Save Google Photos from the web site in your pc
Once you’ve confirmed that your photos and movies are being backed up, the very first thing to do is to fireside up your favourite browser (Chrome, ideally) and go to photos.google.com.
Here, click on on Go to Google Photos and transfer on to the subsequent display screen.

Option 1: Download a single photograph or video
- Click on the photograph or video that you simply wish to obtain.

- Click on the three-dot icon on the prime proper nook and choose Download.

- Your Google photos and movies will likely be downloaded in your PC.

Option 2: Download a number of photos and movies
- To obtain a number of photos and movies, as a substitute of clicking on one, hover over it and click on on the tick mark at its prime left nook to pick it.

- Do the identical for all photos and movies that you simply wish to obtain. Then, click on on the vertical ellipsis on the prime proper nook and choose Download.

- Your Google photos and movies will likely be downloaded in a zipper file.

- Simply choose the file and click on Extract all to extract your Google photos and movies.

Option 3: Download all photos and movies in an album
If you’re the type of one that categorizes his/her photos by album, you possibly can obtain everything of the album to your PC. Here’s how to take action:
- Click on Albums within the left panel of Google Photos.

- Select the album that you simply wish to obtain.

- Here, click on on the vertical ellipsis on the prime proper nook and choose Download all.

- Your album will likely be downloaded as a zipper file that you could extract by right-clicking the file and deciding on ‘Extract all’.
Method 2: Copy from cell storage to your pc using a USB cable
You can simply switch the photos in your cell device to your pc using a USB cable. The following choices will mean you can not solely save the digital camera roll to your cell storage but additionally copy it to your later. Here are the steps for these strategies.
Option 1: Download from the Google Photos web site
The suggestions we shared above for downloading your photos in your pc using the Google Photos web site work on cell too.
- Simply go to photos.google.com in your cell on a browser app like Chrome and be sure to are signed in.
- Download a single photograph, a number of photos, or an album as given above.
- As cell storage is commonly scarce, you’ll want to not choose a ton of media for obtain.
- Once you’ve got downloaded the photos, merely switch them to your pc using a USB cable.
Option 2: Download using the Photos app
The Photos app doesn’t let you choose a number of photos for downloading, nor does it allow you to obtain albums. So this selection is sweet just for downloading one photograph/video at a time.
Note: To obtain an album or a number of photos in your cell storage, you need to use the Google Photos web site in a browser app like Chrome as defined within the methodology above.
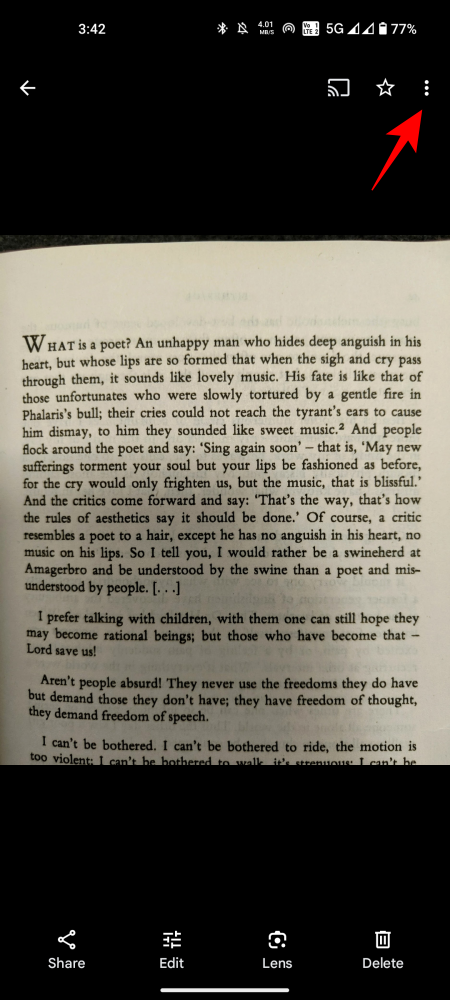
- Open the Google Photos app in your device and choose the photograph/video that you simply wish to obtain.
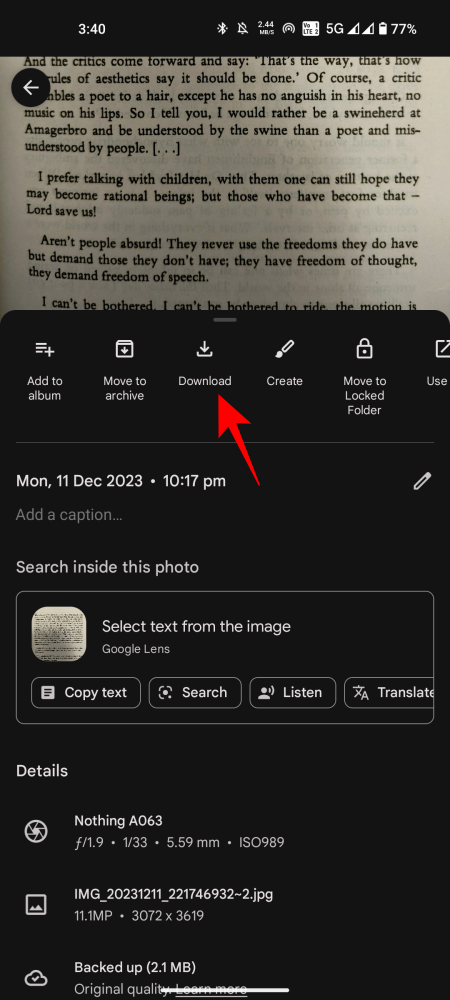
- Tap on the three-dot icon on the prime proper nook to convey up more choices (or just swipe up) and faucet on Download slightly below your photograph.
-
- Your photograph will likely be downloaded to your cellphone’s storage.
Option 3: Copy photos from cell storage to your pc
You can merely copy the photos in your Google Photos app to your pc using a USB cable. Whether these are the photos you took out of your cell digital camera or downloaded from the Google Photos app or web site, you possibly can merely copy them over to avoid wasting them in your pc. Here’s how:
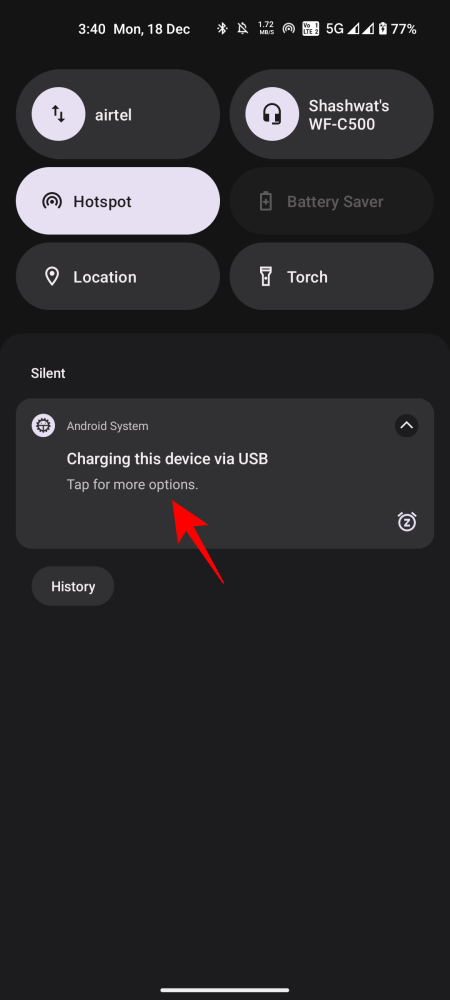
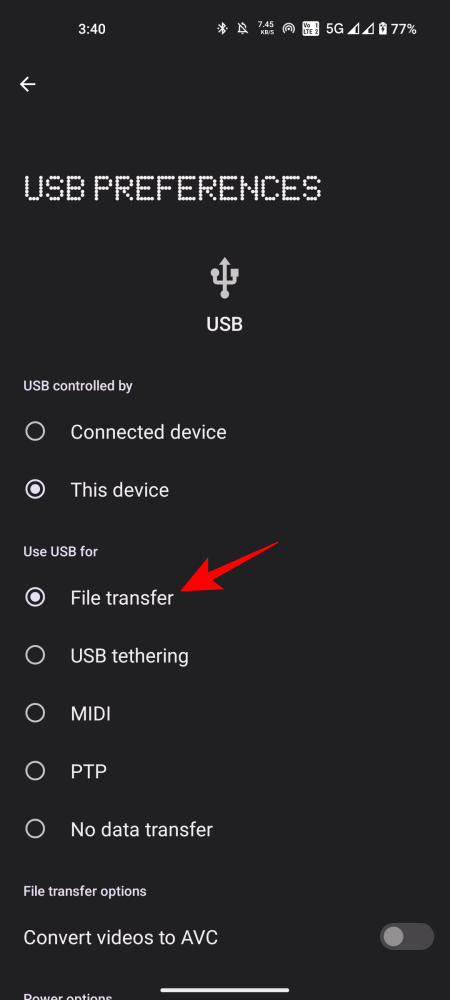
- Plug in your smartphone to your PC through a USB cable. Swipe down in your device and faucet on Charging this device through USB to convey up more choices. Then faucet on File switch. This will enable your PC to entry your cellphone’s storage.
-
- Your Android device’s storage folder ought to mechanically open up in your PC. If it doesn’t, open up File Explorer (
Win+E) and choose your device within the “This PC” part. - Navigate to this DCIM Restored folder of your cellphone’s inside storage and replica the photos from right here to your PC.

It’s a good suggestion to merely copy every thing within the DCIM folder so that every one your photos and movies from not solely the digital camera but additionally the screenshots and media from different apps that save in DCIM, as saved in your pc.
Method 3: Using Gmail
If you don’t wish to cope with cables or backup your photos, you possibly can nonetheless switch photos from Google Photos to your PC by way of the widespread Gmail route.
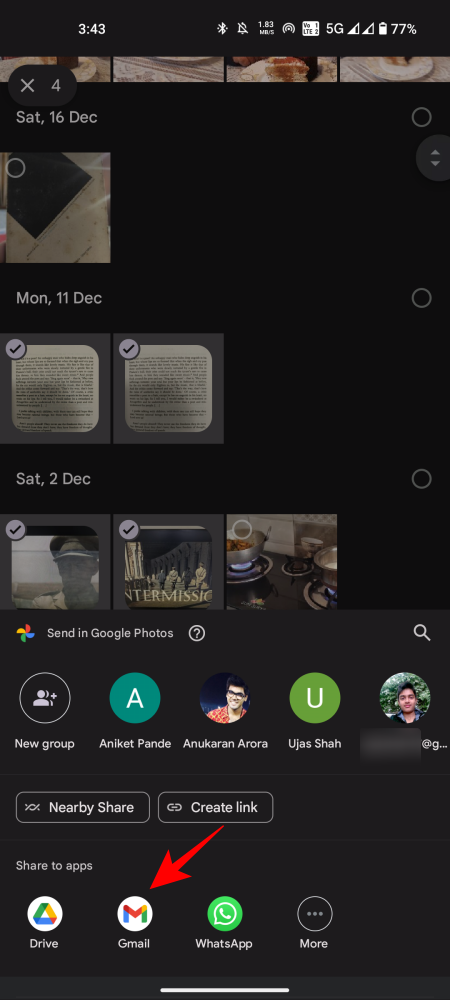
- Select your photograph(s) within the Google Photos app, faucet on Share on the backside, and faucet on Gmail underneath “Share to App”.
-
- Your photograph(s) will now be added as an e-mail attachment. Exit this display screen by going back or swiping up. Gmail will save the draft mechanically.
- Now, open Gmail in your PC browser, click on on Drafts within the facet panel, and open the draft.
- Then click on on the recordsdata within the draft and so they’ll be downloaded to your PC.


Method 4: Using Google Drive
Another Google Workspace software that you could share your photos with is Drive. Most Android gadgets include Drive pre-installed, so you’ll most certainly have already got it in your cellphone. Here’s how one can share photos to Drive after which obtain them in your PC:
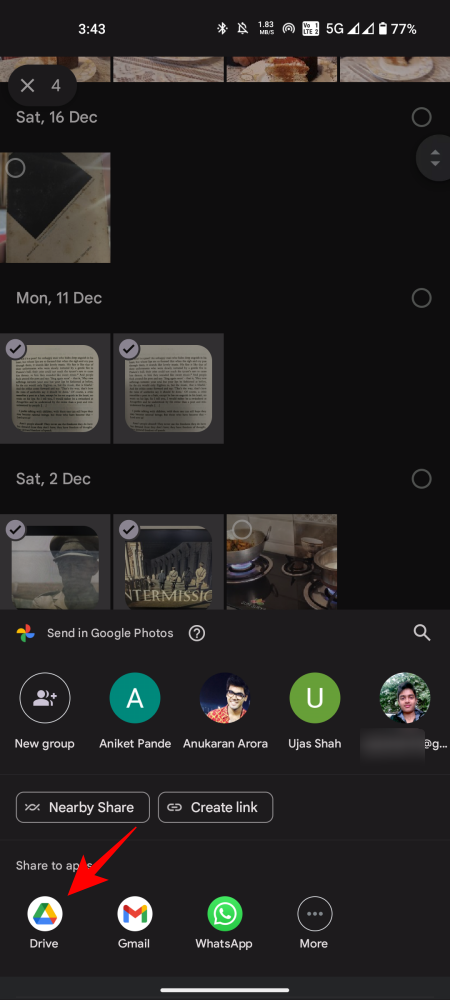
- Select your photograph in Google Photos and faucet on Share on the backside. Then faucet on Drive underneath “Share to Apps”.
-
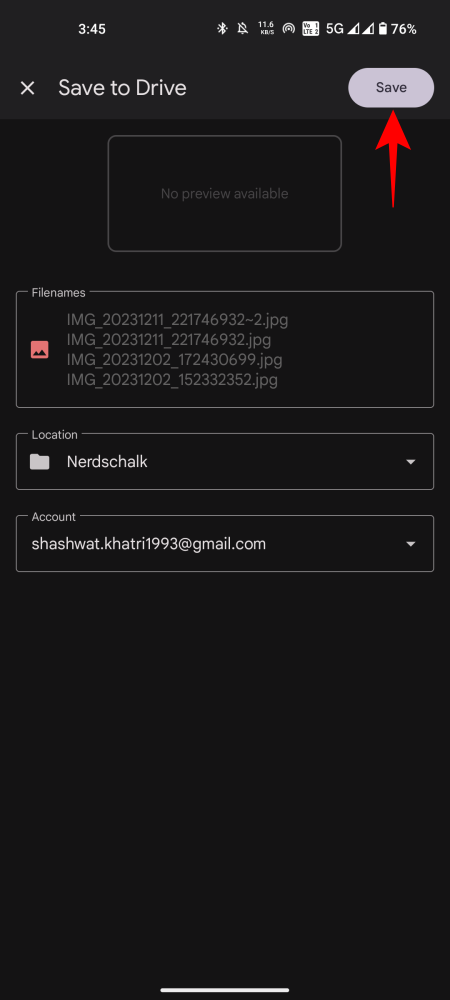
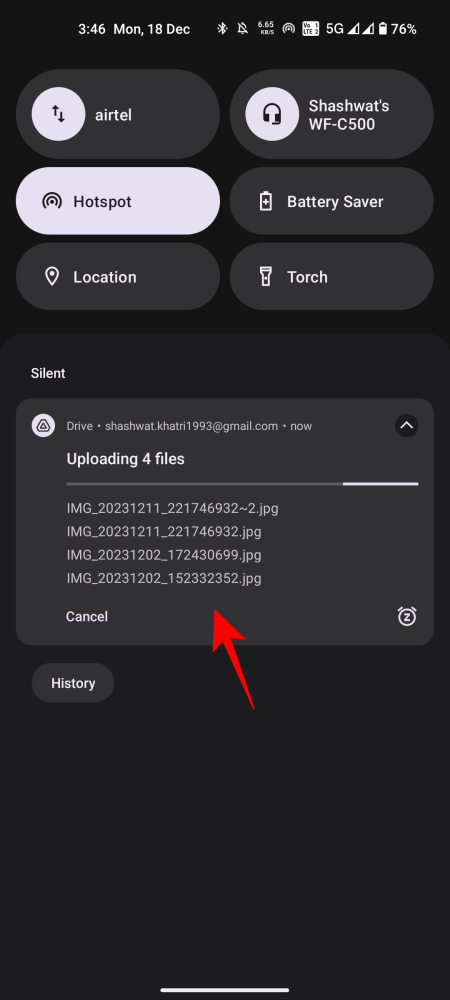
- On the subsequent display screen, you’ll get the choice to vary the Google Drive Account and choose the folder location inside Drive the place you wish to reserve it. Note the Google account that’s chosen (when you have a number of). Then faucet on Save. You’ll be notified when the file is uploaded to Drive.
-
- Now, go to drive.google.com in your PC browser and be sure to have the identical Google Drive account chosen the place you saved the file earlier than. Your photograph’s thumbnail will seem in your Drive’s predominant web page. Now, merely right-click on the photograph and choose Download.

- Your photograph will now be out there in your PC.
Method 5: Download every thing in Google Photos using Google Takeout
Just as many social media apps allow you to entry and obtain your account information with a single click on, so does Google too have the same service to obtain your account information – Google Takeout. With it, all of your backed-up content material could be downloaded with ease. Here’s how you need to use it to obtain your Google Photos information:
- Go to takeout.google.com and be sure to’re signed in to your Google account. Then, for step one, click on on Deselect all underneath “Select data to include”.

- Now scroll down and choose Google Photos.

- This will choose all of your backed-up photos and movies by default. But you possibly can additional specify the folder(s) that you simply wish to obtain. To do that, click on on All photograph albums included.

- Select the person folders. Then click on OK to verify.

- There’s no choice to pick photos and movies individually, solely the folders. If you don’t recall transferring your photos to a different folder, they’ll most likely be categorized by 12 months. Once you’ve chosen the suitable folders (or all of them), scroll down and click on on Next step.

- The second step will allow you to select the supply methodology for all of your Google Photos information. You can change the settings right here when you favor. But when you’re leaving every thing as default (easier that approach), simply click on on Create export.

- You will get the export progress report on the subsequent display screen. Depending on the quantity and dimension of your exported photos and movies, this will take a while.

- Once the export is full, a duplicate of your requested date will likely be made out there in your e-mail inbox (or your chosen software location).

- Now click on on the Download buttons to obtain your photos.

And there you’ve got it, your photos are actually made out there in your PC.
Though there are different methods and means to switch information from Google Photos to PC, akin to sharing them through messenger apps with your self and later downloading them from the providers’ web site, it’s higher to maintain the recordsdata throughout the Google Workspace ecosystem. Not solely does it keep issues organized and easy, but it surely additionally ensures that your information by no means leaves the security supplied by the Google surroundings.
Once downloaded, it’s as much as you what you wish to do along with your Google Photos – allow them to keep backed up, or trash them for good to avoid wasting in your allotted Account space for storing.
Check out more article on – How-To tutorial and latest highlights on – Technical News