
How To Fix Windows 11 Not Compatible Issue.
Windows 11 is the brand new iteration of Windows on the town. It brings a brand new and improved UI, enhanced providers, Microsoft Edge integration and more importantly, the brand new and improved Start menu. For now, plainly Windows 11 is kind of just like Windows 10 beneath the hood, with lots of the applications operating the identical providers and duties as Windows 10.
However, this hasn’t deterred early adopters, who’ve been dealing with just a few compatibility points with the brand new OS right here and there. If you too have been getting incompatibility errors or set up errors when putting in Windows 11 in your system then you’ll be able to strive one of many fixes under. In case you are attempting to put in the OS on a VM and are dealing with points, then we suggest you bounce to the ‘VM Specific fixes’ part under. Let’s get began.
If you are attempting to put in Windows 11 on a VM or your day by day system, listed below are a few normal fixes that can provide help to repair set up errors on every kind of techniques. Let’s begin with the primary one.
Fix #1: Enable TPM 2.0
TPM 2.0 or Trusted Platform Module is a small microcontroller in your PC that helps retailer encrypted data in your system like your Windows Hello knowledge, Windows PIN, passwords and more. Windows 11 wants TPM 2.0 to perform correctly. Without this enabled, Windows 11 cannot securely set up or perform on a contemporary system. Let’s test if TPM 2.0 is enabled or disabled in your system.
Let’s first test the present standing of TPM in your Windows PC first.
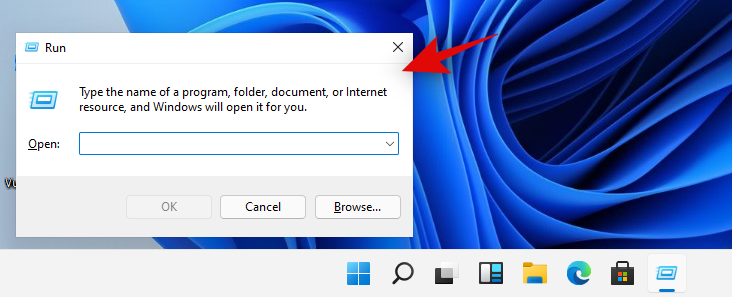
Press ‘Windows + R’ in your keyboard to open the Run dialog field.
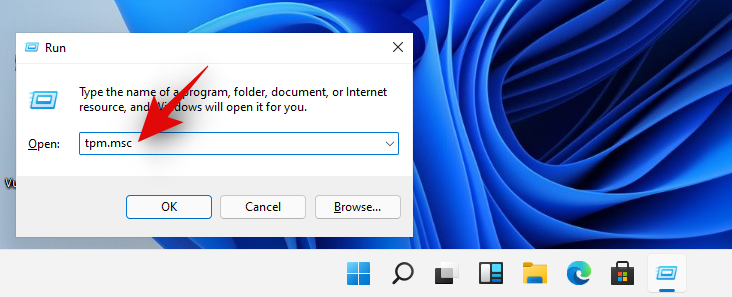
Now kind within the following command and press ‘Enter’ in your keyboard.
tpm.msc
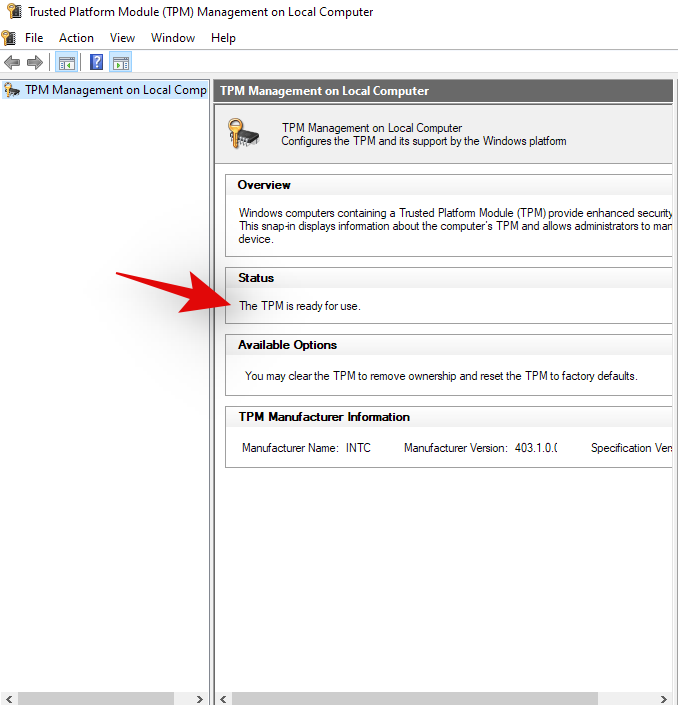
Check the ‘Status’ part in your proper. If the standing says ‘Ready to use’ then it’s already enabled in your system and you’ll strive one of many different fixes under. If nevertheless, the standing reads, ‘Compatible TPM cannot be found’ then TPM is probably going disabled in your BIOS settings.
Enabling TPM is usually a completely different expertise for everybody relying on their system, OEM or motherboard producer. BIOS menus differ barely with each producer be it of the element or your whole system. Hence we suggest you go to your OEM help website to test for TPM 2.0 and the way to allow it. Generally, you will see that the TPM possibility positioned within the ‘Security’ part of your BIOS menu. You can allow TPM by choosing a appropriate device from this record in your system.
Fix #2: Enable Secure Boot
Secure Boot is one other BIOS setting that Windows 11 requires to be enabled for a correct error-free set up in your system. Use the information under to test if safe boot is enabled in your present system. Let’s get began.
Let’s first test if Secure Boot is enabled or disabled in your PC proper now.
Press ‘Windows + S’ in your keyboard to carry the Windows search.

Now seek for ‘msinfo32’ and press ‘Enter’ in your keyboard. Launch the ‘System Information’ app as soon as it exhibits up within the search outcomes.

Ensure that ‘System Summary’ is chosen in your left.
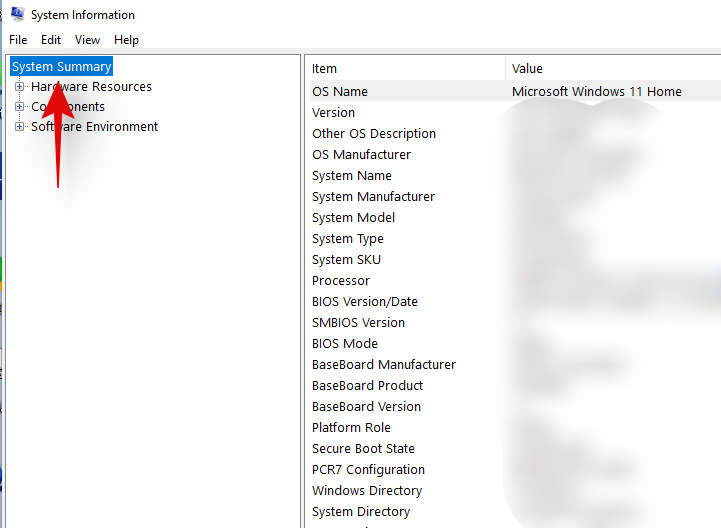
Now search for ‘Secure Boot State’ worth in your proper. Here is what every possibility means on this class.

- On: Secure Boot mode is enabled in your system.
- Off: Secure Boot mode is disabled in your system.
- Unsupported: Your system’s present assets or configuration presently doesn’t help Secure Boot mode state.
If your Secure Boot Mode possibility says ‘Off’ or ‘Unsupported’ then it’s possible the reason for your problem. For ‘Unsupported’ techniques, you’ll be able to strive updating your BIOS, but when the dearth of {hardware} assets is inflicting this, you then may have to improve your system.
Now, allow Secure Boot mode in BIOS.
As acknowledged above, each BIOS is barely completely different, therefore you’ll have to attain out to your OEM to simply and safely edit your BIOS settings. Most OEM’s have a devoted help information on their help pages, so that you may discover some assist there as effectively. Additionally, if you’re trying to be slightly adventurous, then all the time bear in mind, that the Secure Boot mode setting is normally positioned within the ‘Security’ part of your BIOS.
Fix #3: Replace appraiserres.dll beneath Sources folder
Windows 11 like every other Windows is distributed by a digital ISO which is downloaded over your network connection. Network packets can generally go lacking or get corrupted resulting from network points or errors. In such instances, some recordsdata can get corrupted within the obtain course of. Additionally, appraiserres.dll within the ISO can be identified to trigger this problem which will be simply mounted by changing the mentioned .dll file. You can use our complete information at this hyperlink to repair your problem. See the web page linked under, please.
► How To Replace appraiserres.dll in Windows 11 Setup
Fix #4: Change your storage configuration
While Windows 11 works and requires solely round 20GB of storage for set up, it wants extra space for storing to correctly unpack and retailer momentary recordsdata. If you appear to be operating out of area and solely have the required quantity of area obtainable, then it’s presumably the rationale why you might be unable to put in Windows 11.
We suggest you back up your recordsdata and release some extra storage out of your device for a correct set up of Windows 11. If nevertheless, you may have sufficient space for storing in your set up disk, then you’ll be able to strive one of many different fixes talked about under.
Fix #5: Ensure that you’ve got sufficient RAM
Windows 11 requires a minimal of 4GB RAM to perform correctly. While the OS is thought to run on much less highly effective techniques, you’ll be able to face reminiscence leaks or overstress in the course of the set up course of which causees your PC to freeze and within the worst instances, trigger your set up to fail.
We would suggest you improve/allot more RAM to your Windows 11 system to keep away from any doable reminiscence leaks which may intervene with the set up. If you continue to insist on putting in Windows 11 in your system, then we might suggest you begin from scratch with the least quantity of providers operating within the background to avoid wasting up on assets.
► Windows 11 Compatibility: Can Your PC Run Windows 11?
Fix #6: Ensure that you’ve got sufficient video reminiscence
Video reminiscence appears to be one other requirement for Windows 11 that many individuals appear to have neglected. Windows 11 lists a minimum of 64MB of devoted video RAM to perform correctly. And in case you might be limiting assets to your new OS then it could be the rationale why Windows 11 received’t set up in your system. We suggest rising your video reminiscence and even allotting a few of your RAM from the BIOS in case your OEM permits you to take action. Once Windows 11 is ready to set up in your system, you’ll be able to strive limiting its assets once more with only some minor glitches because the consequence.
Virtual Machine (VM) Specific Fixes
In case you are attempting to put in Windows 11 on a Virtual Machine then there could be just a few settings that you just may need neglected which in flip are inflicting incompatibility points with Windows 11. These additionally embrace issues like restricted RAM, Storage, and video reminiscence. Hence we suggest you undergo the guidelines above in your VM earlier than continuing with the particular fixes under. Once you may have gone by the guidelines above, you can begin with the primary repair listed under.
VM Fix #1: Ensure that the proper Windows kind has been chosen
Most VM’s together with Virtualbox lets you dictate which model of Windows can be put in in your VM. Your selection of VM consumer then applies the default settings for the chosen OS for optimum perform. However, as Windows 11 remains to be in its infancy, it’s nonetheless but to be formally supported by most emulators, therefore you will want to make an accurate appropriate selection to your default settings. In case you might be using Virtualbox, you will want to pick out ‘Windows 10’ as your Windows kind when organising your Virtual machine.

Windows 11 is an improve to Windows 10 therefore it’s appropriate with most default settings for the OS. In case this feature was chosen incorrectly, then the digital machine you created can be incompatible with Windows 11 which is probably going the reason for your errors.
VM Fix #2: Ensure that the proper Video Adapter is chosen
In addition to the default VM settings, additionally, you will want to make sure that the proper video adapter has been chosen to your VM. Just like the dearth of video reminiscence could cause set up errors, so can incorrectly chosen video adapters presently incompatible with Windows 11. If you might be using Virtualbox, then it’s essential choose ‘VBoxSVGA’ as your video adapter. Selecting every other adapter will lead to video artifacts and trigger set up or incompatibility errors in the course of the course of.

We hope this information helped shed some gentle on fixes that you need to use to repair incompatibility errors when putting in Windows 11. If you may have any more questions, be at liberty to succeed in out to us using the feedback part under.
Check out more article on – How-To tutorial and latest highlights on – Technical News