
How To Enable TPM 2.0 and Secure Boot in BIOS for Windows 11.
The Windows 11 Health Check Up software has created a significant trigger for concern with outcomes exhibiting {that a} consumer’s PC can’t run on Windows 11. This notification seems when the system doesn’t meet one of many minimal system necessities. Fortunately, this problem is definitely one thing that may be fastened simply.
One of the system necessities for Windows 11 is Trusted Platform Module (TPM) model 2.0, which can be disabled in your system. This is a significant purpose why many customers see rejection within the first place. Your system will grow to be appropriate when the TPM is enabled. Here’s what it is advisable to learn about how to allow TPM 2.0 in your PC.

What is TPM 2.0 and what function does it play?
TPM 2.0 is a safety characteristic that comes with fashionable desktops and notebooks. It is a microchip that’s current within the motherboard and has now grow to be a system requirement for Windows 11. TPM encrypts all of the passwords and delicate info in your system and gives secure storage for this type of info.
In case the TPM detects any form of malware, it executes a course of that may quarantine your system until it removes the malware and safeguards your system once more. TPM was launched in 2009 for mainstream computer systems and laptops and no system runs with out it anymore. So until your system is older than a decade, it is going to positively have the TPM 2.0 microchip.
How to allow TPM 2.0 in your PC
Note: If you need assistance with booting into the BIOS mode of your laptop computer/Desktop, then see the 2 strategies given within the part beneath.
Enter the BIOS menu of your PC and do the next. BTW, the mouse performance might or might not be obtainable right here. We bumped into each the conditions, as you’ll find beneath.
Anyway, use the precise arrow key to go to the Security tab in your boot menu.
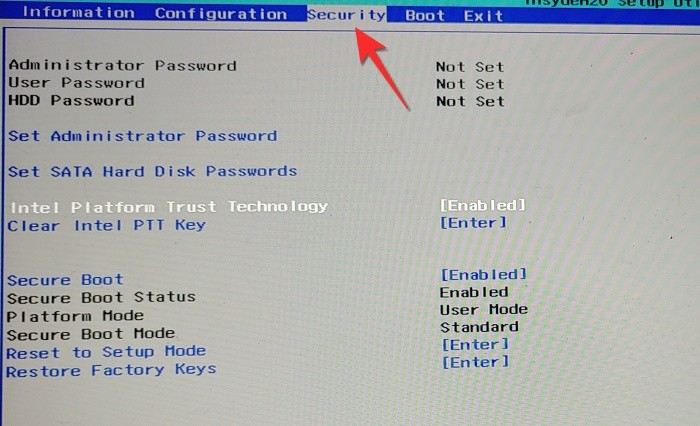
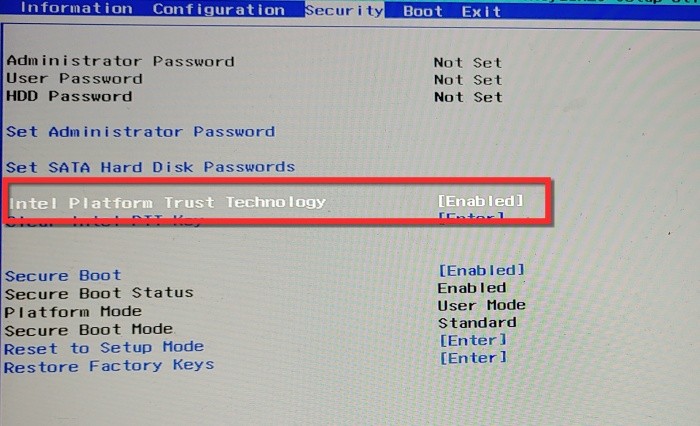
Once within the Security tab, find the TPM choice from the checklist and transfer your arrow key to achieve the choice. It will both be referred to as TPM, Intel Platform Trust Technology (PTT) or AMD CPU TPM, relying in your system producer. The setting of the TPM device choice can be <disabled>, transfer your arrow key to the setting and toggle it to <Enabled>.
Once it’s enabled, go to the Exit menu, save your settings and exit the BIOS.

Can’t discover the ‘Secure Boot’ choice in BIOS? Or TPM?
Boot your PC into the BIOS settings by hitting the delete key or F12 or no matter button your PC reveals for this while you restart it.
In BIOS, flip off CSM first. Here’s how:
Find CSM below BIOS or Security/no matter menu, and double click on on it.

Click Disabled.

Now, you will notice that CSM has turned off.

You may even see the Secure boot choice. But wait, you may’t allow it simply but. So, save and exit and enter the BIOS once more.
Go to the Power menu and choose Save & Exit setup.

Click Yes to save lots of the settings and reboot the system. Be certain to press the required key once more to reboot into BIOS settings once more.

So, boot into the BIOS settings once more by hitting the delete key or F12 or no matter button your PC reveals for this.
Now, go to BIOS settings once more and now double-click Secure boot.
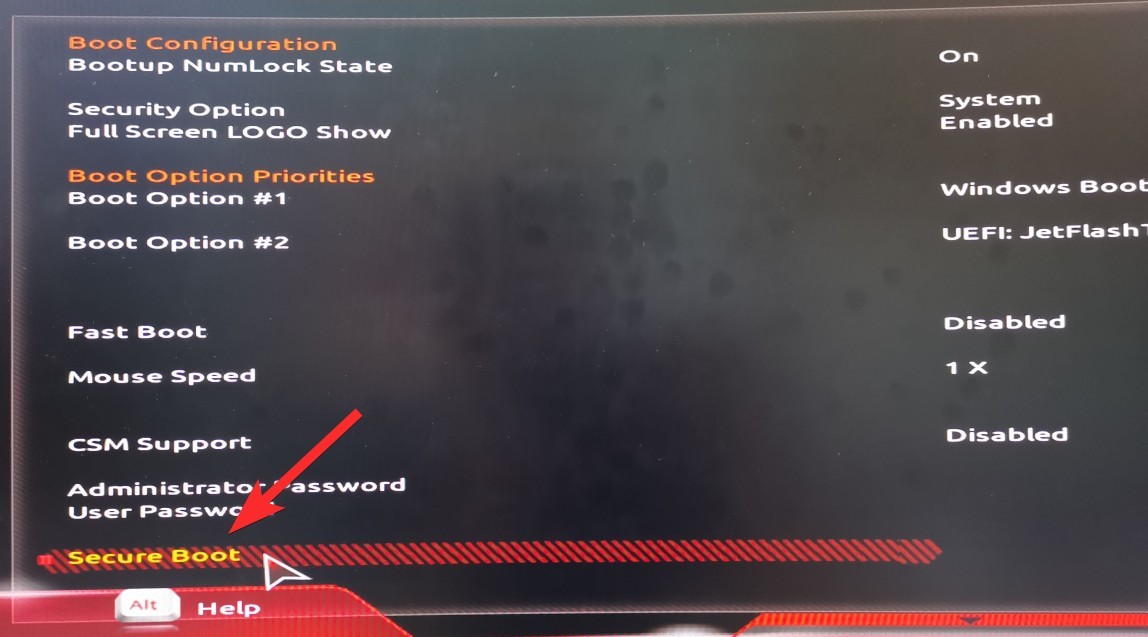
Select Enabled.

The BIOS display will now present the Secure Boot as enabled.

So, as soon as once more, go to the Power menu and choose Save & Exit setup.
Click Yes to save lots of the settings and reboot the system. Be certain to press the required key once more to reboot into BIOS settings once more. Yes, once more, as we have to allow the TPM too.
Let the PC restart however boot into the BIOS display once more.
Now, go to Peripherals (that’s what it’s on our PC), and double-click on Intel Platform Trust Technology (PTT). You can see it’s disabled proper now.
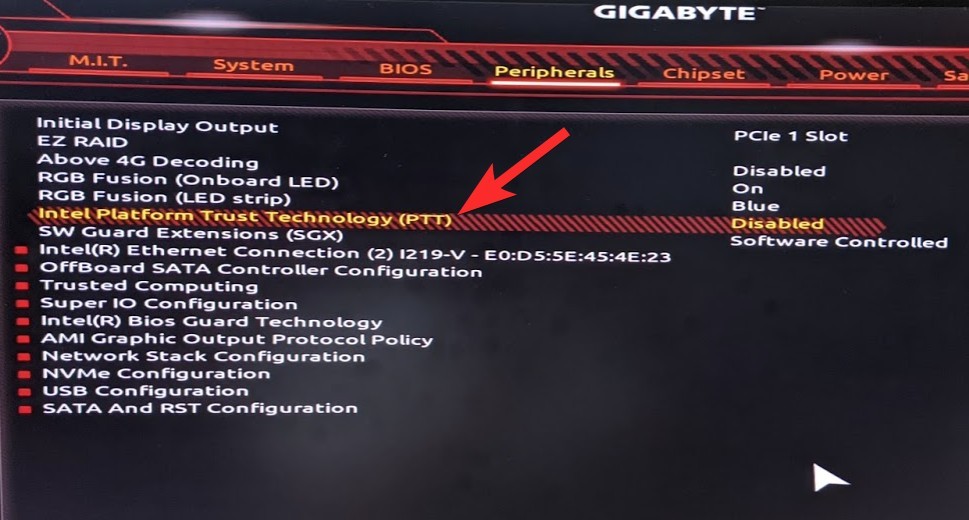
Click Enabled within the pop-up.

Now, it is going to present the PTT as enabled too. Meaning, TPM 2.0 is now obtainable to your PC.

When you test within the Windows 11 well being test app now, it ought to present Windows 11 to be appropriate now.

Here is our TPM Management display you get from the tpm.msc command within the Run window. It now reveals that TPM 2.0 is now obtainable.

We are good to go now. Let’s save and restart and it’s best to have the ability to set up Windows 11 now.
In order to resolve the TPM problem, you’ll need to allow it from the UEFI/BIOS of your system. Depending in your system, there are two strategies that you should utilize to entry the boot menu.
Method #1: Hit the hotkey when your system is booting up
When your PC or Laptop is beginning up, there’s a small window between the emblem look and the loading of the Windows start-up web page when it is advisable to constantly hit the hotkey that’s particular to your system producer.
Upon hitting the hotkey, your system will take you to the UEFI/BIOS web page as an alternative of the conventional Windows start-up web page. The hotkeys that it is advisable to faucet to entry the boot menu are both DEL or more universally, F2. Lenovo Desktops and Thinkpads particularly use the F1 key for boot up.
A a lot simpler and dependable option to attain your UEFI/BIOS menu is the Windows 10 begin menu. Follow these steps:
Type ‘Settings’ within the search field from the Start Menu. Click the Settings menu when it seems.

Click on Update and Security from the Setting menu.

Click on Recovery within the left panel after which click on the Restart now button below Advanced startup.

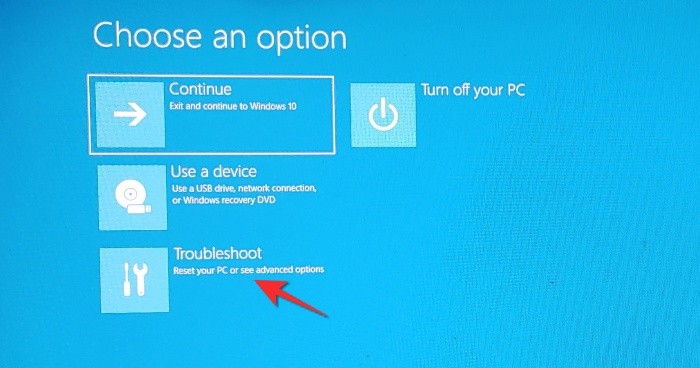
Once you do that, your regular Windows interface will shut down and you can be prompted to pick out an choice from the menu that seems next, click on the Troubleshoot choice from right here.
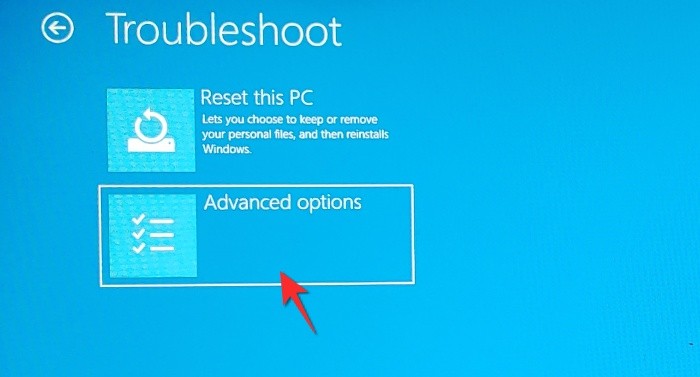
Once the Troubleshoot menu opens, click on the Advanced Options menu choice from right here.
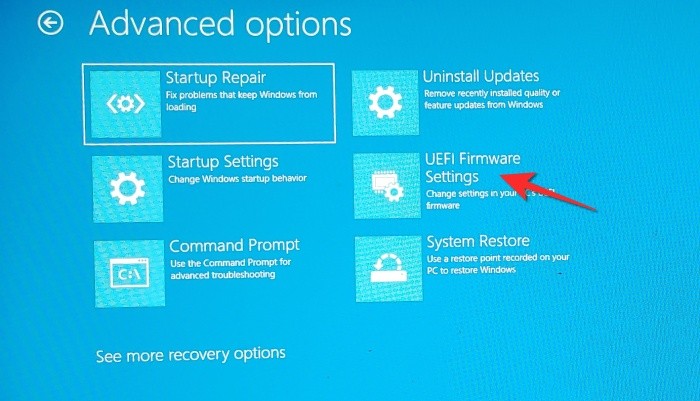
Once the Advanced choices menu will open, click on the UEFI/BIOS Firmware Settings from the choices supplied.
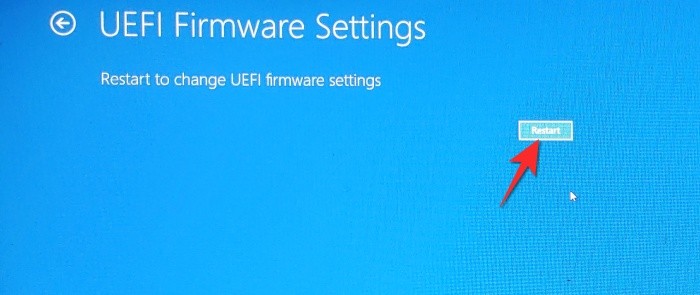
Click the Restart button so that you’re redirected to the boot menu.
We hope you discovered this text useful. Do tell us within the feedback in case of queries! Take care and keep secure.
Check out more article on – How-To tutorial and latest highlights on – Technical News