
How to Clear Space on Windows 11.
Disk Space has all the time been a luxurious be it the outdated days of DOS the place every little thing was saved on a floppy disk or our trendy occasions the place we discover it troublesome to retailer our music libraries on a single drive. Depending in your present system configuration you could possibly simply run out of area as you retain using your system.
This area might be used for momentary information, paging information, outdated Windows, massive archives, obtain information, and more. The best method to unlock some area tends to be to delete the biggest information in your system, however discovering these information can show to be a problem. In such circumstances, you should utilize our information beneath to establish and delete the biggest information in your system. Let’s get began.
: How to Fix Windows Search High CPU or Disk Usage on Windows 11
Free up area on Windows 11
You can simply test for large information in your system in Windows 11 (or 10) using varied strategies. Windows 11 comes with an in-built utility as nicely that helps you establish information taking massive quantities of space for storing in your PC. Follow one of many strategies beneath that most closely fits your present wants and necessities.
Method #01: Uninstalling Apps which might be taking massive area
Press Windows + i in your keyboard to launch the Settings app and click on on ‘Storage’ in your proper.

You will now get a listing of all of the classes taking on massive chunks of disk area in your PC. Click on the class of your option to get began. Follow the steps beneath relying in your alternative.
Click on ‘Sort by’ on the prime.

Select ‘Size’.

The largest apps and applications in your system will now be listed in descending order. Click on the ‘3-dot’ menu icon beside the app you want to take away out of your PC.

Select ‘Uninstall’.

Click on ‘Uninstall’ once more to verify your alternative.

The app ought to now be uninstalled out of your system.
If you have been redirected to the Control Panel
Click and choose the app you want to delete/uninstall.

Click on ‘Uninstall’ on the prime.

The uninstallation program ought to now launch in your PC. Follow the on-screen directions to take away the chosen program out of your system.

The chosen program ought to now be eliminated out of your system.
: How to Repair Windows 11 [15 Ways]
Method #02: Free up area using ‘temporary files’ choice underneath Storage settings
Your momentary information will already be listed in descending order by their dimension. Check the packing containers for all of the momentary information you want to take away out of your PC.

Note: Selecting ‘Downloads’ will delete your private information saved within the ‘Downloads’ folder.
Click on ‘Remove files’ on the prime to take away the chosen momentary information out of your PC.

Temporary information ought to now be cleared out of your system.
: How to delete momentary information in Windows 11
Method #03: Free up area using different choices underneath Storage settings
Click on ‘View Desktop/Music/Documents/Videos’ and you can be redirected to your desktop.

Click on ‘Sort’ on the prime.

Click on ‘More’.

Now choose ‘Size’.

Your information will now be listed in descending order by their dimension. Select the information you want to delete and hit Del in your keyboard.

Now click on on ‘Yes’ to verify your alternative.

Selected information ought to now be deleted out of your chosen folder.
Method #04: Using WizDirStat
WizDirStat is a well-liked open-source utility typically used to generate a graphical illustration of your native space for storing in a user-friendly method. This makes it simpler to establish massive chunks of your disk area occupied by a single file, folder, or archive, which in flip will make it simpler so that you can unlock some area in your PC. Use the information beneath to establish what’s taking on area in your Windows 11 PC.
Download and set up WinDirStat in your PC using the hyperlink above. Once put in, launch the app.

Now choose one of many choices that most closely fits your wants. If you solely have a single drive put in in your system with a single partition, then you may skip this step. Click on ‘Ok’ as soon as you’re performed.
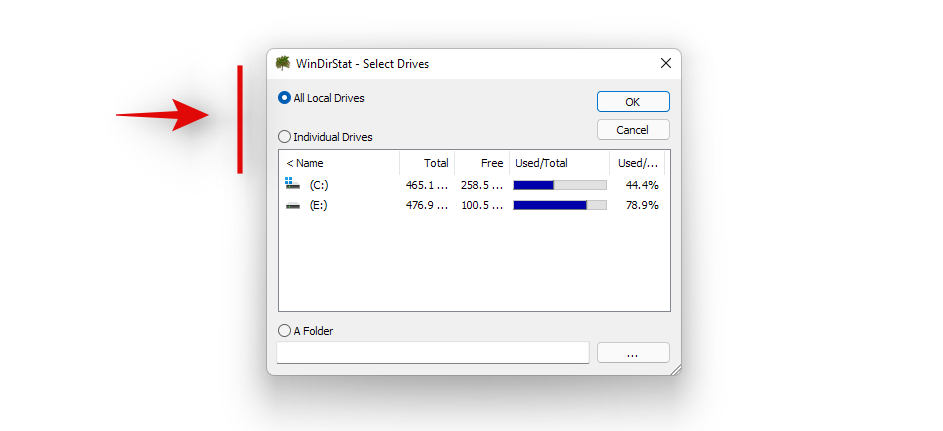
- All Local Drives: This will make WinDirStat analyze all of your disks and show their knowledge graphically.
- Individual Drives: Select one in all your put in drives to be analyzed for disk area utilization. You can choose this selection after which choose the drive you want to use.
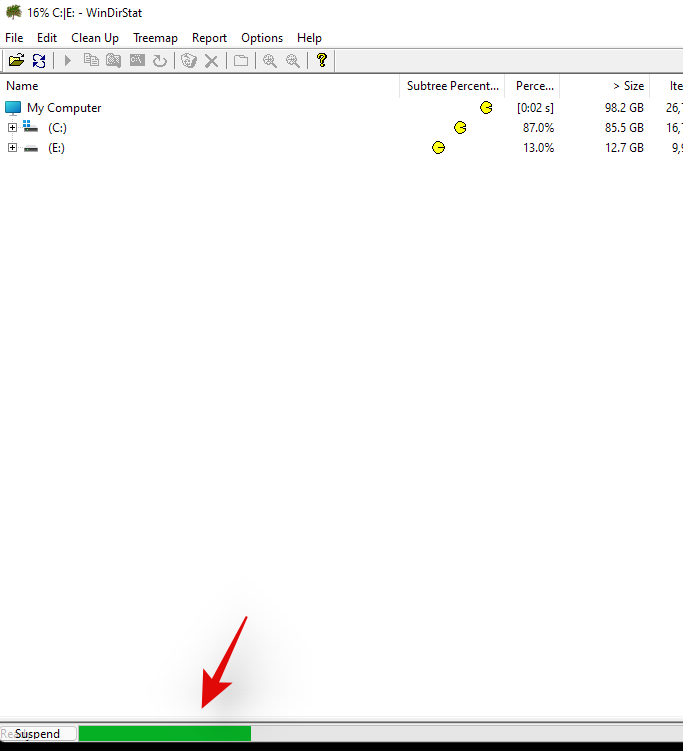
Your drives will now be analyzed and you may monitor the progress for a similar on the backside of the window.
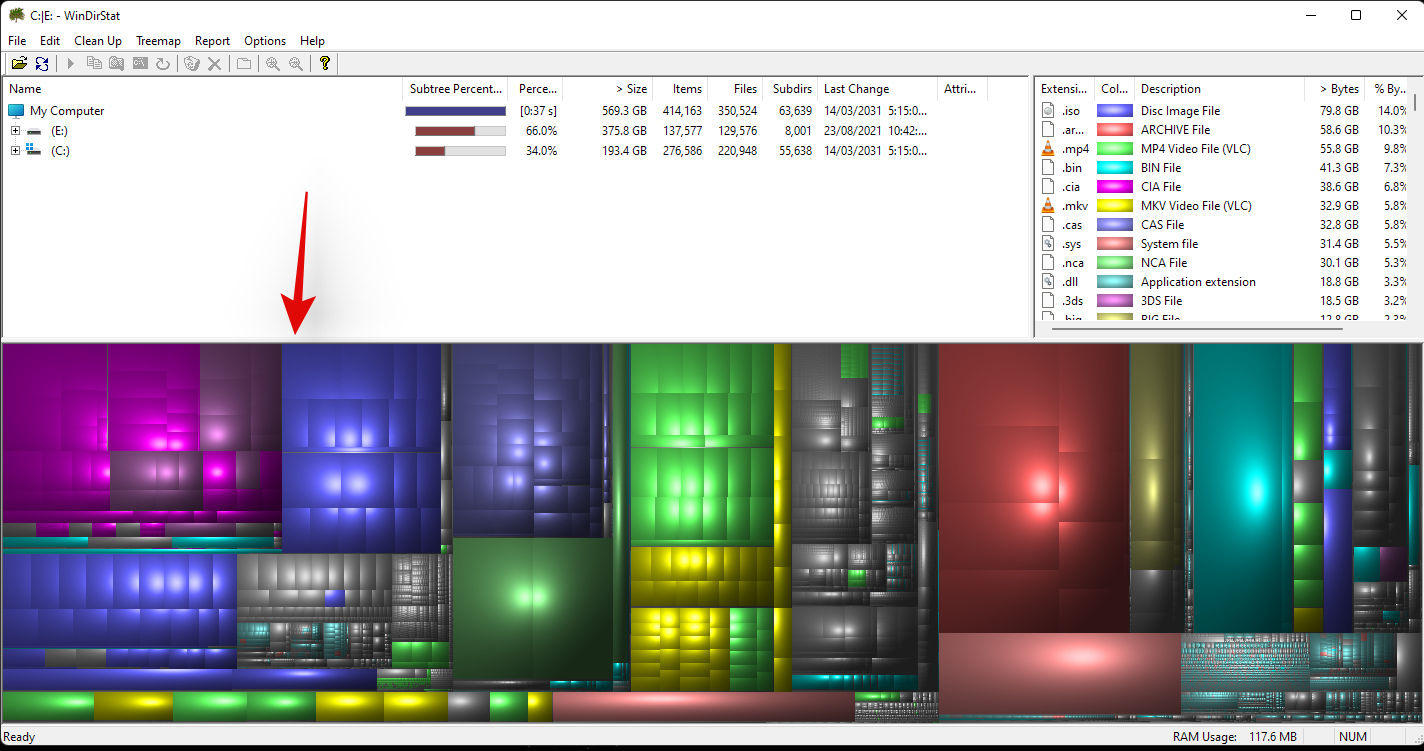
Once analyzed, a color-coded graphical illustration of the disk area utilization on the chosen drive(s) can be proven in your display screen. Simply click on on the biggest chunks to establish the biggest information.
Press Del in your keyboard to delete the file. This will ship it to your recycle bin and you may determine its destiny when reviewing your recycle bin gadgets. Alternatively, you should utilize Shift + Del to completely delete the merchandise out of your system.
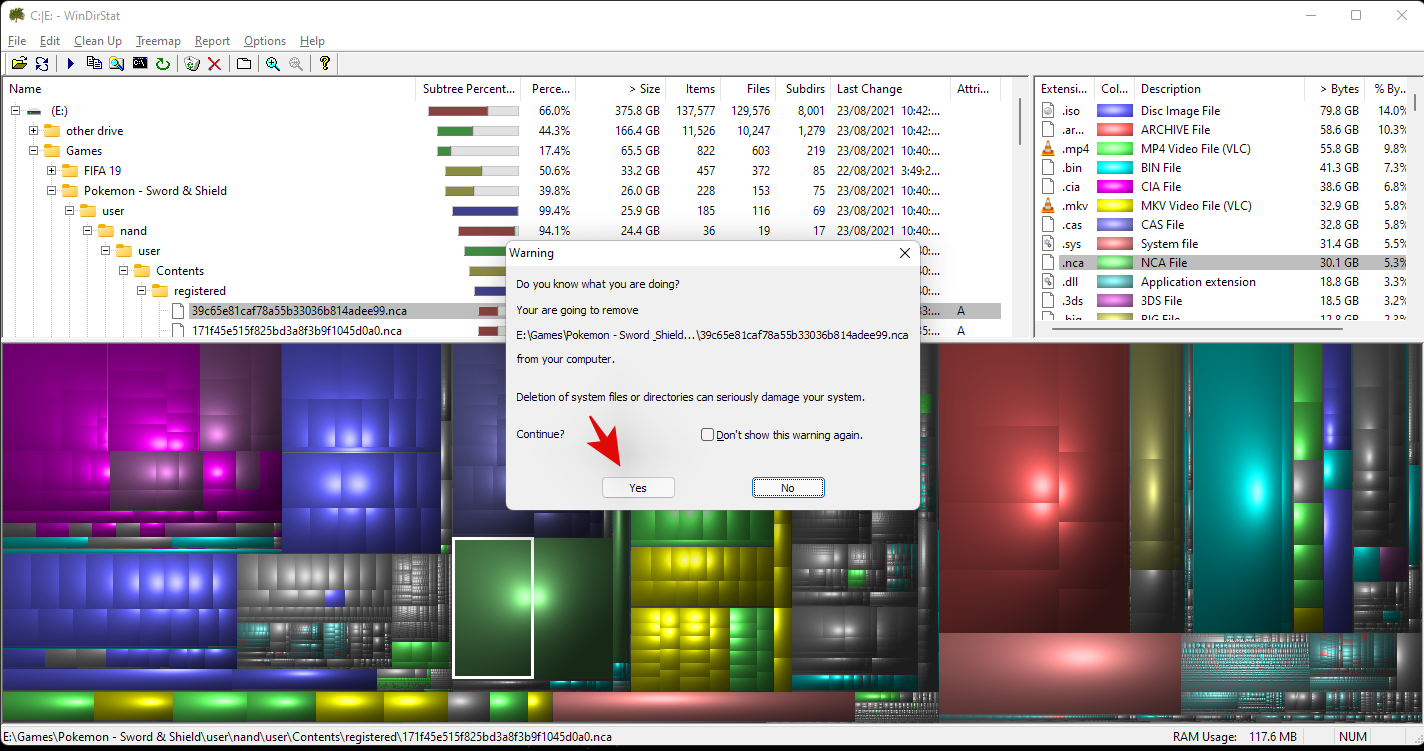
And that’s it! You can repeat the final steps to delete more of the biggest information out of your system.
Method #05: Using Windows Search to delete massive information
Windows Search also can show you how to establish the larges information in your system in Windows 11. However, it is a hit or miss for now with the brand new file explorer, and in case the tactic fails to be just right for you, then you have to to briefly change back to the Windows 10 file explorer. Don’t fear, upon getting recognized and located the biggest information, you may revert the adjustments and get back to the brand new Windows 11 file explorer. Use the guides beneath to get began.
5.1 Search for big information
We will now seek for massive information based mostly in your standards.
Press Windows + E in your keyboard to open the file explorer and click on on the search field within the prime proper nook. Search for the next time period.
dimension:gigantic

The outcomes will now be filtered and information bigger than 4GB will now be displayed in your display screen. Select the pointless information that you do not want in your PC and easily delete them to unlock some area. If you want to use a smaller minimal file dimension, then substitute ‘gigantic’ with one of many phrases beneath relying on the dimensions you favor.

- Large: Files between 128MB and 1GB
- Huge: Files between 1GB to 4GB
- Medium: Files between 1MB to 128MB
And that’s it! You can use Windows Search this method to filter information by their dimension and discover the biggest ones presently in your PC.
Note: In case your PC indexes and exhibits system information as nicely then we advocate you double test information earlier than deleting them to keep away from deleting any very important system information out of your system.
You will now have discovered massive information in your PC using Windows Search.
5.2 If the search time period doesn’t be just right for you
If typing in ‘size:gigantic’ doesn’t be just right for you, then you have to to modify to the outdated file explorer from Windows 10. Use the information beneath to get you began. Once you turn back to the outdated file explorer, use the information above to seek for massive information. Once discovered, use the next information beneath to get the brand new Windows 11 file explorer back in your system.
Switch to the outdated file explorer
Press Windows + S in your keyboard and seek for ‘Regedit’. Click and launch the app out of your search outcomes.

Navigate to the next listing or copy-paste the tackle beneath in your tackle bar.
HKEY_LOCAL_MACHINESOFTWAREMicrosoftWindowsCurrentVersionShell Extensions

Click on the folder named ‘Blocked’.

Right-click on an empty space in your proper, choose ‘New’ after which click on on ‘DWORD (32-bit) value’.

Enter the next identify and press Enter in your keyboard. We advocate you copy-paste the identical to keep away from any naming errors.
{e2bf9676-5f8f-435c-97eb-11607a5bedf7}

Close the registry editor and press Ctrl + Shift + Esc to open the Task Manager. Switch to the ‘Details’ tab.

Click on ‘Explorer.exe’ and hit Del in your keyboard.

Click on ‘End process’ to verify your alternative.

Click on ‘File’ and choose ‘Run new task’.

Enter the next within the textual content field and click on on ‘Ok’.
explorer.exe

Windows File Explorer will now restart in your system and it ought to be reverted to the Windows 10 File Explorer. You can open a random folder to test the identical. Confirm that you’ve got gone back to the outdated file explorer and use the information beneath to search out massive information in your system.
Switch to the brand new file explorer
We can now revert to the outdated file explorer. Follow the information beneath to get you began.
Press Windows + S in your keyboard and seek for Regedit. Click and launch the app as soon as it exhibits up in your search outcomes.
Navigate to the next path beneath or copy-paste it in your tackle bar.
HKEY_LOCAL_MACHINESOFTWAREMicrosoftWindowsCurrentVersionShell Extensions

Simply click on on the DWORD (32-bit) worth we had created earlier and hit Del in your keyboard. Click on ‘Yes’ to verify your alternative.

Press Ctrl + Shift + Esc in your keyboard and change to the ‘Details’ tab.
Click on ‘explorer.exe’ and hit Del in your keyboard.
Click on ‘End process’.
Click on ‘File’ and choose ‘Run new task’.
Type in ‘explorer.exe’ and hit Enter in your keyboard.
You can shut the duty supervisor and registry editor in your PC now.
And that’s it! You will now have gone back to the brand new File Explorer on Windows 11.
Method #06: Using CMD (command immediate)
CMD also can show you how to discover massive information in your system. Use the information beneath to get you began.
Press Windows + E in your keyboard and navigate to a location the place you want to seek for massive information and click on on the tackle bar on the prime.

Type in CMD and press Enter in your keyboard.

CMD will now be launched within the specific folder. Type within the following command and substitute ‘PATH’ with the trail we copied to your clipboard.
forfiles /S /M * /C “cmd /c if @fsize GEQ 1073741824 echo @path > largefiles.txt

The above command will search for information bigger than 1GB in your PC. If you want to outline a bigger minimal dimension, then substitute ‘1073741824’ with one of many following choices beneath.
- 2GB: 2147483648
- 5GB: 5368709120
- 10GB: 10737418240
Execute the command together with your desired variables and a textual content file can be created in the identical location with a listing of all the big information discovered in your system based mostly in your standards. You may also discover the trail for every file in your native storage within the textual content file.

You can use this record to establish the biggest information within the present location after which delete them at your discretion to unlock some disk area in your system.
Method #07: Using PowerShell
You also can discover massive information in your system using PowerShell. Just just like the command for CMD, PowerShell will scour your native information based mostly on a minimal dimension and show all of the information bigger than it. Use the information beneath to get you began.
Press Windows + E in your keyboard and navigate to the situation the place you want to search for massive information. Click on the tackle bar on the prime and sort in ‘PowerShell’. Press Enter in your keyboard as soon as you’re performed.
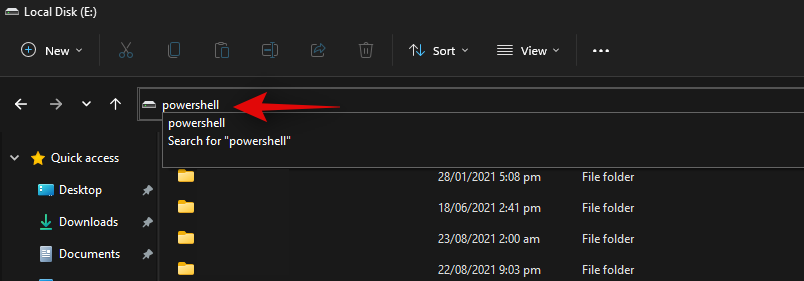
Copy-paste the command beneath within the PowerShell window and press Enter in your keyboard.
gci -r| kind -descending -property size | choose -first 10 identify, size
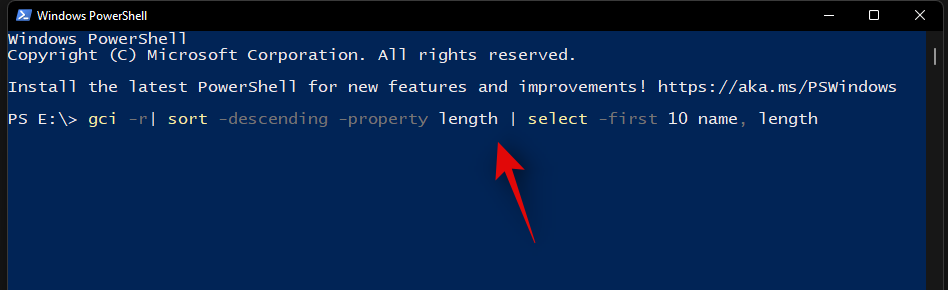
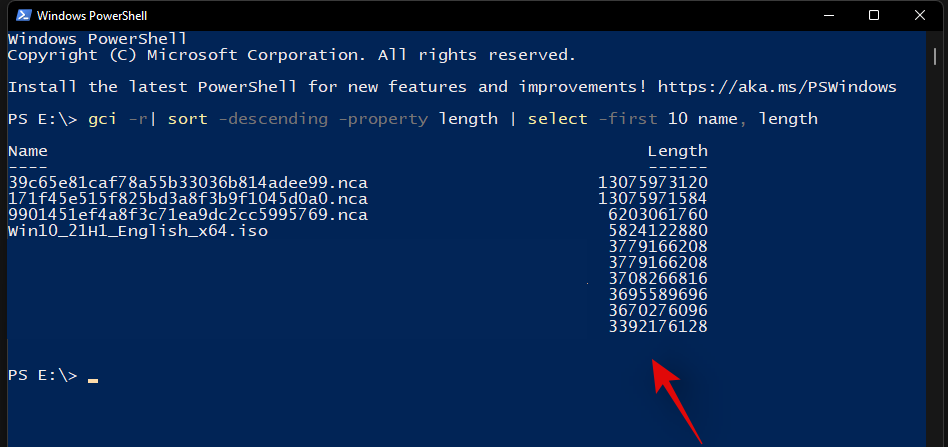
You will now get a listing of the highest 10 largest information presently taking essentially the most disk area in your system. If you want to view the highest 20 information, then substitute ‘select-first 10’ with ‘select-first 20’.
PowerShell will now discover and show the 20 largest information in your system together with their dimension. The file dimension can be in bytes which might make it a bit troublesome to evaluate the dimensions of information by way of gigabytes.
And that’s it! You will now have discovered the biggest information in your PC using PowerShell in Windows 11.
Method #08: Using SpaceSniffer
Space Sniffer is one other in style third-party utility used to research disk area utilization on Windows 11. Space sniffer can assist you establish massive information using large quantities of area in your system. You also can discover hidden information taking large disk area in your PC using the SpaceSniffer. Use the information beneath to get you began.
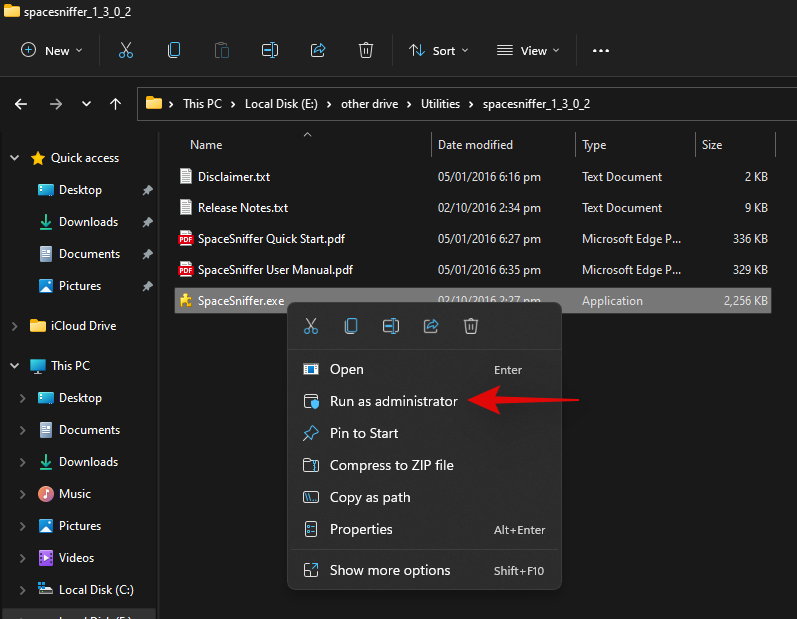
Download SpaceSniffer to your PC using the hyperlink above. A transportable .exe can be downloaded to your system. Extract the archive and right-click on the .exe file.
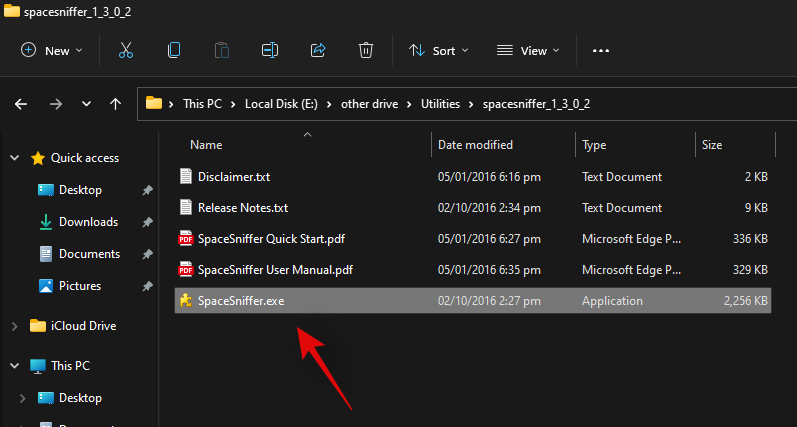
Select ‘Run as administrator’.
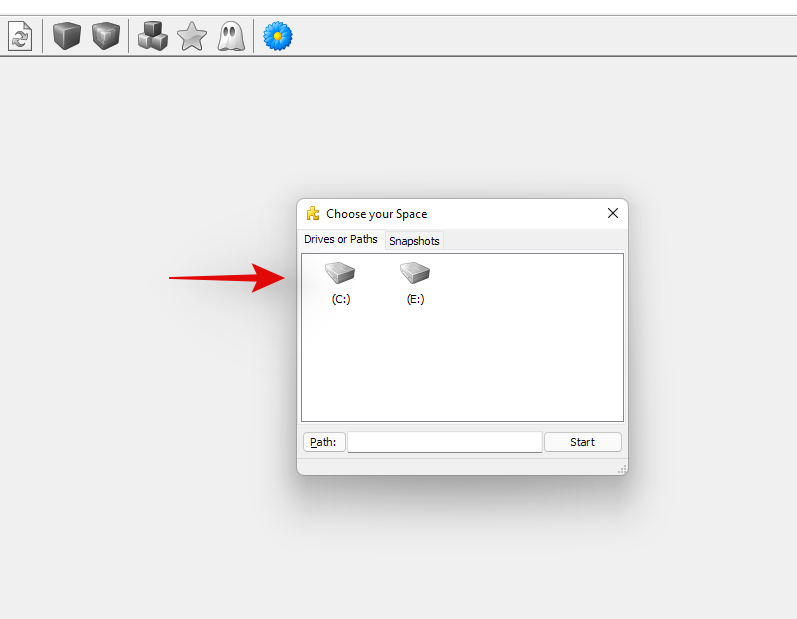
Now choose the drive you want to scan. If you want to analyze and discover massive information in a specific listing, then you may enter its path within the textual content field beneath.
You will now be proven a graphical illustration of your disk area utilization in your display screen. Simply hover over the biggest chunk and you can be proven the identify of the folder or file occupying that area.
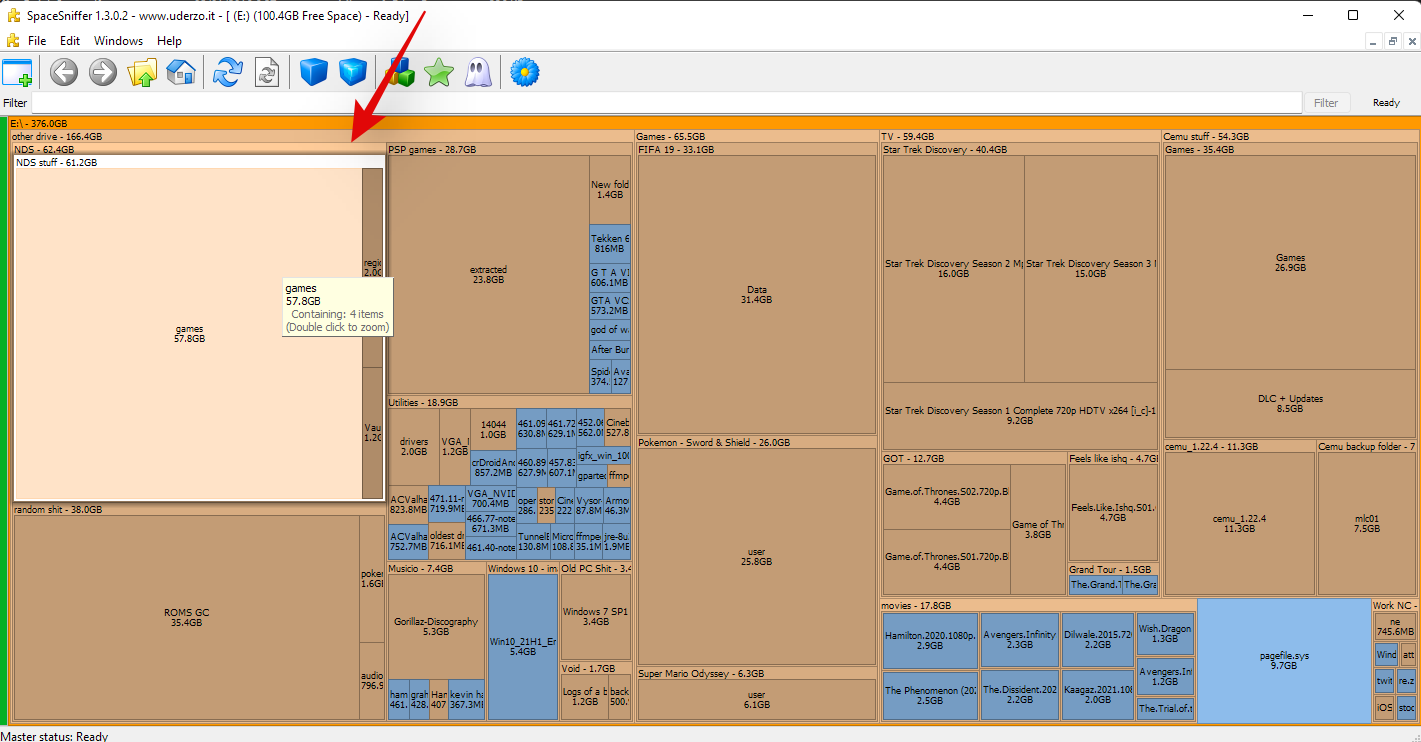
And that’s it! You can use SpaceSniffer this method to establish the biggest information in your system by merely wanting on the largest chunks in your display screen.
Method #09: Other third-party instruments you should utilize to research disk utilization on Windows 11
The world of third-party instruments is a rabbit gap. The more you look, the more applications you’ll find that declare that will help you discover and reclaim your disk area on Windows 11. This large collection of applications will be fairly daunting and difficult at first, making it troublesome so that you can discover the proper instruments that suit your present wants and necessities. If you aren’t a fan of one of many applications used above, then you may go for one of many alternate options listed beneath. You can discover a couple of particulars about every program beneath their itemizing.
Tips to free space for storing on Windows 11
If you’re operating low on disk area or have a smaller-sized drive that you’re unable to presently improve, then you should utilize the next tricks to save as a lot disk area in your PC as presently doable. Let’s get began.
- Use Disk Cleanup
- Run SFC & DISM instructions to repair errors together with your drives
- Uninstall pointless apps
- Delete or Archive pointless or presently unused information
- Use OneDrive or different cloud storage companies to avoid wasting area
- Use an exterior storage device to retailer your libraries
- Regularly unlock your recycle bin
- Use Storage Sense on Windows 11
- Disable Hibernation to delete the hibernation file
- Rebuild your search index
- Delete extra customers created in your system
And more. You can unlock area in your PC using tons of the way however every normally comes with a compromise. If you need to keep away from compromises, then upgrading your storage is the most suitable choice. SSDs are cheaper than ever and in case you are seeking to improve your storage, then an M.2 SSD may go a good distance to your system.
Note: M.2 SSDs will work at their marketed capability solely you probably have a appropriate M.2 slot in your system. Not all M.2 slots are the identical and never all of them are routed by way of the PCI lanes in your motherboard.
Free up disk area on Windows 11!
Using the quite a few strategies above, you may simply discover what’s taking on area in your PC and repair it fairly simply. If the Windows-based options don’t be just right for you, attempt using a free-ish software program like TreeSize (or others talked about above).
If you continue to need assistance with clearing up area in your Windows 11, then tell us within the feedback field beneath. Do clarify your problem correctly.
Check out more article on – How-To tutorial and latest highlights on – Technical News