
7 Ways to Share Files and Folder in Windows 11 (Also, Share Links, Drive, Photos and Videos Easily).
What to know
- Microsoft has made sharing information and folders lifeless simple in from Windows 11.
- For sharing information, you might have choices like Nearby Sharing, Email, or any app, inside the Windows Explorer.
- For folder sharing, you may share a single folder or total drive on a network.
- You can even share media information instantly from the Photos app and hyperlinks by way of Microsoft Edge.
- Find the detailed step-by-step guides beneath for all of the strategies talked about above.
If you’ve ever scratched your head questioning how to share something in your Windows 11 PC, you’re in the correct place. Sharing stuff like information, folders, hyperlinks, drives, photos, and movies ought to be a breeze, proper? Well, Microsoft has jazzed up the sharing sport with Windows 11 to ensure it truly is.
In this information from NerdsChalk, we’re diving into the nitty-gritty of hitting that ‘Share’ button like a professional—with no need a pc science diploma to determine it out. So, whether or not you’re wanting to indicate off your latest photograph masterpiece or keep the staff within the loop with some necessary docs, let’s get you zipping by means of the sharing course of with model and ease. Get able to share smarter, not tougher, with Windows 11.
Here are all of the methods that you could share a file or a folder on Windows 11.
Method 1: How to share information using Nearby Sharing in Windows Explorer
On Windows 11, customers can share information by way of Windows Explorer itself. The capability to take action makes it far more handy than it was earlier than, and listed here are the three choices that Windows offers to simplify sharing information with others and your linked gadgets.
- To share by way of Windows Explorer, click on on the file that you just wish to share and choose Share on the toolbar above.

- Alternatively, you may right-click on the file and choose the Share possibility.

- Now, you should have three choices to select from. Here they’re:

- The first possibility is to share your information by way of ‘Nearby Sharing’. Here, you may choose the drop-down menu to select from ‘My Devices’ or ‘Everyone nearby’. Doing so will even activate Nearby Sharing.
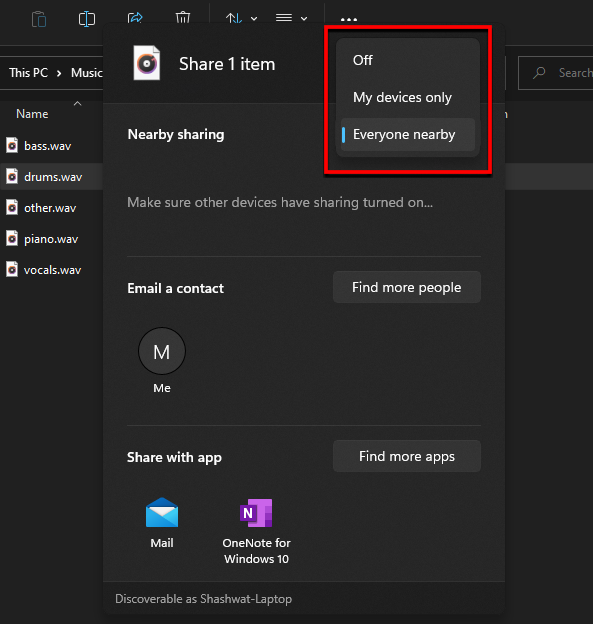
- You will see the gadgets which have their Bluetooth and close by sharing turned on. Select the device you wish to share with and that’s it.

- The receiver will get a notification on their device of the incoming file. Click on Save & open or Save.

: How To Shrink the Taskbar on Windows 11
Method 2: Share information by way of Email in Windows Explorer
- To share by way of Windows Explorer, click on on the file that you just wish to share and choose Share on the toolbar above.
- Alternatively, you may right-click on the file and choose the Share possibility.
- Now, you should have three choices to select from. Here they’re:
- From the share choices, choose the recipient underneath ‘Email a contact’. To discover more contacts, click on on Find more folks.

- Then select your contact.

- Now click on on Send.

- The file can be shared with them by way of e mail. If that is your first time using this selection, you’ll be required to hyperlink an account with the ‘Peoples’ app to import contacts. To accomplish that, click on on Import contacts.

- Choose your account and log in.

Once your contacts are uploaded, choose the one that you just wish to share your file with.
: How To Remove Language Switcher From the Taskbar on Windows 11
Method 3: Share information using any app in Windows Explorer
- To share by way of Windows Explorer, click on on the file that you just wish to share and choose Share on the toolbar above.
- Alternatively, you may right-click on the file and choose the Share possibility.
- Now, you should have three choices to select from. Here they’re:
- Select the ‘Share with app‘ possibility.

- Or you may click on on Find more apps and obtain an app from Microsoft Store to share it with.

- Sharing by way of this selection will assist you to open the file with an app simply so that you don’t should load the app and open the file in it, saving you just a few additional clicks and time.
Method 4: Share photos and movies using the Photos app
The identical three Windows Explorer sharing choices talked about above are additionally discovered on another native apps. For instance, the Photos app, which is the default app to open footage and GIFs on Windows, will even allow you to share them with others.
- To share footage and pictures, open the file within the Photos app. Then click on on Share on the prime.

- Now, you’ll get the identical three choices as talked about above, that are – Nearby sharing, e mail a contact, or share with app.

- The technique to share by way of these three choices is strictly the identical as proven earlier than.
Method 5: Share hyperlinks using Microsoft Edge
Just as you get the three aforementioned sharing choices on the Photos app, you may as well share hyperlinks the identical method by way of Microsoft Edge – Windows default browser.
- To accomplish that, open Microsoft Edge and go to the hyperlink that you just wish to share. Now click on on the three dots on the prime proper nook.

- Then click on on Share.

- The identical three choices of Nearby Sharing, e mail a contact, and share with app will seem.

- Follow the steps as they’re talked about above to share your hyperlinks by way of these three choices.
Method 6: Share a folder on a network
If you’re related to different methods on the identical network, you may share a folder simply with them. Here’s how you are able to do so:
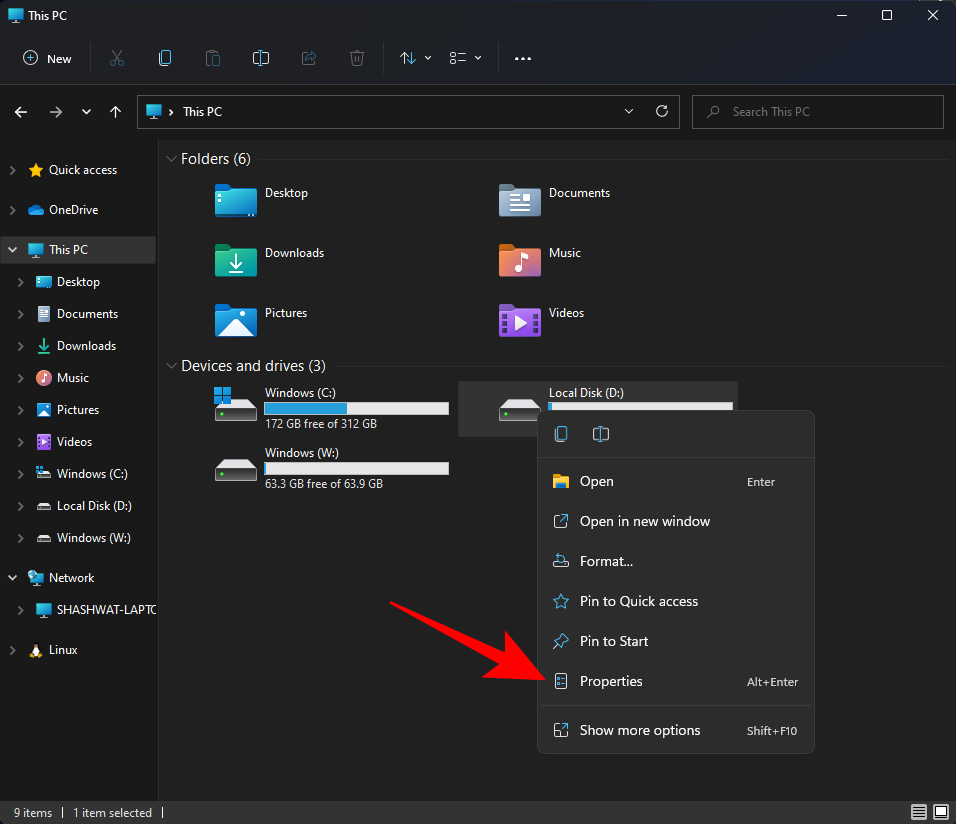
- Right-click the folder that you just wish to share and choose Properties.

- Click on the ‘Sharing’ tab to change to it, and click on on Share.

- Now click on on the drop-down menu.

- Select Everyone.

- Then click on on Add.

- Now click on Share.

- Then press Done.

- Your folder is now shared. But the recipient could not have all of the permissions to the folder and the information inside it. To change that, click on on Advanced Sharing.

- Check the Share this folder possibility.

- Now click on on Permissions.

- Change the permissions as you see match after which click on on OK on all open windows.

This folder will now be accessible to all those that are on the shared network.
Method 7: Share a drive on a network
Similarly, you may as well share your full drive on a Network. This is a vital possibility when working in teams because it offers one entry to their friends’ onerous drive in full. Here’s how one can share your drive on a Network:
- Open File Explorer and right-click on the drive that you just wish to share. Select Properties.
- Click on the ‘Sharing’ tab.

- Then click on on Advanced sharing.

- You will discover that the choices are the identical as earlier than. Check the Share this folder possibility.

- Then click on on Permissions.

- Change permissions as you would like and click on OK.

- And identical to that, your full drive is now shared with those that’re on the identical network.
These are a few of the native methods of sharing information, folders, and drives on Windows 11.
Check out more article on – How-To tutorial and latest highlights on – Technical News