6 Best Duplicate File Finder Apps for Windows 11 and How to Use Them.

Our PCs are part of our personal lives and they are often as cluttered or as organized as we would like them. Those that desire a little bit of group could must do what’s wanted to handle their information beforehand, permitting them to seek out information simply each time required and avoiding the buildup of pointless junk.
But those who keep their information saved willy-nilly must put in the identical quantity of labor later (maybe much more so) when they should discover a single unique amongst a heap of duplicates, or eliminate all of them to get better misplaced house and pace issues up. That is, except they’re using purposes to automate the method.
So, in case your mess has develop into an excessive amount of to tolerate and also you require an app to seek out and delete duplicate information for you, listed here are a couple of suggestions you could profit from.
You may also clear up duplicate information in your PC using native Windows instruments like Search, Search Parameters, Command Prompt, and so forth. — test the hyperlink proper beneath for that.
: How to Find Duplicate Files in Windows 11 using Windows Search, Command Prompt, and more [Tips and Guides!]
However, typically the choices out there natively might not be sufficient. For instance, when you don’t know the place to search for duplicate information, there’s a excessive probability that you simply’re by no means going to seek out them.
Fortunately for us all, that’s the reason duplicate file finder purposes exist, and what a boon they’re! But not all of them are made comparable – some have more options, others have a greater GUI, and others nonetheless have all of it, albeit at a worth. Here are a couple of suggestions that can assist you clear out your PC simply.
6 Best Duplicate Files Finder apps
- Auslogics Duplicate File Finder
- CCleaner
- Easy Duplicate Finder
- Duplicate Files Finder
- SearchMyFiles
- Duplicate Cleaner Free
1. How to make use of ‘Auslogics Duplicate File Finder’
The Duplicate File Finder by Ausloics is definitely our prime decide for the aim. It has a clear GUI and choices sufficient to seek out duplicate information even within the distant areas of your PC.
Download: Auslogics Duplicate File Finder
Do be cautious whereas putting in the appliance. The installer will try to put in different Auslogics packages as effectively when you’re not cautious, so don’t overlook to untick the containers when the display screen comes up.
As quickly as you launch it, the appliance will take you straight to the search display screen to pick the file sorts that you simply need to search and the drives by which to look them.
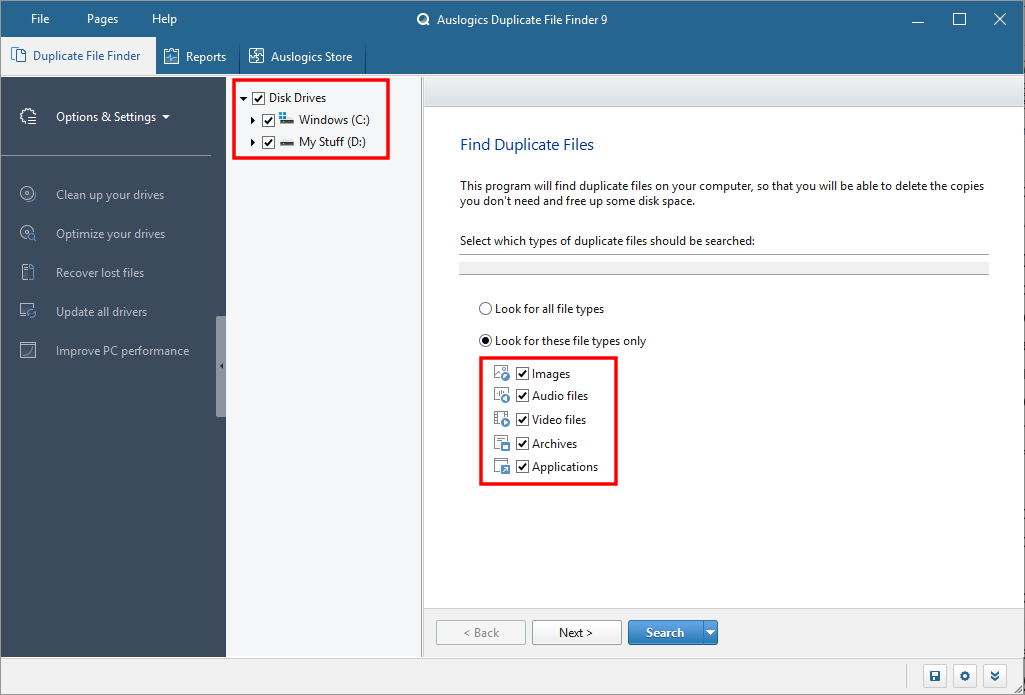
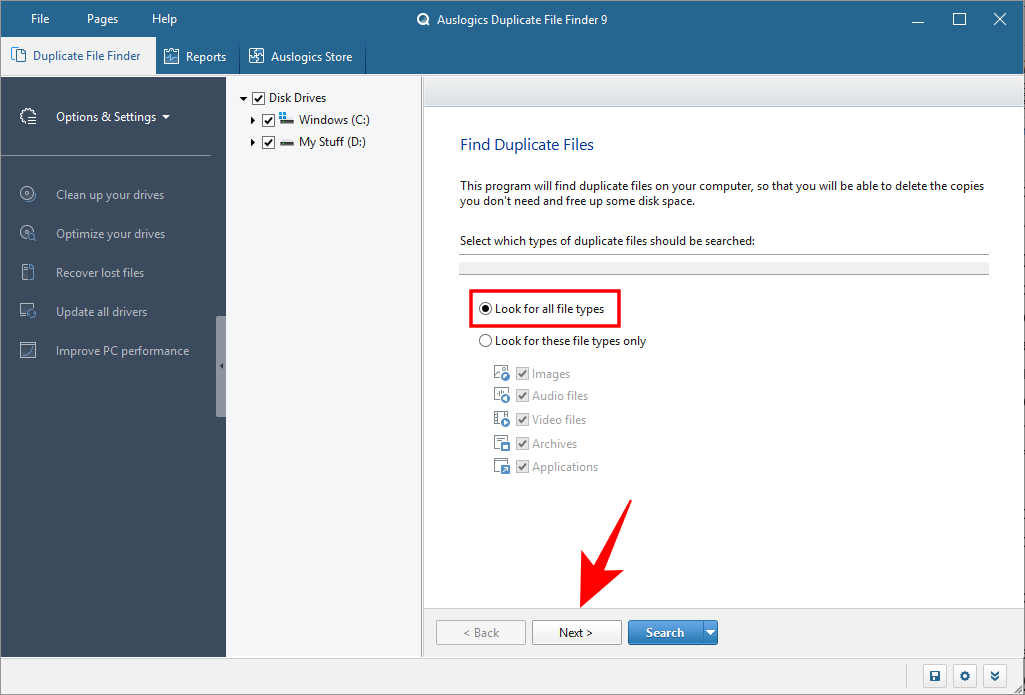
By default, the file sorts chosen are Images, Audio information, Video information, Archives, and Applications. To seek for all file sorts, choose the choice above it – Look for all file sorts. Then click on Next.
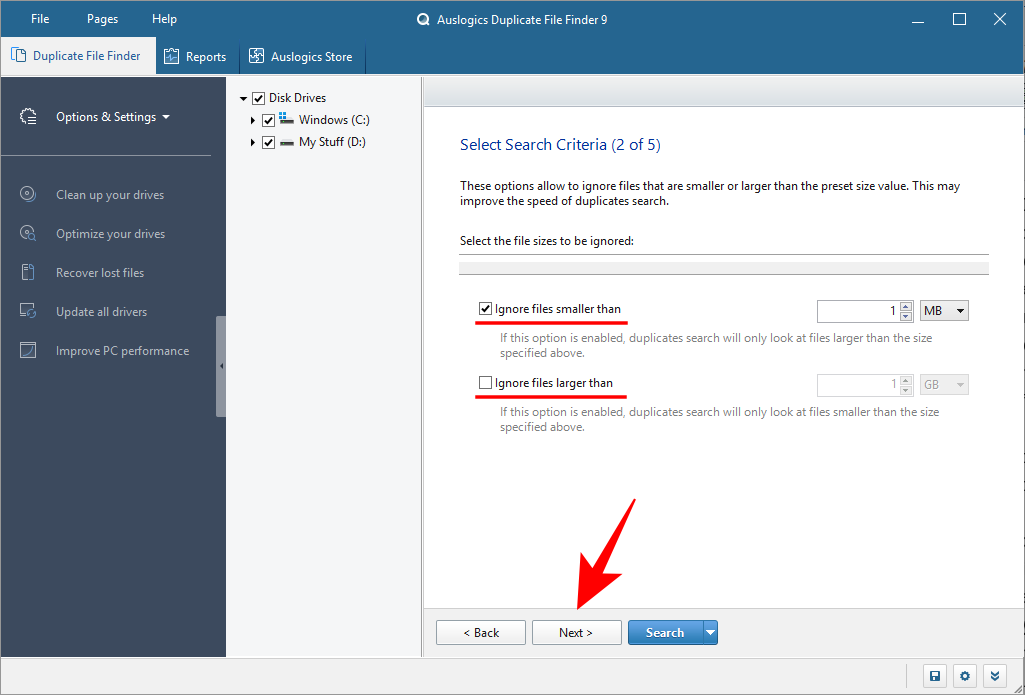
The next display screen permits you to choose the vary of information to look. By default, the search will “Ignore files smaller than 1 MB”. You can change the vary as you see match. Then click on Next.
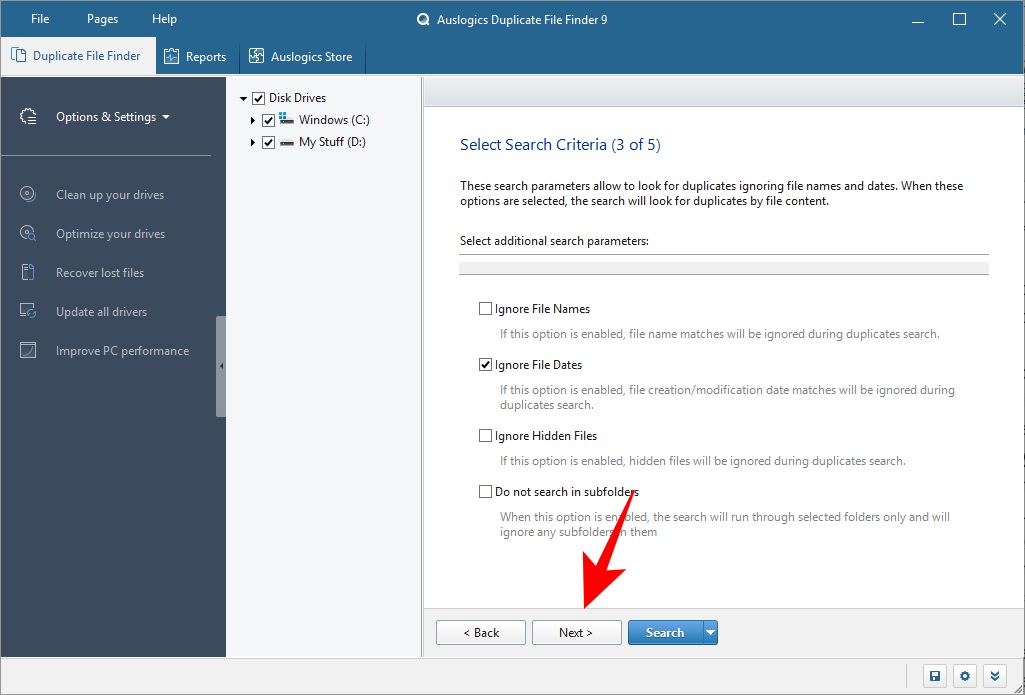
The next display screen will mean you can additional customise your search, by selecting to disregard File Names, Dates, Hidden information, and subfolders. Click Next to proceed.
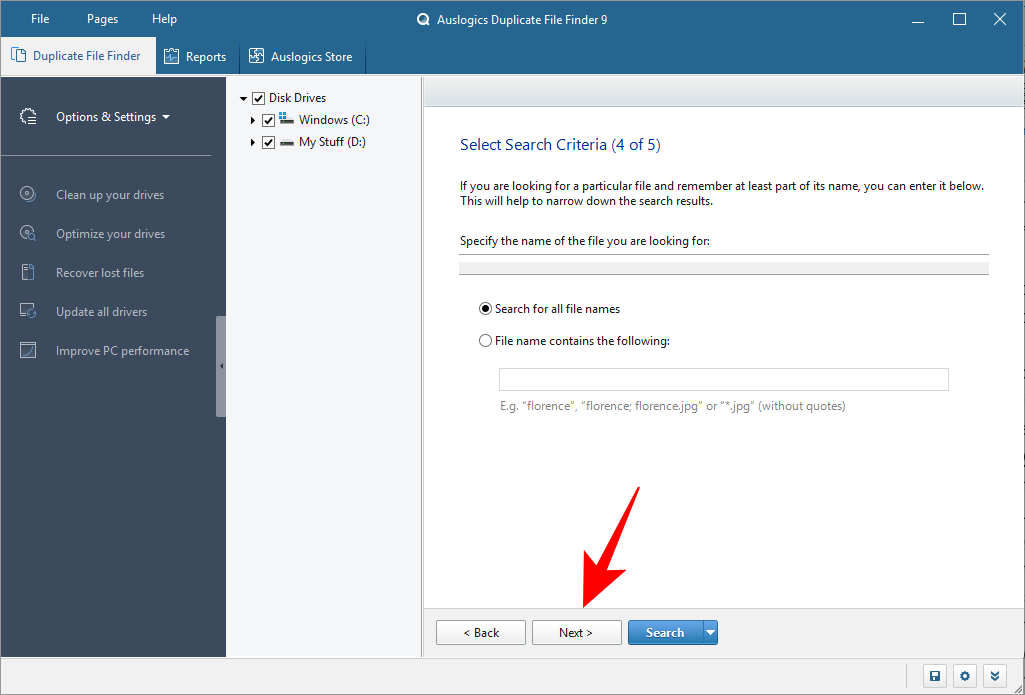
The next display screen will allow you to slim down your search by in search of information with a selected identify or perhaps a fragment of it. We’d advocate trying to find all file names (default), and simply click on Next.
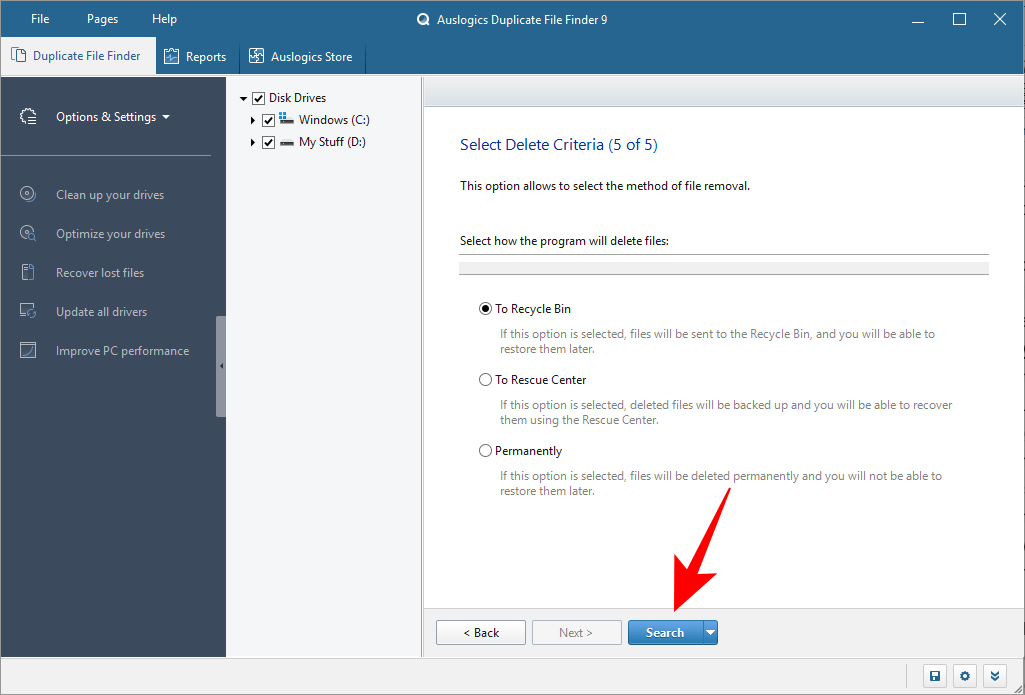
The final display screen lets you choose how this system will delete information, whether or not it’s going to put them within the “Recycle Bin”, back up the information, delete them, and permit recovery by way of the “Rescue Center”, or delete them “Permanently”. Once you’ve gone by way of the search settings, click on on Search.
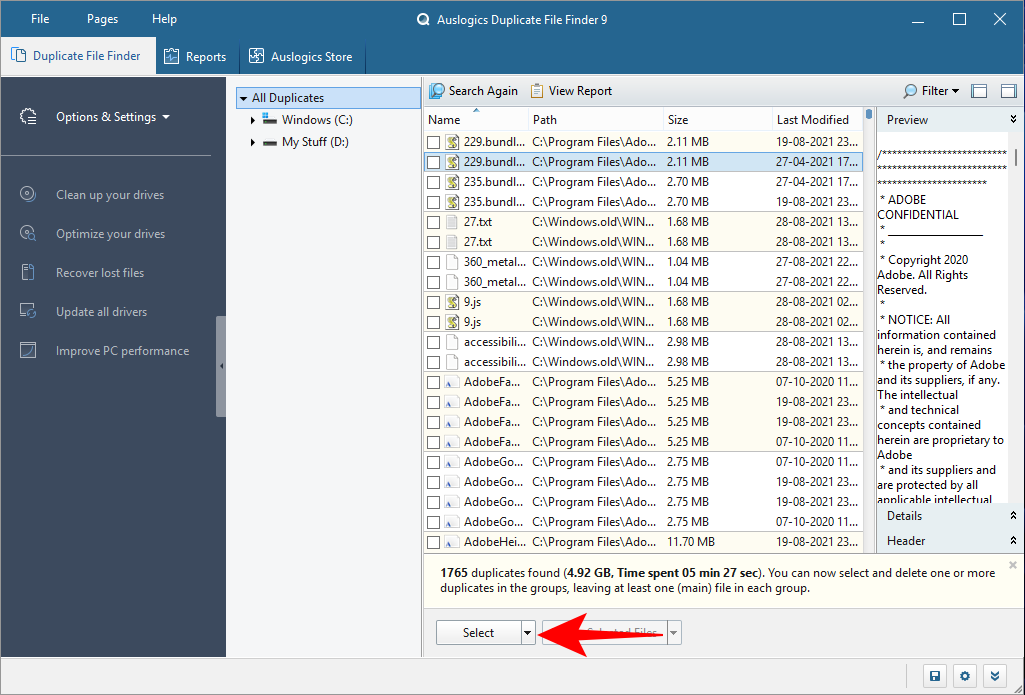
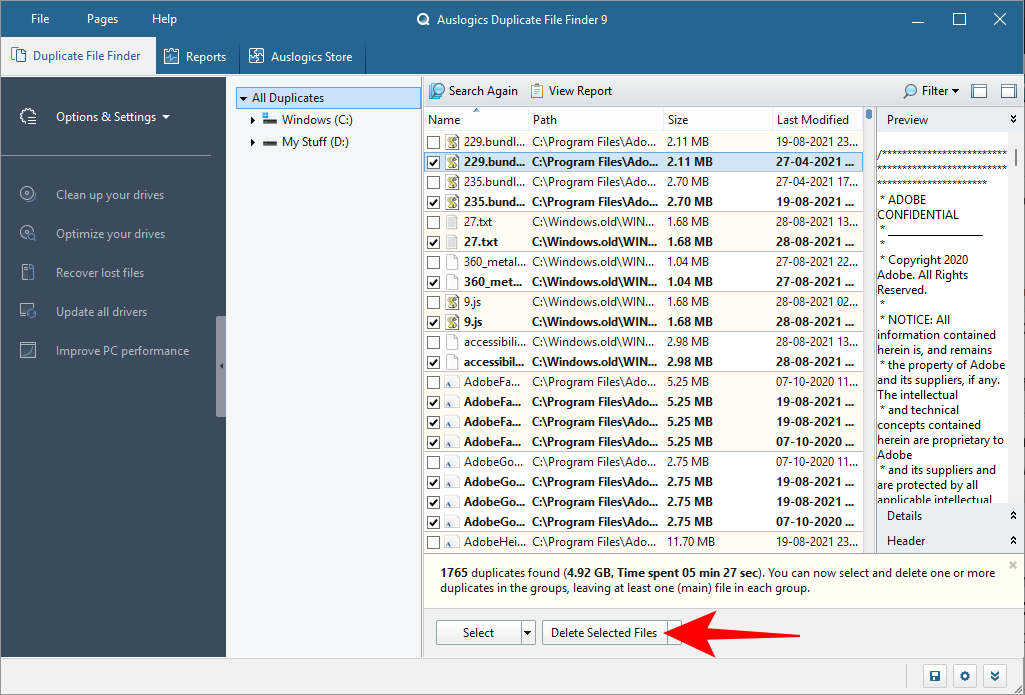
Depending on the variety of information in your system and the search settings, this may occasionally take a while. Once the search is full, you’ll discover a record of information and their duplicates. To choose solely the duplicates, click on on the arrow next to “Select” on the backside.
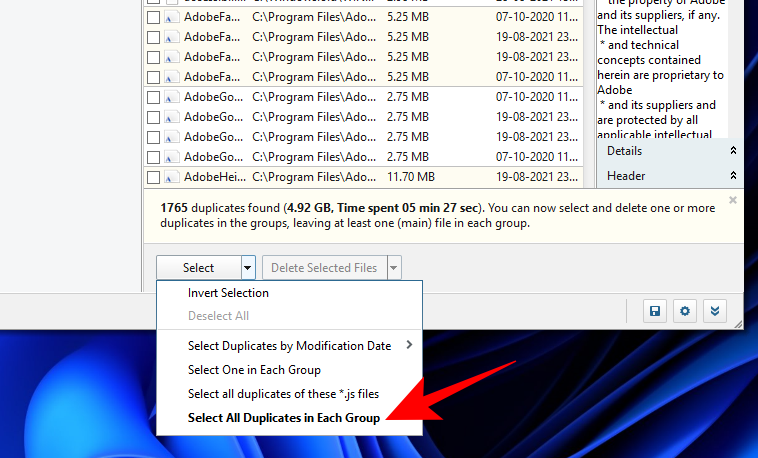
Select an choice (“Select All Duplicates in Each Group” is really useful).
Then click on on the arrow next to “Delete Selected Files” and select the way you need to delete them (“To Recycle Bin” is really useful).
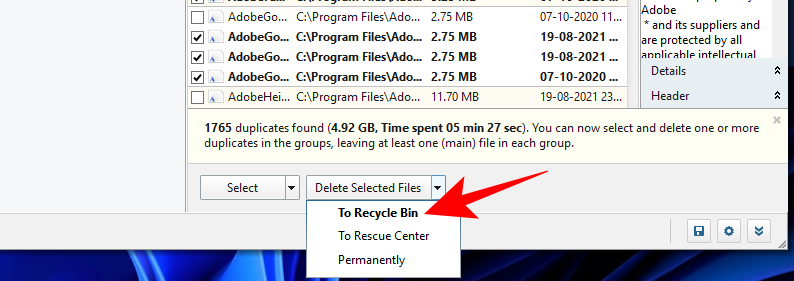
Now go forward and click on on Delete Selected Files.
Auslogics Duplicate File Finder, with its easy but efficient search setting choices and its clear UI, is the right software to scour your PC for duplicate information and purge them within the course of.
2. How to make use of ‘CCleaner’
If you’ve ever appeared for system cleaners you recognize CCleaner and, dare we are saying, its repute as a malware-introducing fairly than a malware-cleaning program. But these controversies are effectively up to now, and it’s constructing itself back up once more.
Download: CCleaner
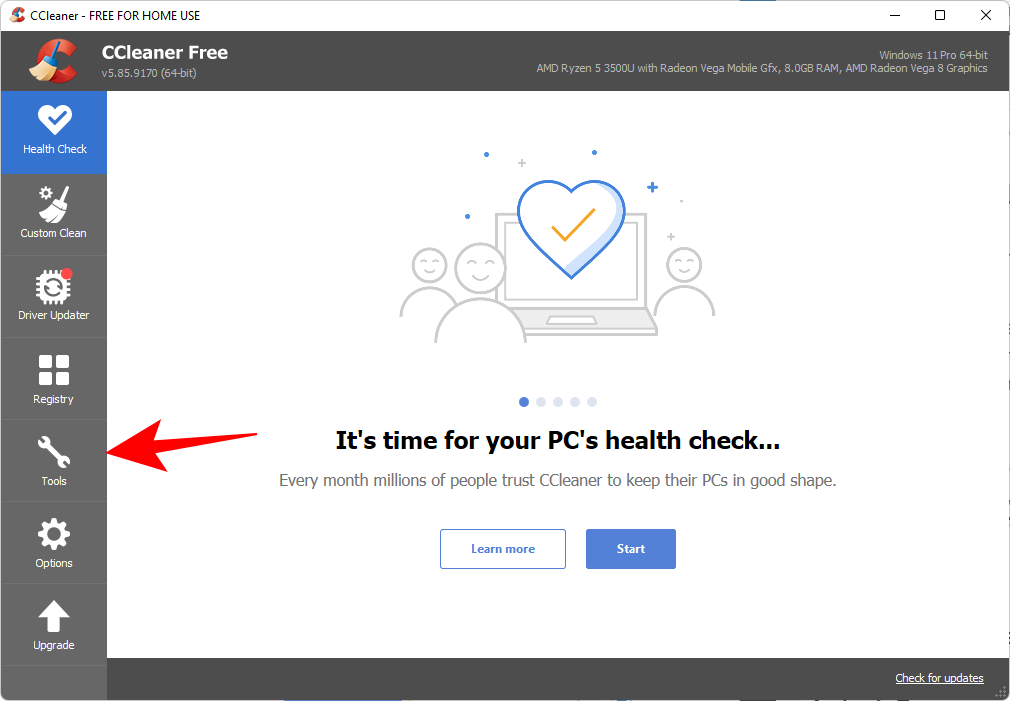
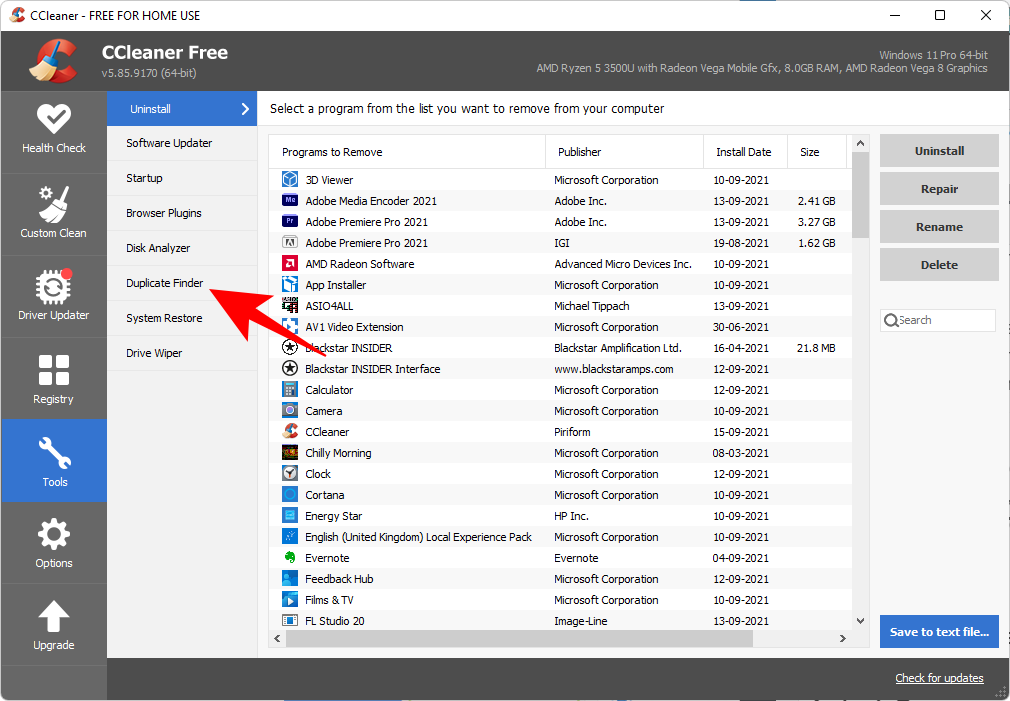
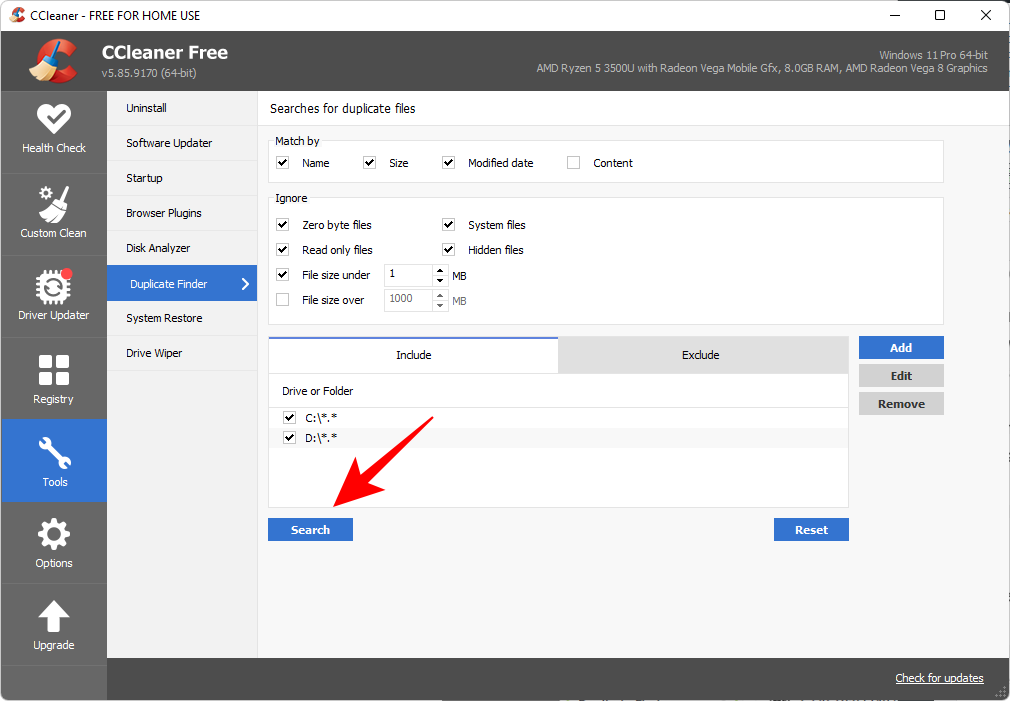
CCleaner nonetheless is without doubt one of the more fashionable instruments on the market which have an all-in-one performance, together with a ‘Duplicate Finder’. Open the appliance and click on on the Tools choice within the left panel.
Then choose Duplicate Finder.
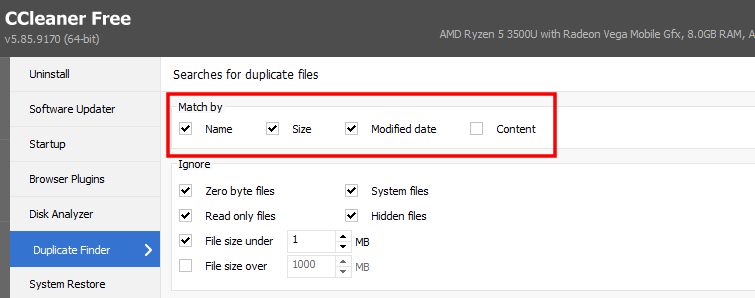
You’ll discover all of the search settings choices on the identical display screen. The identify, dimension, date, and content material choices are on the prime.
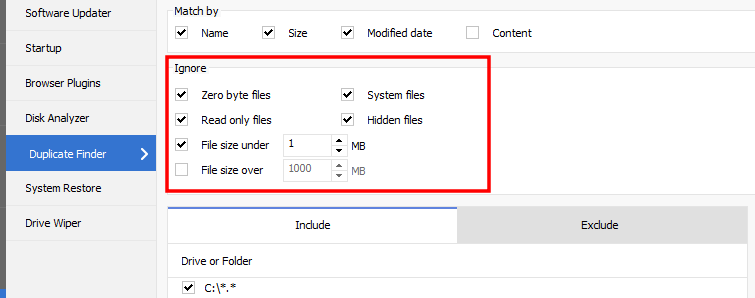
The choices to disregard information by their parameters are within the center.
And the drives and folders to incorporate/exclude are on the backside.
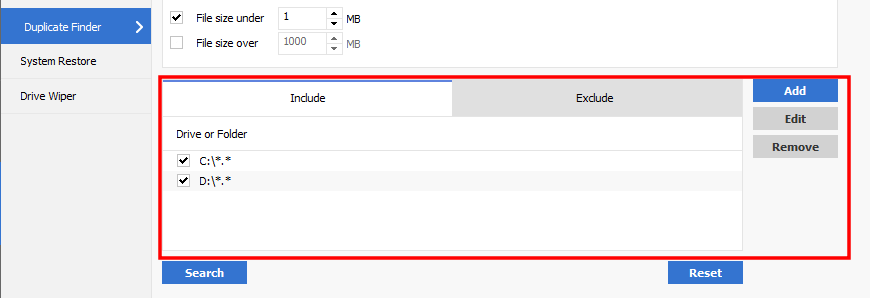
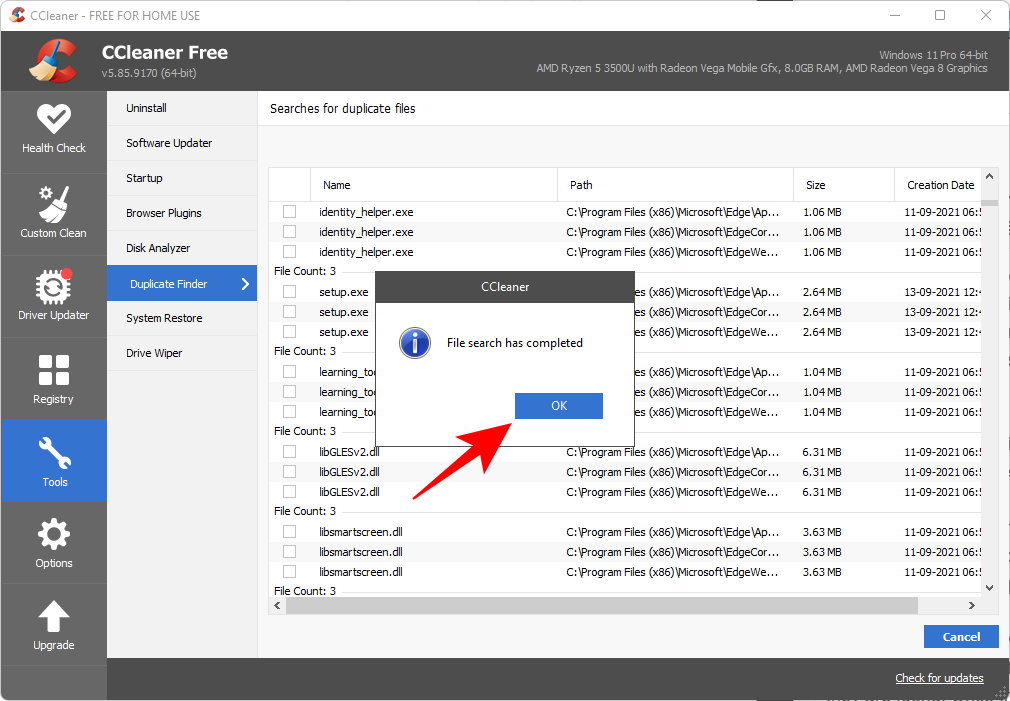
Once you’ve chosen your search settings, click on on Search.
CCleaner will now begin the search and show the duplicate information as they’re discovered. Once the search is full, click on OK.
Now choose the information that you simply wish to delete. This needs to be carried out manually as there isn’t a choice to pick duplicates in every class. But it additionally forces you to watch out whereas deleting as a result of as soon as these information are deleted, they’re gone for good. So watch out whereas making your choice. Then click on on Delete chosen.
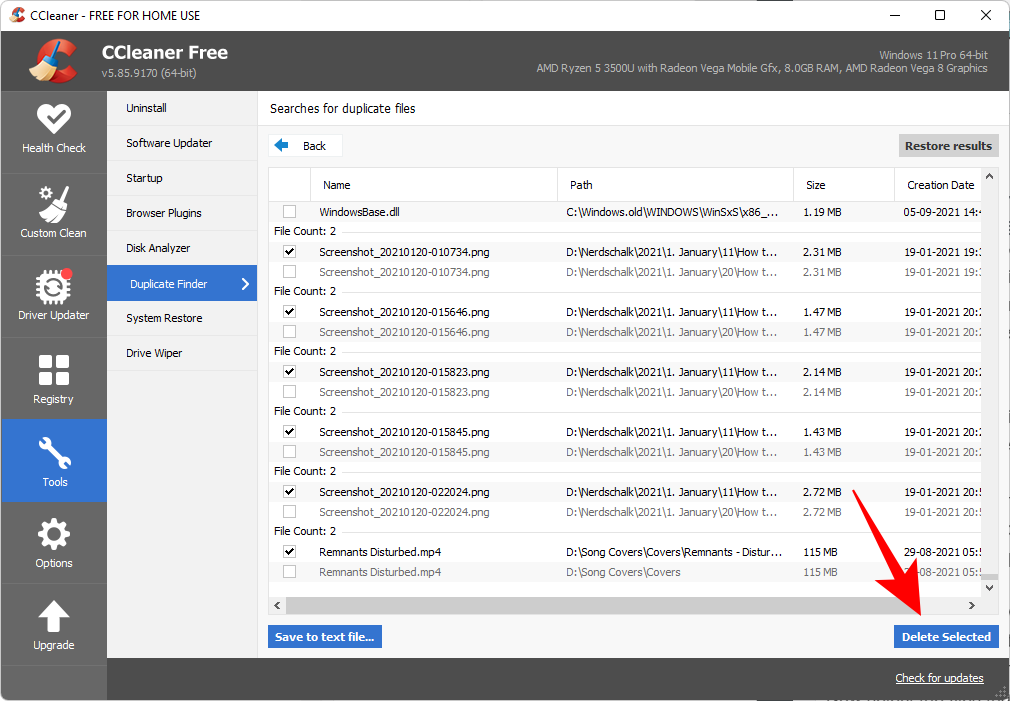
Despite its repute, CCleaner remains to be one of many more fashionable instruments to seek out duplicate information, even when it doesn’t supply sufficient choices for the aim of deletion.
3. How to make use of ‘Easy Duplicate Finder’
The identify says all of it! – an software that allows you to discover duplicate information with ease. This is all attainable thanks to classy algorithms that dig by way of your PC for any and all information hiding in duplicity.
Download: Easy Duplicate Finder
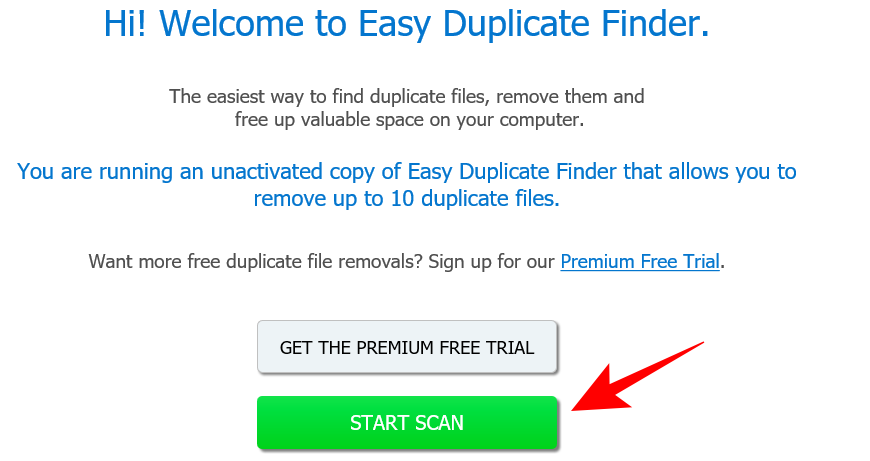
Before we start, know that the appliance solely permits you to take away as much as 10 duplicate information, a really small quantity even by trial-version requirements. You can, if you want, join a free Premium trial and notch up that quantity.
Or you possibly can simply keep using the unactivated free model. Simply go forward and click on on Start Scan.
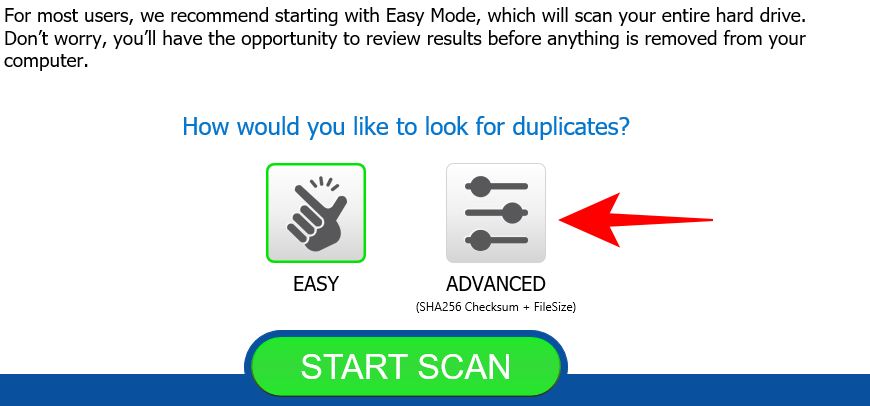
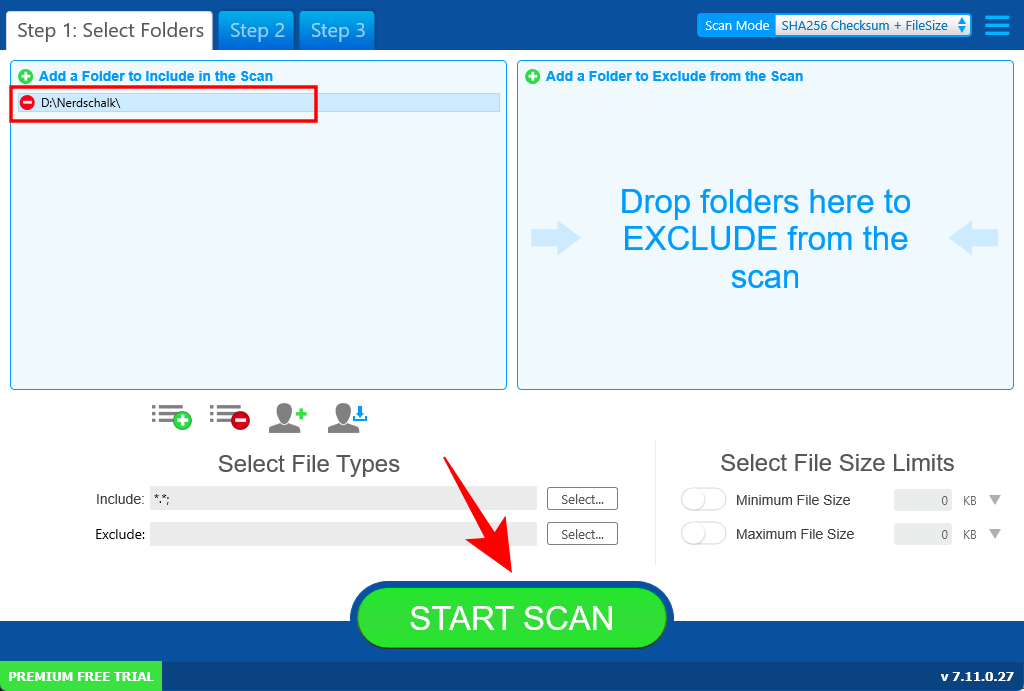
If you don’t have the time to configure the settings, the Easy choice will care for issues for you. Or, you possibly can specify what to look, what to exclude, and all issues to duplicate information search. For this, click on on Advanced.
The Scan Mode on the prime lets you choose from a lot of scan choices. Choose one that matches your function.

The choice to restrict the search by file dimension is in direction of the underside proper. It’s advisable to maintain issues set to default. Then drag and drop the folders that you simply need to scan within the left sq.. Once you’ve specified your settings, click on on Start Scan.
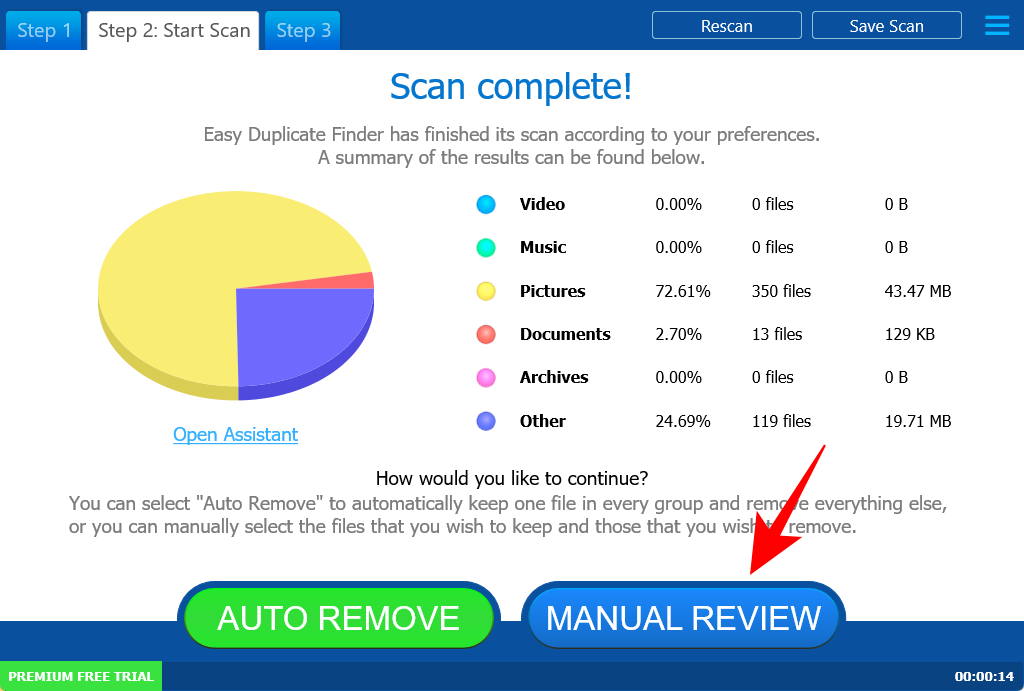
As quickly because the scan is full, you’ll see choices to both ‘Auto Remove’ or ‘Manual Review’. We advocate the latter to make sure that you’re not deleting some necessary system information within the course of (simply in case).
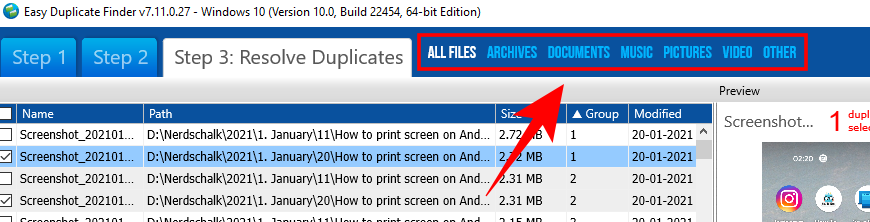
The duplicate information shall be chosen robotically. You can look by way of the completely different classes by deciding on one from the highest.
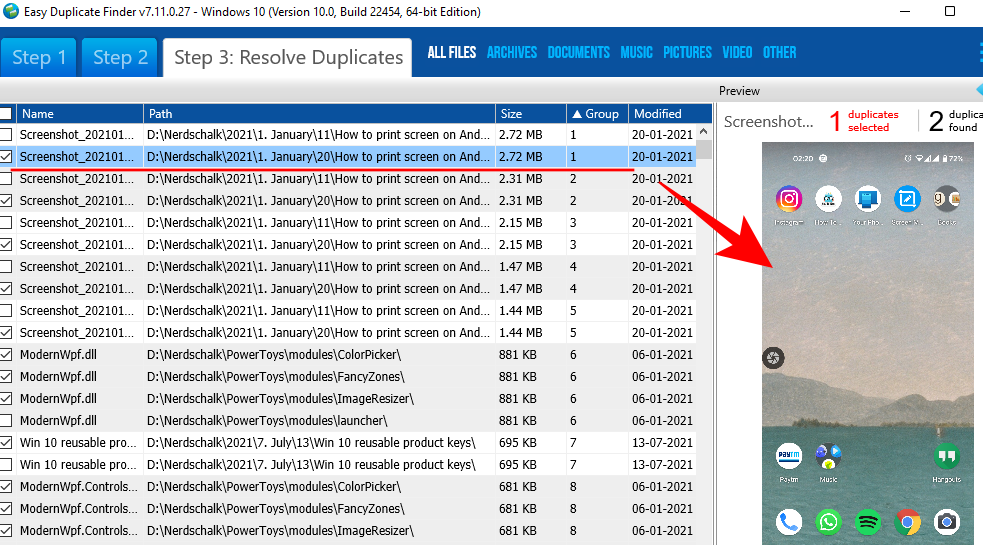
Click on a file to focus on it and see its preview in the fitting panel.
Once you’ve appeared by way of the information to be deleted, go forward and click on on the Trash icon.
Now select whether or not you need to transfer the information to the Recycle bin or delete them completely. Then click on on Yes.

4. How to make use of ‘Duplicate Files Finder’
This software has been round for some time now, and it’s greater than evident with the antiquated interface. Safe to say it hasn’t been up to date in a while, however that’s solely as a result of it doesn’t have to. This titular duplicate information finder is light-weight and fairly adept at detecting duplicate copies.
Download: Duplicate FilesFinder
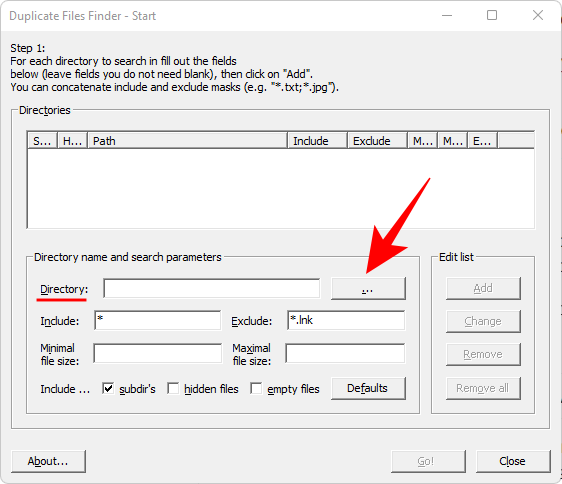
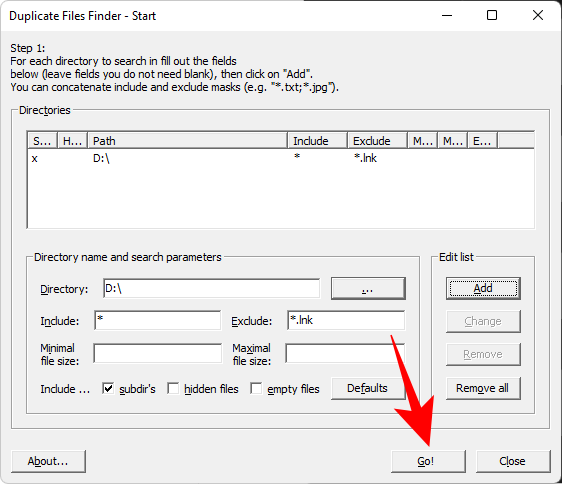
The software has a single display screen that accommodates all the mandatory choices to customise your search. The major factor that you should do is to click on on the ellipsis button next to the Directory subject.
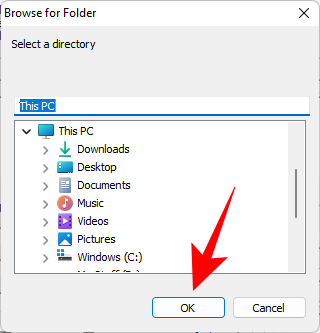
And select which drive or folder you need to scan, then click on OK.
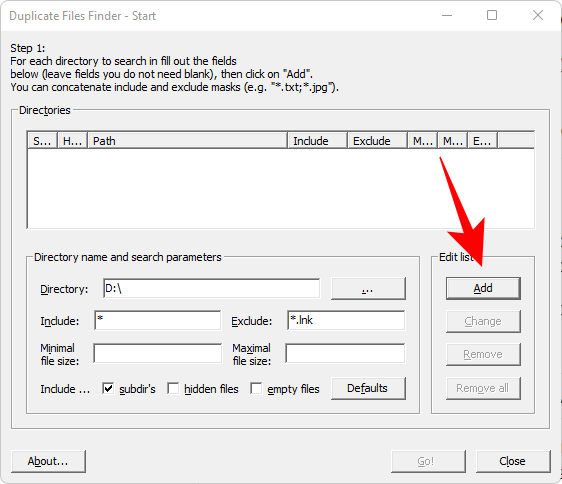
The remainder of the choices are fairly self-explanatory and are not any completely different from what we’ve seen in different duplicate file finders. Once you’ve specified your search (or left the fields that you simply don’t want clean), click on on Add.
Then click on on Go! to begin the search.
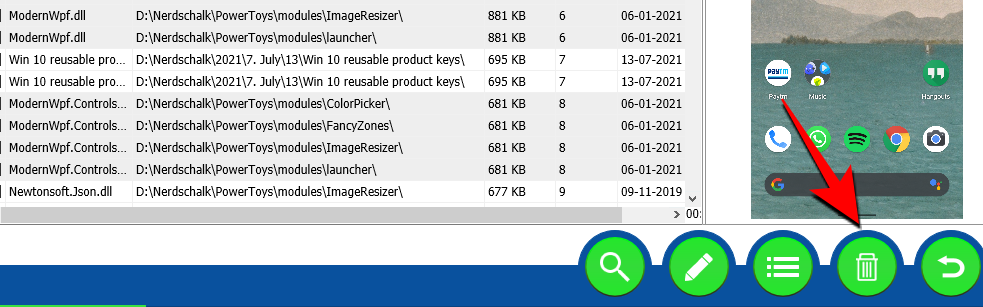
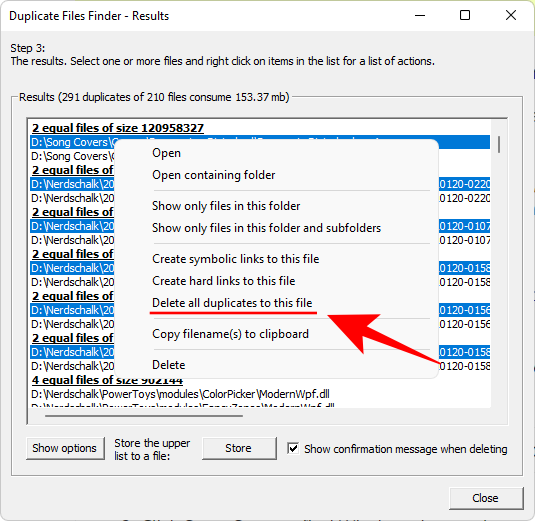
Once the scan is full, you’ll get a listing of duplicate information. To delete a file (or a number of information), choose them, right-click and select Delete all duplicates to this file.
Duplicate Files Finder could appear like an software out of the darkish ages, however it’s a handy little light-weight software that has more choices than most so-called ‘file finders’ of the day.
5. How to make use of ‘SearchMyFiles’
If you favored the simplicity of the nominal Duplicate Files Finder, you might also dig SearchMyFiles. Just just like the earlier entry, this transportable program could make you nostalgic about Windows variations of yore. But its search algorithms and search choices are at par with the very best within the trade at this time.
Download: SearchMyFiles
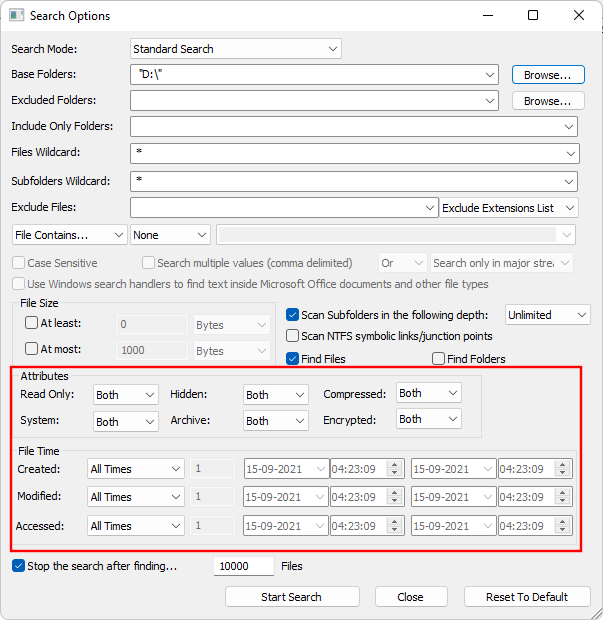
There’s no set up required right here. Simply extract the contents from the downloaded zip file and run the appliance. There are tons of search choices out there on SearchMyFiles. Select from 5 completely different Search Modes, add the Base Folders to scan, and undergo all the foremost choices to slim down your search.

Besides the run-of-the-mill choices to incorporate/exclude folders and subfolders and file dimension vary, you’ll be able to slim down the hunt additional with choices to look primarily based on file attributes, date created, modified, and accessed.
Or, you possibly can go away all of them set to default and get going with the scan by clicking on Start Search.
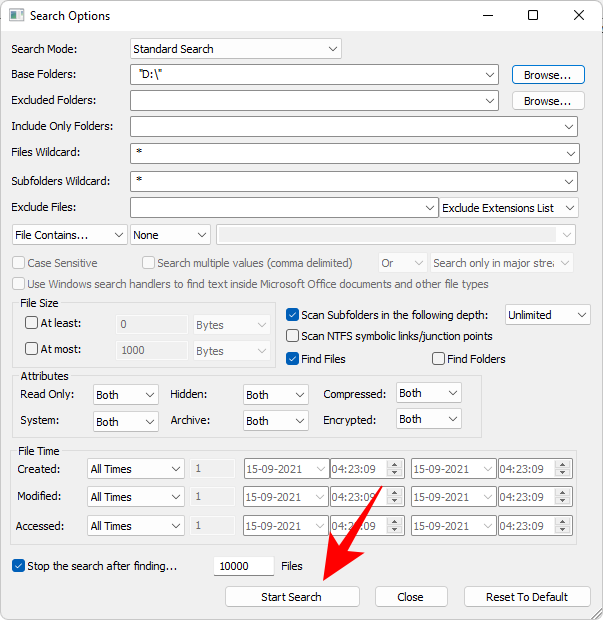
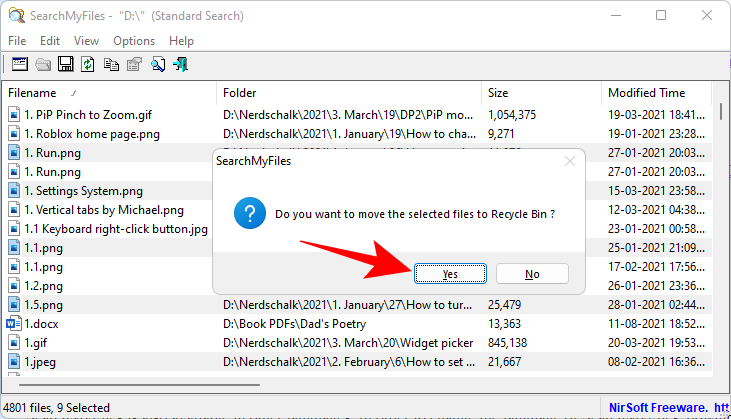
Once the search is full, choose the information that you simply need to delete (maintain Ctrl and click on on the information). Then hit the Delete button. When requested to verify, click on Yes.
Aside from its outdated look, the one factor holding this program back is the unavailability of an choice to pick duplicate information to delete with a single click on. If that doesn’t trouble you, then it is a gem proper right here, in our books at the least.
6. How to make use of ‘Duplicate Cleaner Free’
This is one other a kind of packages that solely offer you per week’s price of trial, after which you’ve bought to buy it to maintain using. But as a one-time duplicate file cleaner, the free model will get the job carried out simply with some class.
Download: Duplicate Cleaner Free
Run the appliance and click on on Search standards to start.

You have 4 modes to select from on the left – Regular, Image, Audio, and Video mode. Each has its mode-specific set of choices, which is sort of an clever function that’s nonexistent on another packages. Tweak your search settings and filters, then click on on Scan Location.

Now, drag and drop the drive/folder to scan, or decide from the left panel by deciding on the drive/folder and clicking on the arrow to its proper.

The superior folder search choices are supplied on the backside. Once you’re glad along with your settings, click on on Start scan on the prime.

Now click on on Start scan.

Once the scan is full, you’ll see the main points of the scan in addition to a graphical illustration of duplicate file sorts in direction of the left.

The visible reference might not be a deal-breaker by itself, nevertheless it’s a pleasant little contact that makes this in any other case banal course of much less of a chore. Click on the Duplicate information tab to modify to it.

You’ll discover the duplicate information are organized by group and the choices to pick information are discovered in direction of the left. By default, the ‘Mark by group’ choice is ready to ‘All but one file in each group’. This is the really useful choice as it’s going to mark the duplicates to delete and go away the unique intact. Click on Mark to proceed.

Now change to the Duplicate folders tab.

Review how the duplicate folders are marked in every group. Once glad, click on on the trash icon on the prime.

Here too you’ll get a couple of choices to select from apart from the standard Delete perform, resembling shifting and copying information, renaming them, and exporting them. But if eradicating them is your sole want, go forward and click on on Delete information.

Were it not for the truth that one solely will get a 7-day free trial for this program, it might have been our major suggestion. But that is too good an software to not check out, and if you wish to keep deep cleansing your PC of duplicate information every so often, you’ll be able to even think about buying it.
So these have been our prime picks for the very best duplicate file finders and cleaners for Windows. Some of those may look antiquated, however make no mistake about their skill to dig out pointless duplicates. We hope you discovered the fitting one to your PC.
Check out more article on – How-To tutorial and latest highlights on – Technical News