How To Install Case Fans On Your PC.
While most PC parts that generate warmth, like CPUs and GPUs, use their separate coolers, these will not be sufficient in any respect. You want extra case followers to tug cool air contained in the PC and take the recent air out of it.
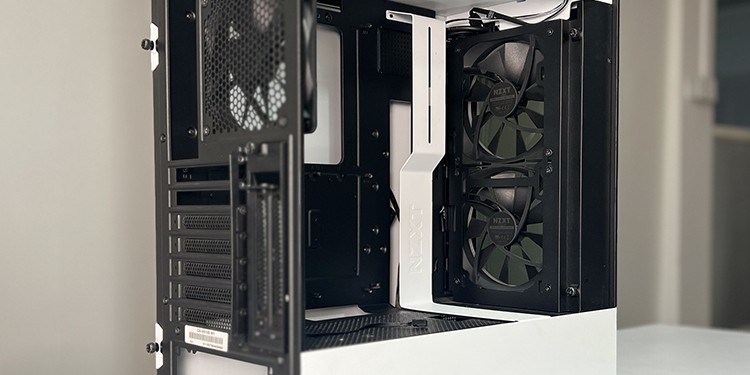
Modern PC instances present a variety of housings or fan slots to position such followers. You can set up the followers in these positions to get the optimum cooling impact.
To set up case followers in your PC, open the required panels, align the followers to the respective slots, fasten them with screws, and join their fan cables. Before that, it’s higher you discover the best sort of fan and determine the inlet/exhaust sides.
In this complete information, I’ll undergo all these items intimately that can assist you set up all kinds of case followers in any PC case.
Get the Case Fans Ready

Before putting in case followers in your PC, it is advisable put together an appropriate variety of consumption and exhaust case followers. Otherwise, the CPU might begin overheating, particularly if you happen to overclock it.
Also, in case you have not purchased the case followers but and are undecided on what sort to purchase, I like to recommend testing my articles on PWM vs DC followers and 120mm vs 140mm followers to get a greater thought.
Open PC Case
Now that you’ve got finalized the quantity, sorts, and place of the followers, let’s begin with opening the PC case by eradicating the panels.
- Bring your PC case to an open and clear workspace.
- Unfasten the screws on the left aspect panel and slide it out or pull it off.

- Depending on the place you need to set up the case followers, it’s possible you’ll must take out different panels as properly. To accomplish that,
- The proper aspect panel is mostly related using screws and comes off in an analogous technique to the left aspect panel. Some instances might have separate locking mechanisms.
- The entrance panel typically makes use of strain clips to hook up with the PC case. You can firmly maintain the highest of the panel with one hand and pull out the panel from the underside. You can even do it within the reverse order.
If it’s troublesome to take away, have another person squeeze the strain clips when you pull the panel.
- Most PC instances don’t include a removable high panel. For different instances, the steps needs to be much like the entrance panel.
- If you have got already put in the motherboard, you might have additionally hooked up its energy/reset, USB, and HS Audio cables to the entrance/high panel. So watch out whereas eradicating it.
You might must unscrew and take out these cable connectors earlier than putting the panel some place else.


Some PC instances might require barely completely different steps to take away the case followers. So, in case you have hassle with opening the case, look into the official sources or the consumer handbook. You can even examine the teardown video for the precise PC case mannequin.
Install Case Fans
If you’re including some more case followers on a PC you have got used for a while, it could be dusty. In such instances, clear your CPU cooler together with the insides of the PC.
If you utilize an AIO cooler, clear the radiator as properly if mandatory.
Then (or if you happen to the PC is already clear), set up the case followers to the related fan slots. For that,
- If you have got but to put in a motherboard, I like to recommend you place the motherboard on the case and screw it first. The I/O defend of the motherboard might impede you from using the case fan within the rearmost place on the highest panel.
- If the case followers are dusty, clear them earlier than putting in them on the PC. Hold the fan blades in place whereas using compressed air to blow out all of the mud. You can even use a brush and microfiber fabric to wash the fan blades and the fan housing.

- If the fan slot the place you want to mount the case fan is roofed by a mud filter, take away it first. If it’s magnetized, merely take it off. Else, you might have to unscrew it.

- Then, align the case followers to the suitable slots the place you need to set up them. Make positive to examine the fan path rigorously. You need to set up the followers as consumption on the entrance/backside and exhaust on the high/rear finish.

- Make positive the cables are out of the way in which of the fan blades earlier than fastening the followers to the OC case.
- Tightly screw the followers to the slots using a screwdriver. It’s higher to lock one diagonally reverse nook at a time to keep away from any alignment points.

- Use the screws that got here with the precise followers. Screws for various case followers might have completely different thread patterns and tolerance ranges. So, forcefully using different screws will harm the threads on the followers.


If you need to set up an AIO cooler in your PC and are putting in the case followers earlier than that, it is advisable contemplate the next issues as properly.
- You have to depart house to mount the radiator. Also, examine the case help for the radiator to find out the place they go first. This method, you’ll know which fan slots you should use for the case followers.
- Bending the AIO tubes an excessive amount of could make it leak, so it might not be attainable to make use of it in sure configurations as consumption or exhaust. Also, you possibly can’t have the pump on the highest place within the loop, or else it’s going to lure air bubbles and make noises.
Both these components additional slim down the place you possibly can place the radiator, and, consequently, the remaining slots for the case followers.
Connect Fan Cables
Now join the fan and RGB cables to the motherboard headers or a fan controller to energy up and management the case followers. If you want any assist to determine the required headers on the motherboard, examine its consumer handbook.
If you’re connecting the cables to the motherboard,
- Use the CHA_FAN or SYS_FAN headers for the fan cable. They also needs to have plastic notches or guides that can assist you plug within the connectors.

- Don’t join them to CPU_FAN or AIO_PUMP/W_PUMP headers as you want them for the CPU Fan/Cooler or the AIO pump.
- If your motherboard accommodates built-in CHA_FAN and W_PUMP headers, depart a minimum of one pump header free if you happen to want to set up an AIO cooler later.
- An RGB case fan might have non-addressable or addressable RGB connectors. You want to attach them to the motherboard’s corresponding LED headers.


If you need to use a fan controller (often when the motherboard doesn’t have sufficient headers),
- Mount the controller to the PC case. They often include a magnetized base to connect to the case. But in case your case comes with slots for the fan controller, you possibly can screw some controllers there as properly.
- Connect the SATA to DC energy cable from the controller to the SATA energy connector of your PSU. If your controller comes with a MOLEX energy cable as a substitute, equally join it to the MOLEX connector from the PSU.

- If it comes with an USB pin header cable, join the cable’s micro-USB connector to the fan controller and the opposite finish to the motherboard’s USB header.

- Plug within the fan cables to the headers on the controller.

- You might be able to join the followers’ RGB cables to the identical controller. If it’s not attainable, use a separate RGB controller in the identical method.


If the cables don’t attain any headers on the motherboard or the fan controller,
- Obtain a fan extension cable and insert one finish of it into the connector and one other into the header on the board.

- You can even use a MOLEX extension with fan energy. However, the fan will at all times run at full pace, and also you gained’t have the ability to management its pace.

You also needs to correctly handle the cables using zip ties or velcro strips. If you had used a fan controller, route the cables correctly by means of the best aspect panel earlier than plugging them into the controller.
Reassemble PC Case
Now, set up every other parts that you’ve got but to mount in your PC, just like the CPU cooler, graphics card, and so forth. Then, re-assemble the panels onto your PC case by reversing the steps you took to take them out.
Set Fan Settings from BIOS
After putting in the case followers (and every other parts to make the PC operable), get to your motherboard BIOS to examine your fan pace and modify it if mandatory.
You might also must set the fan mode to DC or PWM, relying on the kind of fan you’re using.

Then get inside your system (set up Windows in your storage drive if you happen to haven’t completed so already) and monitor the CPU temperature and the GPU temperature.
This method, you possibly can take a look at out whether or not you have got correct fan pace or if there are sufficient case followers.
I additionally advocate testing the GPU temperature whereas gaming, as this device relies upon essentially the most on the airflow offered by the case followers.
Check out more article on – How-To tutorial and latest highlights on – Technical News