How To Fix Driver Verifier Detected Violation.
The Driver Verifier runs within the background throughout startup and scans the system for corruption to detect unlawful perform calls.
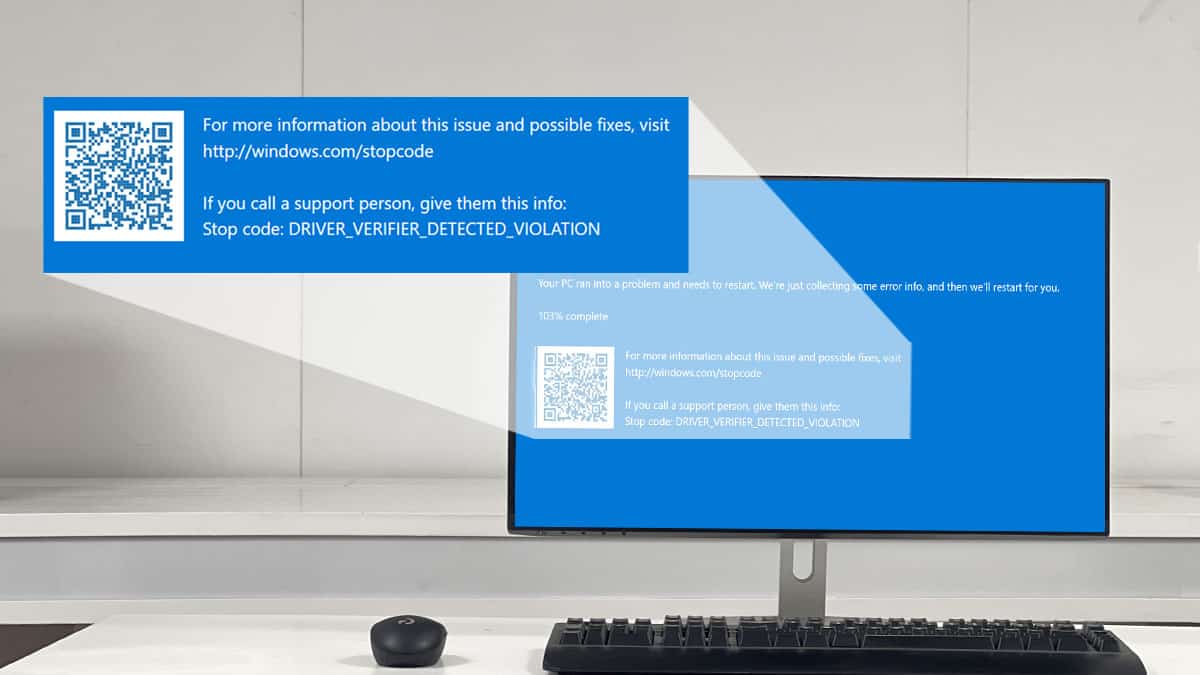
Running the verifier on all drivers makes it unstable and often returns a bug verify error named DRIVER_VERIFIER_DETECTED_VIOLATION.
The resolution is straightforward – disable driver verifier settings. But if you happen to can’t entry Windows because of the BSOD boot loop, disable it through the Advanced Startup menu.
Since this error happens primarily attributable to driver violations, updating device drivers can typically assist.
Well, most customers even reported getting the identical BSOD error after connecting a USB device. If you’re additionally in the same scenario, connecting to a special port ought to repair it.
Disable Driver Verifier
You don’t want a Driver Verifier until you’re a device driver programmer. Even they use this instrument solely to emphasize take a look at a single driver. General customers are suggested to maintain it disabled.
I’ve seen many web sites recommending to allow this for driver points or to detect BSOD. The reality is that working Driver Verifier on all drivers will make the system unstable and may provide you with a collection of driver verifier BSOD.
Tip: Before disabling, it’s a good suggestion to run the SFC command. Since the error is because of issues with the drivers, working SFC will try to seek out and repair driver issues.
If you may boot into Windows,
- Press Windows + R, sort
verifier, and press Enter. - Select Delete current settings, then click on Finish.

- Hit Yes and the system ought to restart.

If you’re caught in a boot loop, attempt the aforementioned steps after getting into protected mode. Also, that is straight doable from the Windows RE. Here’s how:
- In the “Startup repair could not repair your PC” error display screen, click on on Advanced Startup.

- Navigate to Troubleshoot > Advanced Option > Command Prompt.

- Type
verifierand press Enter. - Check Delete current settings and press on Finish.


Another uncommon situation may additionally happen the place you can not even boot into the Advanced Startup Menu. In that case, it’s good to entry this menu using bootable media:
- Create a Windows 10 or 11 bootable USB media relying in your model of Windows.
- Insert the USB drive into the USB port within the I/O panel.

- Boot into the BIOS.
- Here, change the boot drive such that the system boots through the USB drive. Save and restart the system.

- Once the system boots, it is going to boot with a language choose display screen. Select your language and click on on Next.

- Now, click on on Repair your pc. The PC will now boot to the Advanced startup display screen.

- Head over to Command Prompt and run the
verifiercommand. Then, delete current settings as mentioned earlier.


Update Drivers
Deleting current driver verifier settings ought to work until one among your drivers is corrupted. In that case, the good choice is to update them.
Since any driver can result in this error, I extremely suggest updating/reinstalling every of them.
While this will likely not at all times repair the difficulty, the most recent drivers often include more options and are more dependable.

Head over to the device producer’s official web site to search and obtain the most recent recordsdata. After set up, this could repair the DRIVER_VERIFIER_DETECTED_VIOLATION error.
Disconnect Peripheral Devices

It appears for many customers, this blue display screen error solely pops up when using the USB device in a sure port.
To verify if it’s the identical case for you, disconnect all peripherals and check out booting the system. If your PC begins usually, reconnect one device at a time to seek out the defective one.
Simply updating the firmware and troublesome driver ought to now repair the issue completely.
Check out more article on – How-To tutorial and latest highlights on – Technical News