How To Enable TPM On A Gigabyte Motherboard.
Gigabyte’s BIOS UI has seen a number of updates in the previous few years. Naturally, this has led to some confusion when customers have to find sure settings like TPM.
On Intel boards, you possibly can allow PTT from the Trusted Computing tab.
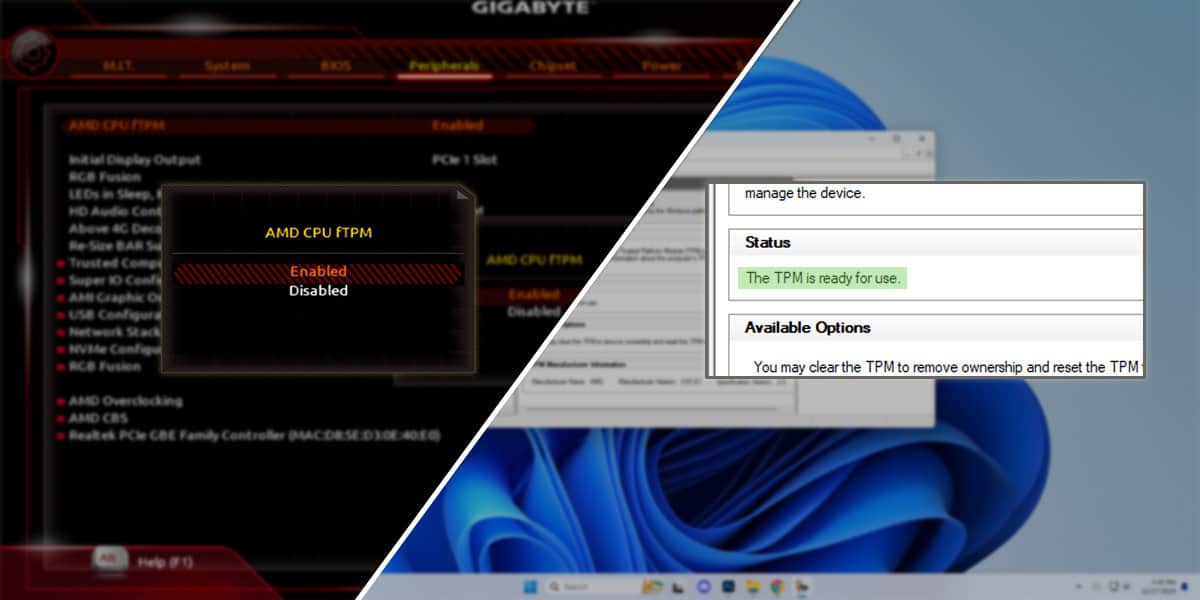
On AMD boards, you possibly can configure fTPM from the Peripherals tab.
Once you allow TPM, it’s best to confirm that it’s prepared to be used in Windows. I’ll present step-by-step directions for this whole course of on this article.
Enter the Gigabyte BIOS

Turn in your PC and repeatedly press Del or F2 to entry the BIOS setup utility.
Sometimes, the BIOS key could not work on account of options like Fast Boot. In that case, use one other methodology like WinRE or Gigabyte’s app in addition to the Gigabyte BIOS.
Enable TPM within the BIOS
In the BIOS, use your mouse or press the important thing proven on the display screen to change to Advanced Mode. This would be the F2 key on most Gigabyte techniques.
On Gigabyte boards with Intel processors,
- Go to Settings > Miscellaneous.
- Set Intel Platform Trust Technology (PTT) to Enabled.

- Go to Trusted Computing and guarantee Security Device Support is Enabled.

- Press F10 to save lots of the adjustments and exit the BIOS.


On Gigabyte boards with AMD processors,
- In the Peripherals tab, set AMD CPU fTPM to Enabled.

- Go to Trusted Computing 2.0 and guarantee Security Device Support is Enabled.

- Finally, press F10 to save lots of the adjustments and restart.


You can even set the TPM device model or handle superior settings like PCR Bank and Platform Hierarchy from the BIOS. But these are normally best left to default. As for resetting TPM, I like to recommend doing it from Windows as an alternative of the BIOS.
Check TPM Status In Windows
After you exit the BIOS and restart, the PC ought to reboot to Windows. Press Win + R and enter tpm.msc to open the TPM Management Console.
The TPM standing needs to be “The TPM is ready for use.” This confirms that you simply efficiently enabled TPM.

Or, should you’re attempting to put in Windows 11, you shouldn’t encounter any TPM-related errors anymore.
In uncommon instances, customers get the This PC can’t run Windows 11 error regardless of enabling TPM. Or, you would possibly see a Compatible TPM not discovered error within the TPM Management Console.
This can occur as a result of the put in TPM module is just not appropriate with the board, amongst different causes. Refer to this information on troubleshooting a TPM device that’s not detected to resolve such issues.
Check out more article on – How-To tutorial and latest highlights on – Technical News