SMB File Sharing Not Working in macOS Ventura? Here’s the Fix!.
If you’re combating Server Message Block (SMB) file-sharing points on macOS Ventura, you’re not alone.
Today, I’ll stroll you thru some troubleshooting steps to get your file sharing operating easily.
Let’s dive proper in!
1. Check Your Network Connection
SMB file sharing depends in your network. If your connection is unstable, you would possibly expertise issues connecting between gadgets and accessing recordsdata.
1.1 Confirm Your Mac Is Connected
Start by confirming that your Mac is linked to your network. Use any browser to see when you’ve got web entry.
You also can search for the Wi-Fi icon within the higher proper nook of your show.
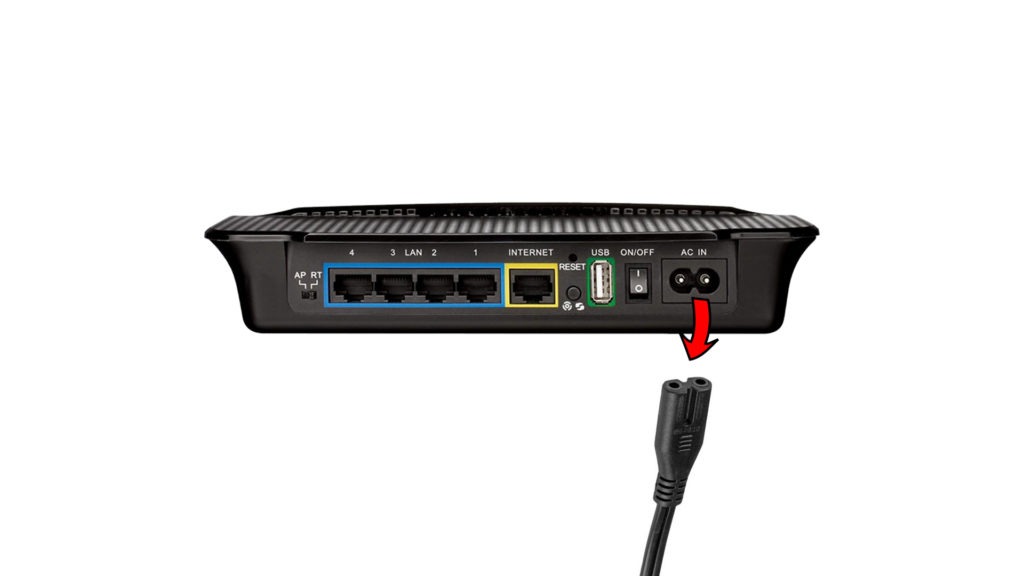
1.2 Restart Your Modem/Router
Network gadgets can expertise momentary glitches. Try restarting your router or modem to reload its firmware.
- Unplug your router from the ability supply.
- Wait for five to 10 seconds. This ensures that the remaining energy from the capacitors inside your router is drained.
- Reconnect your router to the ability supply and watch for it to initialize.
1.3 Restart Your Mac
Restarting your Mac ensures that your network controllers are working.
Like routers, surprising issues would possibly happen in your system that may trigger network-related points.
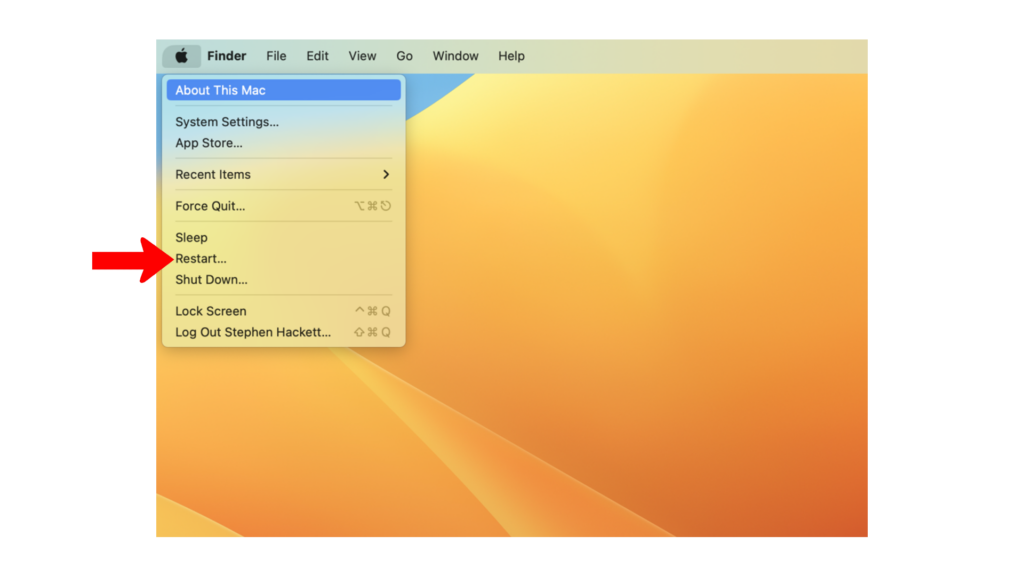
- Click on the Apple brand within the higher left nook of your display screen.
- Now, choose Restart from the drop-down menu.
- Confirm your motion by clicking Restart on the dialog field.
2. Check SMB Settings
Ensuring your SMB file-sharing settings are configured accurately is essential to keep away from pointless troubleshooting steps.
See the steps under to configure SMB file sharing on Ventura:
- Access the Apple Menu by clicking the Apple brand within the higher left nook of your display screen.
- Now, go to System Settings.
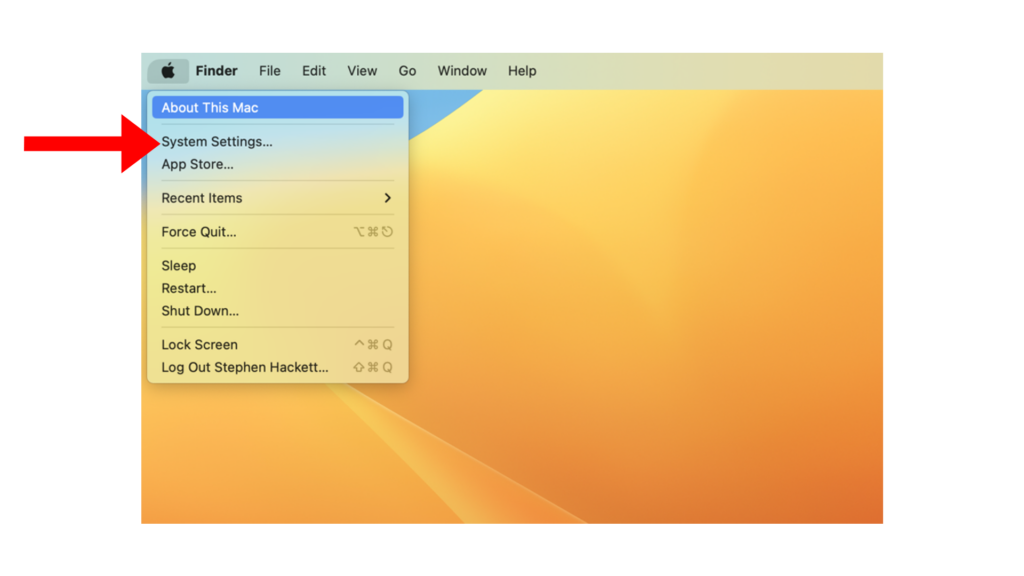
- Navigate to General > Sharing.
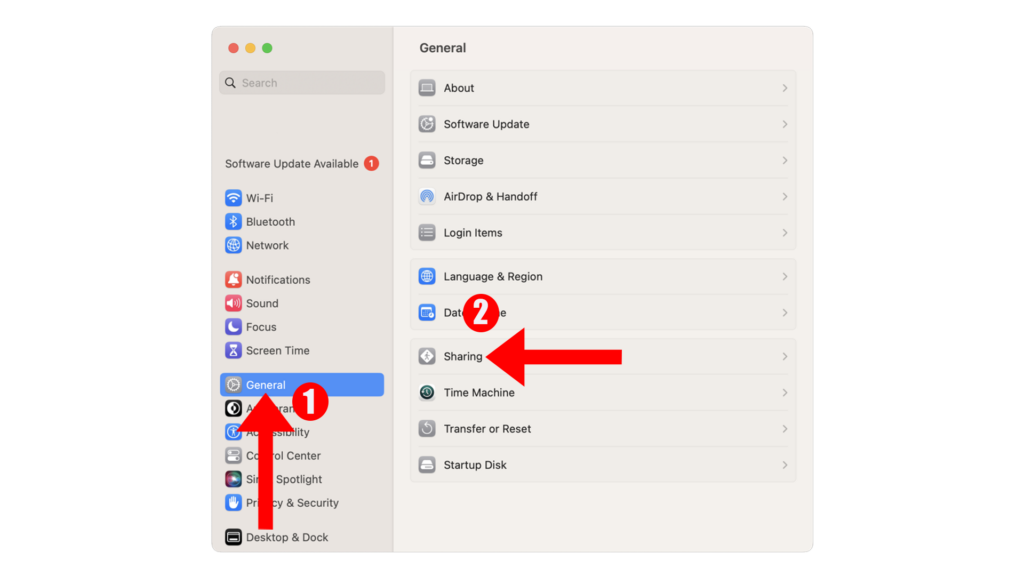
- Enable File Sharing, then click on the Info button (i) on the correct.
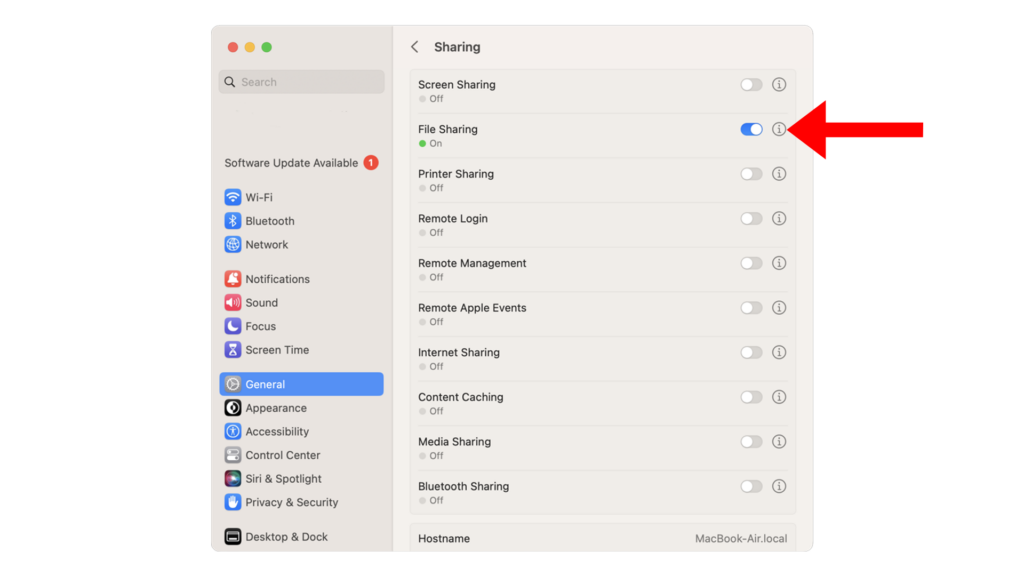
- Next, click on Options and allow Share Files and Folders Using SMB.
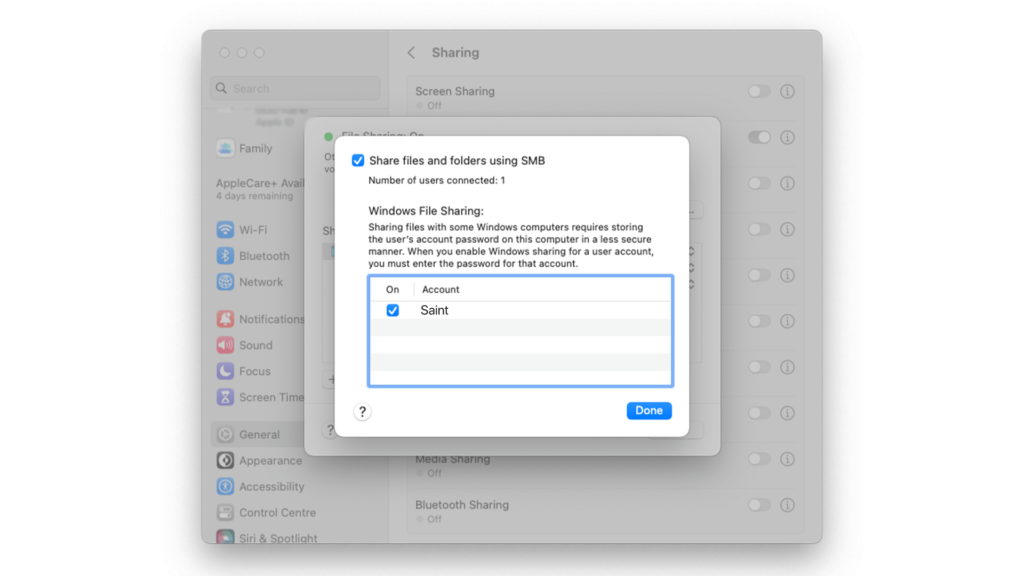
Note
If you’re sharing recordsdata with Windows computer systems, click on the checkbox beside the account you wish to share and enter the password for that account.
3. Restart SMB File Sharing
Sometimes, SMB companies can encounter momentary points that stop correct file sharing. Restarting the service often resolves SMB-related points on macOS Ventura.
Here’s what you might want to do:
- Click the Apple brand within the higher left nook of your display screen.
- Now, click on on System Settings.
- Go to General > Sharing.
- Disable File Sharing.

- Wait for 2-3 minutes.
- Enable File Sharing.
Try using file sharing in your Mac afterward to verify if the issue is solved.
4. Check Firewall Settings
Your firewall is essential in defending your Mac from unauthorized entry and threats.
However, these protecting measures can stop SMB file sharing from working. Make certain that the service is allowed out of your Mac’s firewall settings.
Here’s what you might want to do:
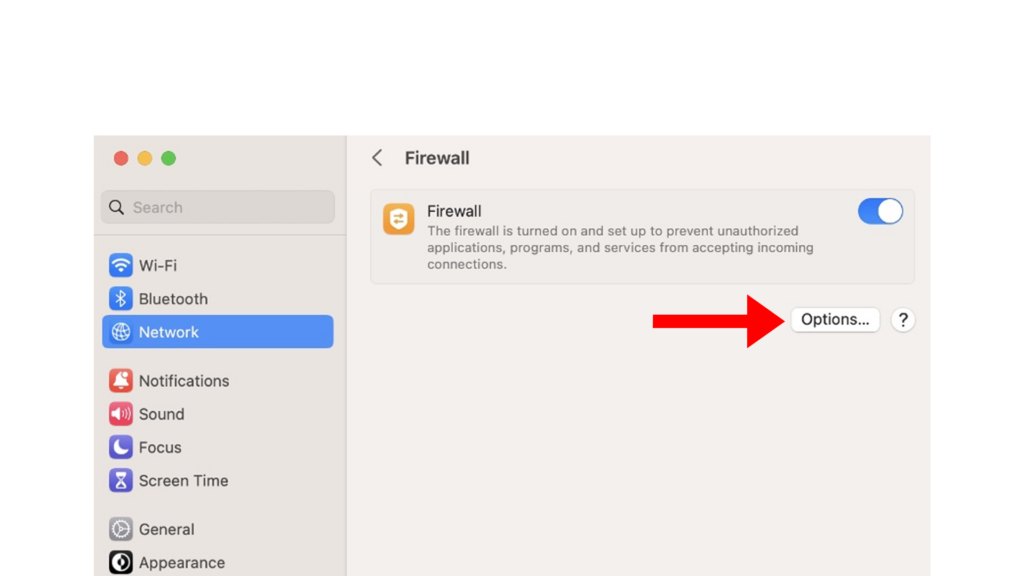
- Click on the Apple brand within the higher left nook of your display screen.
- Select System Settings from the drop-down menu.
- Now, go to Network > Firewall.
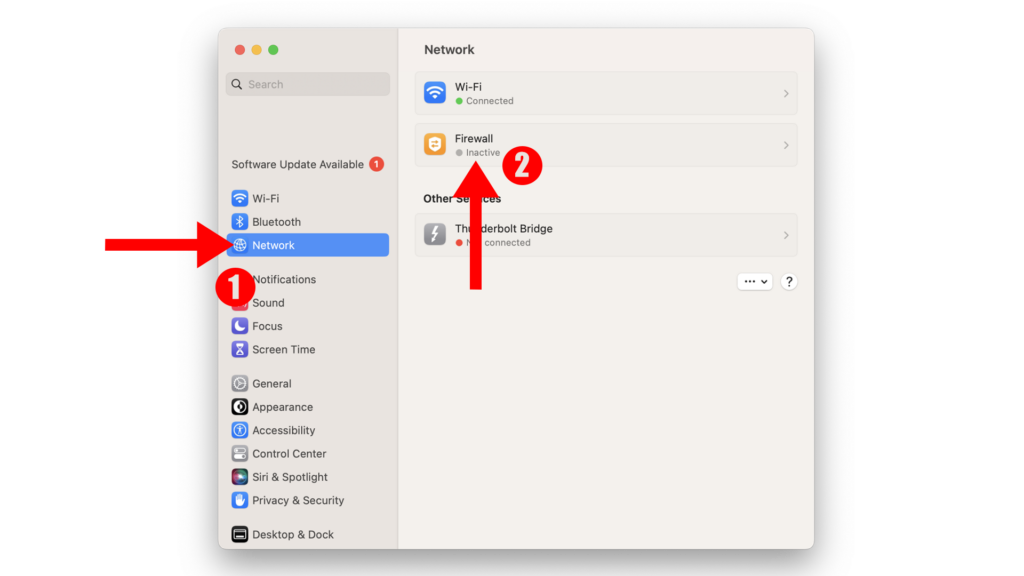
- Click the Options button underneath Firewall.
- Disable the Block All Incoming Connections possibility.
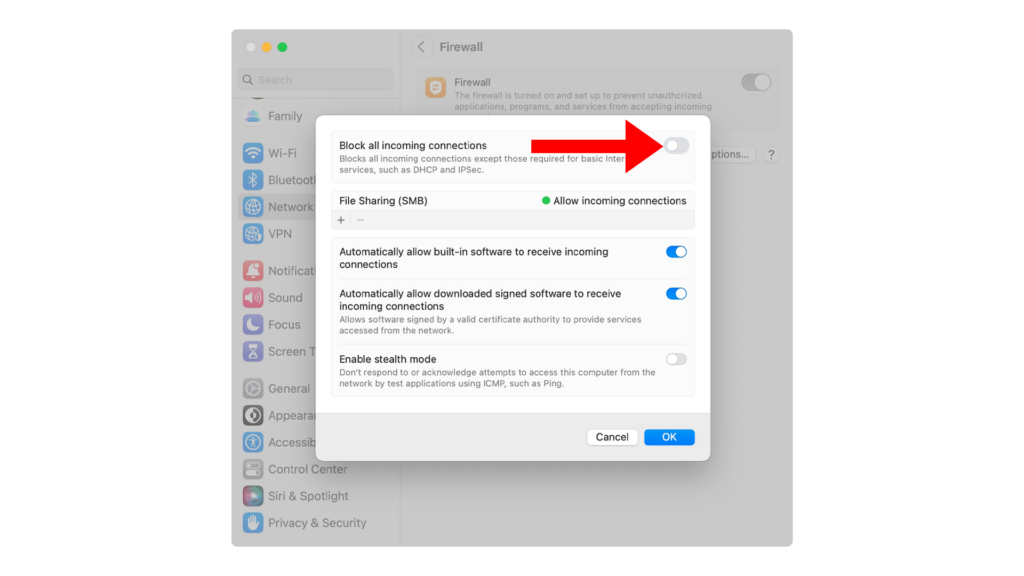
- Under File Sharing (SMB), click on the + button and add the device you permit entry to your Mac.
Try using file sharing afterward to see if it really works.
5. Check Folder Permissions
SMB file sharing received’t work in case your different gadgets don’t have permission to entry your Mac’s folders and recordsdata.
Here’s how one can change your folder permissions:
- Click the Apple brand within the higher left nook of your display screen.
- Now, click on on System Settings.
- Go to General > Sharing.
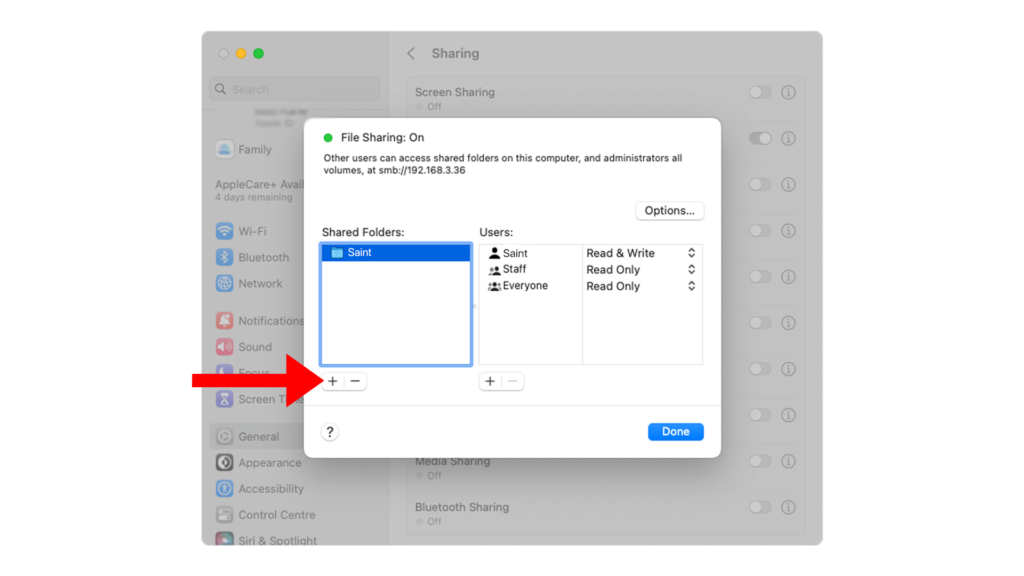
- Click the Info button (i) beside File Sharing.
- Under Shared Folders, click on the + button and choose the folders you wish to share in your network.
6. Update Mac
There may be a difficulty with the model of macOS you’re using that causes SMB file sharing to not work.
To rule this out, see if there can be found updates to your Mac and set up them.
Here’s how one can update your Mac:
- In the higher left nook of your display screen, click on the Apple icon to open the Apple Menu.
- Now, click on on System Settings.
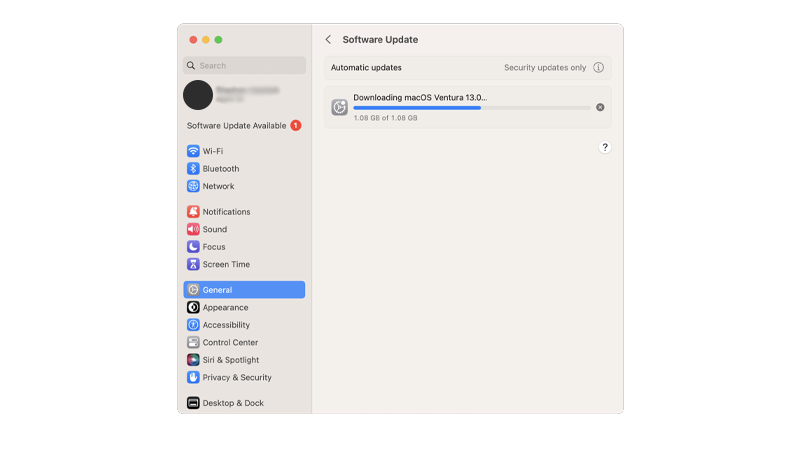
- Inside settings, navigate to General > Software Update.
- If a brand new model is detected, comply with the prompts to put in the update.
Note
- Your Mac can restart a number of occasions whereas putting in the update.
- The update progress bar may additionally look like caught. When this occurs, don’t do something. Software updates can take a number of minutes to finish.
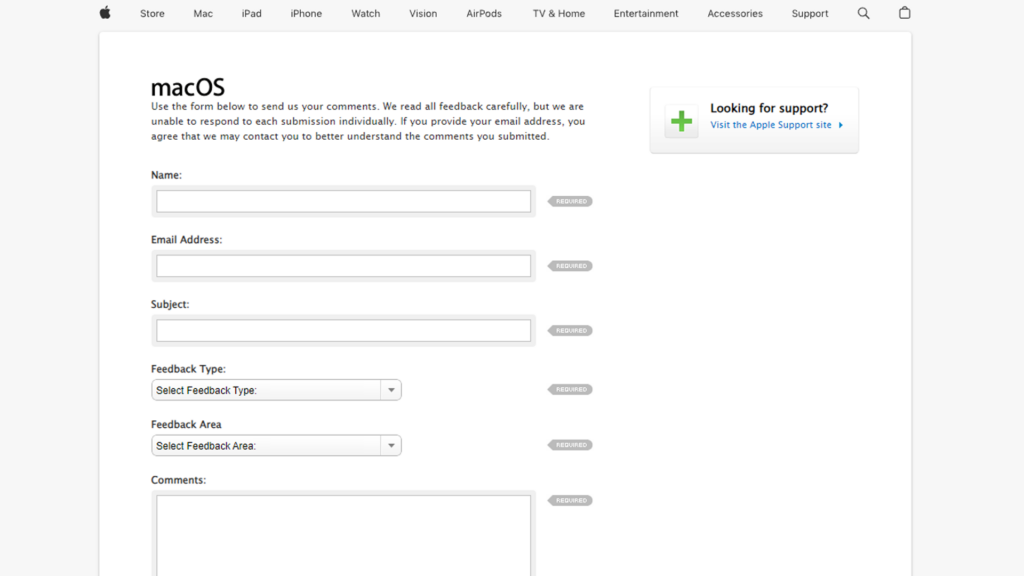
7. Report the Problem to Apple
If not one of the options above labored, your final possibility is to name the eye of Apple by reporting the difficulty.
They won’t concentrate on the difficulty, and reporting it ought to pace up decision.
Submit a suggestions for macOS and clarify intimately the difficulty you’re experiencing with SMB file sharing.
FAQs
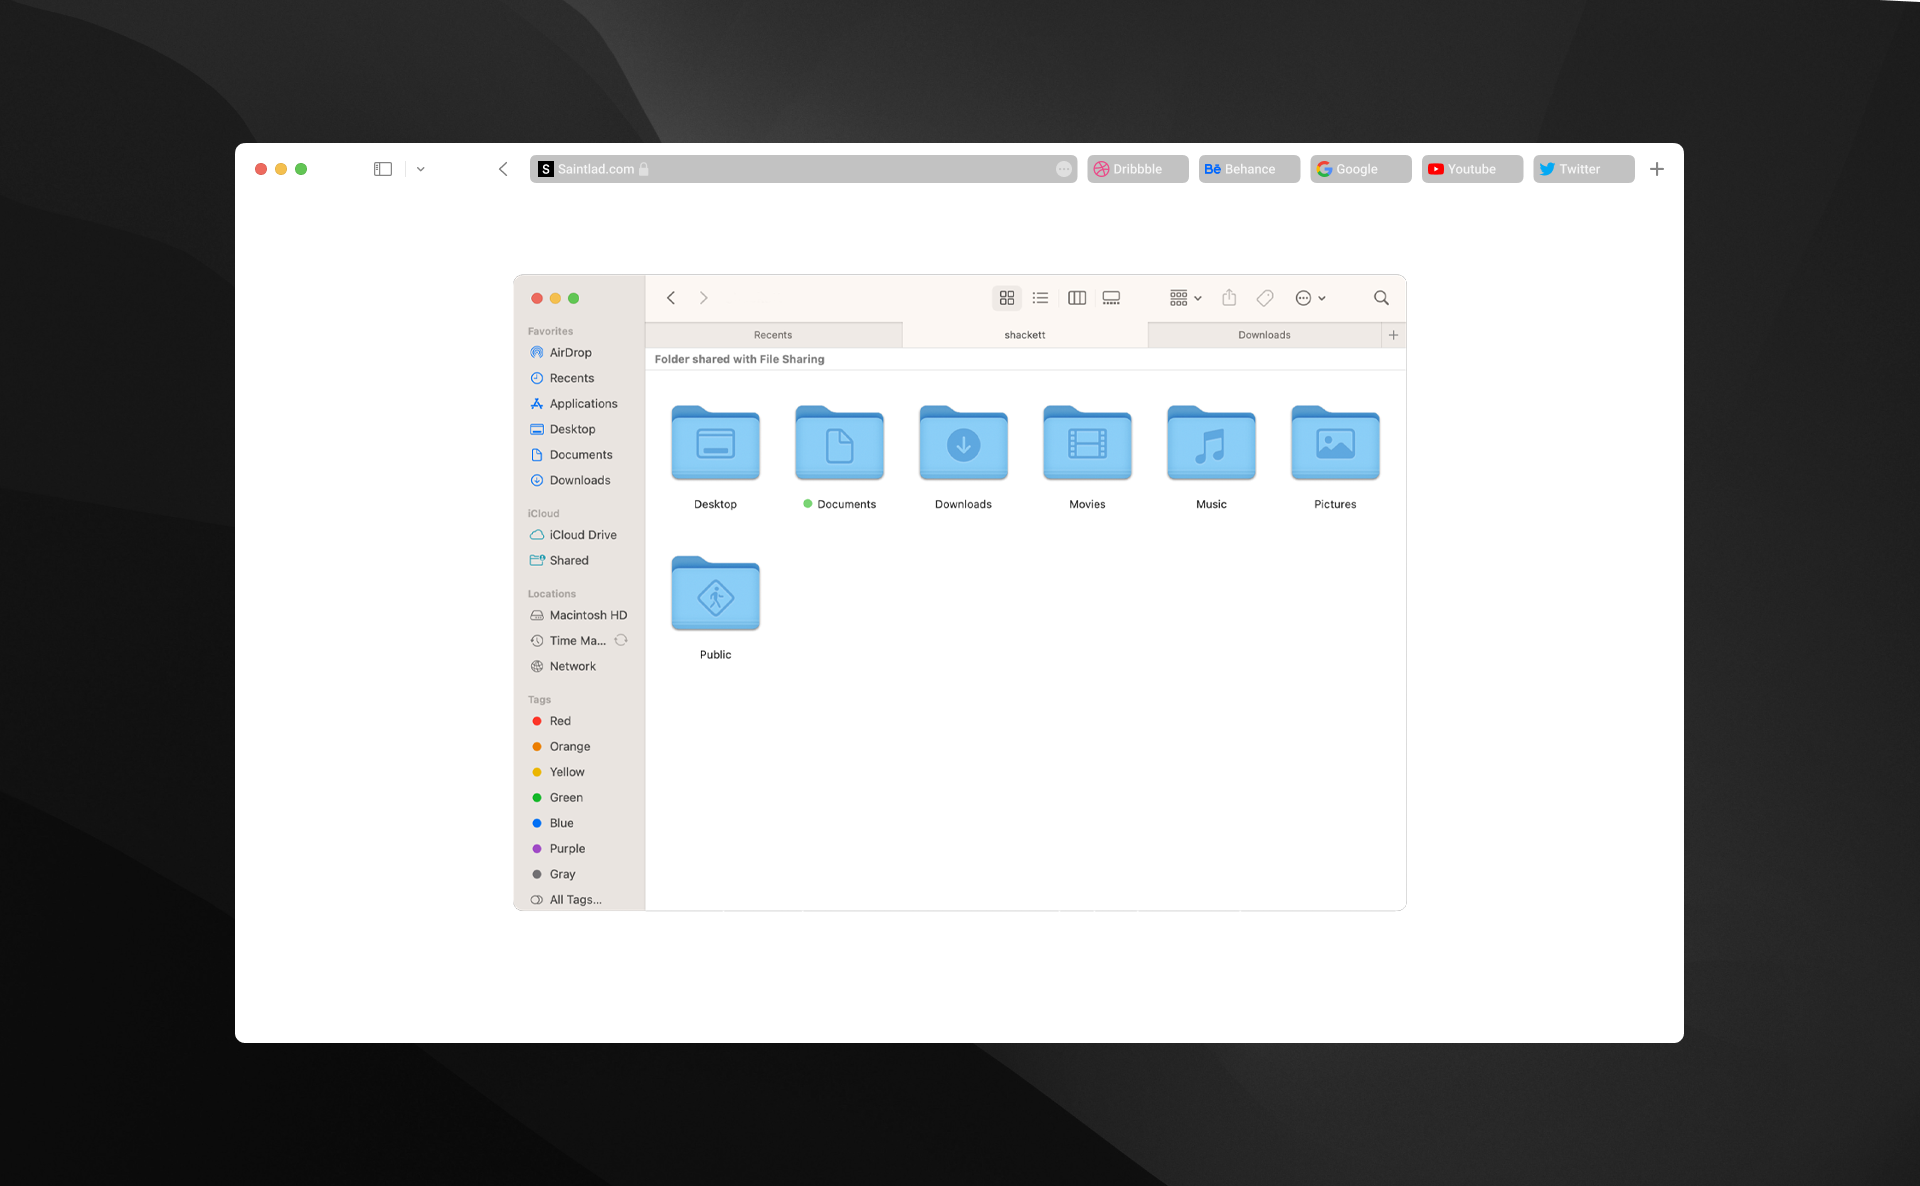
Where is File Sharing in Ventura?
Unlike earlier macOS variations, file-sharing settings are usually not saved in Network Settings. To entry file sharing settings in your Mac operating macOS Ventura, you might want to:
- Access System Settings.
- Go to General > Sharing.
- Click the Info button (i) beside File Sharing.
Does macOS assist SMB?
Yes. You can use the Server Message Block protocol to share recordsdata in your Mac with different Apple gadgets or Windows.
How do I modify permissions on my Mac Ventura?
- Open Finder and choose a disk, folder, or file.
- Now, click on on File > Get Info.
- Expand the Sharing & Permissions tab.
- Select a consumer or group within the Name column and select a privilege setting:
- Read & Write: Allow customers to open and alter the merchandise.
- Read Only: Allows a consumer to open an merchandise.
- Write Only: Turns a folder right into a drop field. Users can add gadgets to the folder however can’t open it.
- No Access: Blocks all entry.
How to repair the “There was a problem connecting to the server” Error on Mac File Sharing?
If you see this error in your Mac, examine your firewall settings and make sure the device you wish to hook up with is allowed.
- Go to System Settings in your Mac.
- Navigate to Network > Firewall.
- Under Firewall, click on the Options button.
- Turn off Block All Incoming Connections.
- Under File Sharing (SMB), click on the + button and add your device.
How to connect with a server with SMB on Mac?
You can hook up with a server with SMB on Mac by doing the next:
- Open the Finder in your Mac.
- Click on Go within the menu bar and choose Connect to Server.
- Under the Server Address, sort smb:// adopted by the IP handle or hostname of the server.
- Click Connect to proceed.
- When prompted, present the username and password to connect with the server.
Check out more article on – How-To tutorial and latest highlights on – Technical News, Apple Products