
6 Best Ways to Fix Mac Reverting to Wrong Date and Time.
Ensuring your Mac has the proper date and time is essential. It impacts the timestamp in your emails, the scheduling of automated duties, the timing of reminders, and way more.
In this information, I’ll stroll you thru troubleshooting steps in case your Mac constantly reverts to an incorrect date and time.
Let’s start!
1. Enable ‘Set Date and Time Automatically’ Setting
To keep your Mac’s date and time correct, I counsel enabling the automated setting function. This permits your Mac to regulate these settings primarily based in your present location.
Follow these steps:
- Click the Apple Menu on the top-left nook of your display screen.
- Select System Settings.
- Go to General, then Date & Time.
- Turn on Set Date and Time Automatically.

2. Switch to a Different Time Server
If incorrect date or time points persist in your Mac, think about using an alternate time server. While Apple’s time server is the default alternative, it might expertise momentary points.
To change your Mac’s time server:
- Click the Apple brand on the top-left nook of your display screen.
- Choose System Settings from the drop-down menu.
- Go to General after which to Date & Time.
- Select the Set button next to ‘Source’.
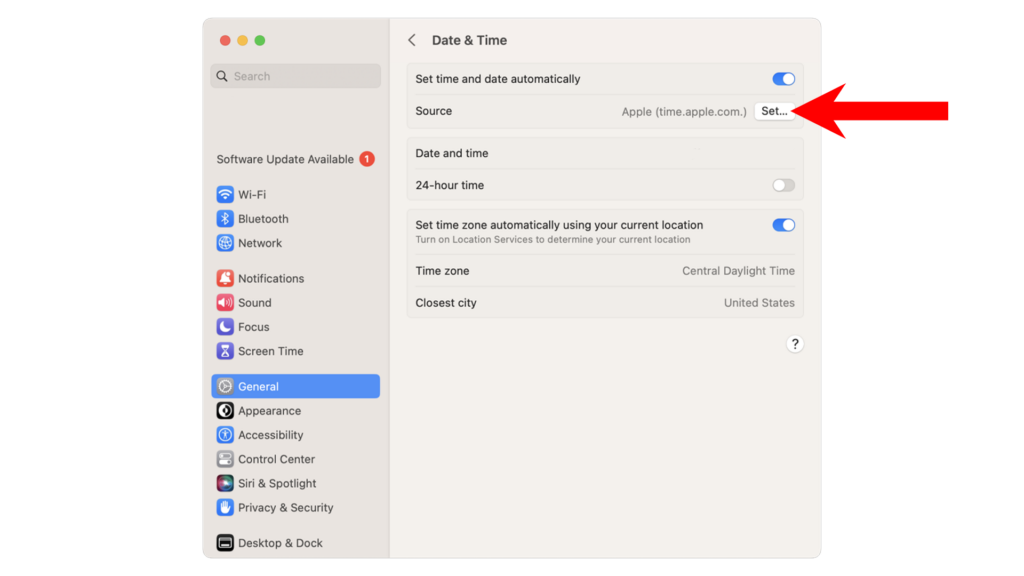
- Choose a distinct time server, similar to:
- time.google.com
- time.facebook.com
- time.windows.com
- Time.cloudflare.com
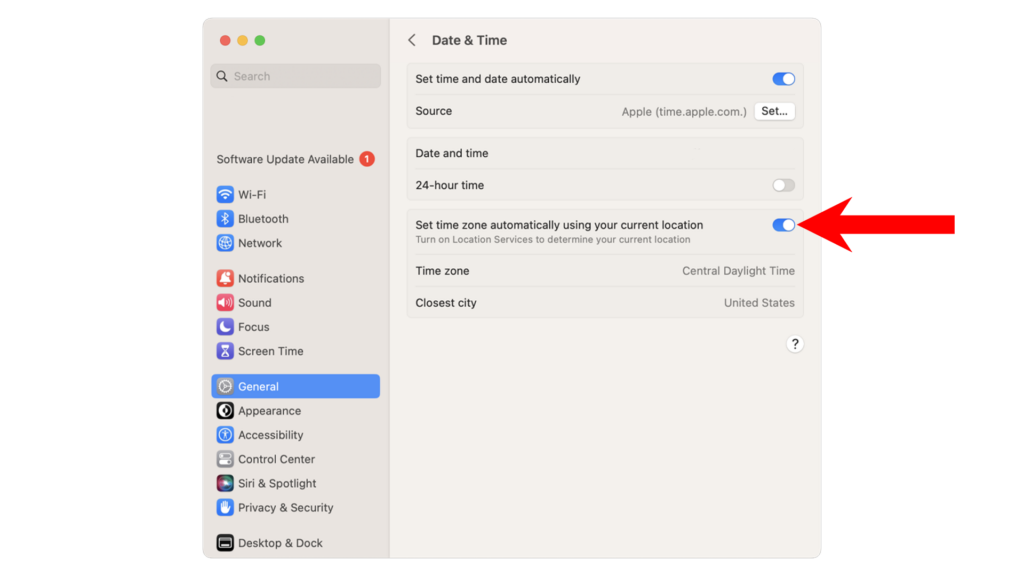
3. Enable ‘Setting Time Zone’ Option
For those that journey usually, enabling location-based time zone settings in your Mac may be very helpful.
To do that:
- Click the Apple Menu on the top-left nook of your display screen.
- Select System Settings.
- In the sidebar, select General.
- Navigate to the Date & Time tab.
- Turn on Set Time Zone Automatically Using Your Current Location.
- Then, transfer to Privacy & Security within the sidebar.
- Scroll to System Services and click on Details.
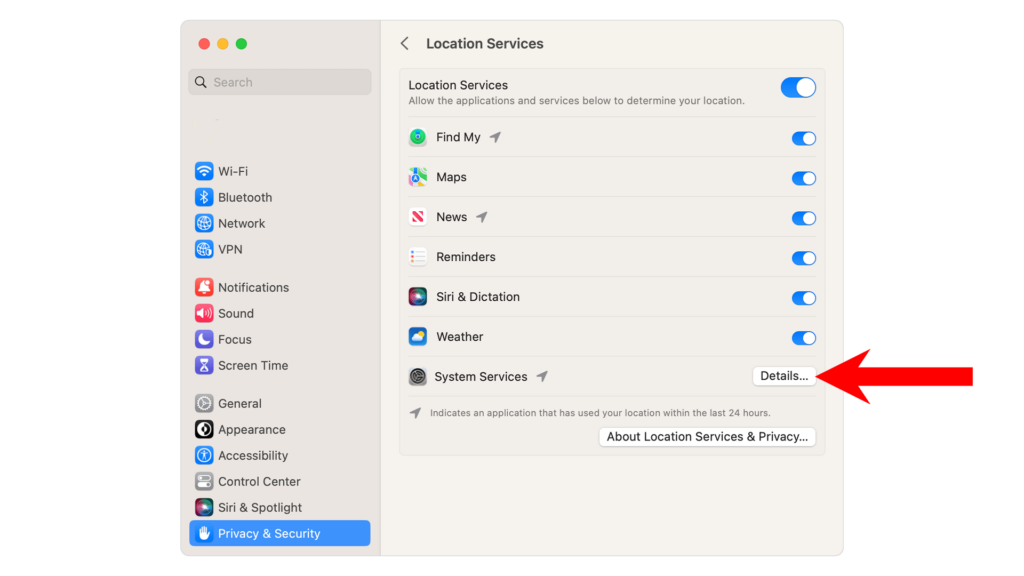
- Check the field for Setting Time Zone.
- Click Done.
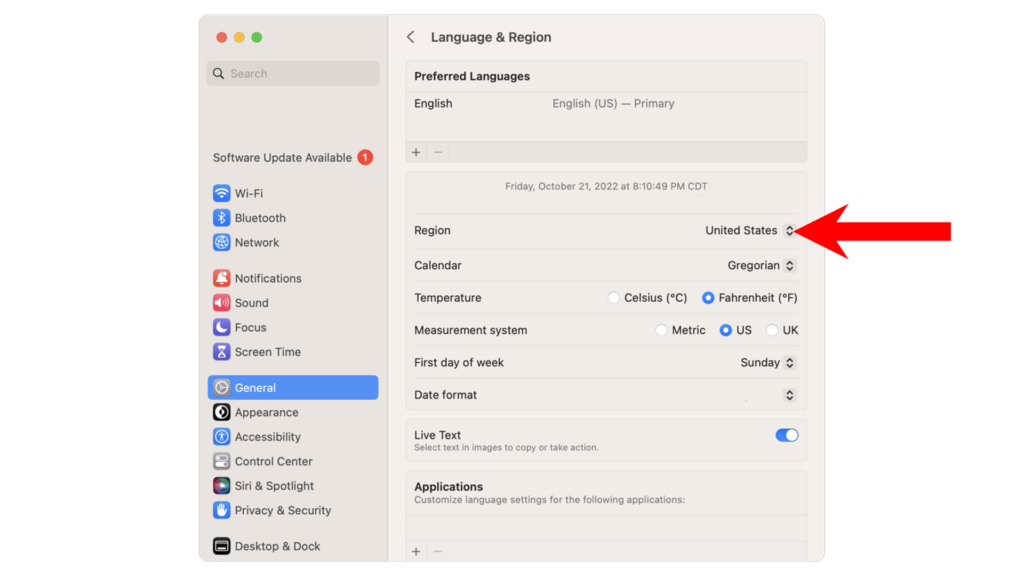
4. Adjust Your Region Settings
Incorrect area settings in your Mac can result in date and time discrepancies. Adjusting your Mac’s area is an easy course of.
To update your area settings:
- Click the Apple Menu on the top-left nook of your display screen.
- Choose System Settings.
- In the sidebar, choose General.
- Navigate to Language & Region.
- Use the drop-down menu next to ‘Region’ to pick out your appropriate nation or present location.
5. Manually Set Date and Time Setting
If all automated choices above fail, I counsel setting your date and time manually.
Follow the information beneath:
- Click the Apple Menu on the top-left nook of your display screen.
- Select System Settings.
- From the sidebar, select General.
- Navigate to the Date & Time tab.
- Turn off Set Date and Time Automatically.
- Click Set next to Date and Time.
- Manually modify the date and time as wanted.
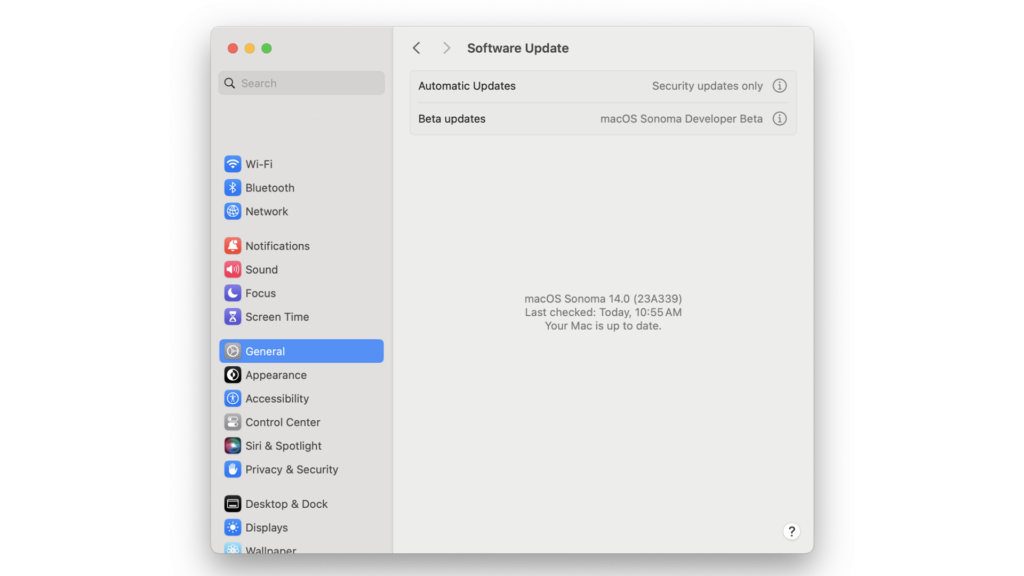
6. Update to the Latest macOS Version
If you’re nonetheless experiencing date and time points, updating your Mac to the most recent model will help resolve potential bugs or glitches.
To verify for and set up software program updates:
- Click the Apple Menu on the top-left nook of your display screen.
- Choose System Settings.
- Navigate to General.
- Select Software Update to see if any updates can be found and observe the prompts to put in.
Important Notes
- Your Mac might restart a number of instances whereas putting in the update.
- The update progress bar may additionally seem like caught. When this occurs, don’t do something. Software updates can take a number of minutes to finish.
FAQs
Why does my MacE book keep exhibiting the incorrect date and time?
This problem usually happens when computerized date and time settings are disabled. To allow them:
- Click the Apple Menu within the upper-left nook.
- Select System Settings.
- Choose General after which Date & Time.
- Turn on Set Date and Time Automatically.
- Also, allow Set Time Zone Automatically Using Your Current Location.
Why does my Mac keep altering the date and time?
If your MacE book incessantly adjustments its date and time, it’s probably because of the location-based setting. This function adjusts the date and time primarily based in your present location, which is especially noticeable throughout totally different time zones.
To disable this setting:
- Access the Apple Menu.
- Go to System Settings.
- Click General and choose Date & Time.
- Turn off Set Time Zone Automatically Using Your Current Location.
Why is my computerized date and time incorrect?
Incorrect computerized date and time may result from an inaccurate area setting in your Mac.
To appropriate this:
- Access the Apple Menu.
- Select System Settings.
- Go to General and open Date & Time.
- Enable Set Time Zone Automatically Using Your Current Location.
- Then, navigate to Language & Region.
- Use the drop-down menu beside ‘Region’ to pick out your applicable nation or location.
What is the time server for Mac?
Apple units default to using time.apple.com as their time server. You can change this if wanted or if there are points with Apple’s server.
To change the time server:
- Click the Apple brand.
- Choose System Settings from the menu.
- Navigate to General > Date & Time.
- Click the Set button next to ‘Source’

Check out more article on – How-To tutorial and latest highlights on – Technical News, Apple Products