How to Set Parental Controls on iPhone [AIO].
There’s nothing flawed in gifting your youngster an iPhone however you ought to be aware of how they use it and what they will entry on their very own. If you and your youngster have your iPhones, you may join your youngster’s account to your individual and management what they will entry, how a lot time they spend on their device, and set restrictions to totally different options and content material.
In this put up, we’ll clarify the whole lot it’s worthwhile to learn about establishing parental controls on your youngster’s iPhone so you may restrict your youngster’s display screen time and device utilization.
What are you able to handle with parental controls on an iPhone?
With Apple’s Content & Privacy Restrictions on the iPhone, you may management numerous elements of how your youngster makes use of his/her iPhone, restrict a number of options, disable entry to sure apps, forestall downloads or purchases of things, and make different privacy adjustments to their device. When your youngster’s iPhone is related to your Apple account, it is possible for you to to regulate the next issues:
- Establish display screen time after which your youngster gained’t have the ability to use their iPhone for leisure and leisure.
- Make certain any purchases which are constructed from your youngster’s telephone are accepted by you, their father or mother/guardian.
- Prevent the kid from having the ability to set up or delete apps from the App Store and disallow in-app purchases.
- Temporarily hide an app or function from the Home Screen and App Library by proscribing the usage of sure apps or options.
- Stop your youngster from viewing specific content material or films and TV reveals with particular scores.
- Limit entry to grownup content material when looking the online on Safari and block particular web sites from being accessed.
- Restrict Siri internet search utilization and cease it from displaying specific language.
- Limit particular options on the Game Center by stopping your youngster from enjoying multiplayer video games, including pals, sending messages, or altering their avatar.
- Control how apps entry {hardware} options out of your youngster’s iPhone and forestall them from using the digicam, microphone, location, contacts, photos, and different options.
- Prevent adjustments from being made to the device passcode, account, quantity, background apps, mobile knowledge, and more.
You can select to restrict or permit any of those restrictions individually and may even customise them your manner to ensure your youngster makes use of his/her iPhone appropriately.
How to arrange a toddler account in your iPhone
Before you may arrange parental controls in your youngster’s iPhone, you’ll need to create an Apple ID on your youngster you can handle out of your iPhone, and to try this, you first have to arrange Family Sharing in your Apple ID.
Step 1: Set up household sharing
You can arrange Family Sharing from any Apple device together with your iPhone. If you’ve already arrange a household group in your Apple, you may skip this step and transfer on to the following one.
- Open the Settings app in your iPhone.

- Inside Settings, choose your Apple ID card on the high.

- On the following display screen, faucet on Family Sharing.

- Here, faucet on Continue.

- You can comply with the on-screen directions to ask members to your loved ones and set it up the way in which you need.

You can add as much as 5 more members of the family (a complete of 6 together with your self) to the group even after the preliminary setup after which transfer on to the following step, the place you may create an Apple ID on your youngster.
Step 2: Create an Apple ID on your youngster
After you’ve turned on Family Sharing on your Apple account, you may proceed to create an Apple ID on your youngster that they will use on their iPhone.
- Open the Settings app in your iPhone.
- Inside Settings, faucet on Family beneath your Apple ID title. If this part isn’t out there, faucet on your Apple ID card as an alternative.
- On the Apple ID display screen, choose Family Sharing.

- When the Family display screen reveals up, faucet on the Add Member button on the high proper nook.

- In the Invite Family display screen, choose Create Child Account.

- You ought to see a brand new display screen the place Apple asks you to enter the title of your youngster and their date of start. Here, enter the kid’s first and final title of their related bins after which faucet on Date of start to decide on the date.

- In the calendar that seems beneath, select the yr, month, and date of the kid’s start.

- After you’ve entered all these particulars, faucet on Verify You Are an Adult on the backside.

- You will now see the Parental Consent display screen. Here, you may be requested to enter your Apple account password. Type the password after which faucet on Next on the high proper nook.

- Apple will now immediate you by asking the way you want to obtain a verification code. On this immediate, select an electronic mail tackle from the listing of choices.

- Apple will now ship you a verification code over electronic mail to the chosen electronic mail tackle. On the following display screen, you’ll need to enter this verification code.

- You will now must comply with Apple’s Family Privacy Disclosure by tapping on Agree on the backside proper nook. Similarly, faucet on Agree on the backside proper nook when the Terms and Conditions display screen seems.

- On the following display screen, Apple will ask you whether or not you need your youngster’s Apple ID to be created using a telephone quantity or an electronic mail tackle.

- We selected Use electronic mail tackle for the sake of comfort.

- Apple will now recommend a brand new electronic mail tackle on your youngster contained in the “Email” field. You can change it to one thing else in case you’ve obtained one thing in thoughts or keep the advised electronic mail tackle as it’s.

- When you’re prepared, faucet on Continue on the backside.

- In the immediate that seems on the backside, choose Create Email Address.

- On the following display screen, you may be required to decide on a password on your youngster’s Apple account.

- Once you’ve created a password, Apple will ask you the place you wish to obtain a verification code when your youngster’s Apple account is signed in to a brand new device.

- If you’re okay with the verification code being despatched on to your youngster’s telephone quantity, choose Use Different Number for <your youngster>. If you’re not snug with that, faucet on Use <your quantity> as an alternative.

- You will now be requested to arrange parental controls on the following display screen. Since we’ll be setting it up manually, we are able to select Set Up Later on the backside. If you wish to arrange parental controls immediately, you may faucet on Turn on Screen Time and comply with the on-screen directions.

- On the following display screen, Apple will notify you that the Ask to Buy function is turned on by default.

- This is the function that stops your youngster from buying or downloading gadgets from the App Store. If you want to keep this function enabled, faucet on Continue or choose Turn Off Ask to Buy to set it up at a later time.

- Apple will now ask you whether or not or not you need your youngster’s location to be seen to you and different members of the family within the group. If you want to find your youngster always, faucet on Share Location; or else faucet on Skip to disable location entry for now.

- You will now have accomplished the preliminary arrange at which level Apple will let that you simply’re “All Set”. You will see your youngster’s new electronic mail tackle which can be the Apple ID that they will use to check in to their iPhones.

Once their Apple ID is prepared, you may flip in your youngster’s iPhone and check in to iCloud using the Apple ID electronic mail tackle that you simply created moments in the past. The iPhone you log in to using this Apple ID could be monitored and managed out of your iPhone always.
How to arrange Screen Time for a kid
When your youngster’s Apple ID has been arrange and signed in to their iPhone, you can begin by establishing their Screen Time. If your iPhone is working on iOS 16 or newer variations, you can too set app and content material limits to your youngster’s iPhone mechanically based mostly on the age group they fall into. This manner you may keep away from setting them up manually one after the other.
- Open the Settings app in your iPhone.
- Inside Settings, choose Family beneath your Apple ID title.

- On the Family display screen, choose the kid whose iPhone you wish to arrange Screen Time on.

- When the kid’s particulars present up, faucet on Screen Time.

- On the following display screen, faucet on Turn On Screen Time.

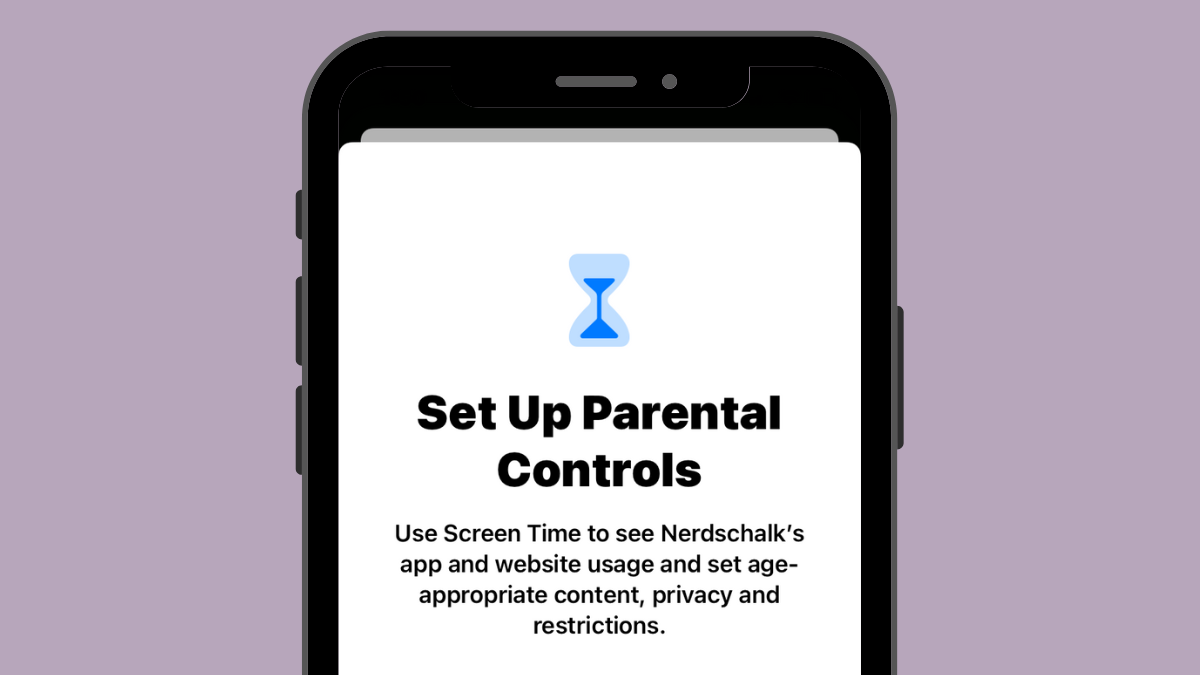
- You will now see the Set Up Parental Controls display screen pop up.

- Here, choose Turn On Screen Time.

- In the “What content can <your child> access?” display screen, it is possible for you to to decide on totally different apps and have limits on your child’s iPhone.

- Here, it is possible for you to to decide on a set of restrictions mechanically by sliding over totally different age teams. For instance, the restrictions will probably be lots tighter in case your youngster is aged 5 or below, and these limitations will ease up as you slide over towards the appropriate.

- You can select an age group your child falls below anyplace between 5 and 18 by transferring the slider to your most popular place.

- Regardless of whether or not or not you select to pick content material restrictions based mostly on age, you may manually set a restrict on any of those classes – Apps, Books, TV Shows, Movies, Apple Media, Music Videos, Music Profiles, Web Content, Siri Web Search, Explicit Language, and Deleting Apps. You can configure any of those classes along with your most popular restriction by tapping on it and selecting the suitable setting on your youngster.

- When you’re able to set content material restrictions, faucet on Turn On Restrictions on the backside.

- On the following display screen, you may be requested to decide on a Downtime on your child’s iPhone throughout which interval, your youngster will want your approval to proceed using their iPhone.

- On this display screen select the popular Start and End instances on your youngster to steer clear of their telephones after which faucet on Turn On Downtime.

- On the following display screen, you may set every day app limits for various classes in your youngster’s iPhone. This is the time your youngster can use their iPhone on your chosen goal. Once this time ends, your youngster might want to request for permission out of your iPhone to provide them extra utilization time.
- On this display screen, select an app class you wish to designate a utilization time for. If you’re undecided about which class to pick, select All Apps & Categories to set a time for throughout all apps.

- Next, faucet on Time Amount to decide on a most popular utilization interval for once you wish to approve your youngster’s telephone use.

- Once you’ve configured this setting, faucet on Set App Limit on the backside.

- On the following display screen, you’ll need to create a Screen Time code that you should utilize to permit more time and configure your youngster’s Screen Time sooner or later. When establishing this code, ensure that this code is totally different out of your iPhone’s passcode and isn’t simply guessable. You might want to enter this passcode once more to substantiate.

Screen Time will now be enabled on your youngster’s Apple ID account and it is possible for you to to watch it immediately from your individual iPhone.
How to allow Ask to Buy for purchases by a toddler
When you will have an Apple account linked to your youngster, it is possible for you to to make use of the Ask to Buy function which forces your youngster to get your approval after they attempt to make purchases or obtain an app from the App Store. If you hadn’t enabled Ask to Buy on the time of initially establishing your youngster’s account, you may flip it on inside iOS settings at a later time.
- Open the Settings app in your iPhone.
- Inside Settings, faucet on Family beneath your Apple ID title.
- On the Family display screen, faucet on the kid for whom you wish to configure Ask to Buy.
- When the kid’s particulars display screen hundreds up, choose Ask to Buy.

- On the following display screen, Apple will clarify more concerning the function.

- To go forward and allow it, faucet on Turn On Ask to Buy.

- Once enabled, your youngster will request your approval each time they obtain or buy one thing from the App Store, iTunes Store, or Apple Books. If you’re feeling that your youngster not wants your approval for this, you may disable the choice by going to Settings > Family > your youngster > Ask to Buy and turning off the Require Purchase Approval toggle on the high.

How to arrange parental controls in your youngster’s iPhone
Parental controls could be arrange in two methods:
- By creating a brand new Apple account on your youngster and linking it to your iPhone: If you opted for a brand new youngster account linked to your Apple ID, you can arrange parental controls on your youngster by going to Settings > Family > your youngster > Screen Time.
- By establishing content material restrictions immediately in your youngster’s iPhone: If for some cause, you don’t wish to arrange a Family Sharing group or in case your youngster already has an Apple account, you may arrange parental controls immediately on the kid’s iPhone. On the involved iPhone, go to Settings > Screen Time to start out the preliminary setup instantly.

While the preliminary setup ought to kind of be the identical in each these methods, there’s one distinct benefit when using the primary one. When you create an Apple ID on your youngster, additionally, you will have the ability to monitor your youngster’s telephone utilization, set cut-off dates, and see their location remotely from your individual iPhone with no need bodily entry to your youngster’s device.
Regardless of which methodology you proceed with, the steps that it’s worthwhile to comply with from right here will probably be related on each events. For the sake of simplicity, we’re establishing parental controls in your youngster’s iPhone by creating a brand new account for them (the primary methodology).
Manage your youngster’s Downtime schedule
After you’ve arrange Screen Time in your youngster’s iPhone, you may handle the schedule of the device’s downtime.
- Go to Settings > Family > your youngster > Screen Time. Inside Screen Time, choose Downtime.

- You will now be requested to enter the Screen Time passcode that you simply set in your youngster’s iPhone.

- Once you’ve entered that, you’ll have the ability to configure additional settings. First factor first, in case you want to briefly allow Downtime outdoors of the scheduled interval, you are able to do that by tapping on Turn On Downtime Until Schedule.

- If you want to disable the Downtime schedule for no matter cause, you are able to do that by turning off the Scheduled toggle.

- When a Downtime schedule is enabled on your youngster, iOS means that you can select a special schedule than making use of it each day. If you want to flip off Downtime on weekends or particular days, choose Customize Days beneath the Scheduled toggle and select the times you need Downtime to remain enabled.

- You also can change the scheduled time for Downtime by altering the instances designated contained in the From and To sections.

- If you don’t want your youngster’s iPhone to be unusable in the course of the Downtime, you may flip off the Block at Downtime toggle on the backside.

When enabled, your youngster might want to ask on your approval to proceed using their iPhone after Downtime begins.
Set app limits
There’s a devoted part labeled “App Limits” contained in the Screen Time display screen that means that you can select the time for which your youngster can use totally different apps on their iPhone. To set a time restrict for various apps and classes in your youngster’s iPhone, comply with the steps beneath.
- Go to the Screen Time display screen as proven on the high of this part and choose App Limits.

- Inside App Limits, you’ll see the totally different classes you’ve allotted utilization time for. Here, you may flip off App Limits totally on your youngster’s iPhone by turning off the App Limits toggle on the high.

- If you want to configure the time restrict for a particular class, choose a class that you simply’ve configured already. In this instance, it’s All Apps & Categories. If you haven’t configured an app restrict but otherwise you wish to set a special restrict for a brand new class, you may faucet on Add Limit as an alternative.

- When you choose an current class, you’ll see the set time for the chosen class or you may change the class for which you configured the time. To change the time set for a class, faucet on Time.

- When the time dials present up, select a interval by sliding the dials to the popular time. By default, the chosen time ought to kick in for all days of the week. If you want to configure it for various days of the week, faucet on Customize Days beneath.

- You can toggle the Block at End of Limit swap on/off to permit or forestall Apple from blocking the app class when your youngster reaches the set restrict.

- If you will have already chosen a class to configure its app restrict however you wish to change it, you are able to do that by tapping on Edit List below “Categories, Apps And Websites”.

- In the Choose Apps display screen that pops up, deselect All Apps & Categories by tapping on the tick mark on its left-hand aspect.

- This will mean you can configure the allotted app restrict time for particular app classes as an alternative of making use of it throughout all apps in your youngster’s iPhone. Here, choose the precise classes you wish to allocate the app restrict for after which faucet on Add on the high proper nook.

The chosen classes will now present up contained in the “Categories, Apps And Websites” part. - Lastly, in case you want to take away an app restrict out of your youngster’s iPhone, you are able to do that by tapping on Delete Limit on the backside of the chosen class’s display screen.

- To verify your motion, choose Delete Limit once more within the immediate that seems.

You can repeat the above actions for more classes you’ve set an app restrict for.
Configure communication limits
Apple allows you to select whom your youngster can contact from their iPhone throughout Phone, FaceTime, and Messages using the Communication Limits part inside Screen Time settings. You can choose totally different contacts that your youngster can work together with throughout Screen time and Downtime, handle their contact listing, and forestall your youngster from enhancing their contacts.
- Inside the Screen Time display screen, faucet on Communication Limits.

- On the following display screen, it is possible for you to to see the way you’ve beforehand configured the restrict. To select whom your youngster can contact when their iPhone isn’t on Downtime, faucet on During Screen Time.

- Here, you’ll have the ability to select between three choices:
Contacts Only: When you choose this selection, your youngster will solely have the ability to make audio and video calls or ship messages to contacts saved on their iPhone. They gained’t have the ability to make calls to unsaved contacts from their device.
Contacts & Groups with at Least One Contact: This is an extension of the above choice however your youngster may even have the ability to make calls and ship messages to folks in a gaggle.
Everyone: When this selection is chosen, your youngster can contact anybody from their iPhone. They will have the ability to ship texts and make calls to anybody, even telephone numbers that aren’t saved of their contacts.
For the utmost security of your youngster, we’d recommend you select Contact Only or you may change it to the second choice if you wish to allow them to talk in teams they’re part of.
- You can configure the Downtime communication restrict equally as above by tapping on During Downtime contained in the Communication Limits display screen after which selecting your most popular setting from the listing of choices.

- There are different settings you may change contained in the Communication Limits display screen. By default, Apple doesn’t allow contact administration in your youngster’s iPhone after the preliminary setup however you may select to handle and monitor your youngster’s contact listing remotely by turning on the Manage <your youngster’s> Contacts toggle.

- Since this function requires your youngster’s consent, a request will probably be despatched to your youngster’s iPhone which they’ll have to approve to allow you to handle contacts on their device.
- Additionally, you may select whether or not or not you need your youngster to create and modify contacts on their iPhone with out your permission. If you’re snug letting your youngster create contacts and edit them on their very own, activate the Allow Contact Editing toggle on the backside of the Communication Limits display screen.

- You will see a immediate on the display screen asking you to substantiate your choice. Inside this immediate, faucet on Continue to allow the choice.

Choose apps and contacts your youngster can entry always
An necessary setting that must be configured when establishing display screen time in your youngster’s iPhone is which apps and contacts are accessible by your youngster always, even throughout Downtime.
- Inside the Screen Time display screen, choose Always Allowed.

- Inside Always Allowed, you may select the contacts and contacts your youngster is allowed entry to at any time in the course of the day. To management whom the kid could make a name or ship a textual content to, choose Contacts below “Allowed Contacts”.

- Here, you’ll have two choices:

Specific Contacts: When this selection is chosen, you may select a customized listing of individuals out of your contacts listing to be accessible to your youngster always for communication. This manner, your youngster will have the ability to ship messages in one-on-one and group conversations with these particular contacts.
Contacts Only: This choice will ensure that communication could be made with any contact saved in your youngster’s iPhone.
If you select the primary choice, you’ll have to both select a bunch of most popular contacts out of your contact listing or add a brand new contact in your youngster’s iPhone for communication. - When you choose Choose From My Contacts, you will notice the My Contacts display screen pop up. Select the contact you wish to permit your youngster to speak with from right here, then faucet on Done on the high proper nook.

- Now, you may transfer on to choosing which apps are all the time allowed in your child’s iPhone, even throughout downtime. The Phone app will all the time stay accessible on your youngster however it is possible for you to to take away different apps from the “Allowed Apps” part by tapping on the minus (-) icon on the left-hand aspect of the app you wish to take away.

- If your youngster has put in more apps on their iPhone, you will notice them below the “Choose Apps” part. You add them to the “Allowed Apps” part by tapping on the Plus (+) icon on the left aspect of the chosen app.
Enable Content & Privacy Restrictions
Other than the settings configured above, you may make additional adjustments to how your youngster makes use of their iPhone contained in the Content & Privacy Restrictions part.
- Go to Settings > Family > your youngster > Screen Time and choose Content & Privacy Restrictions.

- On the following display screen, activate the Content & Privacy Restrictions toggle on the high to have the ability to select what apps and content material your youngster can entry from their iPhone.

Configure App Store buy and obtain restrict
When Content & Privacy Restrictions are enabled, you may configure whether or not or not your youngster can set up or delete apps from their device or make in-app purchases on the App Store.
- Inside the Content & Privacy Restrictions display screen, choose iTunes & App Store Purchases on the high.

- On the following display screen, you’re going to get particular person choices to decide on which options to permit or disallow in your youngster’s telephone. From right here, choose a class from the listing of choices. For instance, we chosen Installing Apps.

- On the following display screen, faucet on Don’t Allow to forestall your youngster from putting in new apps on their iPhone on their very own.
- You can configure the remainder of the classes equally.

- If you permit your youngster to buy one thing an app, ebook, or an merchandise from the App Store, iTunes, or Books, you may make it possible for extra purchases from the identical app or class nonetheless require your approval sooner or later. For this, keep the Always Require choice chosen below “Require Password”.

Prevent your youngster from using sure apps
Content & Privacy Restrictions additionally permit mother and father to restrict sure apps from getting used on their youngster’s iPhone. You can disable native apps like Mail, Safari, and Messages, and even forestall your youngster from using sure options like SharePlay, AirDrop, and Siri.
- Inside the Content & Privacy Restrictions display screen, choose Allowed Apps.

- On the following display screen, you will notice particular person toggles to permit or disallow apps like Mail, Safari, FaceTime, SharePlay, Camera, and so forth. To disallow an app from being accessed by your youngster, flip off the toggle adjoining to that exact app or function.

Disallow inappropriate or specific content material from being accessed
Just like apps, you may configure what sort of content material your youngster has entry to on their iPhone. You can select age-appropriate content material that your youngster can watch or take heed to and forestall specific content material from being seen or accessed by them.
- Inside the Content & Privacy Restrictions display screen, choose Content Restrictions.

- On the following display screen, you’ll have the ability to configure the sort of content material you assume must be applicable on your youngster. You can individually customise the content material sort throughout totally different classes like Music, Music Videos, Music Profiles, Movies, TV Shows, Books, Apps, and App Clips.

- Let’s say, as an example, you wish to management the sort of music your youngster listens to on their iPhone. For that, choose Music, Podcasts, News, and Fitness from the Content Restrictions display screen.
- On the following display screen, you’ll have the ability to select between Clean or Explicit. If your youngster is simply too younger, we advocate selecting Clean when consuming content material.

- Similarly, you may select which films your youngster can watch on their iPhone by choosing an age-appropriate score from the listing of choices for “Movies”.

- You also can apply content material restrictions to the apps your youngster can set up and use by choosing a score that’s applicable to their age.

Enable internet content material restrictions
You can restrict the sort of web sites your youngster can entry and flick thru on Safari by following the steps beneath.
- Inside the Content & Privacy Restrictions display screen, choose Web Content.

- Inside Web Content, you may select from three classes:

Unrestricted: This choice lets your youngster go to any youngster no matter any sort of score; this will give them entry to grownup web sites as effectively.
Limit Adult Websites: When you select this selection, your youngster gained’t have the ability to open any grownup web sites as Apple will discover and restrict such web sites mechanically when Safari is redirected to them. Additionally, you can too permit or disallow particular web sites on your youngster individually by tapping on Add Website below the “Always Allow” and “Never Allow” sections and including the hyperlink to the web site you wish to permit or block.
Allowed Websites: When this selection is chosen, your youngster can solely entry a handful of internet sites that you simply’ve allowed entry to. With this selection chosen, you will notice an “Only Allow These Websites” part beneath which lists the web sites which were configured for entry by your youngster.
You can add more web sites to this listing by tapping on Add Website.
In the display screen that seems next, enter the title of the web site and its related hyperlink.
The new web site will now be added to the present listing of allowed web sites.
Control Siri internet search utilization
Similar to the restrictions you may apply to the web sites which are being accessed, you may resolve whether or not or not your youngster can use Siri to go looking the online.
- Inside the Content & Privacy Restrictions display screen, choose Web Search Content.

- Inside Web Search Content, select Don’t Allow in case you don’t need your youngster to make use of Siri to go looking the online. In case you’re snug with them using Siri or they’ve reached the suitable age, you may choose Allow to approve Siri utilization.

- Additionally, you can too select whether or not or not you need specific content material to indicate up when your youngster makes use of Siri. To disallow specific content material on Siri, choose Explicit Language below “Siri” contained in the Content Restrictions display screen.

- To forestall the usage of specific language, choose Don’t Allow on the following display screen.

Turn on Game Center restrictions
Game Center means that you can play multiplayer video games with your pals, problem them, and talk with them. If your youngster performs such video games on their iPhone, you may prohibit the usage of Game Center in a number of other ways. You can forestall your youngster from enjoying multiplayer video games totally, including new pals, messaging somebody inside video games, recording their screens, or altering their username or avatar inside a sport.
- To management how our youngster makes use of Game Center, go to the Content Restrictions display screen and choose a class you wish to configure below “Game Center”. For instance, we chosen Adding Friends to decide on whether or not or not your youngster can add new pals from multiplayer video games.

- On the following display screen, you may select Don’t Allow to limit the chosen function contained in the Game Center.

- You can repeat this throughout different classes contained in the Game Center to use your most popular restriction.

Control your youngster’s location-sharing privileges
While you may configure your youngster’s location to stay accessible to you always, you may cease this location entry from being shared with others by your youngster.
- Go to the Content & Privacy Restrictions display screen and choose Share My Location below “Privacy”.

- To cease your youngster from sharing their location with another person, choose Don’t Allow on the following display screen.

Your youngster will not have the ability to share their location with anybody with out your data.
Prevent adjustments from being made to settings and options
Besides restrictions to the content material and options they will entry, you can too forestall your youngster from making any adjustments to their device from the Allow Changes part contained in the Content & Privacy Restrictions display screen. In this part, it is possible for you to to individually permit or disallow adjustments to be made to the device passcode, account, cell knowledge, TV supplier, and background app actions.
- To cease your youngster from making such adjustments, select a class you wish to restrict entry to from the “Allow Changes” part. For instance, we chosen Passcode Changes within the screenshot beneath to forestall the kid from altering their device passcode.

- On the following display screen, faucet on Don’t Allow to cease your youngster from modifying the passcode on their iPhone.

You can repeat this to disallow different adjustments contained in the “Allow Changes” part.
Prevent your youngster from altering their location-sharing settings
Your youngster’s iPhone will proceed sharing its present location with you in order that they’re protected and in the appropriate place.
- To forestall them from altering their location-sharing settings, go to Settings > Family > your youngster and choose Location Sharing.

- On the following display screen, activate the Block Changes toggle below “Location Sharing Settings” to forestall the utilized location-sharing settings from being modified.

Change your youngster’s Screen Time passcode
If someway, your youngster has managed to study the Screen Time passcode for his or her iPhone to achieve entry to their iPhone throughout Downtime, you may change this Screen Time passcode at any time.
- Go to Settings > Family > your youngster > Screen Time and faucet on Change Screen Time Passcode on the backside.

- In the immediate that seems next, faucet on Change Screen Time Passcode to vary it to one thing else.

If you not wish to restrict your youngster’s iPhone utilization, you may choose Turn Off Screen Time Passcode to provide them limitless utilization time.
Change your youngster’s Apple ID password
Like the Screen Time Passcode, you can too change your youngster’s Apple ID password in case you assume another person could have gained entry to the password or their account.
- To change your youngster’s Apple ID password, go to Settings > Family > your youngster and choose Apple ID & Password on the high.

- Inside the Apple ID display screen, faucet on Change <your youngster’s> Password and comply with the on-screen directions to vary their account password.

That’s all it’s worthwhile to learn about establishing parental controls on your youngster’s iPhone.
Check out more article on – How-To tutorial and latest highlights on – Technical News