How to Fix “Updating Cloud Music Library” Error on Apple Music.
Apple Music is the popular service for streaming songs and podcasts for iPhone customers. Similar to different providers, the music you hearken to is synced between units you’ve signed in together with your Apple ID and the Apple Music app put in. For essentially the most part, iCloud syncing will get the job achieved by itself so you’ll be able to take pleasure in streaming your favourite songs from any device.
If you’re having a tough time getting your library synced in your Mac and also you see the “Updating Cloud Music Library” error contained in the Apple Music app, then the next submit will clarify what this problem is all about and the way it’s possible you’ll repair it.
“Updating Cloud Music Library” error on Apple Music: What is it?
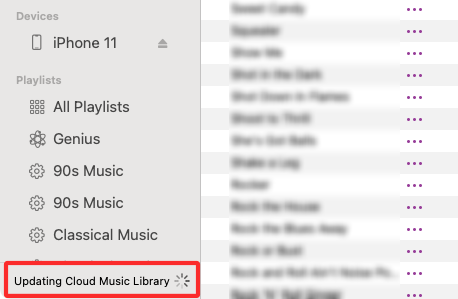
If you’ve the Apple Music app open in your Mac and also you see the “Updating Cloud Music Library” banner displayed always on the backside left nook of the window, then it might occur on account of any of the explanations under:
- You arrange the Music app for the very first time and that’s why it’s taking Apple time to load all of the songs you’ve added to your library from iCloud to your Mac.
- You haven’t synced your Music library shortly otherwise you opened the Music app on the Mac after a very long time.
- You not too long ago added or uploaded a track, album, or playlist to your Apple Music Library.
- There’s a problem that’s stopping the Music app from utterly syncing your library.
Ideally, the “Updating Cloud Music Library” banner shouldn’t seem for quite a lot of minutes because it doesn’t take lengthy for iCloud to sync music throughout a number of units. If this banner is persistent, then it’s most likely as a result of one thing is improper with the Music app in your Mac.
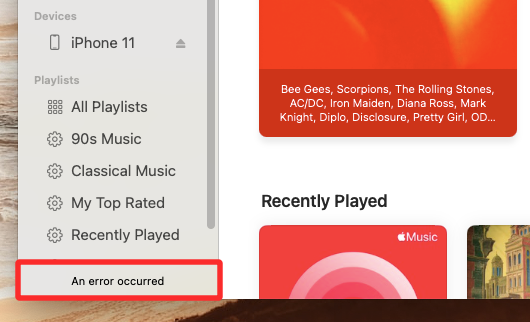
Along with this banner, it’s possible you’ll usually see the “An error occurred” banner in the identical spot when including one thing to your library.
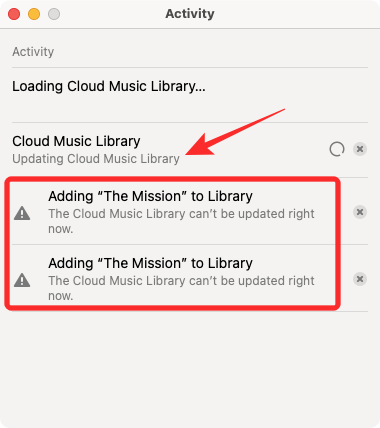
Clicking on this banner will reveal the Activity window that can present that your Cloud Music Library is at the moment updating and that the music you tried so as to add couldn’t get added to your library.
How to repair the “Updating Cloud Music Library” error on Apple Music on a Mac
If the “Updating Cloud Music Library” banner retains displaying contained in the Apple Music app in your Mac, you’ll be able to repair that by following the fixes under.
Fix #1: Disable and Re-enable Sync Library
If the “Updating Cloud Music Library” banner continues to look contained in the Apple Music app and you can not see it making any progress, you’ll be able to attempt disabling Sync Library on the Mac after which re-enabling it. For this, open the Apple Music app in your Mac.
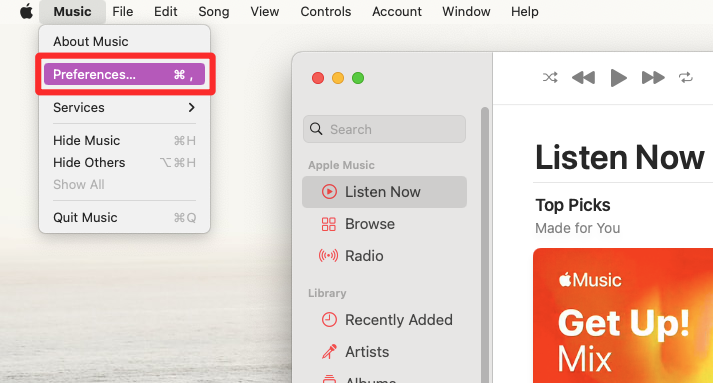
With the app open, click on on the Music tab from the Menu Bar on the high and choose Preferences.
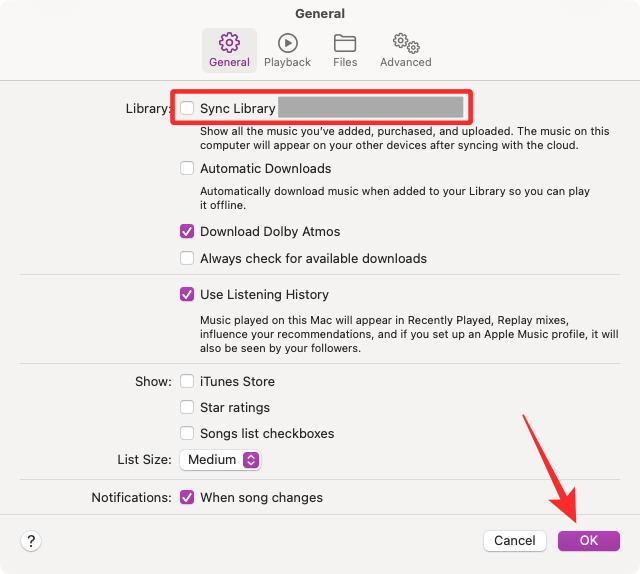
When the Preferences window masses up, uncheck the Sync Library field contained in the General tab on the high and click on on OK.
With the Sync Library characteristic now disabled, pressure give up the Apple Music app using the Command (⌘) + Q shortcut in your keyboard.
When the app closes, it is advisable to restart your macOS device by clicking on the Apple icon () from the Menu Bar and choosing Restart.
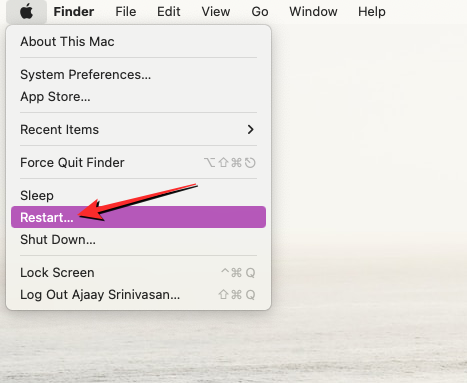
Your Mac will now shut all apps in your laptop and reboot. Once the reboot course of is full, sign up together with your password. Now, open the Apple Music app in your Mac.
Similar to the way you disabled it, it is advisable to re-enable Sync Library inside Apple Music by going to Music > Preferences from the Menu Bar on the high.
Inside Preferences, examine the Sync Library field underneath the General tab after which click on on OK.

The app ought to begin updating your music library and if all goes to plan, the updating course of ought to be full in a couple of minutes.
Fix #2: Stop Cloud Music Library updating and begin it manually
If the above repair doesn’t update your Cloud Music Library, you’ll be able to resolve it by stopping the update manually after which restarting it once more. To cease the updating course of in your Cloud Music Library, open the Apple Music app after which click on on the Updating Cloud Music Library banner on the backside left nook.
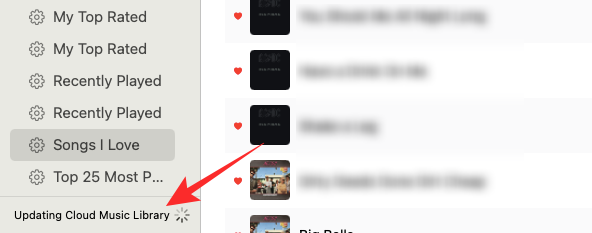
In the Activity window that seems, you must be capable to see the Cloud Music Library part updating. To cease this update, click on on the x icon on the right-hand aspect of this part.
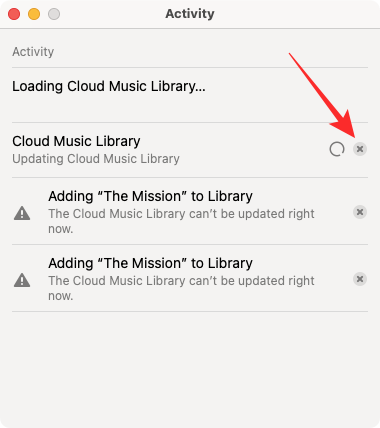
The Activity window will now turn into empty and you’ll go forward and shut it.
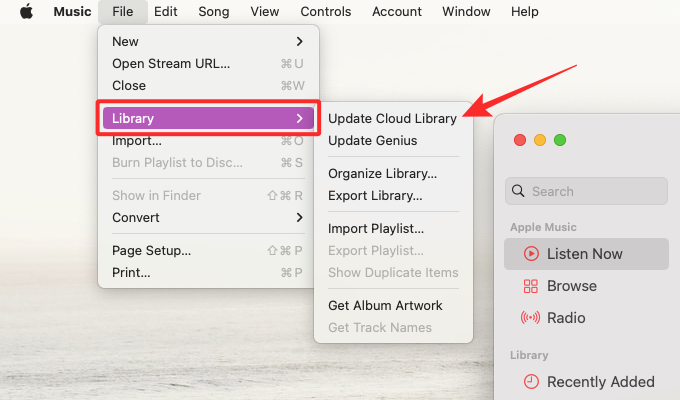
With the Apple Music app open, click on on the File tab from the Menu Bar on the high and go to Library > Update Cloud Library.
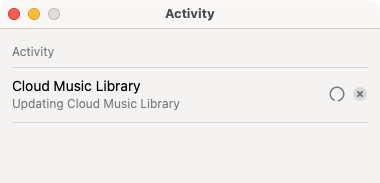
The Updating Cloud Music Library banner ought to reappear on the backside left nook of the window. You can click on on this banner to open the Activity window.
Inside the Activity window, you’ll be able to examine whether or not your library is getting up to date.
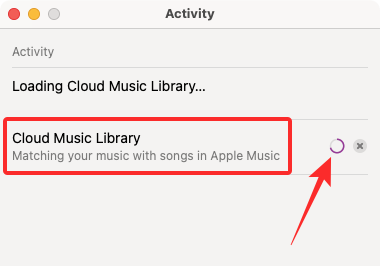
If you’ll be able to see the “Matching your music with songs in Apple Music” message underneath the Cloud Music Library part, then the update within the remaining phases and your library is getting up to date for actual. You can examine its progress by trying on the progress circle on the right-hand aspect of this part.
Once achieved, your Apple Music library on the Mac can be synced to stay the identical because the one in your iPhone or different Apple units.
That’s all it is advisable to learn about fixing the “Updating Cloud Music Library” error on Apple Music.
Check out more article on – How-To tutorial and latest highlights on – Technical News