
4 Ways to Make a Photo Collage on iPhone.
Apple’s Photos app helps you to edit photos out of your digicam roll with ease however should you want to sew a bunch of them right into a single image, there isn’t any such software throughout the app that allows you to do this. However, there are different methods you can also make a collage in your iPhone, and on this submit, we’ll make it easier to create collages in numerous methods.
How to make a photograph collage on iPhone [4 methods]
You can create a photograph collage in your iPhone using 4 apps – Shortcuts, Google Photos, Layout from Instagram, and Canva.
Method 1: Using the Shortcuts app
Apple’s native Shortcuts app can be utilized to carry out actions that aren’t built-in to an iPhone in addition to automate duties to get issues completed. One such factor you are able to do with Shortcuts is make a collage in a sample that you simply need to create.
While there’s a pre-existing Photo Grid shortcut contained in the app’s Gallery part, it comes with a serious flaw that solely combines photos horizontally, so your photos are stacked side-by-side. This isn’t a wise strategy to create collages as choosing a lot of photos will solely create a skinny row of images that may be inconvenient to view.
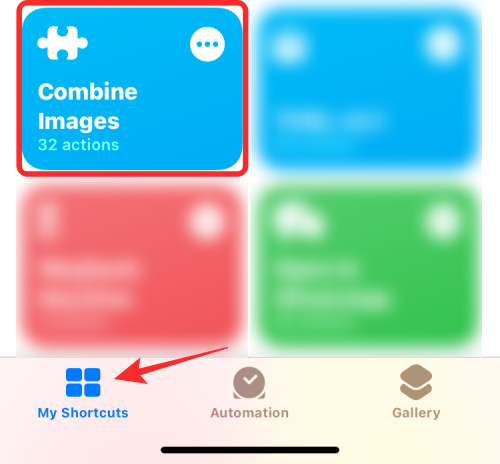
- For higher personalization, we’ll be using a community-made Combine Images shortcut you can add to your iPhone. When you entry this shortcut hyperlink in your iPhone, faucet on the Add Shortcut button.
- When this shortcut is added to your device, it ought to seem contained in the My Shortcuts tab contained in the Shortcuts app. To create a collage with this shortcut, choose the Combine Images shortcut.
- iOS will now open your iPhone library, exhibiting you all the images you’ve captured or saved in your device. From right here, choose the images you need to make a collage from both the Photos tab or the Album tab.

- Once your most popular photos are chosen faucet on Add on the high proper nook.

- The shortcut will immediate you with a dialog asking by which order do you need to prepare these photos. Select both Chronological or Reverse Chronological.

- Next, enter the spacing you want between the pictures, i.e., a spot between particular person photos within the collage. We recommend setting this house to “10”, however you possibly can set it to your required worth of your individual. If you don’t need the collage to have any white house between photos, set this to “0”. After setting the image spacing, faucet on Done.

- The shortcut will now ask you ways you need the images to be organized – horizontally, vertically, or in a grid. If you’re confused about which one to pick, we’ll make it easier to perceive which one would fit your wants.

Combine images horizontally – If you could have a bunch of portrait pictures, as much as 7 of them, selecting this could stack your photos one after the opposite in a single row.
Combine images vertically – If you solely have as much as 3 pictures to stack up and all of them are broad pictures, you possibly can select this feature to line up photos in a single column vertically.
Combine images in a grid – If there are 4 or more pictures and also you need photos to be aligned symmetrically in a grid trend, select this feature and the shortcut will output your collage in m x n format, relying on the variety of photos you could have chosen.
- Once the collage is created, faucet on Done on the high left nook.

- The shortcut will now ask you ways you need to save your new collage. Select Save to digicam roll to avoid wasting the brand new collage and protect your unique photos.

- The collage will now be saved in your iPhone and might be accessible contained in the Photos app.
: How to Loop a Video on iPhone
Method 2: Using the Google Photos app
Google Photos helps you to create collages in minimal steps with out a lot effort. Although the method of making a collage with it’s straightforward, there are some limitations to using the app. One draw back to Google Photos’ collage software is you can solely choose as many as 9 photos to mix. Another limitation is that the Photos app will create collages of the images you decide and as soon as created, there’s no strategy to manually re-position the photos in a grid or change grid sort immediately. Google Photos can thus be used to make a collage in little to no time with out extra instruments.
- To create a collage, open the Google Photos app on iOS and faucet on the Library tab on the backside proper nook.

- Inside Library, choose Utilities from the highest.

- On the subsequent display, faucet on Collage beneath “Create New”.

- You will now have to pick the images you need to create a collage with. You can choose anyplace between 2 and 9 photos to create your collage. When you’ve made your collection of photos, faucet on Create on the high proper nook.

- Google Photos will now create a collage out of your chosen photos with a format that it thinks fits you best. From this display, you possibly can share or make different modifications to the collage from the on-screen instruments.

: How To Inspect Element on iPhone
Method 3: Using the Layout from Instagram app
Since more of us use Instagram to add our every day reminiscences, you should utilize the app’s native Layout software to create collages from photos you could have saved in your iPhone or seize one using an in-app digicam immediately.

But Instagram’s software has two limitations – you can not mix greater than 6 photos in a grid and though you possibly can reposition the place every image goes, the variety of obtainable choices to rearrange is restricted to six grid sorts.
Step 1: Add photos to your collage
That’s why, we’ll use the standalone Layout from Instagram app for this technique, to make a more personalised collage.
- Open the Layout app in your iPhone, and permit entry to all of your photos on the iPhone.

- Inside the Layout app, you’ll see all of the latest photos saved in your iPhone. If you need to choose a unique folder or album to view and choose photos from, faucet on the Recents tab on the backside left nook and choose your most popular folder/album.

- Now, you’ll see all the images that had been saved within the chosen location. From right here, choose the images you need to make a collage from. You can choose anyplace between 2 and 9 photos when making a collage.

- When you’ve chosen all the images, it is possible for you to to see the totally different grids that your photos are organized in on the high of the display.

- Depending on the images you choose, you’ll see totally different numbers of layouts and also you’ll get totally different format sorts to select from.

- To flick thru totally different layouts, simply swipe from proper to left on the layouts row on the high.

- When you discover your most popular format from right here, faucet on it to make additional modifications.

Step 2: Edit your collage
You’ll now see the app’s Edit display that may allow you to mirror/flip photos in a format, substitute an image, and add borders to your collage.

- To reposition a photograph contained in the collage, long-press on it and transfer it to your required location contained in the collage to position it there.

- To resize photos within the format, choose an image and drag any of its edges to your most popular dimension. You ought to needless to say, when resizing an image inside a format, the adjoining photos or those in the identical row/column can even be resized accordingly.

- To mirror an image vertically, faucet on an image from the grid and choose Mirror.

- To mirror an image horizontally, faucet on an image from the grid and choose Flip.

- To substitute an image, choose it from the format and faucet on Replace.

- Next, choose an image you need to use as a alternative after which faucet on Done. The new image will substitute the chosen one contained in the collage.

- To add borders between photos and across the collage, faucet on the Borders tile on the backside.

- Once you’ve made all modifications to the collage, faucet on Save on the high proper nook.

- The collage might be saved routinely to your iPhone’s library and also you’ll get more choices to share it on Instagram, Facebook, or one other app.

Method 4: Using the Canva app
If you’re like us and use Canva to design headers, displays, and posters on Canva, you also needs to know that the app can be utilized to create collages from photos in your iPhone. If you need to customise your collage together with your contact with texts and different results, Canva could be fairly handy as there are a bunch of templates to select from as a way to get began with it right away.
Before making a collage, obtain the Canva app from the App Store and create an account using your Google/Apple account or an e mail deal with, should you don’t have an present account on the service.
- Open the Canva app and also you’ll land on the For you display.

- Swipe left on the For You tab on the high after which choose the More tab.

- Inside More, choose Photo Collage from the listing of design choices.

- Now, you’ll see a bunch of collage templates to select from. Scroll down and choose the template you want to make use of in your collage by tapping on it.

Note: Before you choose a template, it is best to know what number of photos you need to create a collage with and if the template has the required house to stick all of your photos. Some templates could have photos lined up in a grid and a few could have texts, stickers, and frames; so select the template that you simply suppose will best fit your collage. - The template will now load up on the display and Canva will immediate you asking should you want to add photos out of your library for creating the collage. Here, faucet on Select More Photos.

- Next, choose the images out of your iPhone library that you simply need to make a collage of after which faucet on Done.

- After this, it is best to see the template that you simply chosen.

- Here, you possibly can add your picture from the iPhone by tapping on an image from the template and choosing the Replace possibility on the backside.

- In the popup display that seems, faucet on the specified picture you need to make a collage from.

- The chosen image will now be copied to the collage.

- You can repeat this step to pick and substitute different photos in your collage.

- If the template has textual content, you possibly can edit it and write your caption by tapping on the textual content and choosing Edit.

- If you need to change the textual content’s font, choose the textual content portion from the template and choose Font.

- You can then choose the font you need to apply to the collage.

- Canva additionally permits you to change the background of a template by tapping on it and choosing Color from the underside.

- When you accomplish that, you possibly can choose the colour you need to apply to the highlighted area from obtainable colours on the canvas, colours extracted out of your photos, or different default colours.

- Additionally, you possibly can alter the spacing between gadgets in your collage by tapping anyplace in your design and choosing Spacing from the underside toolbar.

- After choosing this feature, modify the grid house by dragging the slider in direction of left/proper.

- You could make different modifications to the collage by including animations, transparency, and different results.
- Once you’ve made all the specified modifications, faucet on the Share icon on the high proper nook.

- In the popup display that seems, choose Download to avoid wasting the collage onto your iPhone.

That’s all you want to find out about making a collage on an iPhone.
Check out more article on – How-To tutorial and latest highlights on – Technical News