How do I Blur on CapCut: Step-by-Step Guide.
With the recognition and demand for short-format movies on social media, a lot of chances are you’ll be seeking to grasp the artwork of modifying movies earlier than they get revealed. If you’ve been using TikTookay to add your movies, then chances are high that you just may need undoubtedly come throughout this video-editing app – CapCut.
Developed by the staff behind TikTookay itself – ByteDance, CapCut is out there on each iOS and Android without spending a dime. The app gives primary to average modifying options like including colour filters, stabilization, masks, chrome key, soundtracks, modifying backgrounds, and way more, however the more well-liked options of the app have been 3D Zoom impact and Green display screen.
If you’re searching for a solution to blur a video on CapCut, you possibly can relaxation assured that you are able to do so by following the steps talked about under. But earlier than you progress on to including a Blur impact to your video, ensure you have the Captcut app put in via the App Store or Google Play Store.
With that behind us, let’s get began.
: How do I do 3D Zoom on CapCut
How do I blur a video on CapCut in 4 Simple Ways
There are other ways you possibly can add a blur impact to your video using the CapCut app.
1. Blur a complete video
If you need to blur all of the contents of a video, CapCut permits you to do exactly that. Keep in thoughts that blurring a complete video will have an effect on all elements and objects of the video via the length of the video.
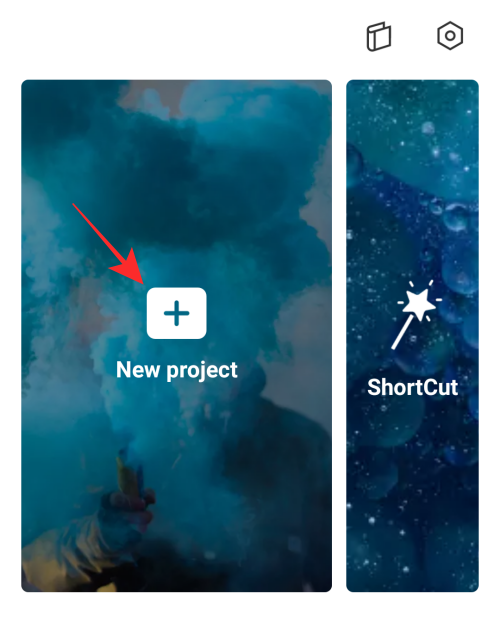
To do that, open the CapCut app on iOS or Android and faucet on the ‘New project’ possibility on the app’s Home Screen.
On the subsequent display screen, choose the video you need to edit and add a blur impact to.
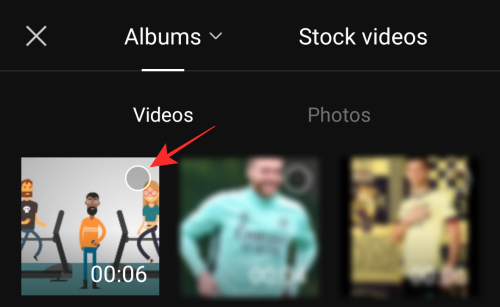
Once you’ve got chosen the video you need to edit, faucet on the ‘Add’ button on the backside proper nook.

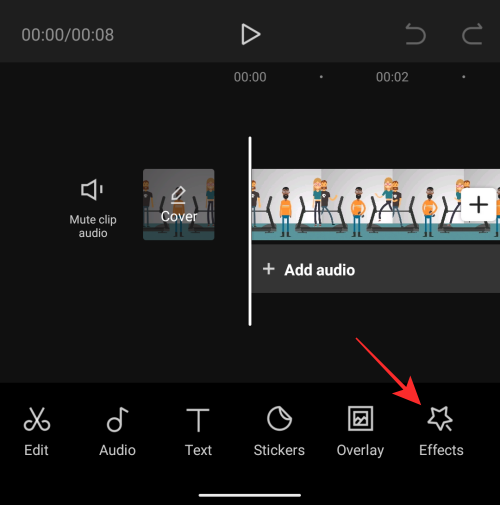
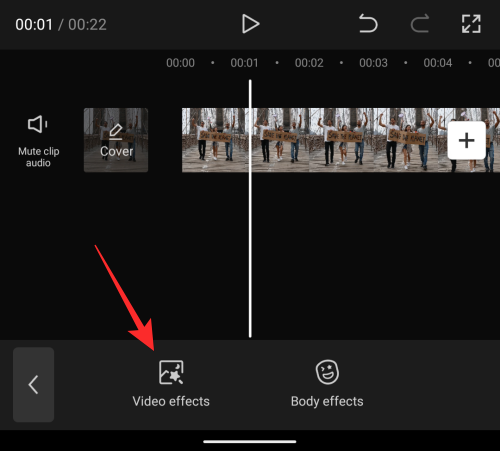
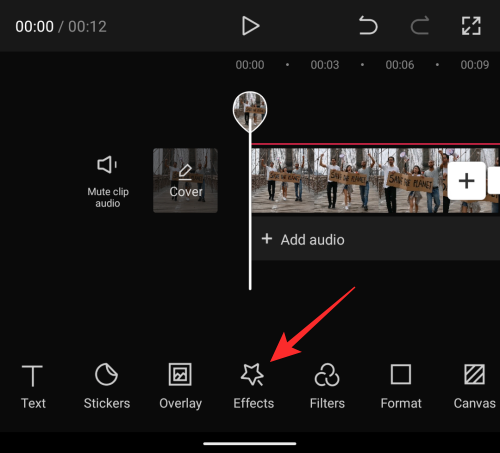
The chosen video will now be added to a brand new CapCut challenge. On this display screen, faucet on the ‘Effects’ tab from the underside toolbar.
An overflow menu will now seem on the backside portion of the display screen. By default, you’ll be proven all the results out there on the ‘Trending’ tab on the prime. Scroll via these tabs and discover the ‘Basic’ class.
Inside the ‘Basic’ tab, scroll down, choose the ‘Blur’ impact, and in the event you’re happy with the form of blur, faucet on the tick mark.

You will now be taken back to the challenge timeline inside CapCut the place it is best to be capable of see the Blur impact utilized to your video.
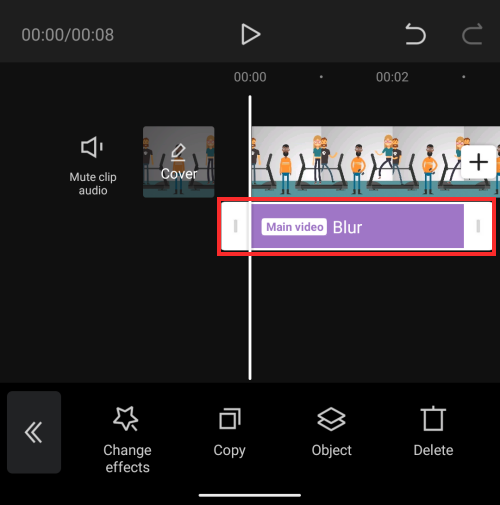
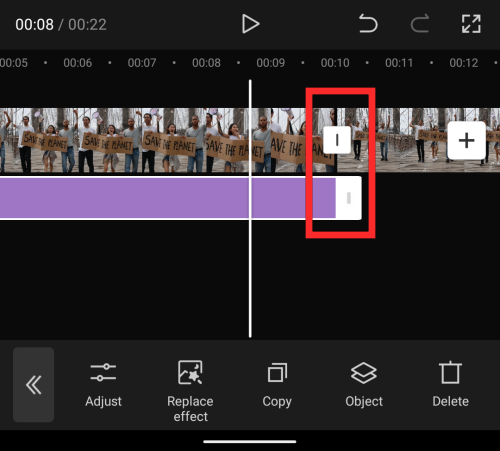
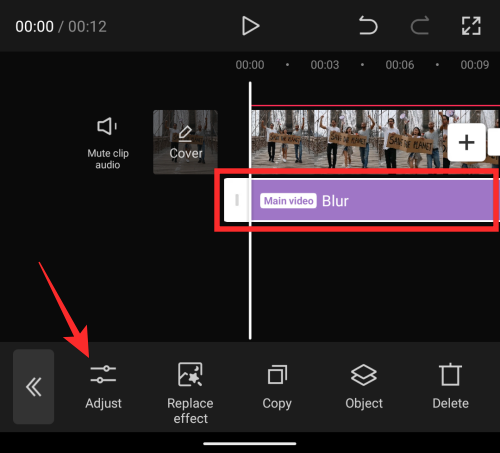
By default, the Blur impact will solely be utilized to a portion of your video. To increase the impact to the whole length of the video, faucet on the “Blur” bar marked right here in purple, drag its finish pointer, and drop it on the finish of your video. This will be certain the whole thing of your video is roofed in blur.

When the Blur impact and your major video have the identical finish time, it is going to appear like this.

You can then save your video by following the directions offered within the final part.
: How do I Use Green Screen on CapCut
2. Blur a portion of a video
If you need to blur just some parts of the video, like a face, then the next set of steps ought to provide help to get that finished. For this, first add a video you need to blur. You can do that by creating a brand new challenge contained in the CapCut app.
Now, choose the video you need to edit and faucet on the ‘Add’ button on the backside proper nook.
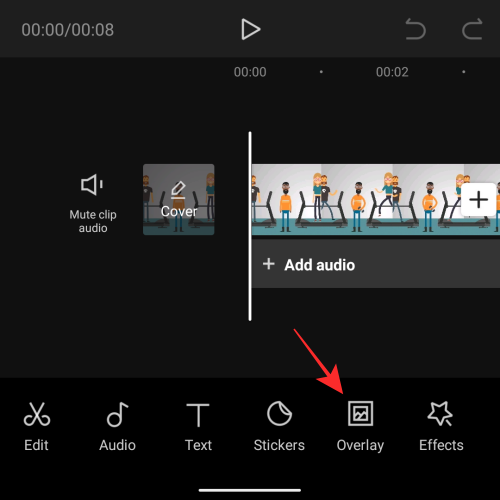
When the video is added to a brand new CapCut challenge, faucet on the ‘Overlay’ tab on the backside.
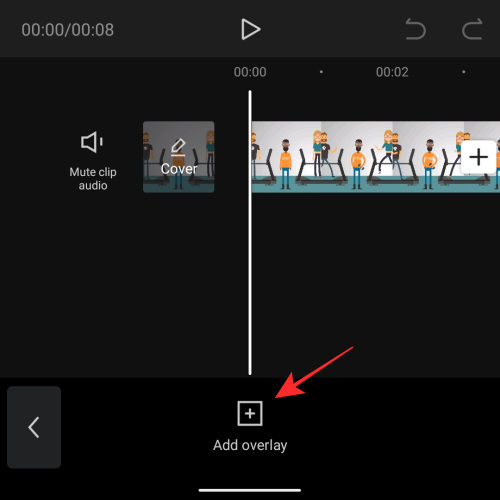
On the subsequent display screen, faucet on the ‘Add overlay’ possibility.
Select the identical video you added first as an overlay.

The overlay video will now seem on prime of your major video.

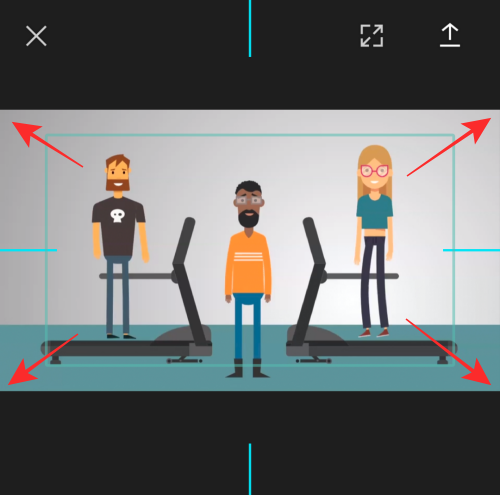
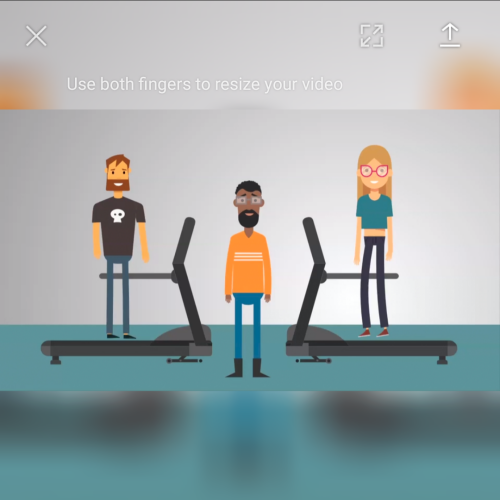
Using your fingers, pinch and drag the overlaid video and place it immediately over your major video. This is critical as a result of, for some cause, CapCut overlays the second video contained in the borders of the primary video. You want to verify the border of the primary and second movies are lined up completely.
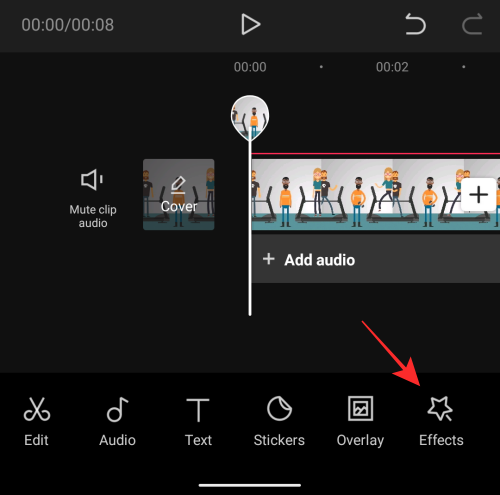
After you’ve got aligned the second video on prime of the primary one, faucet on the left-facing arrow icon on the backside left nook.

This will take you to the primary toolbar on the backside. The next step is to use the blur impact to the whole video as you probably did within the earlier part. For this, faucet on the ‘Effects’ possibility on the backside.
Next, go to the ‘Basic’ class when the Effects menu pops up, and choose the ‘Blur’ impact. When you’re finished choosing the impact, faucet on the tick mark icon.
You ought to be capable of see the Blur impact utilized to your video.
For some cause, CapCut doesn’t apply an impact to the whole length of the video. But you possibly can increase it to cowl the whole video by dragging its finish pointer and dropping it on the finish of your video.

When you’ve got finished that, choose the “Blur” bar marked right here in purple after which faucet on the ‘Object’ tab from the underside.

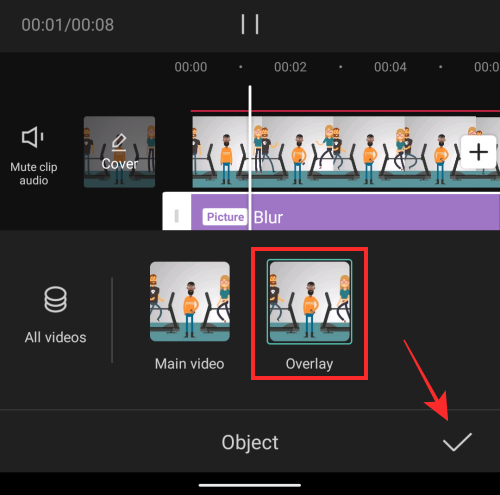
You might want to choose the place you need to place the Blur impact on. From the menu that seems, choose the ‘Overlay’ tile after which faucet on the tick mark.
Now, return to the primary challenge timeline by tapping the left-facing arrow icon on the backside left nook.

On the challenge time display screen, go to the ‘Overlay’ tab as soon as once more.
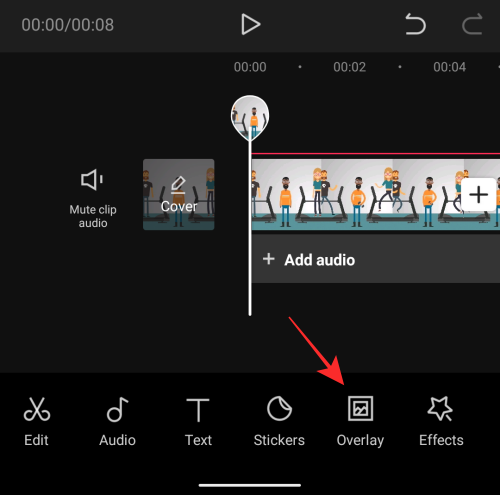
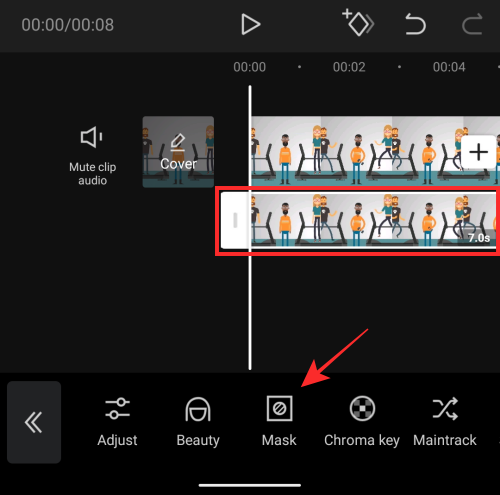
Inside the Overlay display screen, faucet on the second video that you just added as an overlay earlier. Swipe via the underside toolbar and choose the ‘Mask’ device.
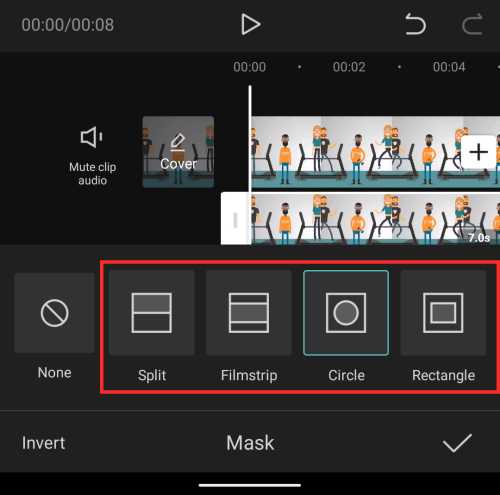
From right here, you possibly can select completely different shapes to your blur impact. If you’re making an attempt to blur a face on the video, we’d recommend you decide the ‘Circle’ possibility on the display screen. You can, nevertheless, select any form you need for the blur impact, relying on what you need to blur.
Before tapping on the tick mark, place the Blur onto your most well-liked place and resize it using the arrows offered on the prime and proper. You may also regulate the blur depth by dragging the downward-facing arrow up and all the way down to your most well-liked setting.

Once you’ve got custom-made your Blur masks, faucet on the tick mark on the backside to use it.
Now, you possibly can go away the blur impact at it’s if the topic you blurred is stationary. But since this can be a video and issues are sometimes shifting, chances are you’ll need to take into account blurring the topic because it strikes. To get this finished, we’ll be using Keyframes to reposition the Blur masks to completely different positions as the topic strikes.
For this, search via the video because it performs and examine when the topic strikes out of the Blur space. Seek to the spot when that occurs and faucet on the Keyframe icon adjoining to the play button.

When you try this, CapCut will mark the spot with a diamond icon. When this icon is coloured in pink, it means you’ve got chosen it. With a keyframe chosen, faucet on the ‘Mask’ possibility from the underside toolbar.

Next, reposition or reshape the Blur masks nevertheless you favor.

Now, faucet on the tick mark on the backside.
You can add as many keyframes as you want inside a video, offered that they’re needed. When you add a number of keyframes, it is best to be capable of see a number of diamond icons on the search bar like within the screenshot under.
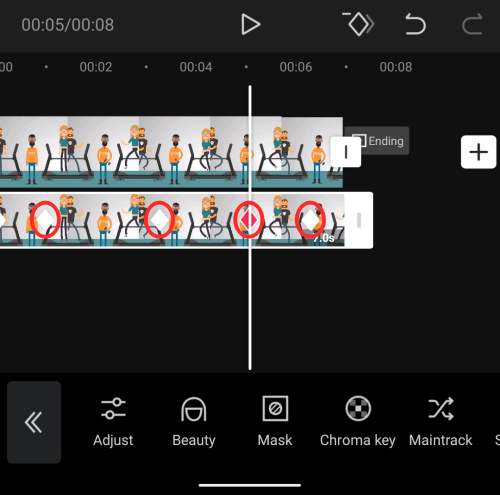
As the video jumps from one keyframe to the subsequent, the Blur masks modifications place and form regularly in order that the standard of the video isn’t affected.
That’s about it. You can proceed to export and save the video to your library by following the directions we’ve defined within the final part.
3. Blur your background
CapCut additionally permits you to blur the background behind you if it detects you or one other human contained in the video. However, the blur impact can’t be utilized natively and you have to fiddle across the app to get the specified impact in your video.
To get began, open the CapCut app and faucet on New challenge.

Now, choose the video you need to edit and faucet on Add on the backside proper nook.

CapCut will now begin compressing the video you chose after which load it in your display screen.
Note: To create a background blur impact to your video, you first must create a replica of this video so you’ve got two clips – one the place you apply blur and the opposite the place you take away the background whereas maintaining the faces and our bodies of individuals intact. After creating these two movies, you’ll then need to merge them collectively right into a single video to get the specified background blur impact.
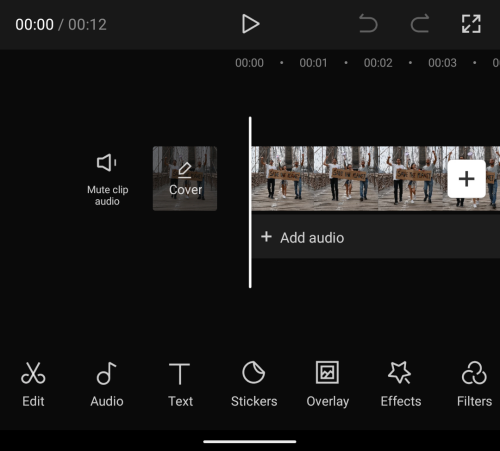
To duplicate the video you need to edit, choose the clip under the video preview. With this clip chosen, swipe via the underside toolbar and faucet on Copy.
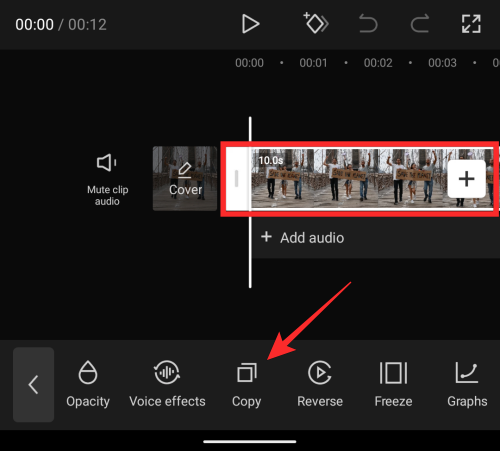
This clip will now be duplicated and it is best to see the copied clip seem on the finish of your unique video.

Now, scroll over leftwards to the primary clip and faucet on the Effects possibility from the underside toolbar.

Next, choose Video results.
In the popup display screen that seems, go to Basic and choose Blur.
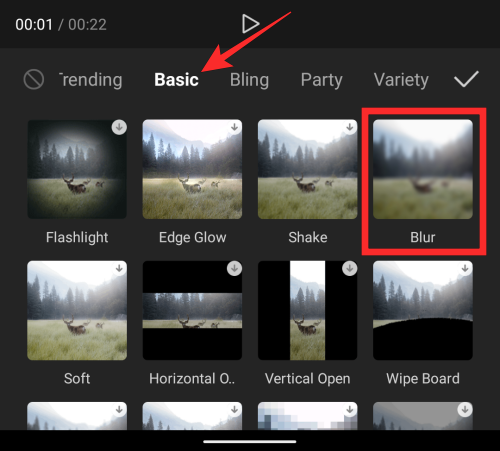
Once chosen, faucet on the tick mark icon to use it.

You will now see that the blur impact has been added to a portion of the primary clip and can be seen as a layer below the clip.

To be certain it’s utilized for the whole thing of the primary clip, drag each ends of the Blur layer to cowl the size of the primary clip. While doing so, be certain this impact isn’t copied over to the second clip; so be exact.
When finished neatly, the entire timeframe ought to look one thing just like the image under. As you possibly can see, the Blur layer seems solely below the primary clip, that means solely the primary clip is blurred.

Now, we are able to transfer over to the second clip and take away the background from it in order that solely individuals within the video are seen.
To do that, slide over to the second clip and faucet on it.

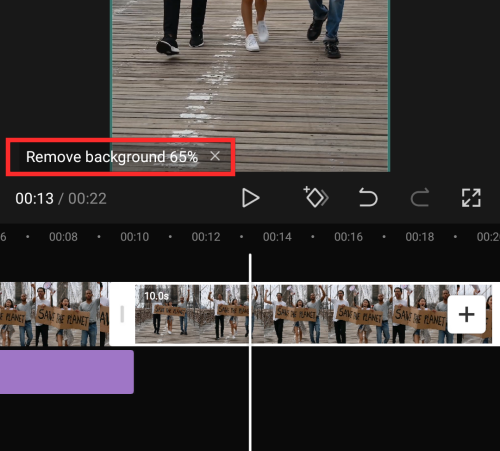
With the second clip chosen, swipe via the underside toolbar and faucet on Remove background.
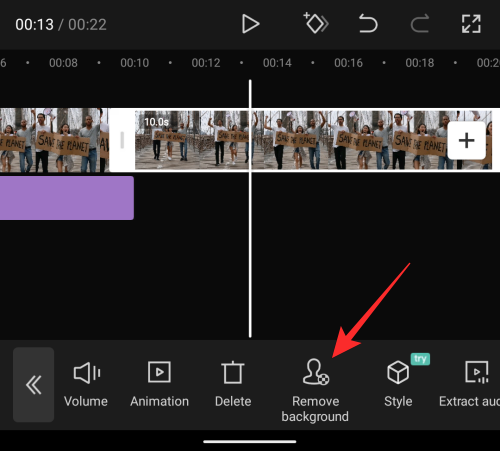
CapCut will now begin eradicating the background from the clip and it is best to be capable of see its progress under the video preview above.
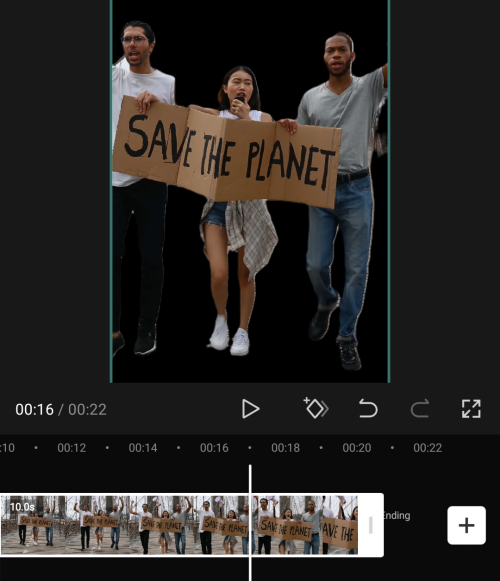
Once the background has been eliminated, you possibly can examine the end result by enjoying the second clip or scrolling via the second clip.
If you’re happy with the end result, you possibly can faucet on the left arrow icon on the backside left nook.

Your job is to merge each the primary and second clips into one single video. To try this, choose the second clip on the subsequent display screen and faucet on Overlay from the underside toolbar.

You’ll now see that the second clip now seems in a separate layer under the primary clip.
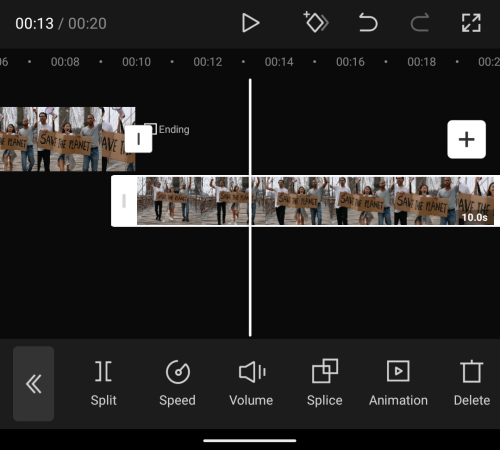
To be certain each clips are merged collectively, faucet and maintain on this second clip and drag it leftwards to the beginning of the primary clip. It ought to be positioned in such a manner that the beginning and finish factors of each clips coincide with one another.

And that ought to be it; you possibly can efficiently merge each the clips. You can now faucet on the Play icon to see what the ultimate video seems like.

If you suppose the blur impact is somewhat too aggressive, you possibly can regulate it. To modify the blur depth, faucet on Effects from the underside toolbar.
On the subsequent display screen, choose the present Blur layer after which faucet on Adjust.
You will now see a Blur slider on the backside. Drag via this slider to get your required blur depth. We advocate selecting a blue anyplace between 10 and 15 as that ought to be optimum to make the topic(s) come out. Once you’re finished altering the Blur depth, faucet on the tick mark on the backside proper nook.

You can preview the resultant video to see it play together with your desired background blur impact.

You can proceed to export and save the video to your library by following the directions we’ve defined within the final part.
4. Blur sides of a video
Many a time you’ll have come throughout a scenario the place it’s a must to add a video in a sure facet ratio when the video itself is in one other facet ratio altogether. CapCut permits you to increase your video to completely different codecs and in addition provides a blur impact to the edges that may in any other case be empty.
To add blurred sides to a video, create a brand new challenge contained in the CapCut app.
Now, choose the video you need to edit and faucet on the ‘Add’ button on the backside proper nook.
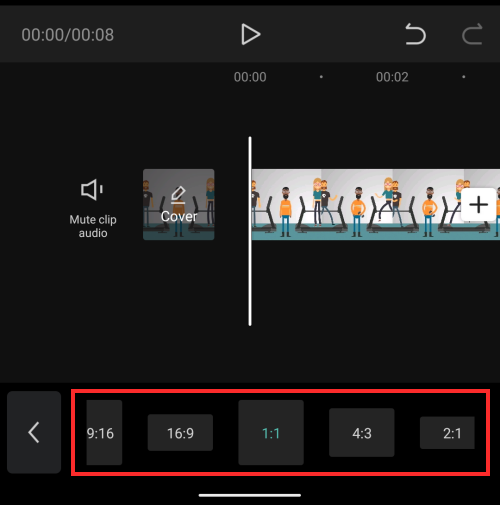
When the video is added to a brand new CapCut challenge, faucet on the ‘Format’ tab on the backside. You will see the Format tab after swiping left on the underside toolbar.

Next, choose your most well-liked facet ratio. You can select something from 9:16, 16:9, 1:1, 4:3, 2:1, and different choices.
After you’ve got chosen a format, choose the ‘Canvas’ tab from the underside.

Inside the Canvas display screen, faucet on the ‘Blur’ possibility.

Next, select a Blur impact that you just need to apply to the edges of your video after which faucet on the tick mark icon on the backside proper nook.

You ought to now be capable of see the video preview on the prime displaying your video with blurred results utilized to the highest and backside sides. Depending on the format you select, the blur impact can be utilized on the edges that may in any other case have remained black.
The newly-blurred video is now able to be saved. Read the part under to discover ways to export your edited video on CapCut.
How do I save an edited video on CapCut
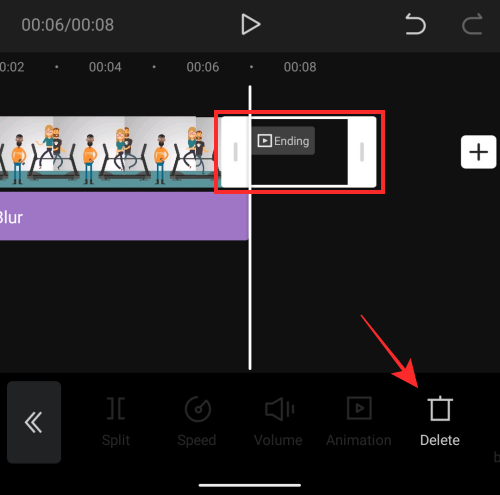
After you’ve got blurred a video the best way you needed to, chances are you’ll need to immediately proceed to save lots of your video. But earlier than you do, there’s another necessary step that you have to care for. Exporting a video from CapCut will lead to an Outro that exhibits the CapCut brand on the very finish of your clip. Fortunately for you, CapCut permits you to delete this a part of the video in case you need to take away it.
You can take away the outro portion out of your edited video by looking for to the top of your video, choosing the Outro portion that performs the CapCut brand, after which tapping on the ‘Delete’ button from the underside proper nook.
Once that’s sorted, faucet on the Export icon on the prime proper nook of the display screen indicated by an upward-facing arrow on prime of a touch.

You ought to now see an overflow menu prompting you to pick your most well-liked video decision and body fee. For the very best video high quality, we recommend you select 1080p because the video decision and 60fps because the body fee. If you don’t need to save your video within the highest of high quality, you possibly can cut back both of those settings which will even convey down your video’s file measurement. After you’ve got chosen your most well-liked video settings, faucet the ‘Export’ button on the backside to save lots of the video to your library.

CapCut will now export your video and as soon as that is full, it is best to see the message “Saved to device and your projects”. On the subsequent display screen, you’ll be given choices to share the video immediately on TikTookay, WhatsApp, Facebook, Instagram, and different apps.

That’s all we’ve on blurring movies using CapCut.
Check out more article on – How-To tutorial and latest highlights on – Technical News