3 Simple Ways to Control How You Share Contacts With Apps in iOS 18.
What to know
- In iOS 18, now you can restrict an app’s entry to your contacts and determine precisely which contacts an app has entry to.
- To restrict an app’s entry to your contacts, go to Settings > Privacy & Settings > Contacts > choose the app > and determine the extent of entry.
- Alternatively, go to Settings > Apps > choose the app > Contacts > and determine the extent of entry.
Third occasion apps require entry to your contacts so you’ll be able to message, name, or electronic mail them. But granting such requests permit the apps entry to all of your contacts. This has been one of many largest privacy points for customers.
With iOS 18, Apple is lastly letting customers to take back management of their knowledge. Users can now choose the person contacts that they wish to share with the app – and nothing more. Here are all of the methods in which you’ll management the way you share contacts with apps in iOS 18.
How do I management the way you share contacts with apps in iOS 18
Thanks to the brand new privacy controls, you’ll be able to management and restrict an app’s entry to your contacts. Here’s how to take action:
Method 1: When prompted by an app
If you’ve lately put in an app and are prompted by the app to offer entry to your contacts, right here’s how to manage which contacts the app can see:
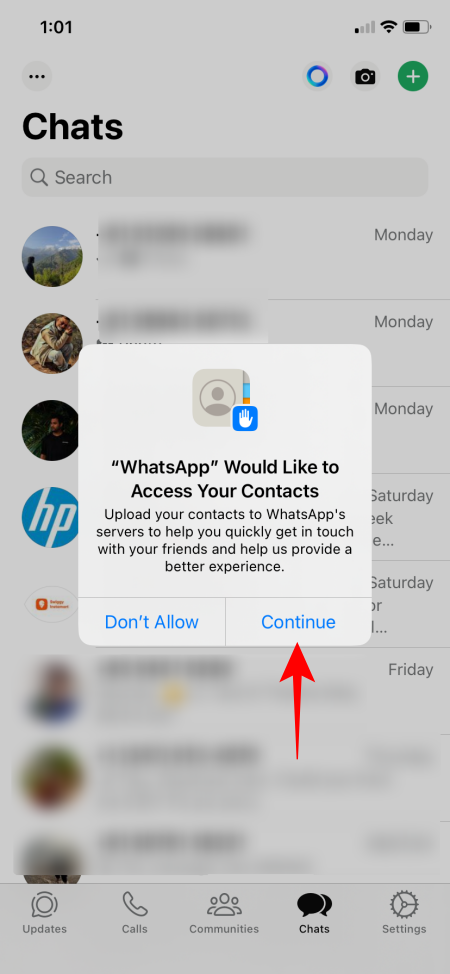
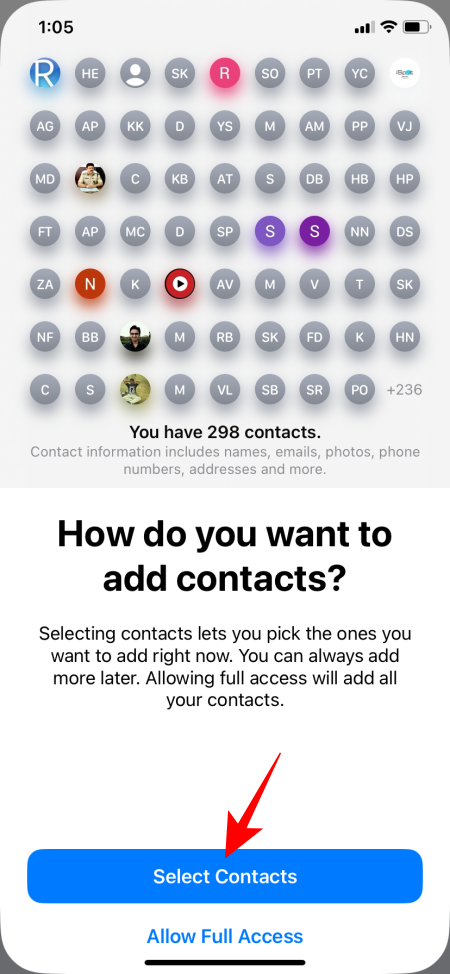
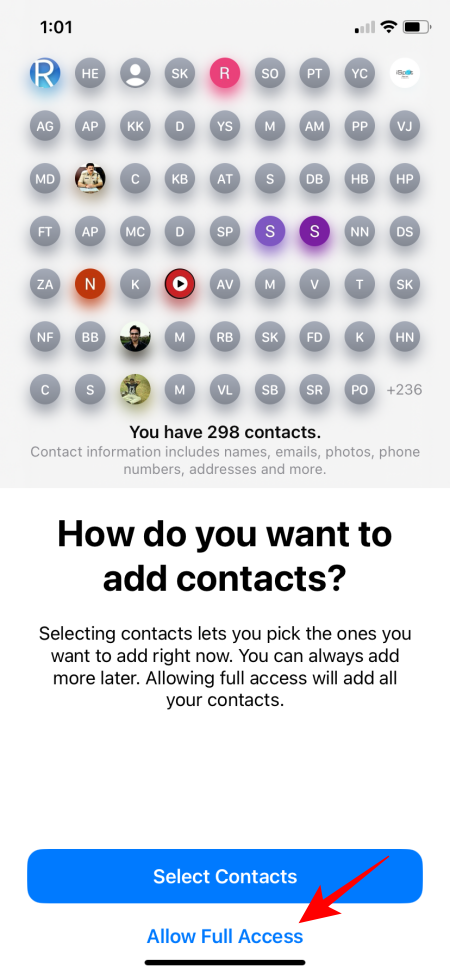
- When prompted by the app for entry, faucet Continue. On the following web page, faucet Select Contacts.
-
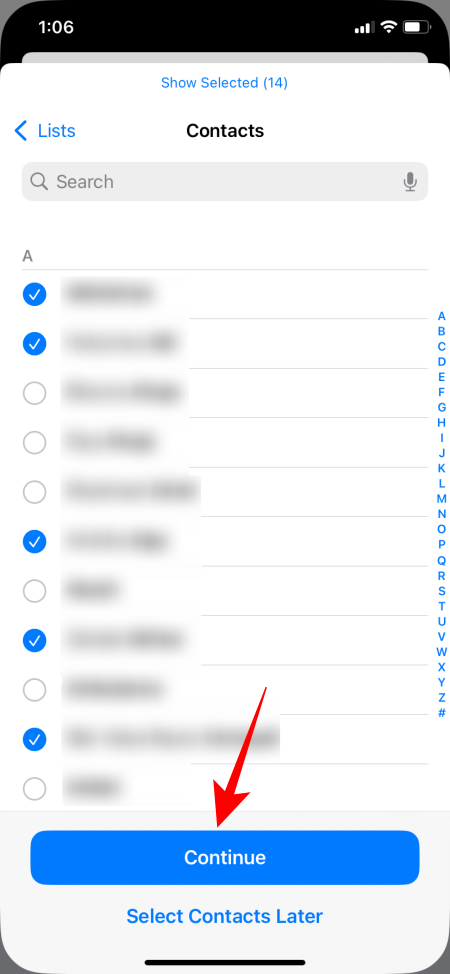
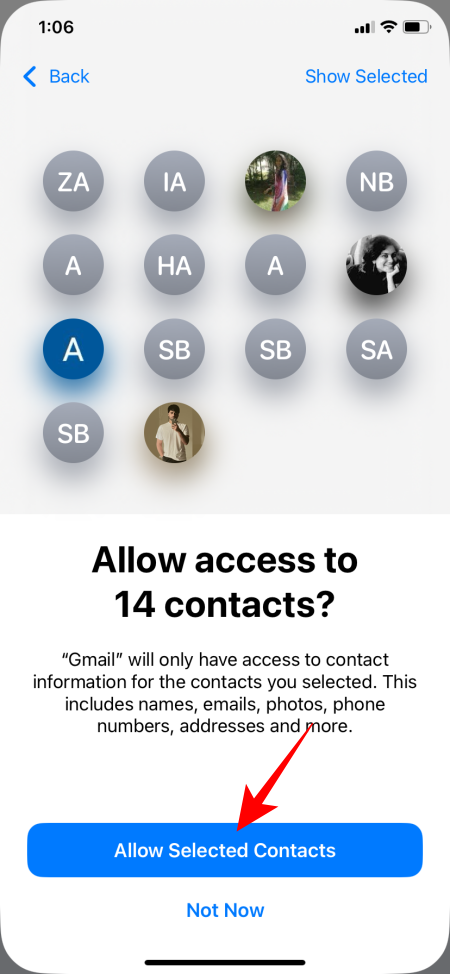
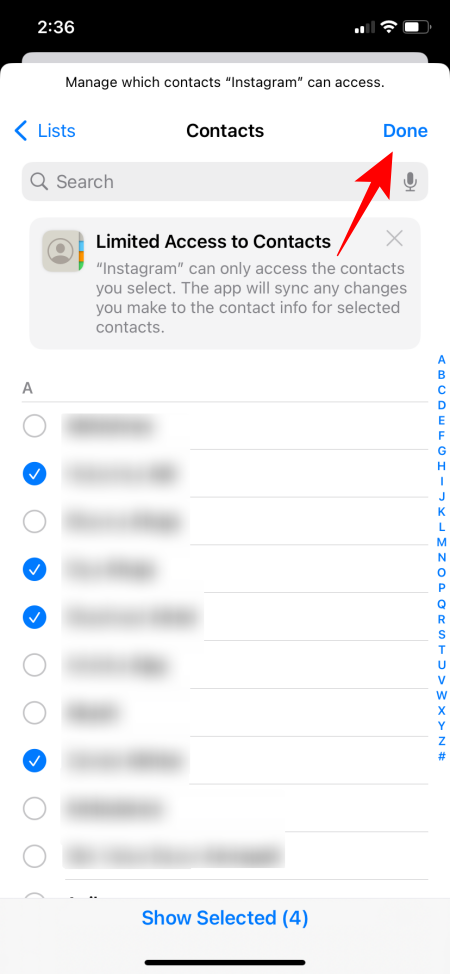
- Then go down the record of your contacts and choose the contacts that you really want the app to see. Tap Continue after which choose Allow Selected Contacts.
-
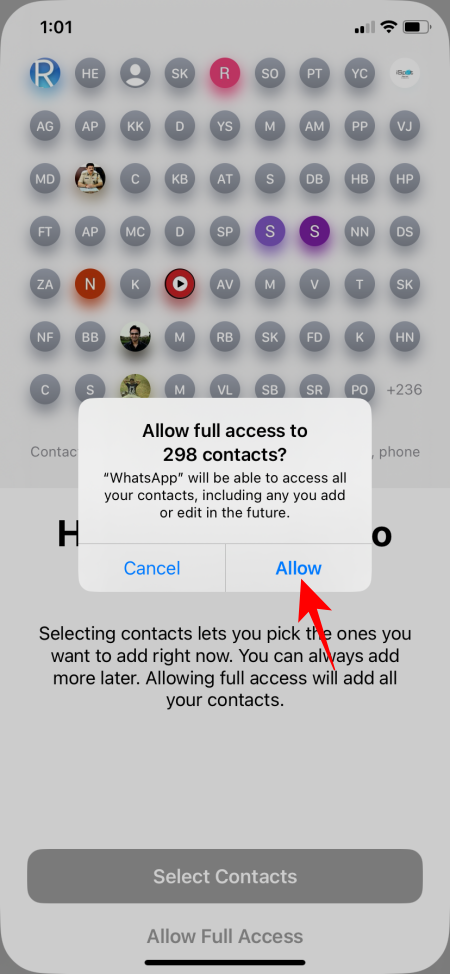
- If you wish to give the app full entry to your contacts, choose Allow Full Access and choose Allow.
-
Of course, you may as well merely deny any entry to your contacts by choosing ‘Don’t Allow’.
Method 2: From Privacy & Security settings
If you’ve already allowed entry to your contacts and wish to change the settings, right here’s how to take action:
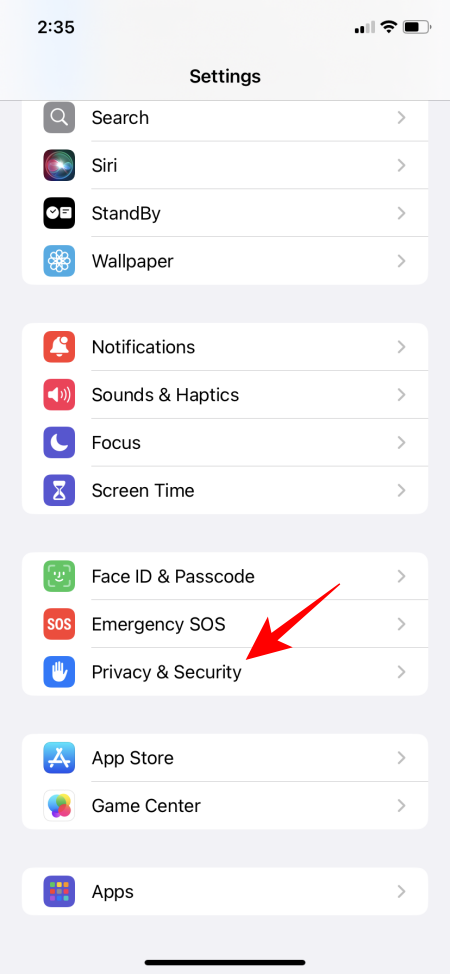
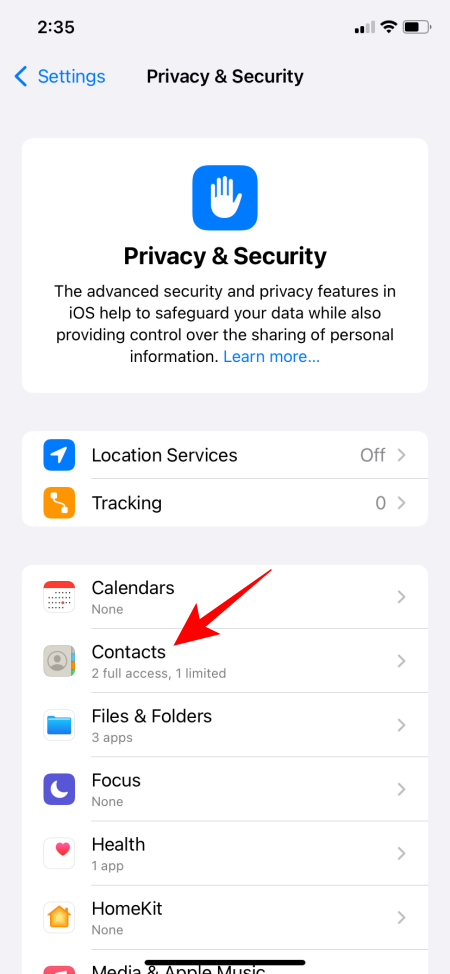
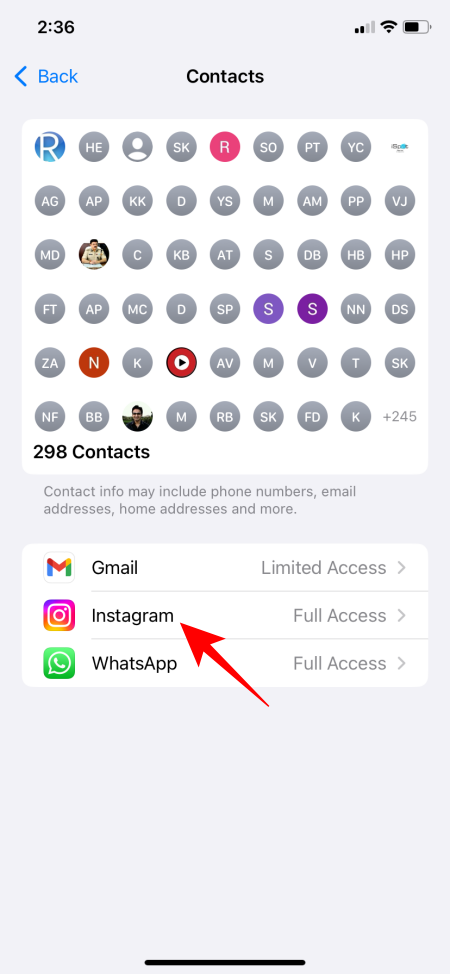
- Open the Settings app. Then go to Privacy & Security > Contacts.
-
- Here, you’ll see the apps and the entry they’ve. Tap on one to alter its contact entry settings.
-
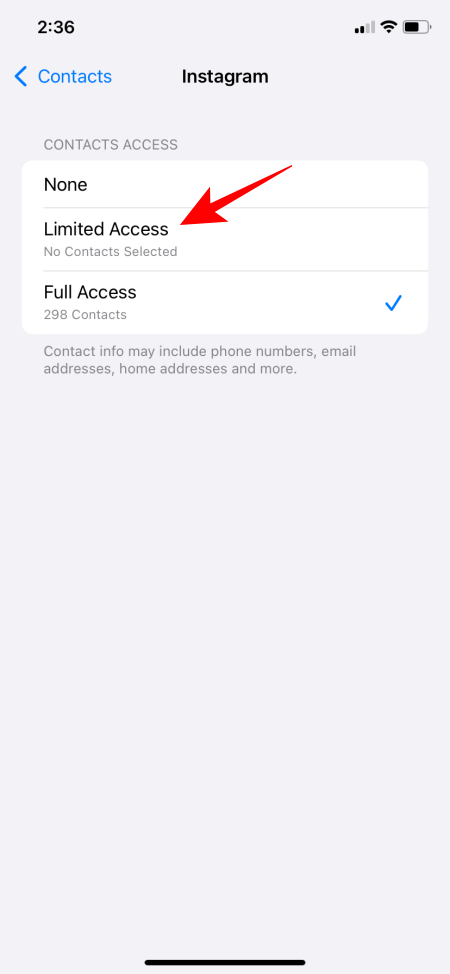
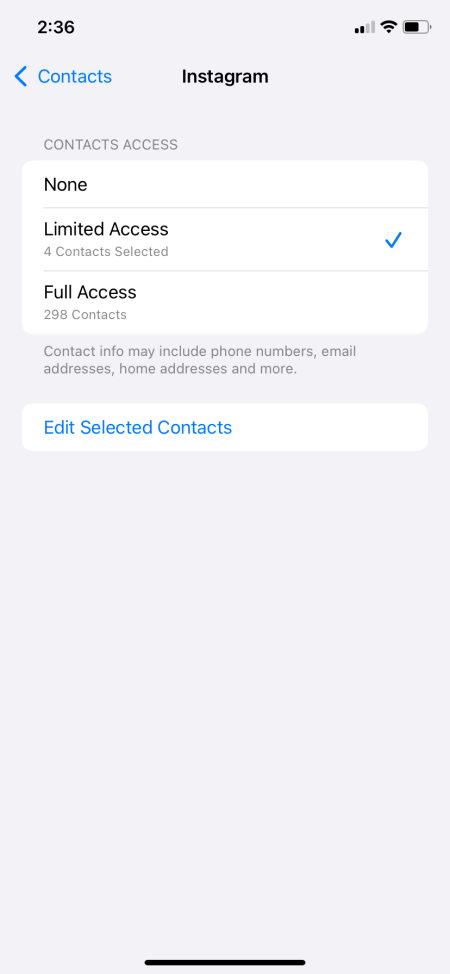
- Then choose the entry you wish to give it (if in any respect).
-
Method 3: From Apps settings
Another option to change how apps entry your contacts is through the Apps settings. Here’s how to take action:
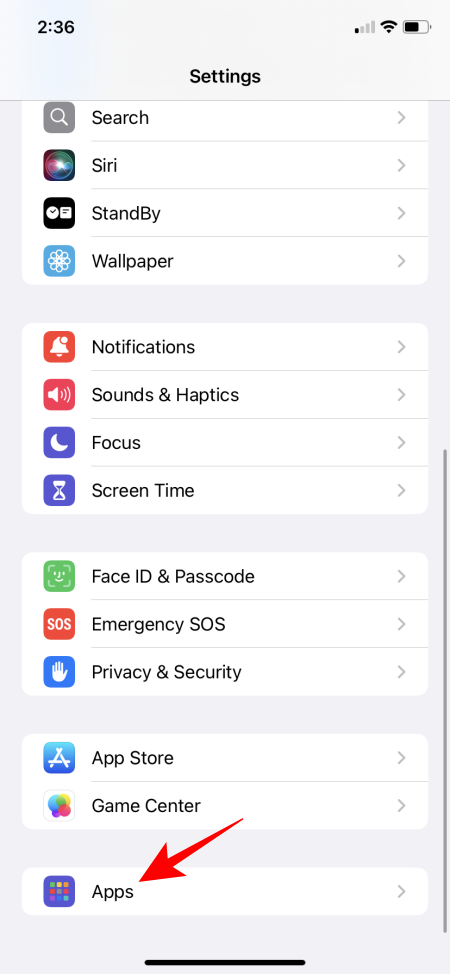
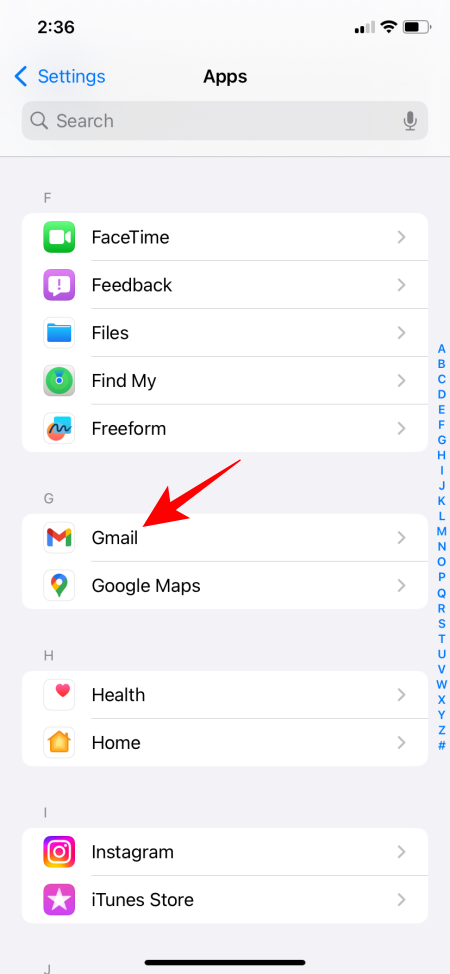
- Open the Settings app. Then go to Apps. Select the app whose entry you wish to restrict.
-
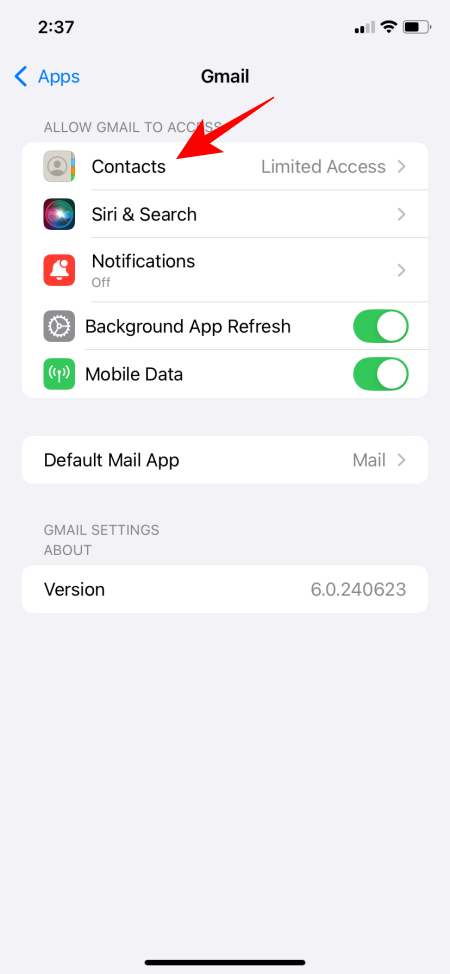
- Tap Contacts. Then change its entry to your contacts as earlier than.
-
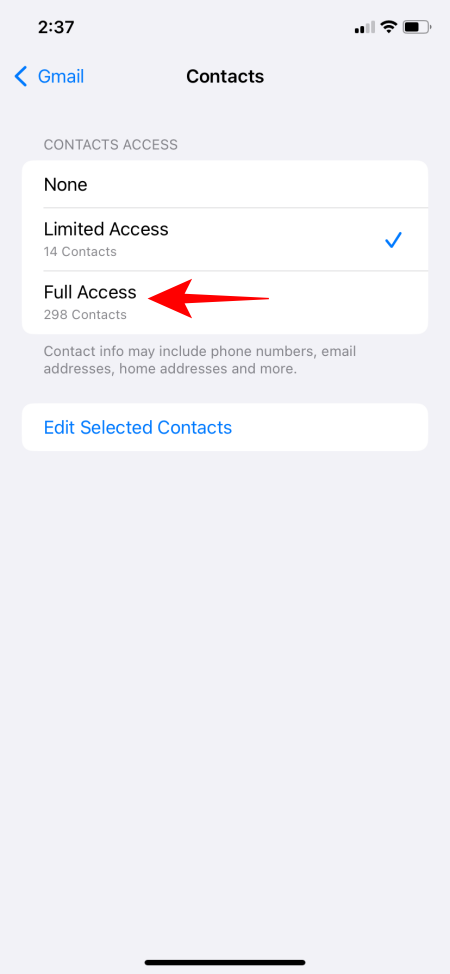
Note that for this methodology, the ‘Contacts’ possibility will seem just for apps which have already requested for contacts entry, even you probably have denied them entry.
The new privacy controls will hopefully mark the loss of life of information harvesting by apps that mine the contacts of customers, particularly those that enroll simply to test the app out. More importantly, you’ll have the ability to keep your contacts personal except chosen in any other case.
We hope this information helped you management the way you share contacts with apps in iOS 18. Until next time! Stay secure.
Check out more article on – How-To tutorial and latest highlights on – Technical News