How To Test Your RAM For Errors.
Memory points can decelerate your pc and may trigger it to point out random blue display screen errors or frequent freeze/crash. To stop such issues, I counsel checking your pc’s RAM for errors or corruption each few months.
You can take a look at your RAM using the Windows built-in Memory Diagnostic device. You may also use open-source purposes like MemTest86, MemTest86+, Memtester, or HCI Memtest to check your RAM sticks.
Additionally, you possibly can monitor RAM temperature using HWMonitor and examine its voltage by way of the BIOS. Knowing these parameters helps you establish in case your RAM sticks are overheating or not getting sufficient energy.
For the take a look at, we used an 8GB V-Color DDR4 4100 (working at 3200 MT/s) and one other 16GB TridentZ Royal DDR4 3600 (working at 3200 MT/s).
But, earlier than beginning the take a look at, disable any overclock in your system. Incorrect overclock settings might outcome within the take a look at to show error messages. You can do that by resetting the BIOS.
Another factor that you need to know is that testing a number of high-capacity reminiscence modules will take considerably longer. Stopping the diagnostic course of will restart it from scratch.
So, I like to recommend that you simply take away all reminiscence sticks besides one and run the take a look at. This method, you possibly can nonetheless use the system between every take a look at.
Windows Memory Diagnostic Tool
If you’re a Windows person, you should utilize its built-in device to check your reminiscence. Memory Diagnostic Tool runs a collection of assessments and checks the reminiscence addresses for any faults which may trigger system instability.
Note: Save your work earlier than you start the reminiscence diagnostic.
- Select the Windows + R key.
- In the Run window, sort
mdschedand hit enter. This will open Windows Memory Diagnostic.
- Select Restart now and examine for issues (really useful).

- The PC will now restart and start the reminiscence take a look at.

- You can press F10 to view Windows Memory Diagnostic Tool-Options. Here, you possibly can select between Basic, Standard, and Extended assessments.


By default, the system will run the diagnostic in Standard mode. The commonplace mode contains assessments like MATS+ INVC, SCHCKR, and so forth., the place the assessments are accomplished with cache enabled.
With cache enabled, the CPU might not entry reminiscence however accesses knowledge by way of cache. This will lead to inaccurate outcomes.
Therefore, I like to recommend that you simply run the Extended take a look at, which disables the cache. Running a reminiscence take a look at by disabling the cache will take considerably longer however offers you more correct outcomes.
After the take a look at is completed, now you can use one other built-in utility named Event Viewer to view the outcomes,
- Open Run, sort
eventvwrand press Enter.
- On the left facet, increase Windows Logs and click on on System.
- On the rightmost panel, click on on Find.

- Here, sort
MemoryDiagnostic-Results, then click on Find Next. The latest reminiscence diagnostic occasion shall be highlighted within the background.
- Close the Find dialog field.
- Click on the highlighted occasion. Under, you possibly can see the small print in regards to the occasion.

- It will inform you “detected no errors” if the diagnostic didn’t discover any errors.


MemTest86
MemTest86 is an open-source software that runs a collection of assessments, 13 to be precise and runs them 4 occasions (passes) to search out any errors in your reminiscence module/s.
It runs a complete of 52 assessments and, subsequently, will take considerably longer. So, i like to recommend that you simply let this take a look at run in a single day if you’re testing a number of reminiscence sticks on the similar time.
To run the take a look at using MemTest86, you’ll require a USB drive. Make positive that the drive doesn’t comprise any recordsdata or folders, as the method requires you to format the drive.
Now, it is advisable make a bootable USB drive. For that,
- First, obtain memtest86 and extract the downloaded folder.

- Insert the USB drive into the USB slot on the back panel of the PC (You should insert it within the USB port of the motherboard itself)
- Open the folder and run
imageUSB.exe.
- Here, in Step 1, choose the USB flash drive.
- Under Step 2, examine Write image to USB drive.
- Click on Write.

- Select Yes.
- Again, click on on Yes when it asks for affirmation.
- Now, anticipate the Write Process to finish.

- Once it says Write Complete, click on on Exit.


You ought to see that the USB drive’s measurement is decrease than what it truly is. This shouldn’t concern you for now; I’ll present you ways to reformat and get the remaining capability back on the finish of this technique.
Once you might have efficiently made the USB bootable, it is advisable change the boot order such that the system boots using the USB drive containing MemTest86.
Now, restart your PC, and the PC ought to boot from the USB drive,
- Wait for the system to retrieve {hardware} info.

- Once you get to the house display screen of PassMark MemTest86, press S to begin the take a look at.

- Wait for the system to undergo 4 passes of the reminiscence take a look at. Depending on the overall reminiscence in your system, this may occasionally take a number of hours.

- Once the primary cross is accomplished, you will notice a message that claims Finished Pass #1 and the overall error within the reminiscence. In my case, it’s 0.

- Once all 4 passes are accomplished, you will notice a inexperienced PASS textual content if the reminiscence stick passes the take a look at. If not, you will notice a reminiscence deal with error in purple, together with a number of Errors.


During the take a look at, make it possible for the RAM temperature doesn’t exceed 40°C for DDR4 and 55°C for DDR5.
If there are a number of errors, RAM reaches excessive temperatures or your system freezes consistently attributable to reminiscence errors, it could be best that you simply exchange the defective reminiscence stick.
But if all of the reminiscence sticks show errors throughout testing, it might be that the reminiscence slot or the inner connection within the motherboard is at fault.
In such circumstances, you need to clear the reminiscence slot or take a look at the motherboard for errors.
Once the take a look at is accomplished, you’ll wish to get the unique capability of the USB drive back. But first, change the boot order in order that the system boots using the storage device containing the OS.
Then, observe the steps under,
- In Windows, open the MemTest-86 folder that you simply extracted beforehand.
- Run
imageUSB.exefile. - Select the USB drive in Step 1.
- In Step 2, examine the Zero USB drive.
- Finally, click on on Zero in step 4.

- Click on Yes.
- Again, choose Yes when it asks for affirmation.
- Wait for the method to finish and click on on exit.

- Again, format the USB drive, and it’ll return to its authentic capability.


Check Memory Stick and Slot
If your system consistently crashes attributable to reminiscence points and can’t full an in depth reminiscence take a look at, you possibly can attempt using one stick at a time to search out the defective reminiscence. This will solely work in case you have two or more reminiscence sticks.
If your system doesn’t have two reminiscence sticks, you want one other reminiscence module to find out if the primary one is defective.
To take a look at your RAM stick,
- Turn off the PC and take away the ability plug from the wall outlet.
- Press the ability button three or 4 occasions to discharge the capacitors.
- Now open the PC case. For that, take away any screws that maintain the facet panel of the PC case and take the facet panel out.

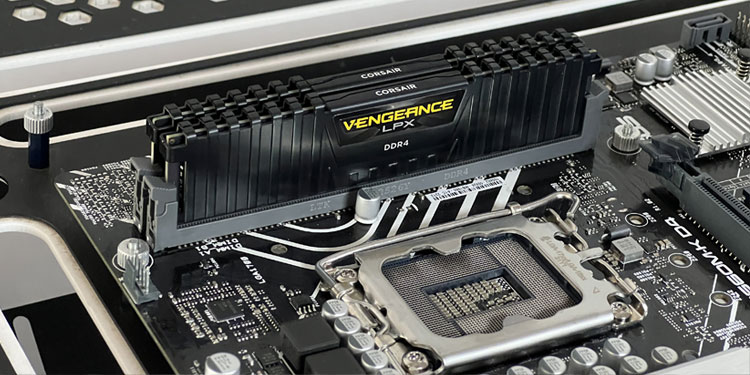
- The RAM sticks are usually positioned beside the CPU. There needs to be two or 4 reminiscence slots. If you might be using a workstation motherboard, there could be more.
- Unclip either side of the reminiscence slot by pushing it outwards. Some motherboards might solely have a clip on one facet of the slot.

- Remove all of the reminiscence sticks besides one and use the PC.
- Check if the system nonetheless crashes or freezes. If it does, exchange the reminiscence stick.
- If you might have greater than two reminiscence modules, repeat this till you discover the defective reminiscence.


It is also that the reminiscence slot is broken. To eradicate this risk, attempt switching between DIMM slots.
If the identical error/crash happens on all of the reminiscence modules and slots, the issue might be with the motherboard’s inside reminiscence connection.
Check RAM Voltage
A vital element that I like to recommend you examine is the RAM voltage. Depending on the DDR model and the kind of RAM put in in your system, it should require a sure voltage.
If the motherboard or the PSU will not be supplying the really useful voltage, reminiscence may throw a number of surprising errors.
The minimal voltage necessities in accordance with DDR model are,
- DDR3: 1.35 Volts
- DDR4: 1.2 Volts
- DDR5: 1.1 Volts
These numbers shall be increased in case you have enabled XMP.
Note: You may also discover DDR2 and DDR RAM, however a lot of these RAM are not often utilized in right now’s pc.
You can examine the voltage at the moment being equipped to your RAM sticks by way of the BIOS. Here’s how,
- Repeatedly press the BIOS key to enter your system’s BIOS. The BIOS key might be the Delete key or one of many perform keys, relying in your motherboard.
- Once in BIOS, examine for an possibility PC well being.

- Here, examine the DRAM voltage. The quantity needs to be near the worth talked about above.


Using a RAM Tester
All the strategies talked about above would require the system to POST. The strategies won’t work if the system can’t even boot into BIOS. In conditions like that, I counsel using a RAM tester to diagnose your reminiscence module.
You can discover a reminiscence module or reminiscence slot tester that may precisely take a look at your RAM for connection points. In our case, we are going to simply be specializing in the reminiscence module tester.
These units have quite a few LEDs and their respective labels for every connection. The LED lights up when practical. Connection points or defective elements will cease its corresponding LED from lighting up.
This device will assist you pinpoint the precise space the place the issue lies in your reminiscence stick.
To use this device,
- First, insert the CR 2032 Lithium (CMOS) Battery within the reminiscence module tester with the constructive facet up.
- Now, insert the RAM within the tester.
- Press and maintain the black button.
- A collection of LEDs will activate.
- Here, examine if any of those LEDs are turned off. If it’s, the reminiscence module is defective.
There is an opportunity that the LED on the tester itself is broken. To eradicate this risk, attempt testing one other reminiscence module within the tester. If the identical LED activates, the tester itself is probably going at fault.
Final Thoughts
If your system shows reminiscence errors after working just a few of the assessments talked about above, there might be just a few the explanation why this occurred.
If you might be testing your entire set of reminiscence kits at a time, make it possible for all of them are working on the identical reminiscence frequency and latency. Mixing RAM is also one of many causes behind reminiscence errors.
Besides this, the reminiscence slot is also behind the reminiscence error that you simply see from the above take a look at. So, earlier than leaping to the conclusion that the reminiscence module is defective, ensure to examine the reminiscence slots as properly.
In case of a slot problem, the rationale behind it might be an inside connection error or possibly even broken elements.
Check out more article on – How-To tutorial and latest highlights on – Gaming News