How To Fix System Interrupts 100% CPU Usage.
100% CPU utilization attributable to system interrupts signifies that some {hardware} element or device driver is failing and producing more interrupts than your system can deal with.
To repair this, you must first use instruments like Process Explorer to determine the defective element. Then, you possibly can update or roll back the device driver. Or if coping with defective {hardware}, you possibly can take away and substitute the gadgets.
I’ll stroll you thru this whole troubleshooting course of and in addition present some further basic fixes on this article.
Diagnose the Faulty Component
First of all, reverting any adjustments you made proper earlier than this downside began may very well be the simplest answer. Besides that, in case your system is non-responsive attributable to excessive CPU utilization, restarting ought to get it briefly working.
Process Explorer
Process Explorer enables you to take a deeper look contained in the System course of and determine which actual threads are maxing out the CPU utilization. This can lead you to the motive force producing all these interrupts.
- Download Process Explorer and launch it with the executable.
- Right-click the System course of and choose Properties.

- Google the entries with the very best CPU utilization to determine them. For reference, some regular culprits seen right here embrace
risdxc64.sys(card reader driver),avc3.sys(BitDefender driver),aswbidsdriver.sys(Avast driver), and so on.
- Troubleshoot the drivers with the fixes described additional within the article.


Driver Verifier
Driver Verifier stress assessments the drivers with the purpose of detecting any problematic conduct. In uncommon circumstances, this will result in additional crashes with the Driver Verifier Detected Violation loop. So, solely use this should you’ve tried different diagnostic strategies with no success.
With that out of the best way, right here’s a basic overview of the method:
- Create a system restore level earlier than you begin.
- Use Driver Verifier to check one or just a few non-Microsoft drivers at a time. The linked information gives step-by-step directions for the whole course of.

- After Driver Verifier generates a bugcheck, analyze the dump file to determine the defective driver.
- Reset Driver Verifier, then troubleshoot the motive force that you just simply recognized.

Third-Party Tools
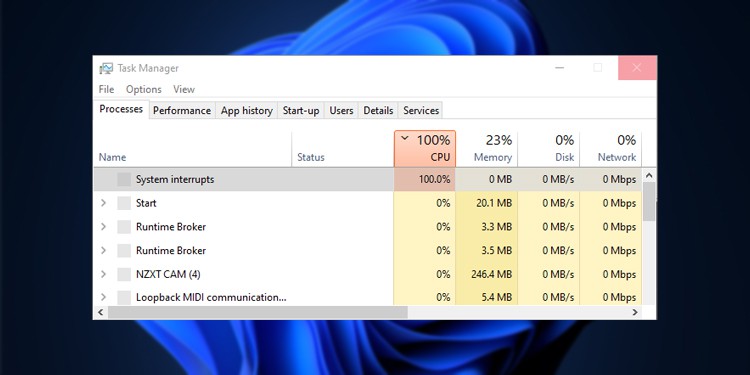
The System Interrupts merchandise within the Task Manager represents the whole CPU utilization of all interrupts. Interrupts are regular as they’re how your gadgets talk with the CPU.
But the CPU is meant to deal with these swiftly by invoking interrupt handlers. They postpone lower-priority duties till the interrupts are handled. This mechanism is known as Deferred Procedure Call (DPC).

Third-party instruments like LatencyMon can rely the DPC per driver. This enables you to determine the drivers which can be possible inflicting the very best variety of interruptions. If Microsoft’s instruments don’t make it easier to, you possibly can take a look at such third-party choices.
Disable, Remove or Replace Devices
Note: This part assumes that you just’re dealing with a {hardware} problem. If you watched the issue is on the software program finish (drivers or anything), be at liberty to check out the opposite options first.
If you’ve adopted the steps up to now, you must have just a few potential culprits. I’ve seen drivers associated to every thing from network adapters and webcams to displays, GPUs, and mice trigger this downside.
So, undergo your wrongdoer listing, beginning with non-critical gadgets just like the webcam or network adapter. For such gadgets, it’ll be quickest to disable them from the Device Manager.
- Press Win + R, kind
devmgmt.msc, and press Enter. - Right-click the primary device and choose Disable device.

- Check the CPU utilization within the Task Manager.
- You can re-enable the device should you don’t discover any change within the CPU utilization. Afterward, repeat these steps for the opposite gadgets.

With sure parts just like the mouse or keyboard, you must unplug the gadgets from their ports in an effort to simply reconnect them later. Similarly, with important parts just like the GPU or the storage drive, you’ll must briefly substitute them with spare elements.
Troubleshoot Device Drivers
When a defective device driver is the foundation of the excessive CPU utilization, updating or rolling back the motive force normally fixes the issue.
- To begin, you must update the device drivers from the Device Manager.

- If accessible, you can even obtain the drivers instantly from the device producer or use their Driver Manager software.
- If updating to the newest model doesn’t assist, take into account reverting to an older steady model as an alternative.

- If that doesn’t assist both, uninstall the motive force in order that your system makes use of the default drivers from Microsoft. These are meant for compatibility quite than efficiency, in order that they’ll work most often.


Troubleshoot ACPI Driver (Situational)
Refer to the analysis outcomes from the beginning and test if the Acpi.sys driver was inflicting excessive CPU utilization. It is without doubt one of the commonest culprits, whereas additionally being one of the vital tough ones to efficiently debug.
This is as a result of the ACPI driver gives an interface for energy administration of Plug and Play (PnP) gadgets, and even SoC gadgets in some circumstances. As your system has a whole lot of ACPI-managed gadgets, discovering the problematic one gained’t be simple.
Here are some fixes which can be more than likely that will help you on this case:
- Update your BIOS model to make sure the most effective {hardware} compatibility and patch any bugs.

- Load the default BIOS settings afterward to ensure you’re using the default energy configurations.

- On Intel techniques, putting in the Intel RST driver can assist. Even should you don’t use RAID, it’s value a strive as merely putting in this storage controller driver has mounted this problem for a lot of customers.


General Fixes
At this level, you have got two methods to proceed. You might create a reside Linux USB and boot from it. If you face excessive CPU utilization in Linux as properly, you’ve received some {hardware} that it’s worthwhile to substitute.
But if the CPU utilization downside exists in Windows solely, that confirms that there’s some device driver problem or software program incompatibility. In this case, listed here are some basic fixes which can be confirmed to work:
- Stop Diagnostic Policy Service from the Services Manager.

- Restart or briefly disable Windows Defender. It typically conflicts with companies like Easy Anti-Cheat, which results in excessive CPU utilization.
- Ensure Windows is up-to-date.
- If the issue nonetheless persists, backup your recordsdata to an exterior drive and reinstall Windows.

Check out more article on – How-To tutorial and latest highlights on – Gaming News