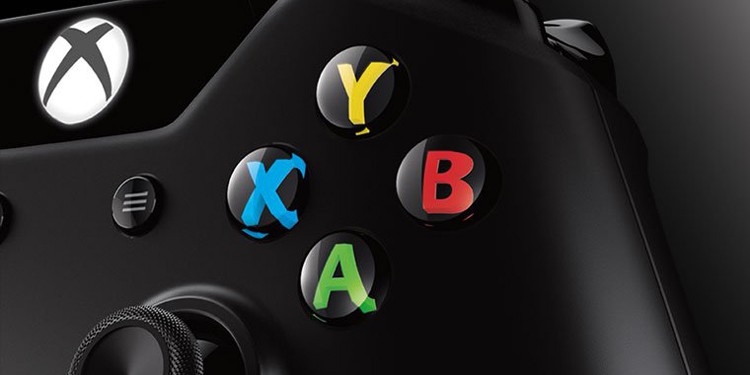
How To Calibrate Xbox One Controller On Windows PC?.
Microsoft has performed a unbelievable job to make sure Xbox and Windows work collectively. Pairing controllers to your PC is usually tremendous simple, typically a matter of plugging a USB cable or turning on the Bluetooth. However, generally, you could have to intervene for some guide adjustments.
Gamers know the way necessary it’s to keep up and care for his or her gear. Part of the job is ensuring your controllers are in nice situation. In specific, fallacious settings can injury your aiming, precision, motion, and more.
Therefore, one of the vital important guide adjustments is calibrating Xbox One controllers. It fixes axis points, drift motion, thumbstick sensitivity, and related. In essence, recalibrating the controller will convey back the sleek really feel of a manufacturing unit situation controller.

Why Is My Xbox One Controller Not Calibrated?
You will know you might want to calibrate Xbox One controller whenever you’re having hassle enjoying. Wrong calibration settings produce random motion throughout your playtime.
In specific, the problem might depend on the Axis, which is your X-Y-Z motion and perspective.
A non-calibrated controller is a typical problem on these events:
- You’re using a brand new controller in your Windows PC
- You’re using a really outdated controller in your Windows PC
- You haven’t used the controller for some time in your PC
- Steam, Epic Games, or Windows robotically modified your controller’s settings after an update
- There’s bodily injury like put on, tear, mud or rust within the controller.
For all causes, the steps are the identical. Bear in thoughts that Xbox One calibration has nothing to do along with your PC’s drivers or the controller’s firmware. Either approach, protecting each updated is best to keep away from connectivity points.

How to Calibrate Xbox One Controller?
Windows 10 and Windows 11 PCs have a built-in program for the job, the Calibration Tool.
This works with any controller you plug through a USB cable, together with any PlayStation, Xbox One, Xbox Series, Nintendo Switch, or any generic controller. So, our directions might help you calibrate any controller you might have.
There’re 3 ways to calibrate Xbox One controller on Windows 10:
- Reset the settings to default
- Calibrate the controller manually
- Calibrate the controller through Steam
Before making an attempt one of many three options, please make sure that your Windows PC acknowledges the controller.
How to Reset the Xbox One Controller Calibration?
The first methodology is resetting the settings. It’s a good suggestion to check it earlier than manually calibrating the peripheral, as it may be robust. Additionally, you’ll be able to at all times interact the choice if the guide calibration goes fallacious.
- Plug your controller into the PC through a USB cable.
These steps don’t work wi-fi or through Bluetooth. Only by connecting a controller to the PC can Windows interact the Calibration device. - Open the Control Panel
Type “Control Panel” in your Windows search bar and open “Control Panel.” - Go to “Devices and Printer.”

- Go to your Game Controller Settings

- Go to Properties
Inside the controller’s menu, click on on Properties on the backside proper. - Go to Settings and Reset to Default
Click on the prime left for the Settings menu. The menu has two choices: Reset to Default and Calibrate. Click on Reset to Default.
- Close the device
After deciding on the Default choice, press OK to shut the device and OK once more. - Test the calibration
Finally, check your controller by enjoying in your PC. There’s no higher technique to see its efficiency than truly using it.


If it’s not working correctly, please proceed to the subsequent methodology. Alternatively, you would begin with a guide calibrate as a substitute of resetting to default.
How to Calibrate Xbox One Controller Manually?
We’re going back to the identical menu as earlier than for a guide calibration:
- Go to Control Panel
- Select Devices and Printers
- Go to your controller’s Game Controller Settings
Remember to right-click on the peripheral on the Devices and Printers {hardware} menu. Then, click on on the primary choice within the drop-down menu. - Choose to Calibrate on Settings

Back on the settings menu, we’re now to press the Calibrate choice. - Follow the wizard

Your PC will launch a calibration wizard. Click next, and comply with the directions. - Center the D-Pad

The first instruction is leaving the D-Pad (or the left thumbstick) centered after which urgent a button on the controller. After you’re performed, click on Next. - Find the corners with the D-Pad

Next, you might want to transfer the D-Pad (the left thumbstick) across the corners. Then, press a button on the controller and click on next. Additionally, you’ll be able to test the Display Raw information field beneath to see your progress. - Verify D-Pad middle

You have to repeat a earlier step by leaving the left thumbstick on the middle. - Calibrate the Z-Axis

The next step is transferring the Z-Axis up and down. That means transferring the left and proper sticks all the best way after which down. After you end, press a button in your controller, and click on next. Once once more, test the uncooked information field.The wizard will show a share field, letting you recognize whenever you end calibrating the Z-Axis motion settings.
- Calibrate the X-Axis
Now, it’s time to arrange the X Rotation. That means transferring the appropriate thumbstick left and proper. After you end, press a button on the controller, and click on on next.
As earlier than, the wizard showcases a share bar to let you recognize your completion. - Calibrate the Y-Axis

Now it’s time to repair the Y-Rotation. You can transfer the appropriate thumbstick down and up. After you end, press a controller button after which click on on Next. - Finish the method

Lastly, click on on Finish to shut the wizard and save its settings. - Test the settings

Now, go to the Test tab and check the calibration. You can press your buttons to strive it out. When you end, click on on Apply after which on OK. - Test the controller on video games
If all the things goes your approach, you would check the controller in your video games. Often, after you calibrate Xbox One controller, will probably be nearly as good as new.
How to Calibrate Xbox One Controller on Steam?
There’re numerous third-party software program calibration options, however we suggest using Stream to calibrate the Xbox One controller. Bear in thoughts that the Epic Games launcher doesn’t have calibration choices.
So, we’re recommending Valve’s storefront, as most PC video games have already got a Steam account and use the app to purchase and play video games.
Moreover, Steam means that you can fine-tune the controller on a game-by-game foundation, even when these video games don’t assist USB controllers. It’s an excellent all-around device to make use of.
Here’re the steps:
- Open the Steam app

- Open Big Picture Mode

- Go to Settings

- Go to Controller Settings

- Open the calibration device

Checking the Configuration field of a controller will make Steam set up the drivers it wants. However, it would ask you to restart the app to use the adjustments. - Enable “Lock Out Joystick Navigation.”

- Enable the Full Auto Calibration

- Follow the calibration wizard directions

When the wizard finishes, Steam will shut it robotically. - Select Calibrate once more
Now, we’re going by way of a more complicated course of. For that, you might want to click on on the Calibrate choice once more. - Lock Joystick Navigation

- Adjust the sticks’ “deadzones”

It helps worn-out sticks to operate if they’ll’t sit nonetheless. If your controller is fresh-new, you’ll be able to go away the setting at zero or close to zero. Better but, alter it till you’re feeling comfy.
- Return to the Controller Settings menu
After adjusting the deadzones, return to the Controller Settings menu. There’re, you’ll see the video games you might have in your library, and you may select every one to regulate the precise settings you need.


Check out more article on – How-To tutorial and latest highlights on – Gaming News