How do I Make a Brochure on Google Docs on PC and Mobile App.
Google Docs has plenty of built-in instruments that can assist you create the right word paperwork for skilled use. Released back in 2006, Google’s on-line office apps have since then expanded into varied territories and so they can now do much more.
You can create articles, analysis papers, letters, resumes, and much more in Google Docs, however what about brochures? Let’s discover out!
Can you make a brochure on Google Docs?
Yes, you possibly can create brochures in Google Docs however you should have a restricted set of customizations accessible at your disposal. If you’re trying to create preliminary drafts that may then be forwarded to designers then it’s the excellent instrument for you.
However, in case you’re trying to solely use Docs to create brochures you then may need to make a number of compromises. Either approach, we’re right here that can assist you together with the method and you should utilize some nifty tips to your benefit to get the brochure that you simply had envisioned.
: How do I rely phrases on Google Docs
Is a brochure the identical as a leaflet or pamphlet?
A leaflet is often a single sheet of A6 paper that’s used to advertise small or midsize companies. They are slightly more presentable than a flyer however aren’t practically as ornamental as a brochure.
A brochure or pamphlet is a set of pages, which is created primarily to let potential consumers and buyers know more concerning the imaginative and prescient of the corporate and essential details about the involved products. A brochure is so much more durable to create, so some famend manufacturers and organizations provide their companies for a similar.
: How do I Flip Images in Google Docs on Mobile and PC
How do I make a brochure on PC
We will cowl the 2 most typical forms of brochures on this information. In case you want to make a more specialised brochure then you should utilize a mixture of the 2 guides beneath that can assist you out with the method.
If you’re on a PC or mac then right here’s how one can create varied sorts of brochure in Google Docs relying in your necessities. Follow one of many guides beneath that most closely fits your present wants.
Can I create a double-sided tri-fold brochure?
Yes, you possibly can create a double-sided trifold brochure. This will take a number of tries although relying in your printer. Once you’ve created your essential brochure using the information beneath, you possibly can take the printed paper, flip it the wrong way up and insert it on the backside of your printer pile so that it’s the next web page picked up by your printer.
Doing so will print the second web page on the bottom of the primary web page. You can then reduce and fold the identical to create a double-sided trifold brochure. We advocate you retain your margins and textual content aligned for each pages to make sure that the whole lot is printed as wanted.
Having inconsistent margins or indents can lead to misaligned pages that may not be folded with out overlapping or slicing of the textual content on the opposite facet.
How do I create a tri-fold brochure in Google Docs
Here’s how one can create a tri-fold brochure in Google Docs and customise it in keeping with your liking.
Step #01: Tune in your web page sizes
Let’s get your Page Setup to print a tri-fold brochure. Follow the steps beneath that can assist you together with the method.
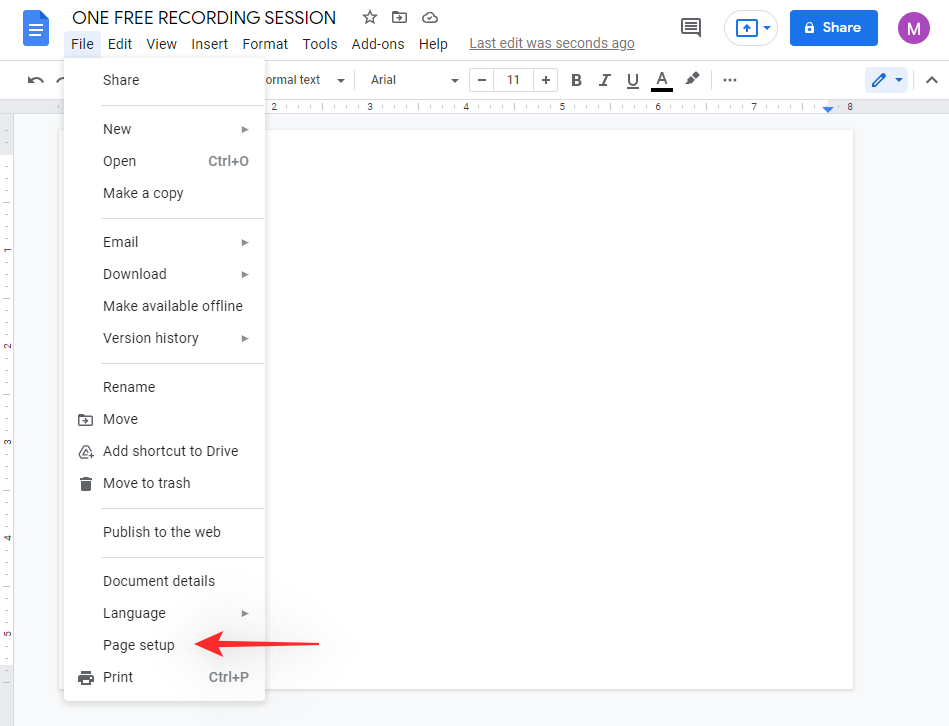
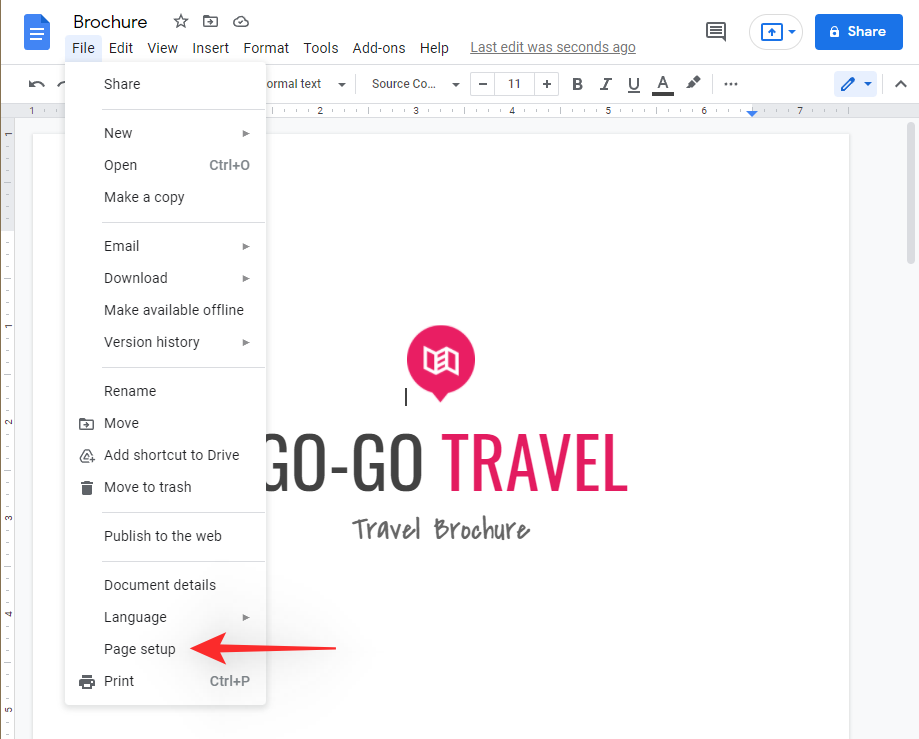
Open Google Docs in your desktop browser and click on on ‘File’ within the high left nook.
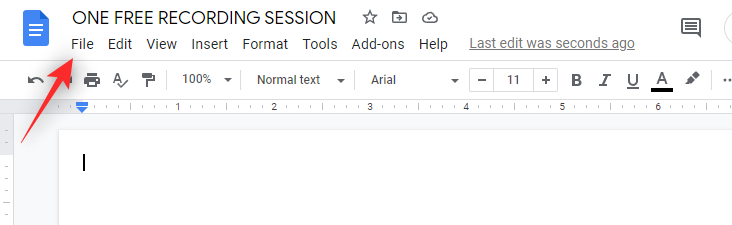
Click and choose ‘Page Setup’ on the backside.
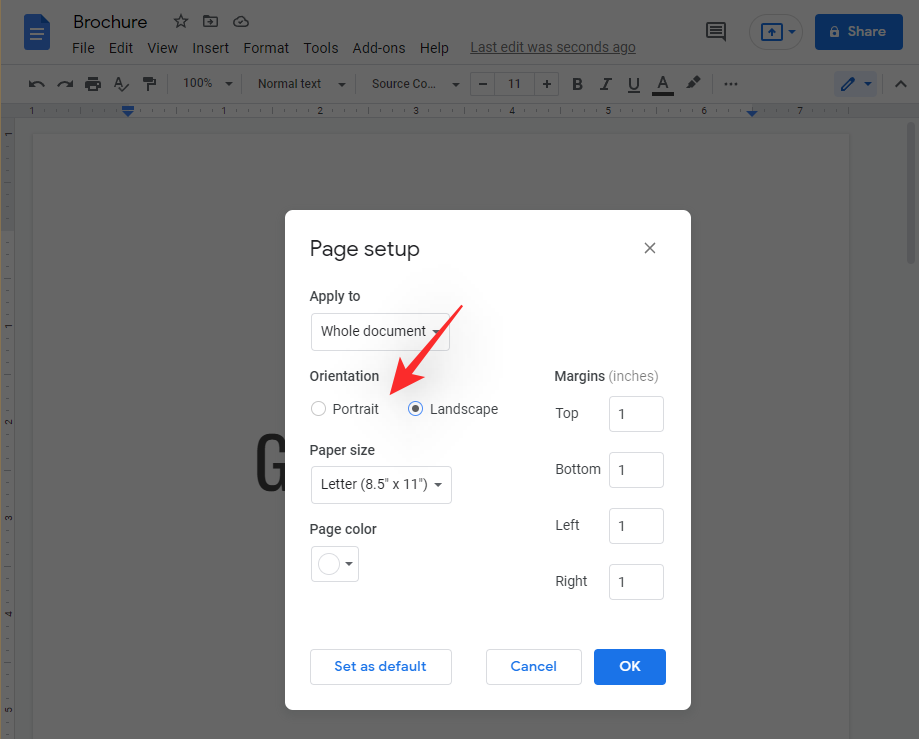
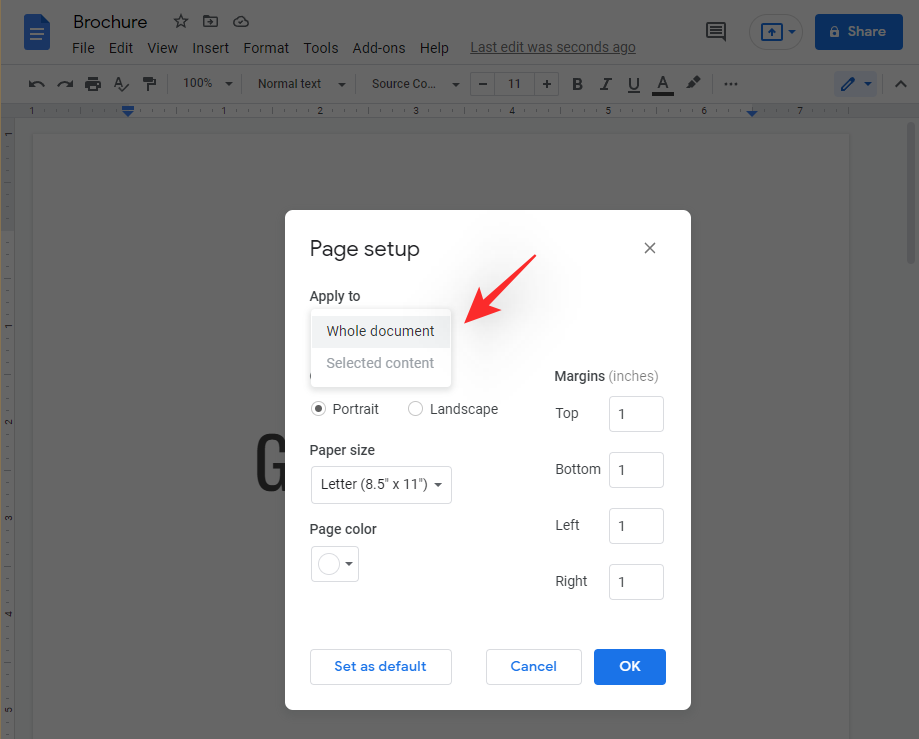
Ensure that ‘Whole document’ is chosen on the high. If not, click on on the drop-down menu and choose the identical.
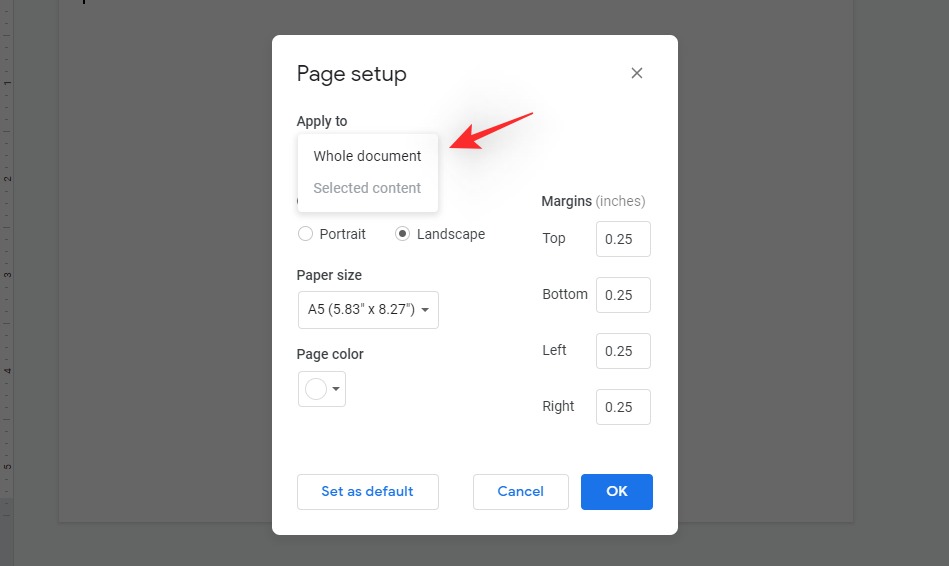
Set your orientation as ‘Landscape’ by clicking on the identical.
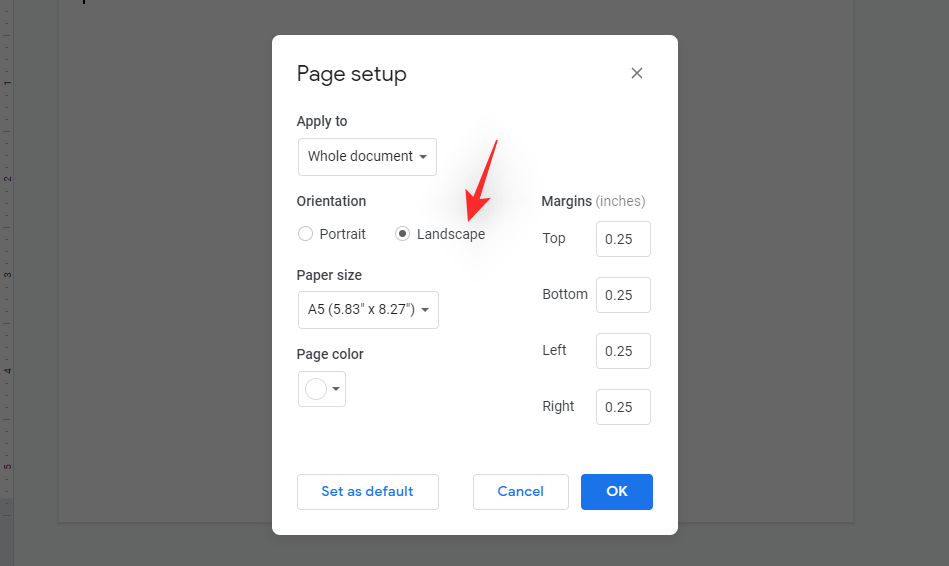
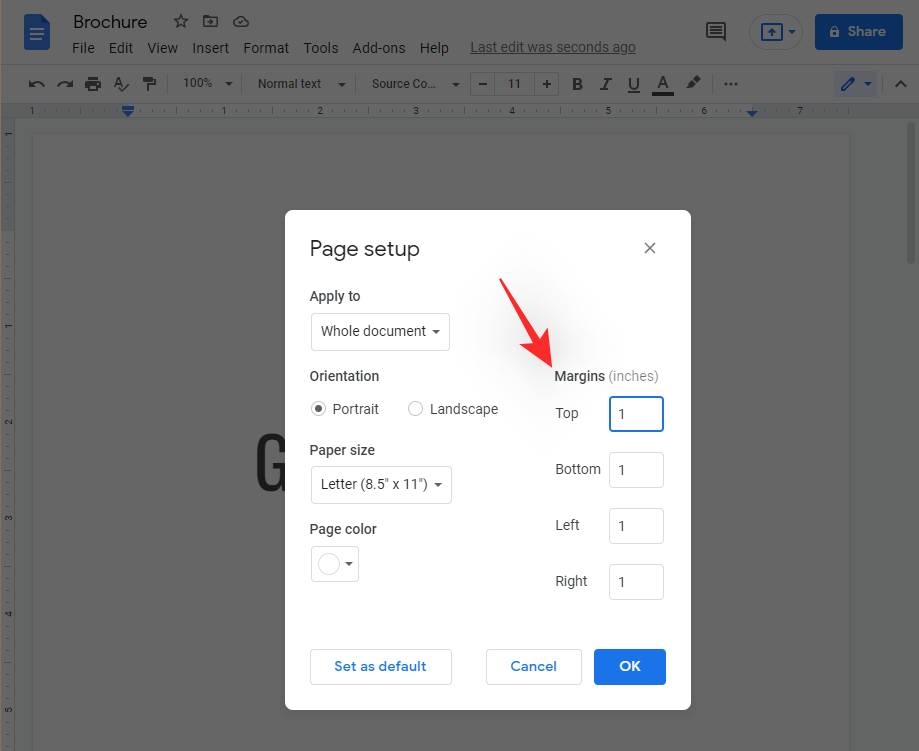
We will now set your margins to 0.25, this may give us the utmost quantity of area on the web page.
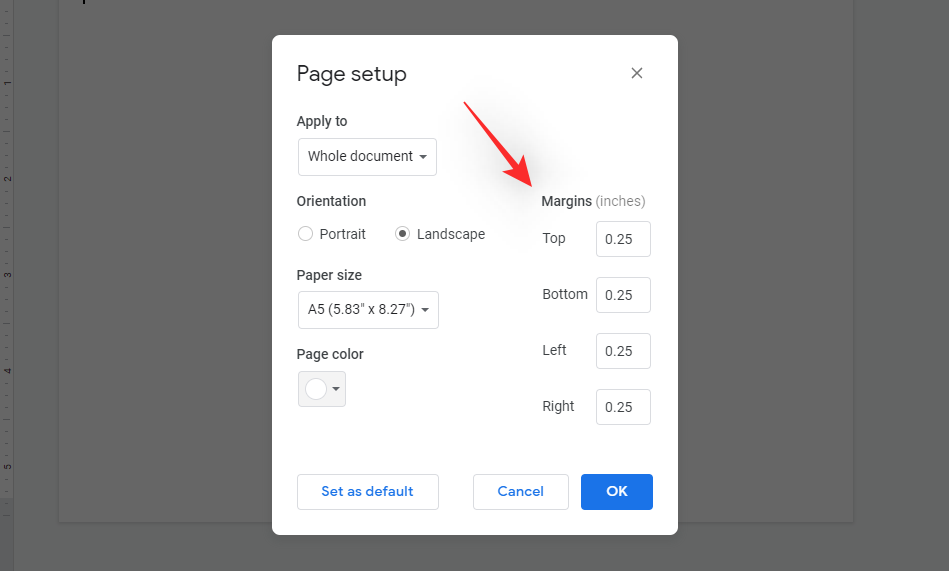
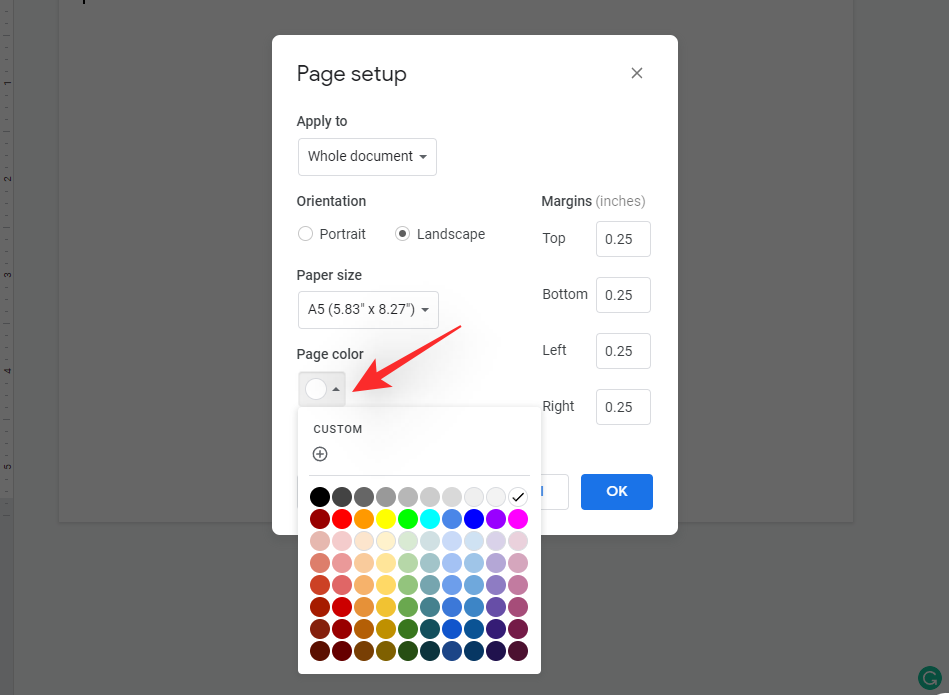
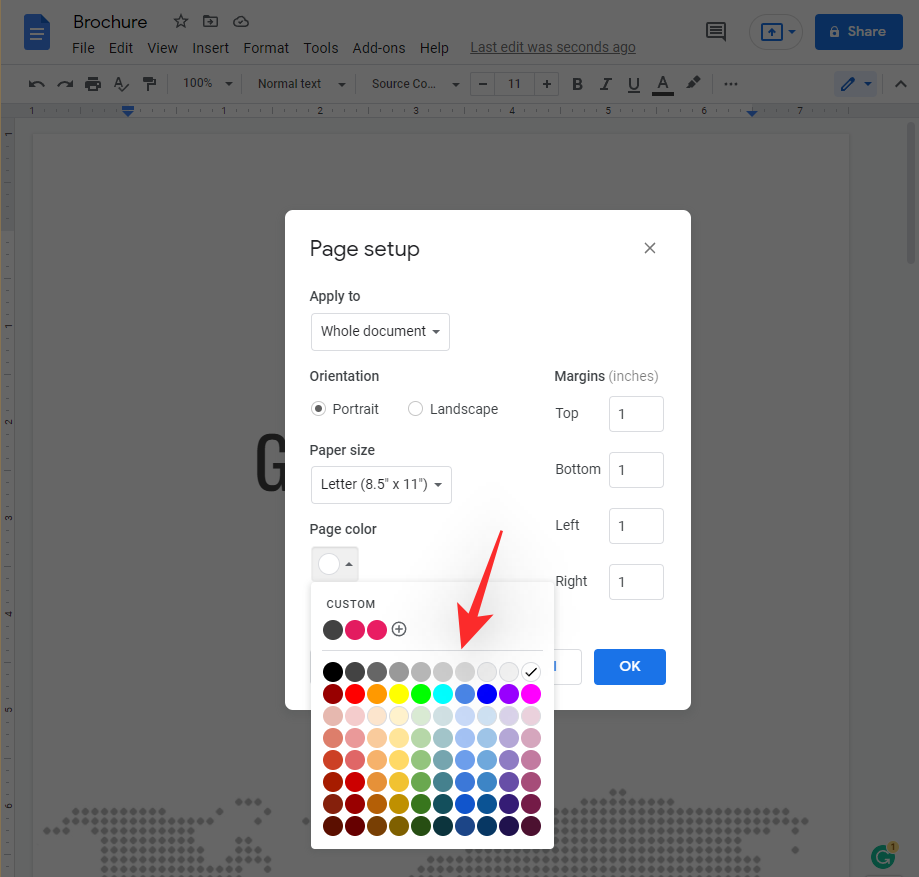
Click on the drop-down menu for ‘Page color’ and alter the colour of the web page if wanted.
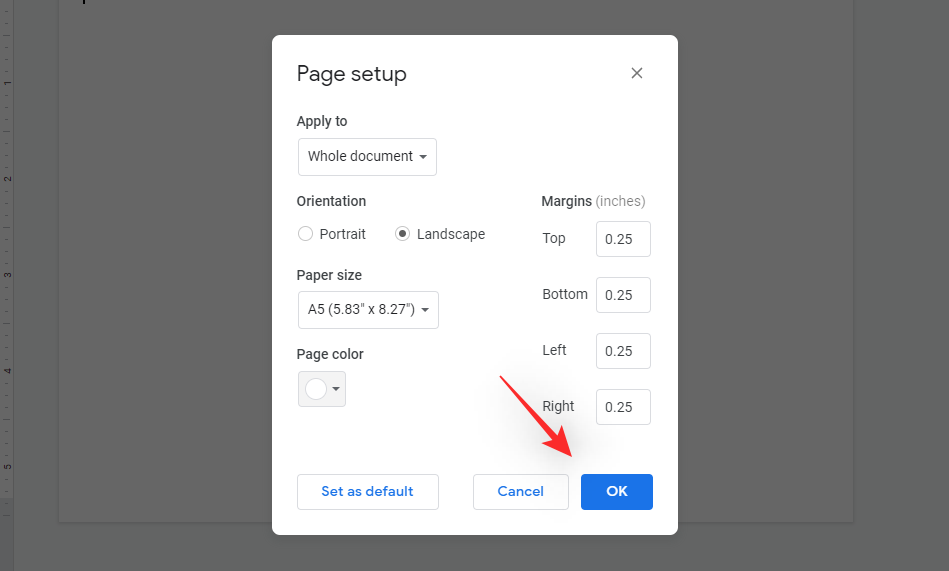
Click on ‘Ok’ as soon as you might be executed.
You ought to now have a web page setup as proven beneath. Place the cursor within the first line as proven beneath. Double click on on the empty area above the road.
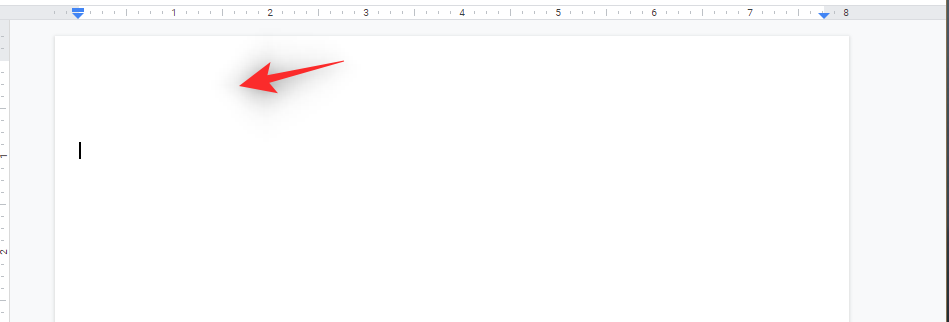
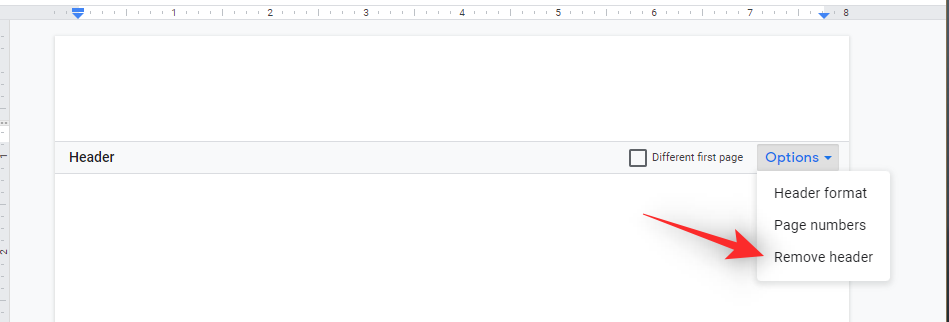
Now click on on ‘Options’ after which choose ‘Remove header’.
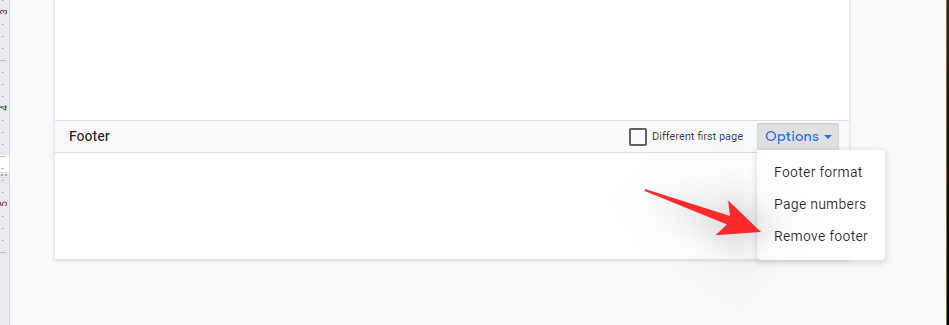
Similarly double click on on the underside of your doc. Select ‘Options’ once more and this time click on on ‘Remove footer’.
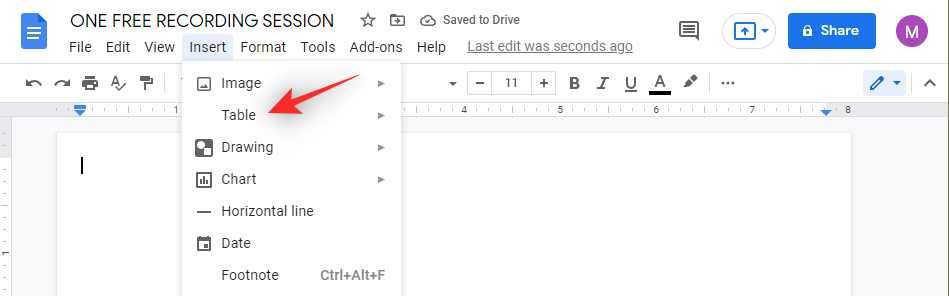
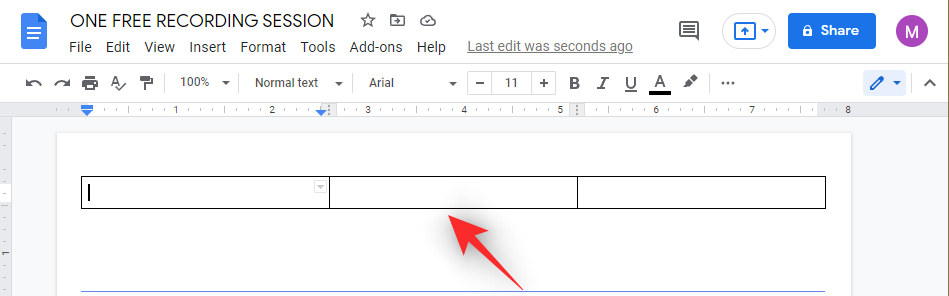
Click on ‘Insert’ on the high and choose ‘Table’.
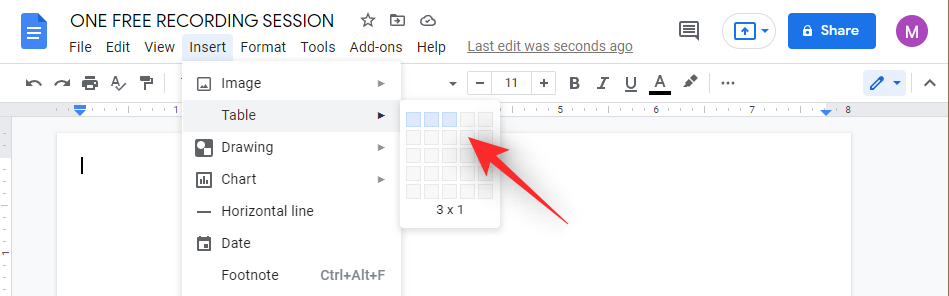
Add a 3×1 desk by deciding on the columns as proven beneath.
Highlight the underside line of your ‘Table’ and drag it to the underside of the web page.
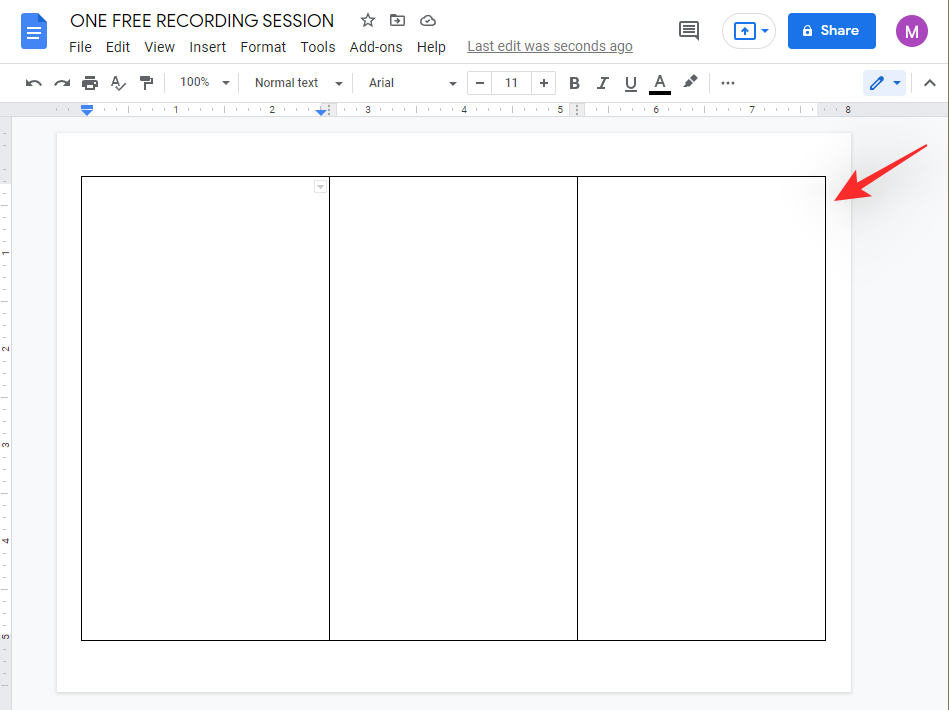
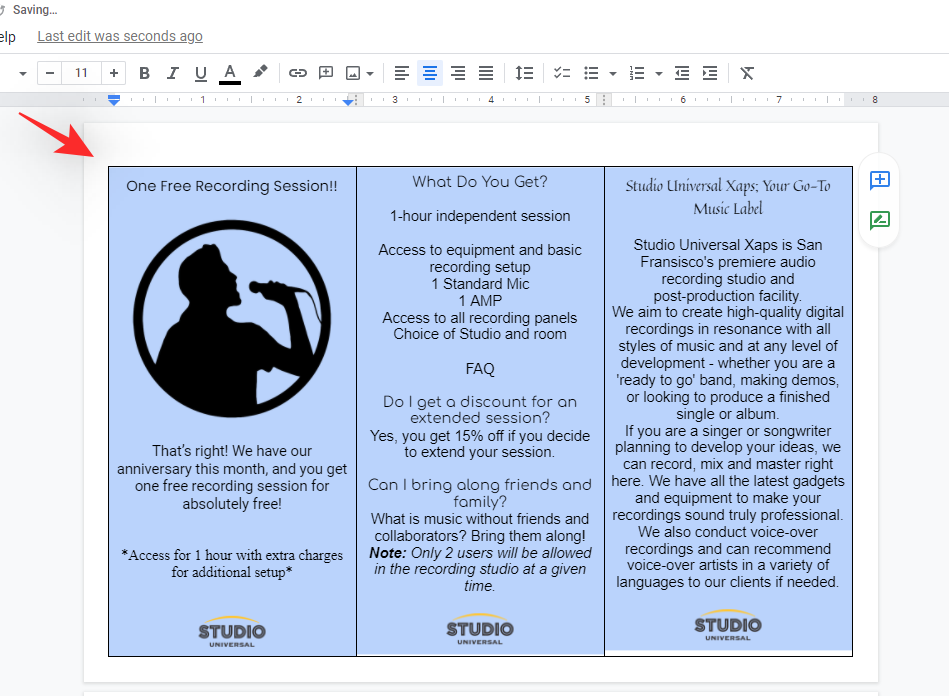
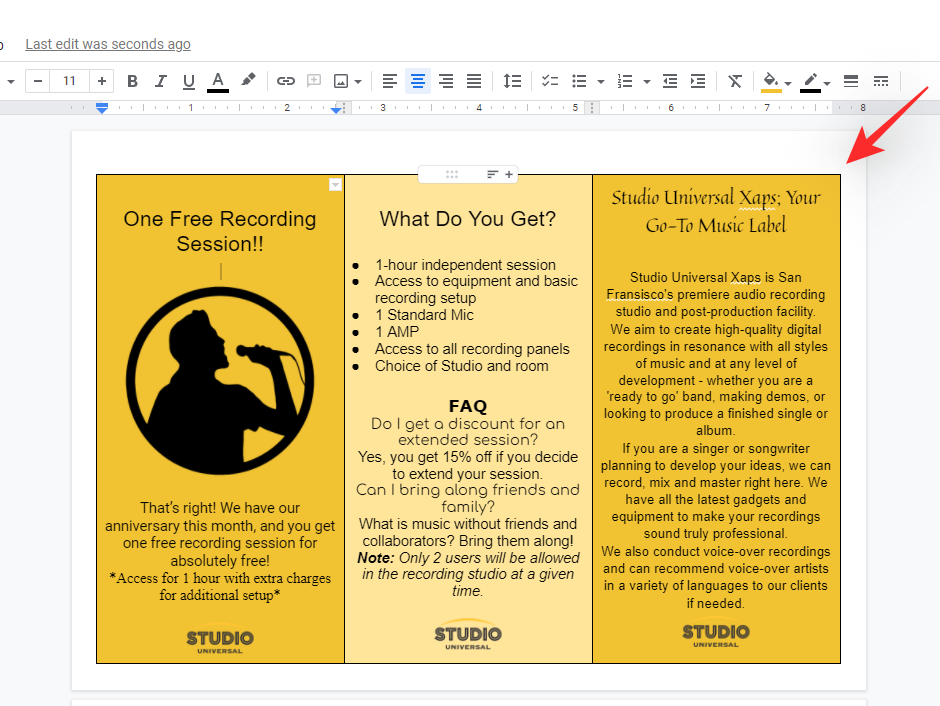
We now have an overview in your trifold brochure. The first column would be the first web page, the center column would be the web page in your physique and the third column can be your final web page of the brochure.
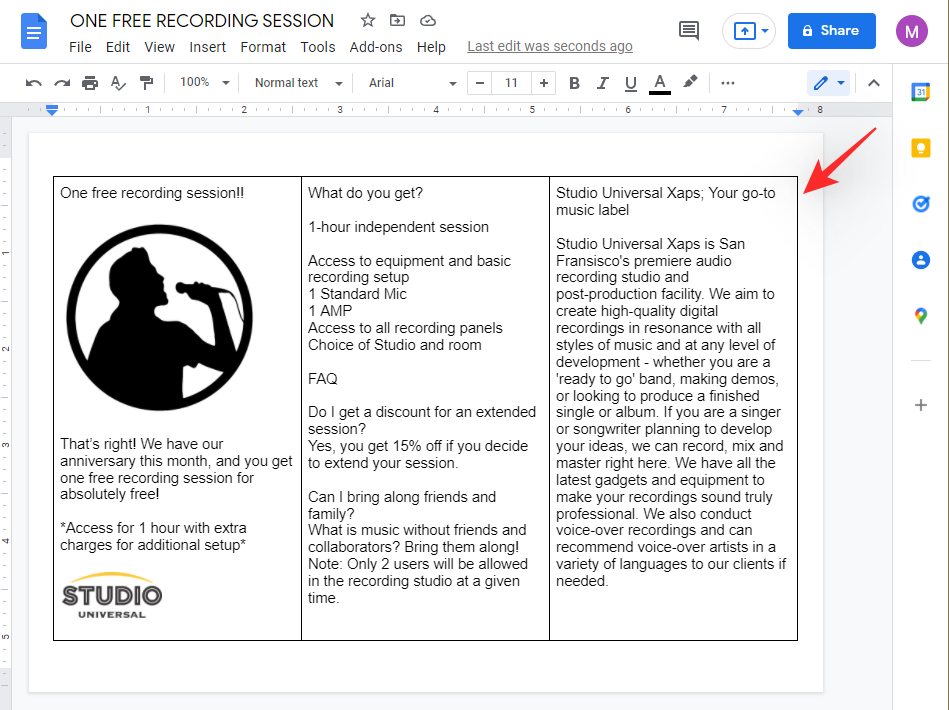
Add textual content and pictures to your brochure as wanted.
You can then use the following part to format your textual content and desk relying in your ultimate imaginative and prescient for the brochure.
Step #02: Format your textual content and desk
You have the next choices at your disposal when formatting your textual content and desk in Google Docs.
Use both of the steps beneath relying on the formatting you want to apply to your textual content and desk.
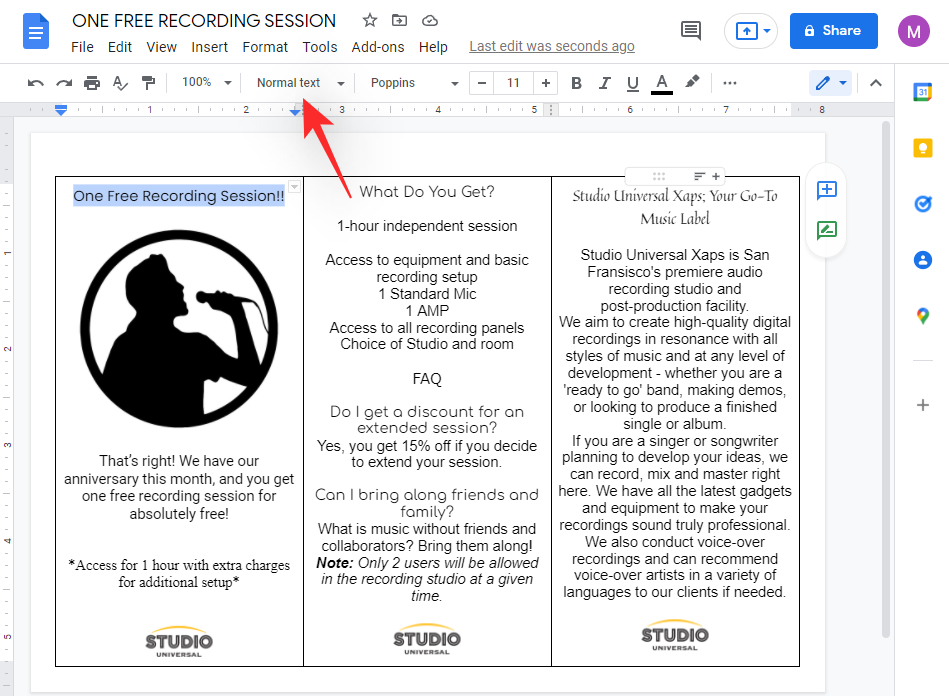
2.1 Change Font
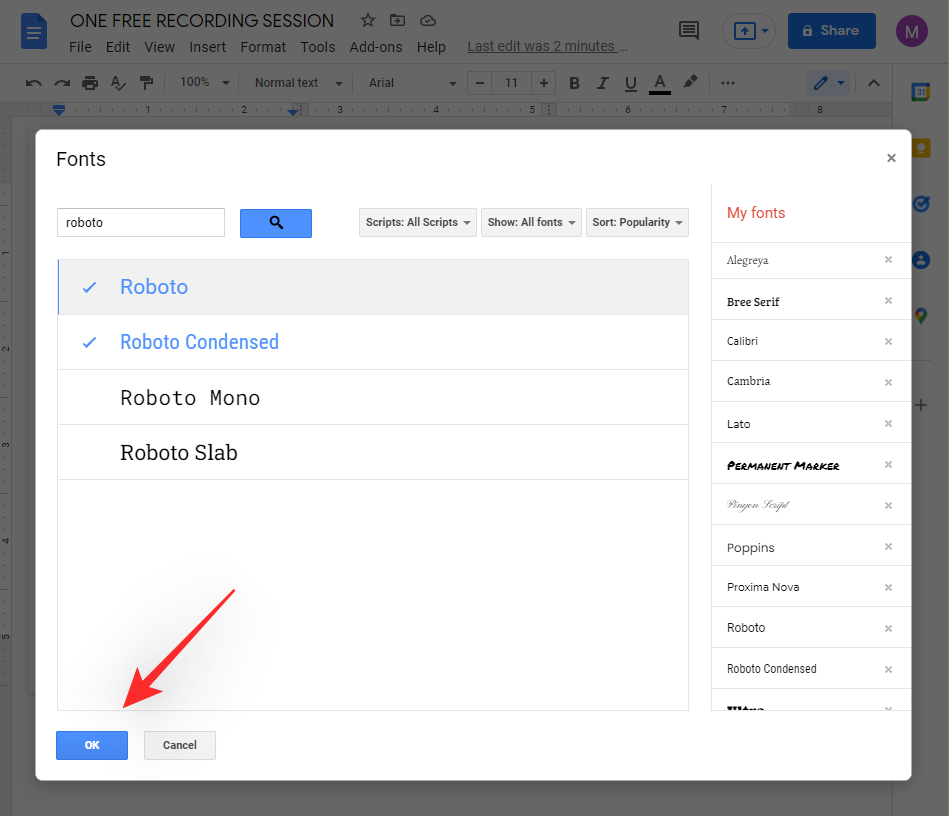
You can change the Font on a per-text foundation. This means that you can use completely different fonts in your physique, title, lists, and more. Simply choose the textual content you must change the font for, and click on on the drop-down menu for Fonts as proven beneath.
Now discover and click on on the font you want to use.
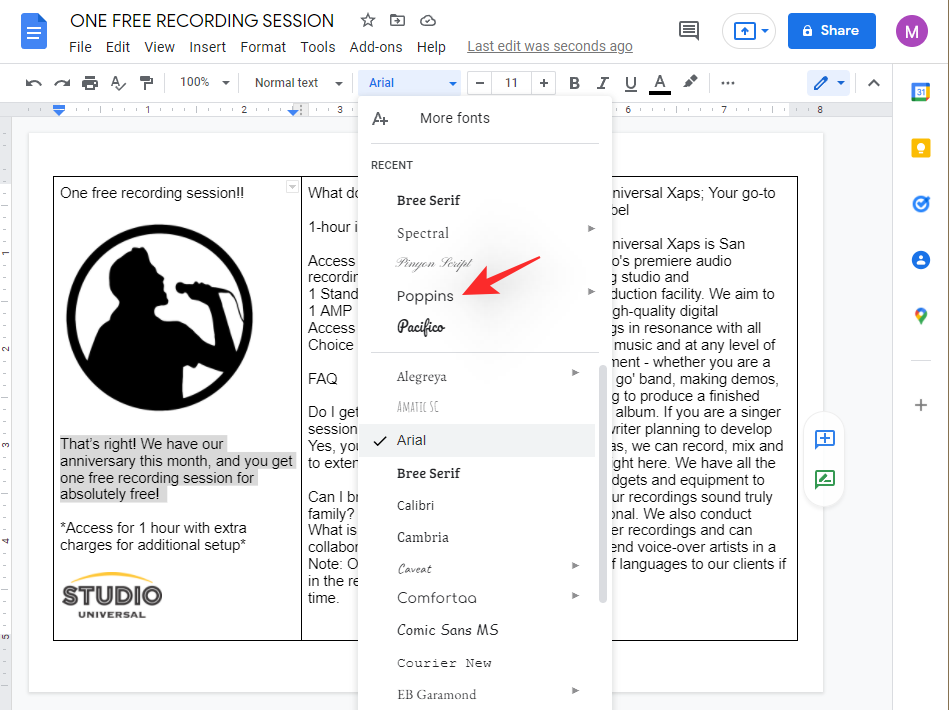
If you might be unable to discover a font to your liking, then click on on ‘More fonts’ on the high.
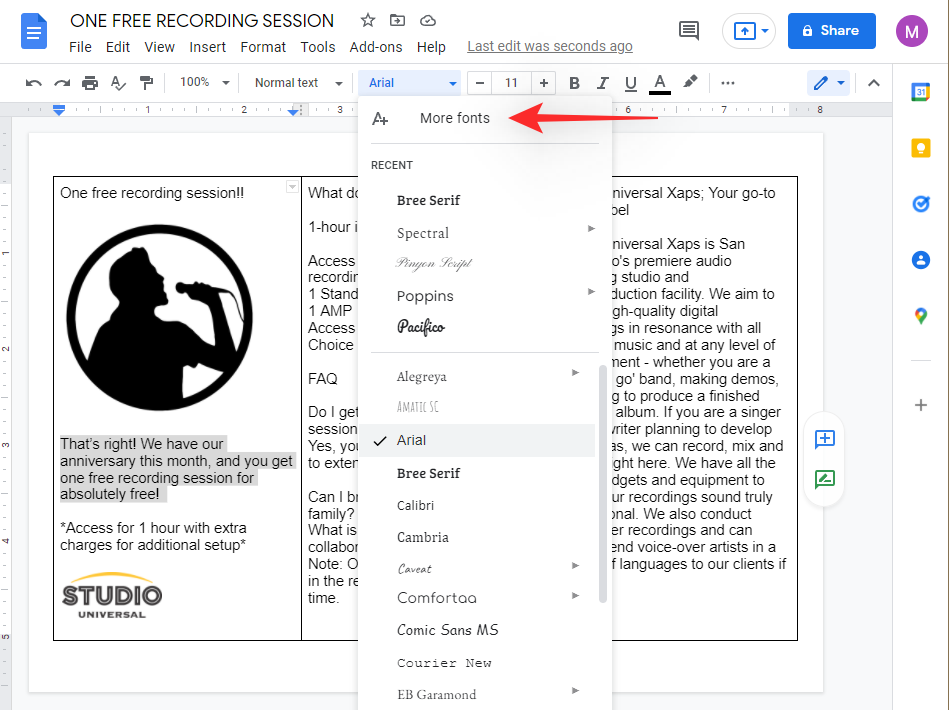
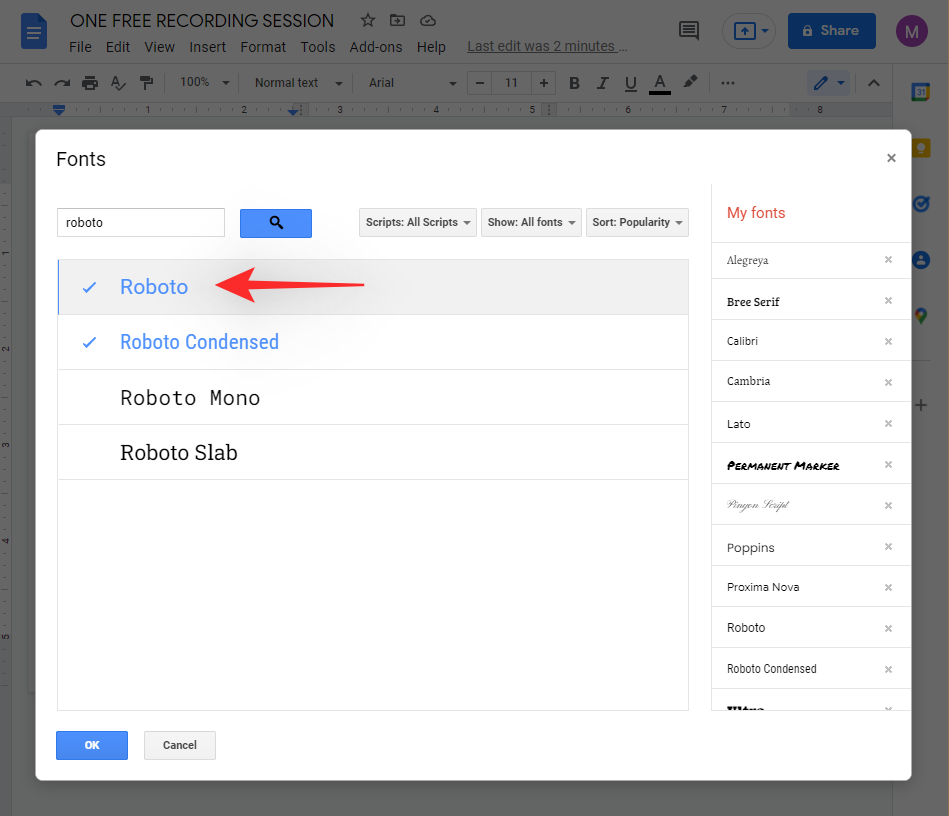
Use the search bar on the high to seek for your font.
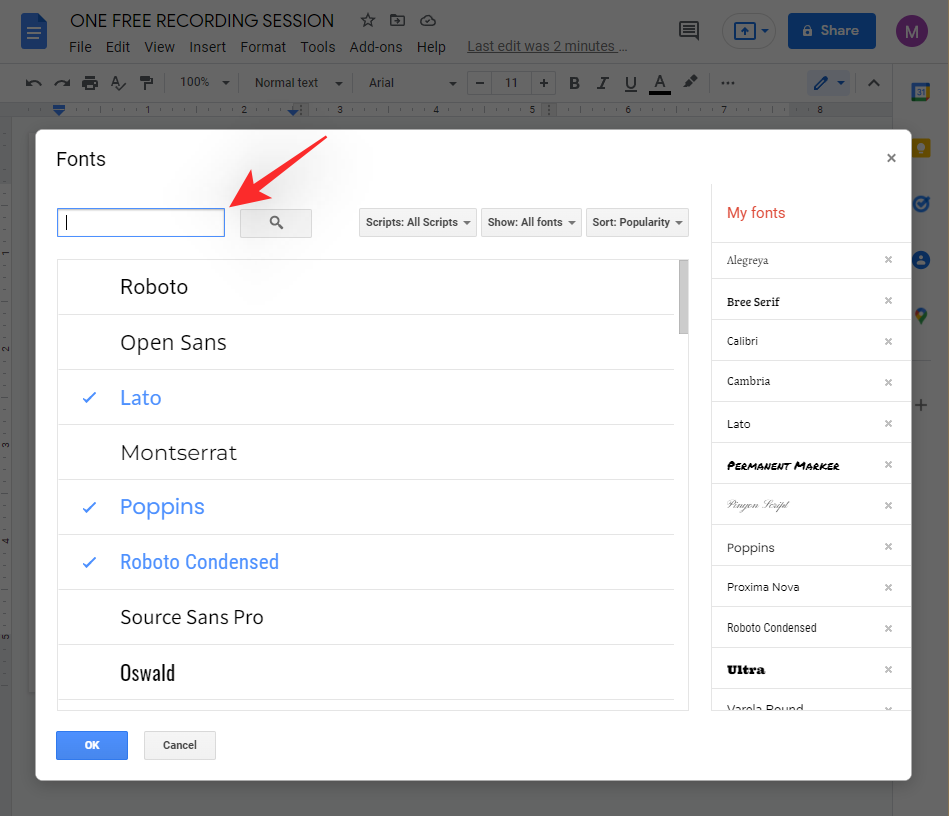
Once discovered, click on on it and it will likely be mechanically added to your account.
Click on ‘OK’.
You can now proceed formatting all different textual content in your brochure primarily based in your necessities.
2.2 Change Alignment
You can change the alignment of your textual content to create a more symmetrical design in your brochure. You can even use it to create area for images that we are able to add later to the brochure.
Select the specified textual content and click on on both of the icons proven beneath to alter the alignment.

The icons are for the next alignments when counting them from the left.
- Left Alignment
- Center Alignment
- Right Alignment
- Justified
2.3 Change Text type
Text kinds will help you apply font-weight and spacing preset to your textual content. While largely meant for weblog posts and digital publications, you should utilize it to your benefit to use 1 click on kinds to completely different components of your textual content. Use the steps beneath to get you began.
Select the specified textual content after which click on on the drop-down menu for textual content type beside the font.
Now select the specified type. Their listings are indicative of the kinds that can be utilized to your textual content.
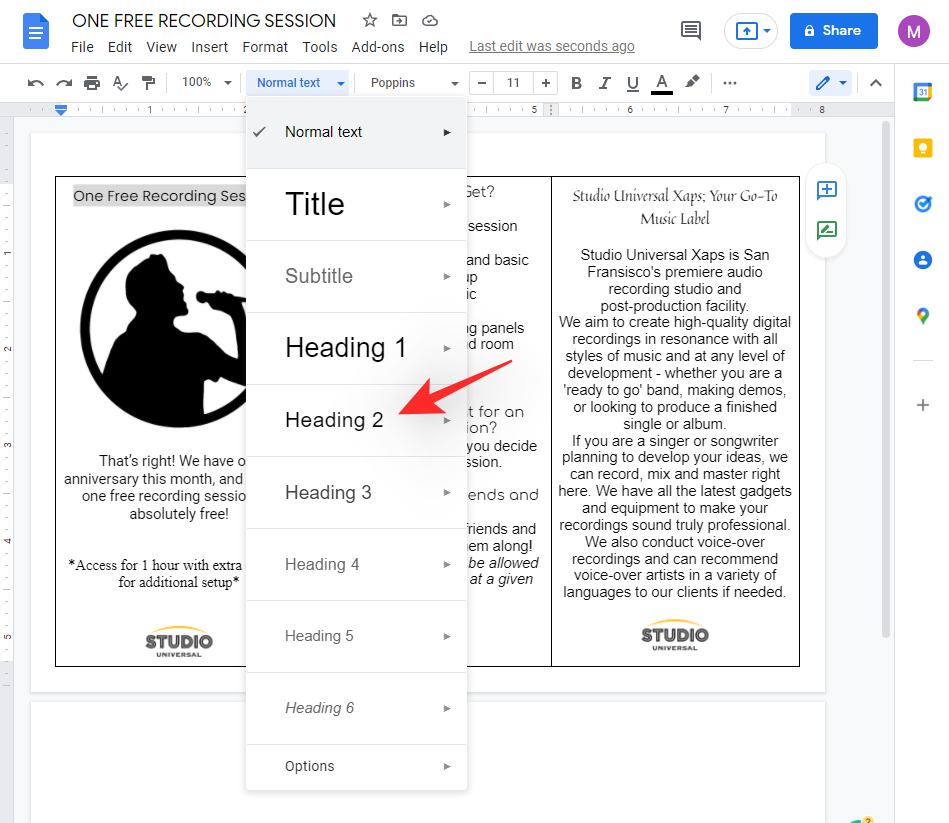
Repeat the steps above to use textual content kinds to different components of your brochure as effectively.
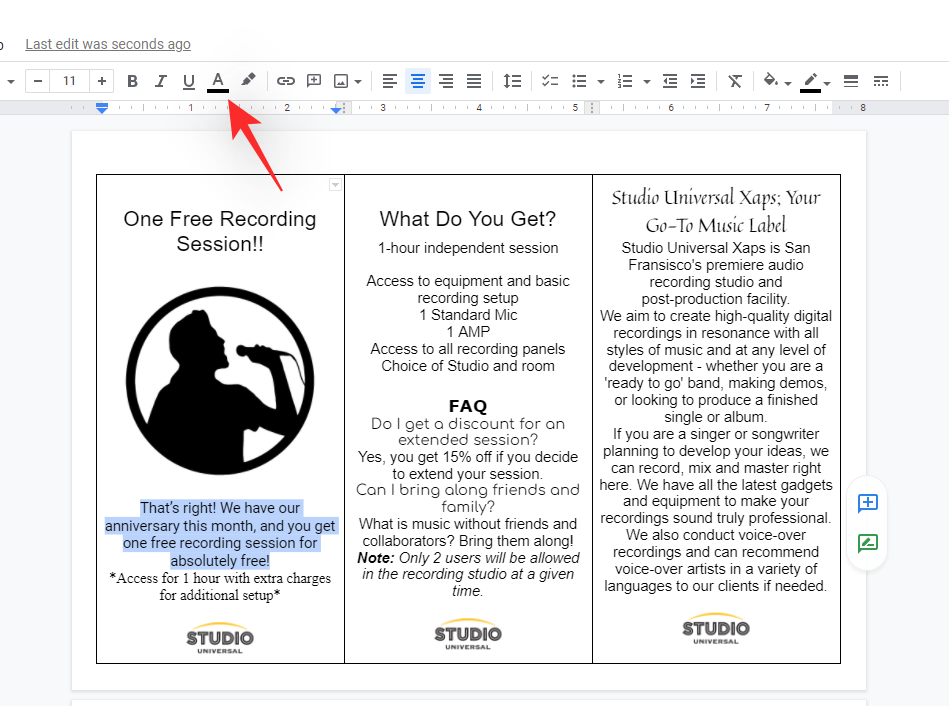
2.4 Change font colour and spotlight
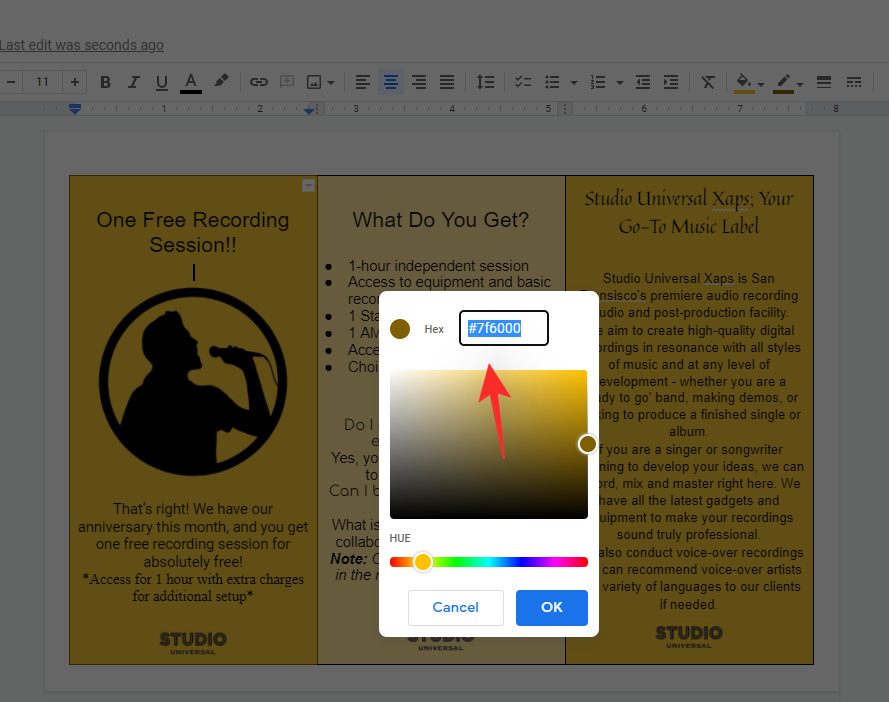
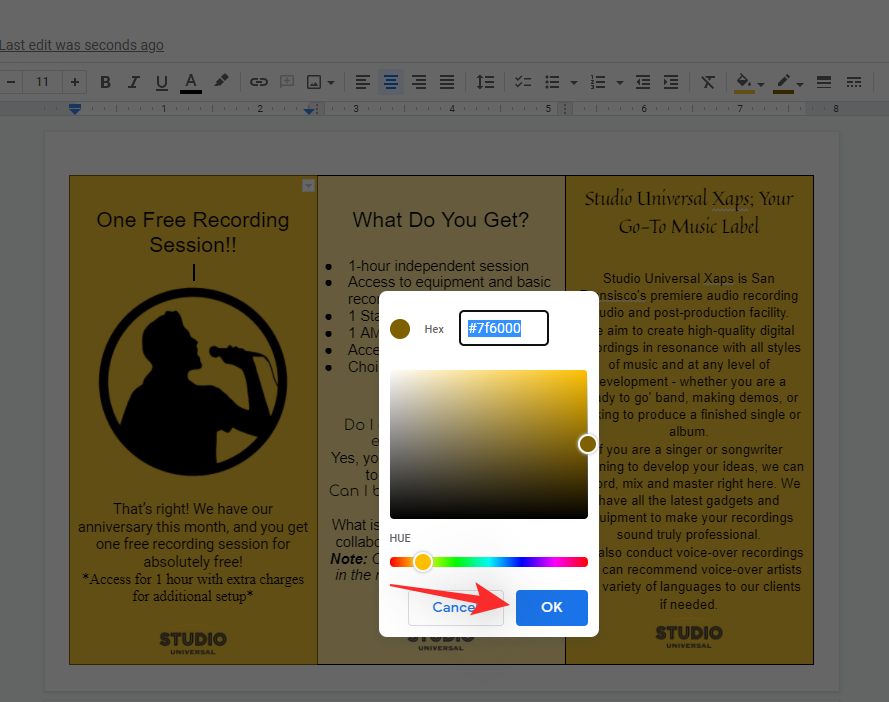
We can now apply colour or spotlight the textual content relying in your wants. We advocate you do that with the background colour of your brochure in thoughts. If you want to set the background colour first then skip to the part beneath after which change your font colour using the steps beneath.
Select the textual content you want to colour or spotlight. Once chosen, click on on both of the icons proven beneath. The first one from the left is for font colour and the following one is in your spotlight colour.
Click and choose the colour you want to apply to your textual content.
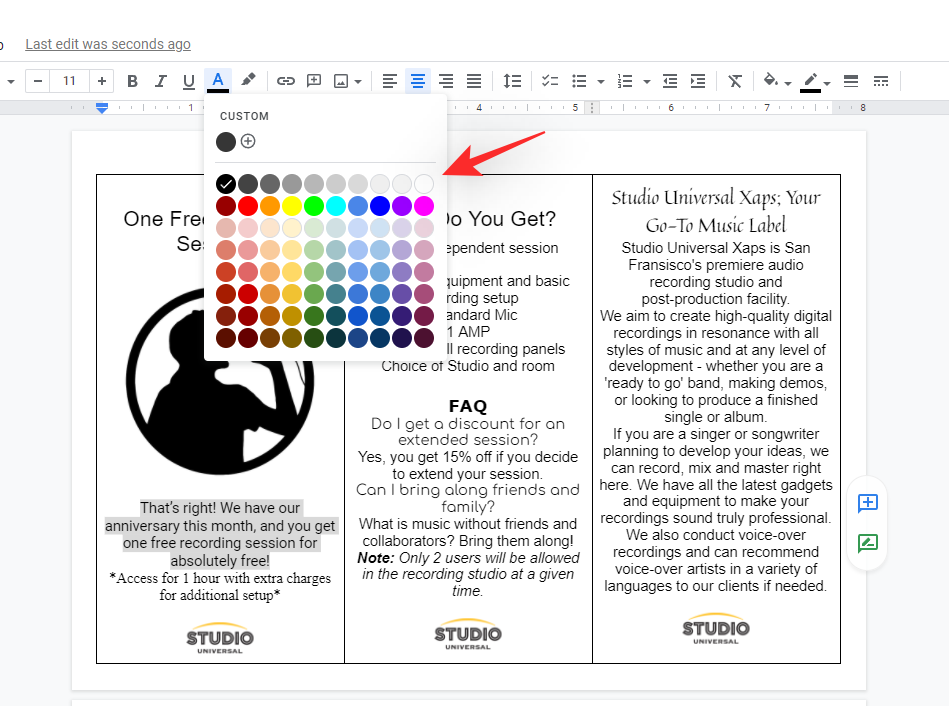
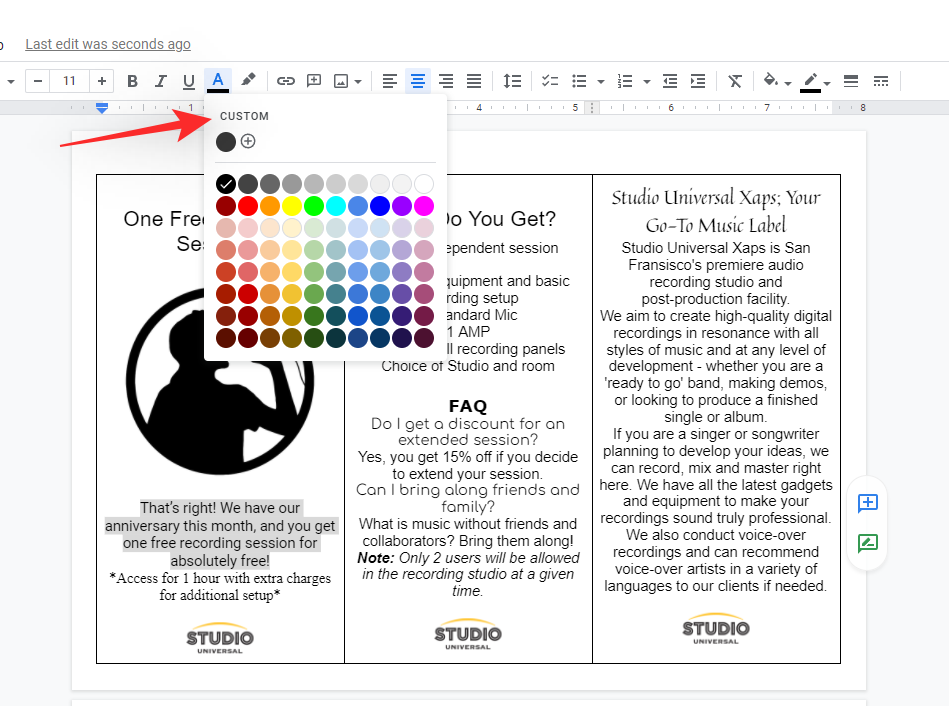
If nevertheless, you want to apply a customized colour then click on on the identical on the high when selecting the colour.
Enter the Hex code in your customized colour on the high when you have one. If not, use the slider on the backside and the palette selector on the high to pick out your customized colour.
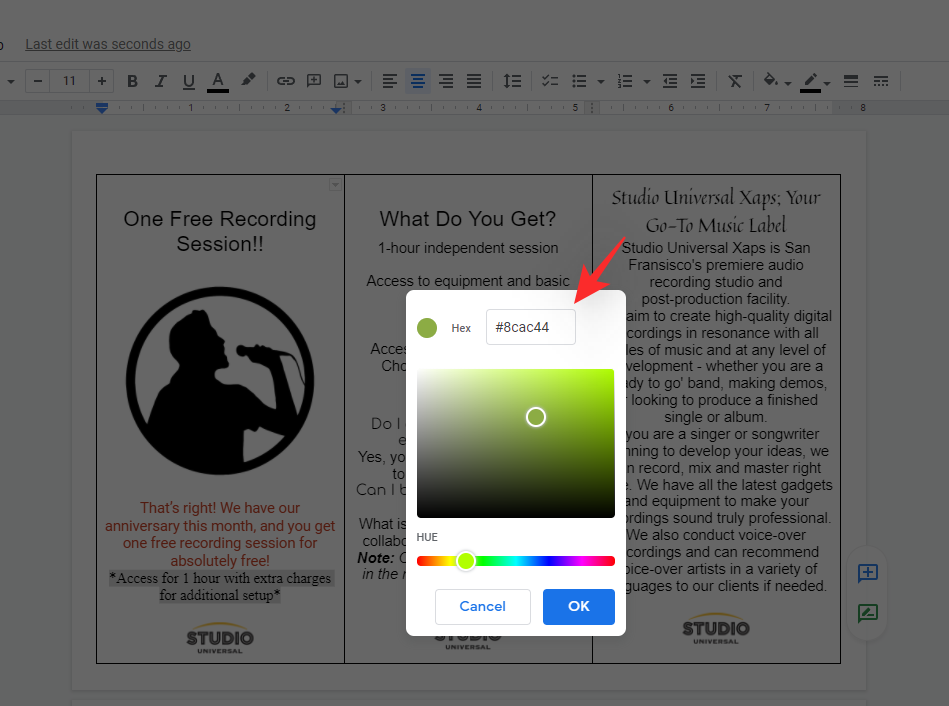
Click on ‘OK’ as soon as you might be executed.
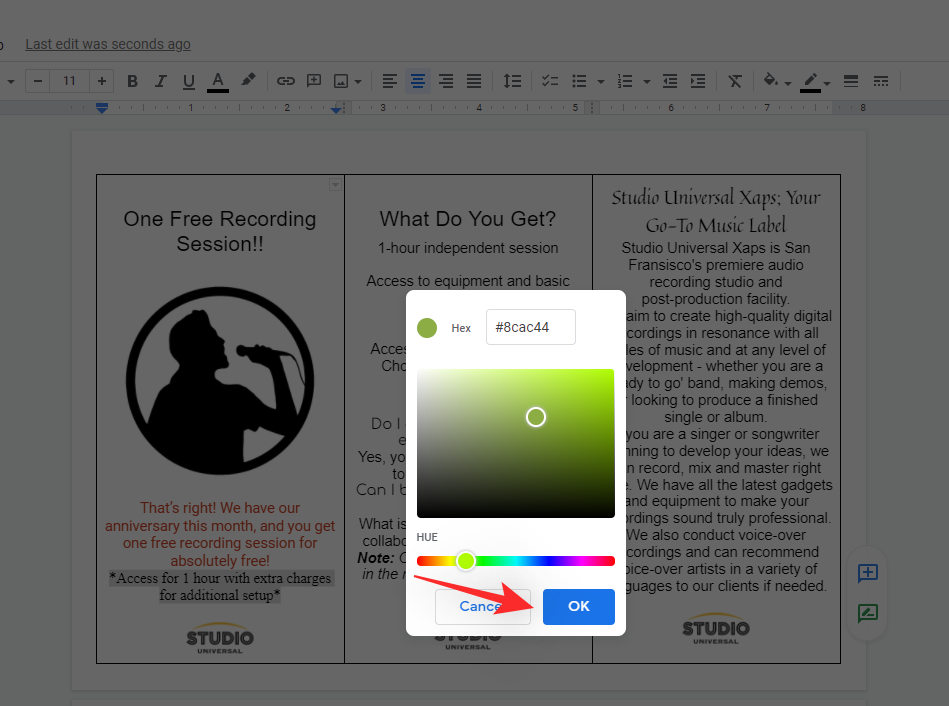
And that’s it! You will now have modified the colour or spotlight of your textual content.

Repeat the steps above to customise different components of your textual content physique.
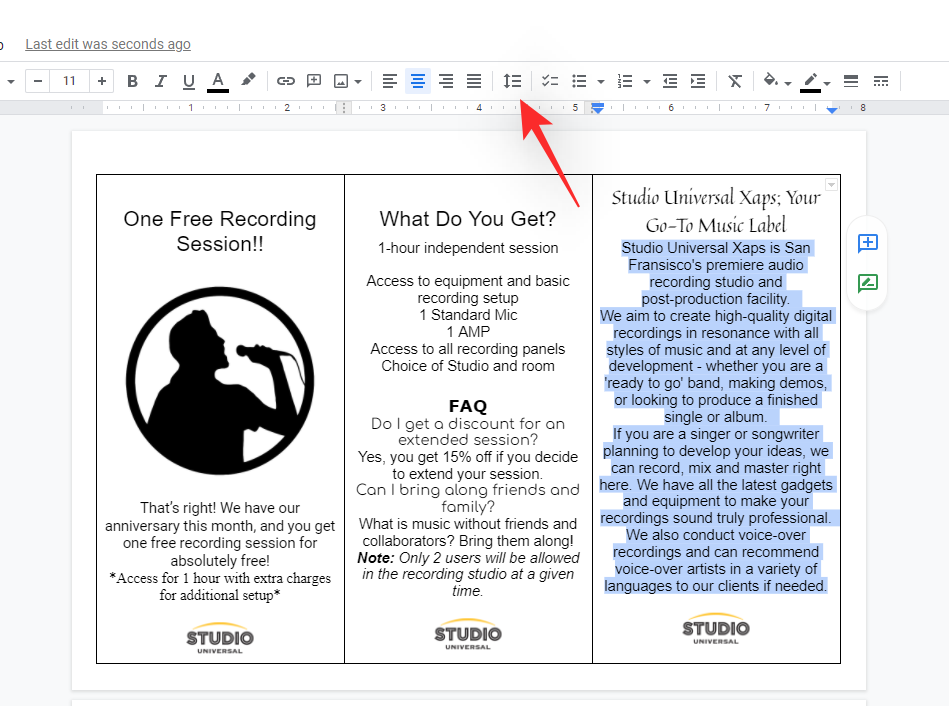
2.5 Change line and paragraph spacing
We can now change your line and paragraph spacing relying in your wants. If you’re trying to match massive quantities of textual content in your brochure then lowering these will assist you to match more textual content in the identical area.
On the opposite hand, having letters too cramped up collectively can extremely scale back the readability of your brochures. Hence, you should utilize the road and paragraph spacing choices to area aside out of your traces and letters. This will make them more legible and enhance the readability of your brochure. Follow the steps beneath that can assist you together with the method.
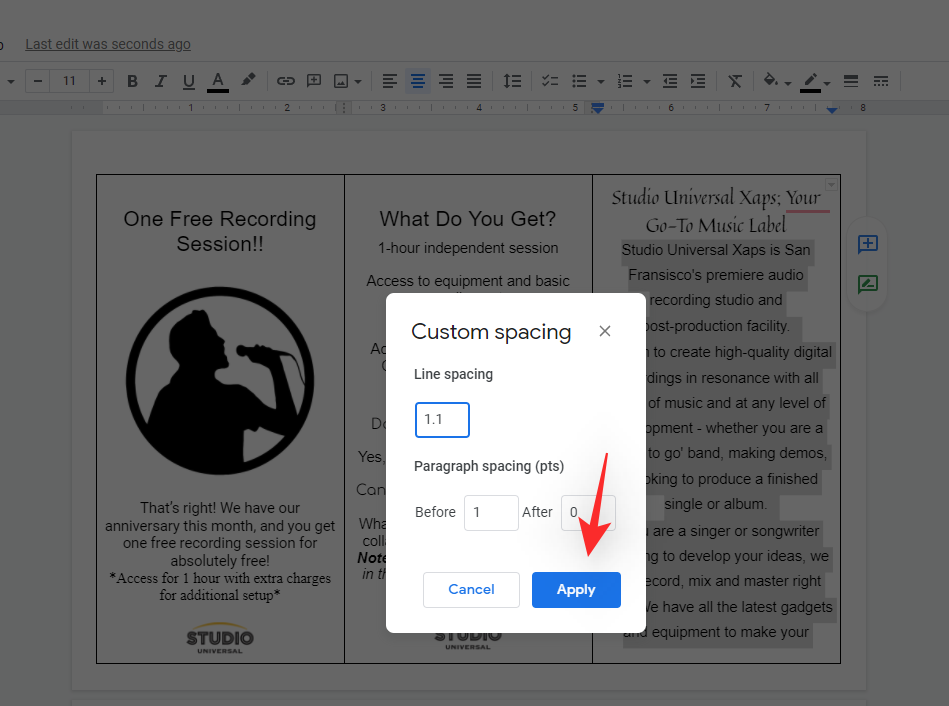
Select the specified textual content after which click on on the Line and paragraph spacing icon as proven beneath. You will discover it beside the textual content alignment icons.
Click on ‘Custom spacing’.

Choose your line spacing by getting into the identical within the first field. By default, the road spacing worth can be set as 1. Line spacing will dictate the area between traces in every paragraph.
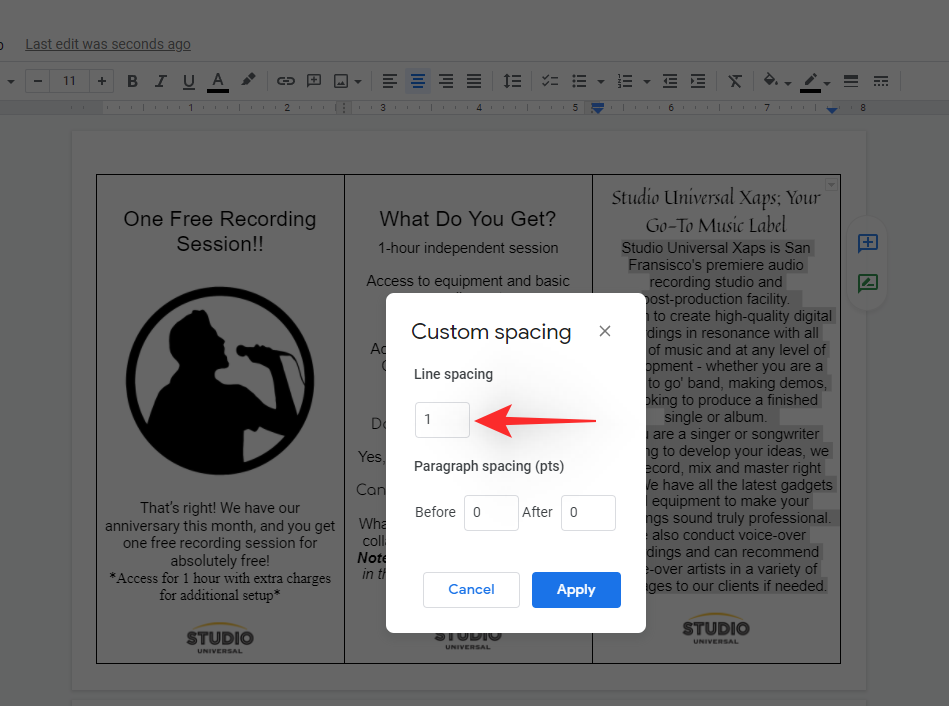
Now select your paragraph spacing. This will dictate the default area within the doc, earlier than and after every paragraph.
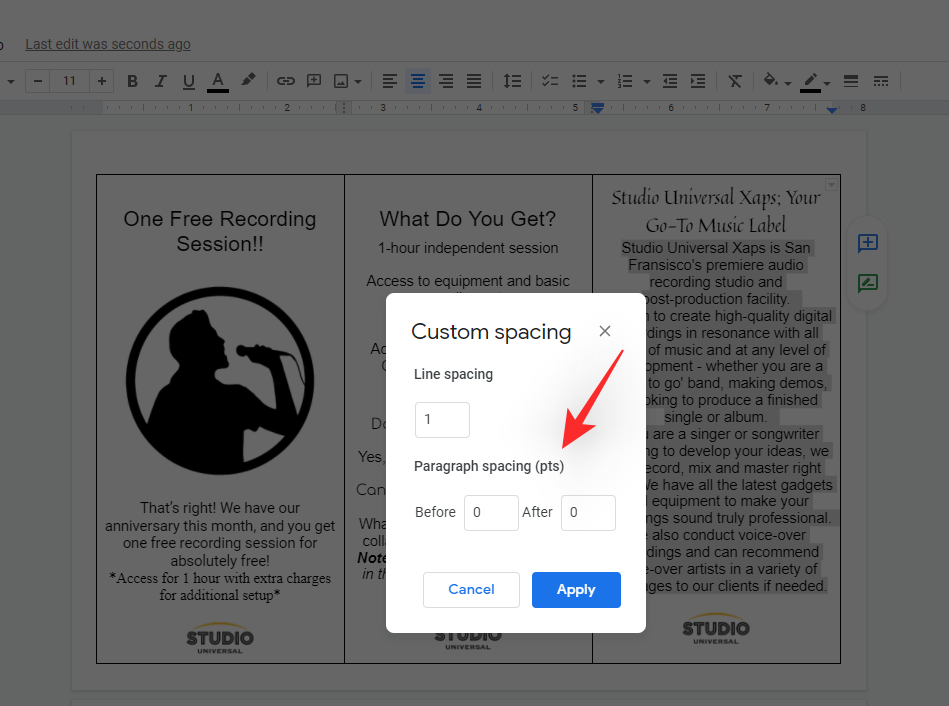
Tip: For a more cohesive and symmetrical aesthetic, we advocate retaining your paragraph spacing for ‘Before’ and ‘After’ the identical quantity.
Click on ‘Apply’ as soon as you might be executed.
And that’s it! You can now repeat the steps above for different components of your textual content to format and area them within the brochure in keeping with your necessities.
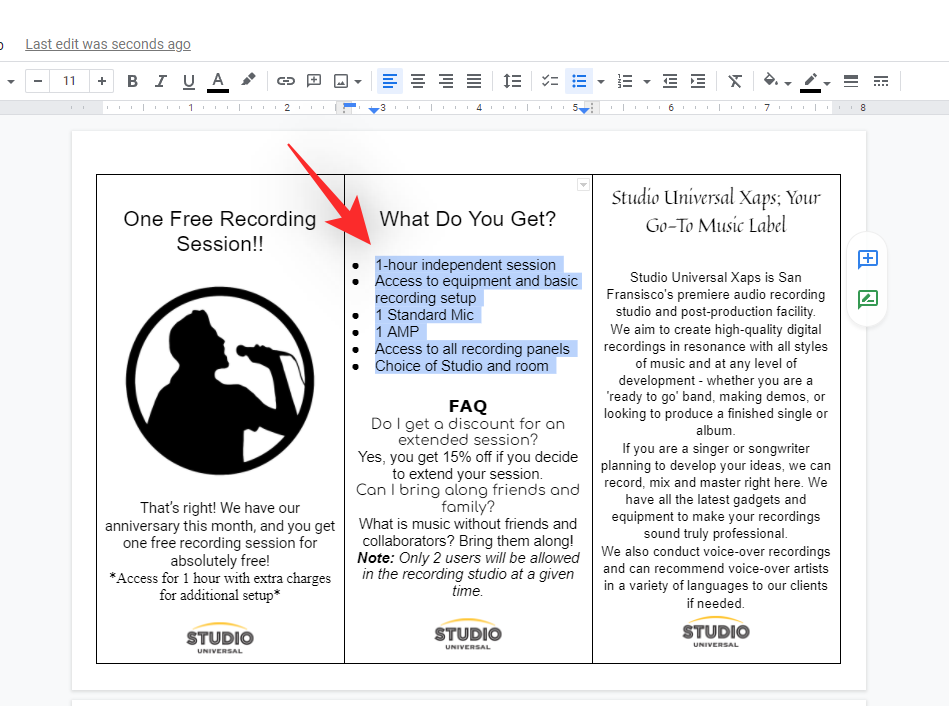
2.6 Change add lists
You can add lists to your brochure as effectively. This can turn out to be useful if you’re itemizing products, options, companies, or anything supplied by your organization. Follow the steps beneath to create lists in your brochure.
Place your cursor the place you want to add your lists. Your lists can be indented mechanically so that you gained’t must pre-indent the situation of the cursor. You can even choose already included textual content to transform it into lists.
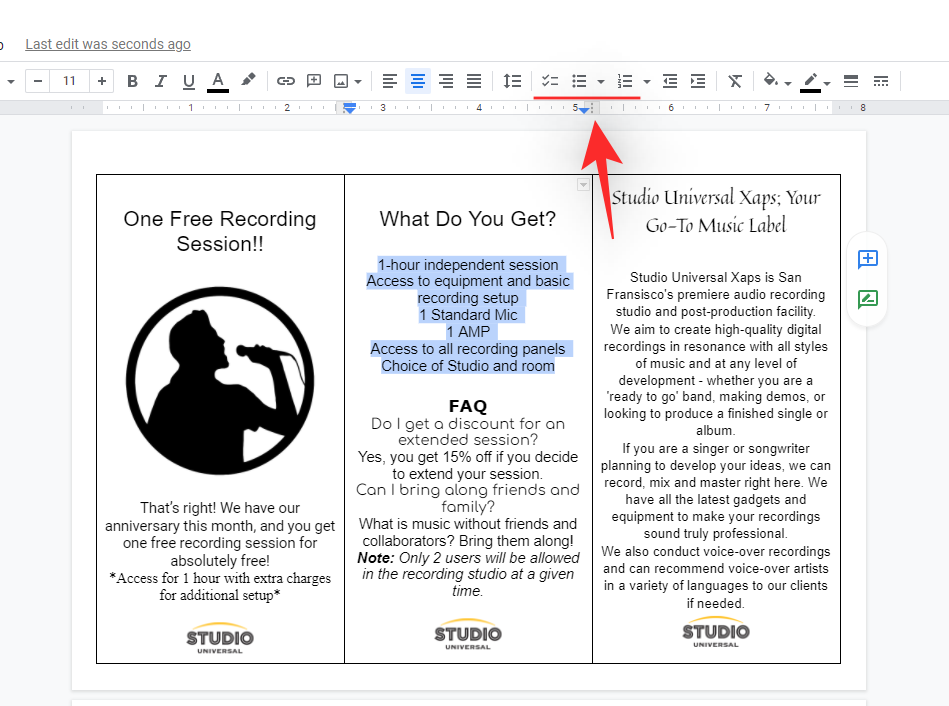
Now observe one of many steps beneath relying on which checklist you want to add to your brochure.
- Checklists: Use the icon so as to add checklists. Hitting Enter as soon as will assist you to add more gadgets to your checklists.
- Bulleted lists: Click on the icon so as to add a bulleted checklist to your brochure as an alternative.
- Numbered lists: You can add numbered lists to your brochure by utilizing the respective icon.
And that’s it! You can now add different lists to your brochure by repeating the steps above if wanted.
2.7 Change background colour
‘Background color’ is an choice relevant to every cell in your desk. As we’ve tricked our approach into using a single cell for every of our pages, we are able to use this selection to simply colour sections of our brochure. Follow the information beneath to get you began.
Select and place your cursor within the cell you want to colour. Now click on on the ‘Background color’ icon on the acute proper within the toolbar on the high.
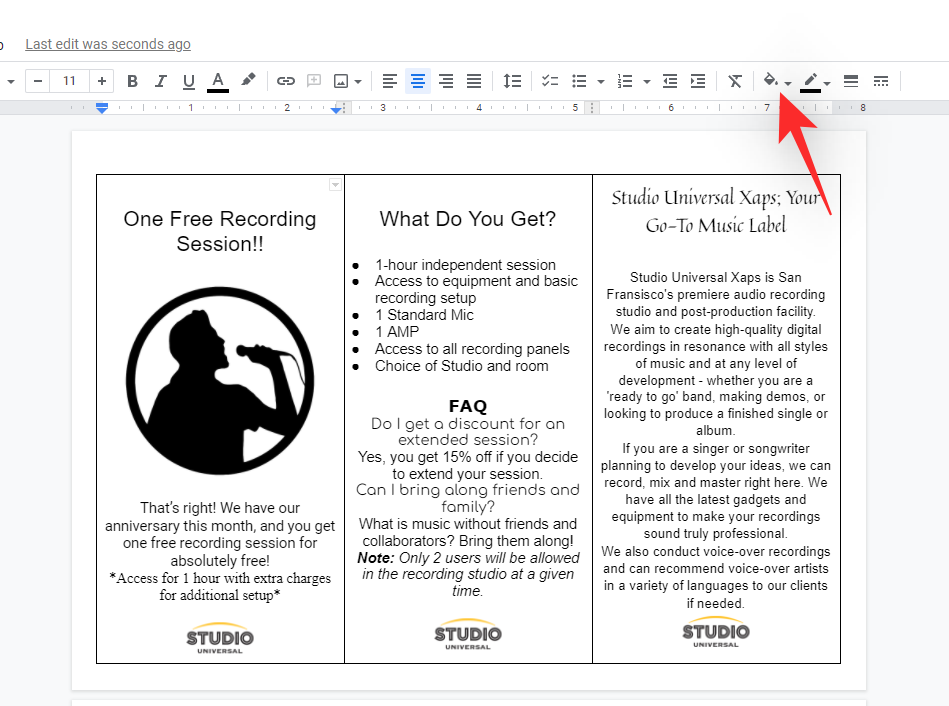
Select a colour that you simply like by clicking on it.
If you want to use a customized colour, then click on on the identical on the high of your display screen.
Enter the Hex code or use the sliders on the backside to dial in your required colour.
Click on ‘OK’ as soon as you might be executed.
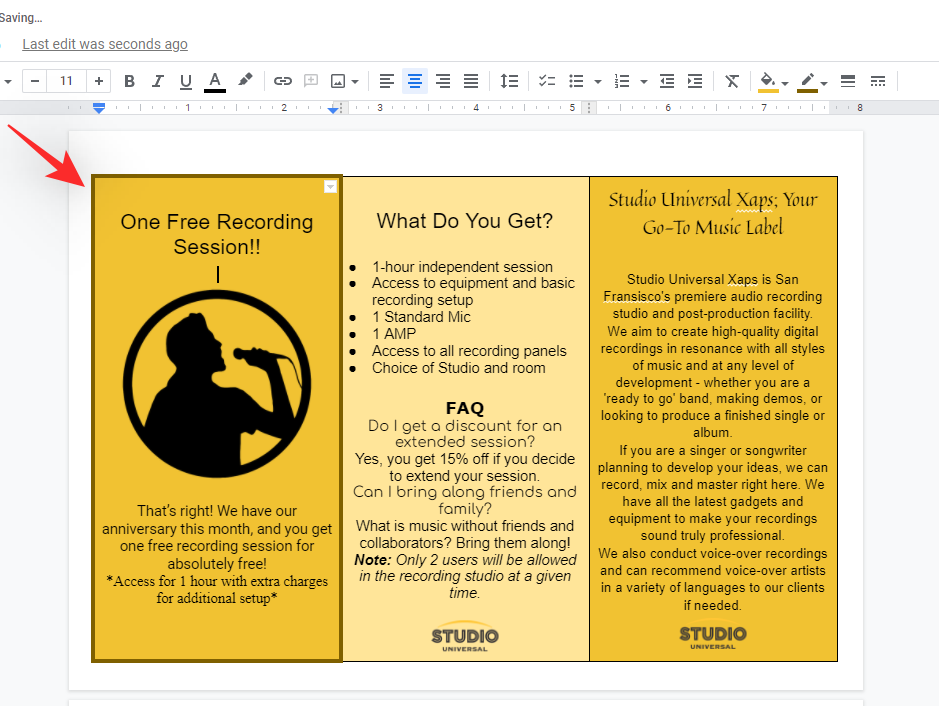
The chosen colour will now be utilized to the chosen cell.
You can proceed coloring different pages of your brochure as wanted.
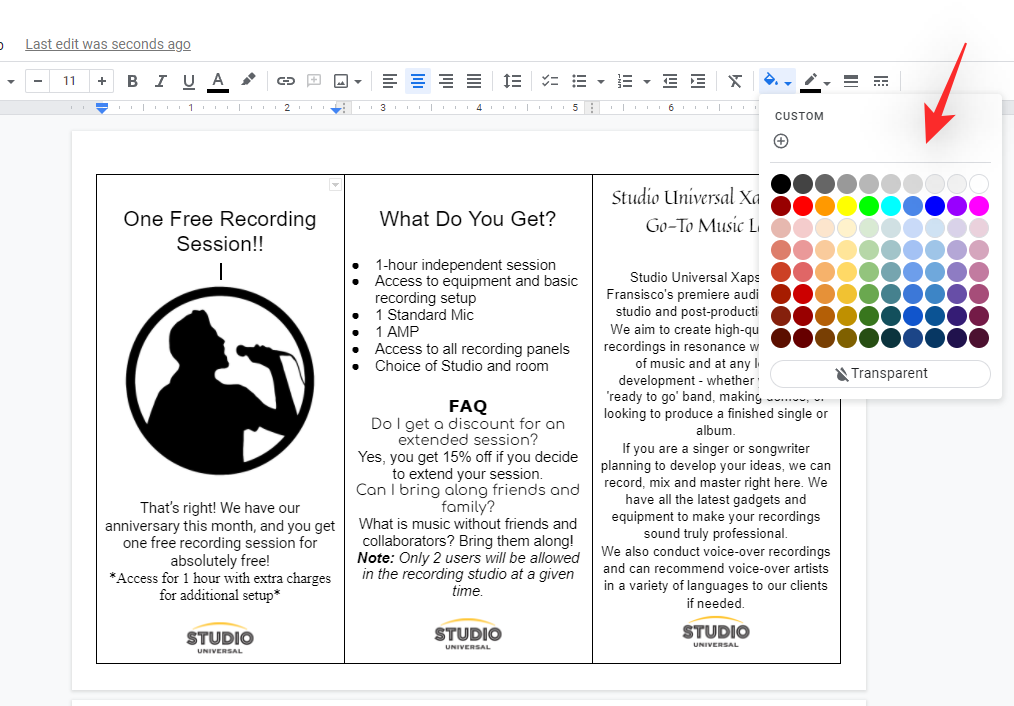
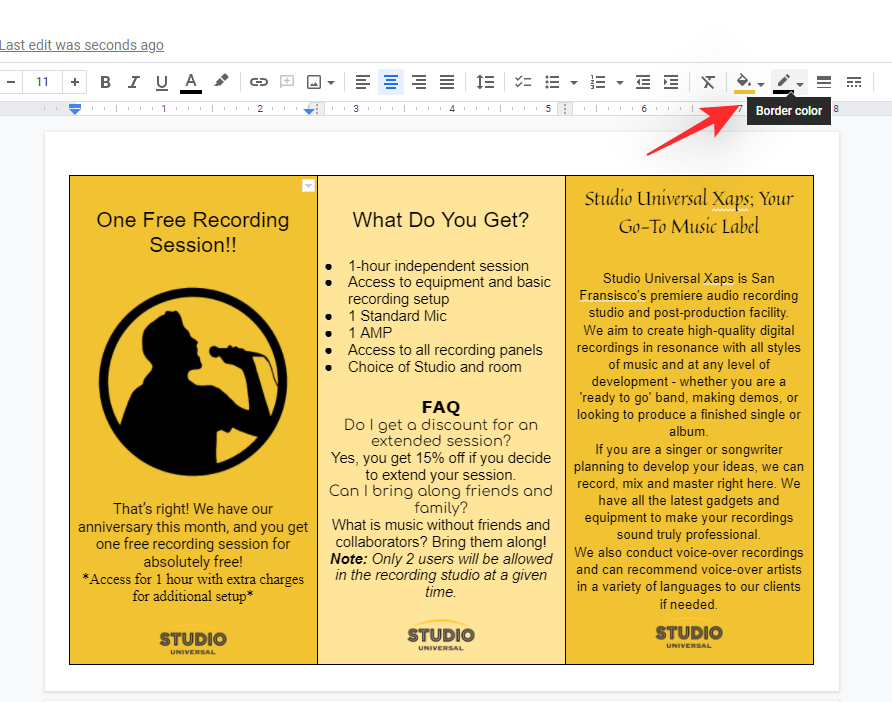
2.8 Change desk border-color
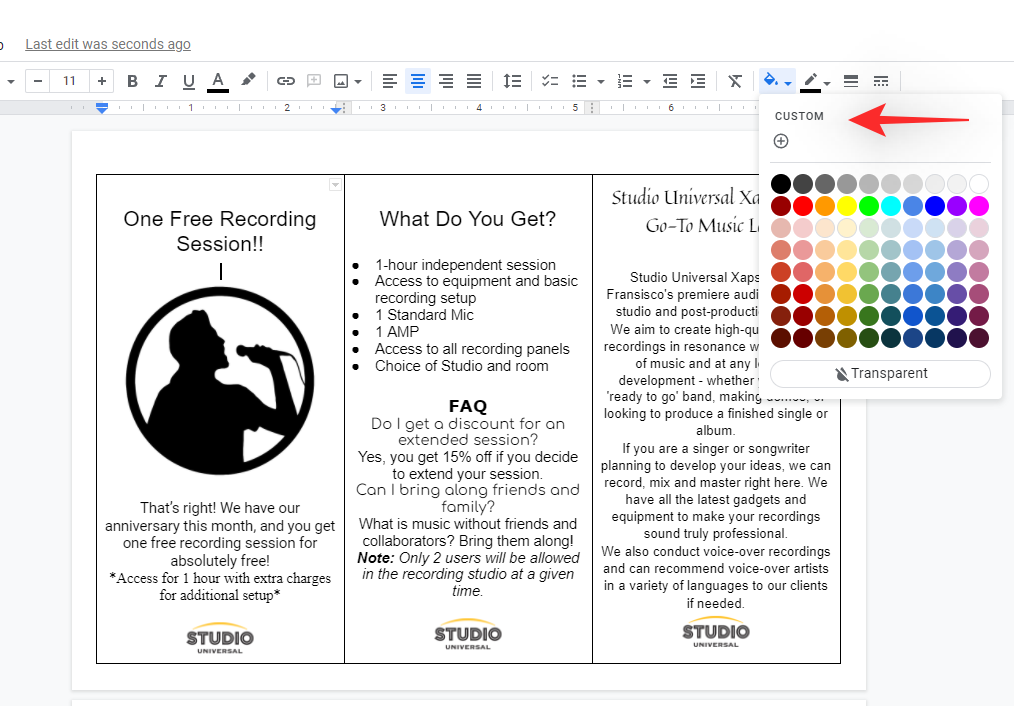
Click and place your cursor within the desired cell you want to change the border colour for, and click on on the ‘Border color’ icon as proven beneath.
Select the specified colour from the samples in your display screen by clicking on the identical.
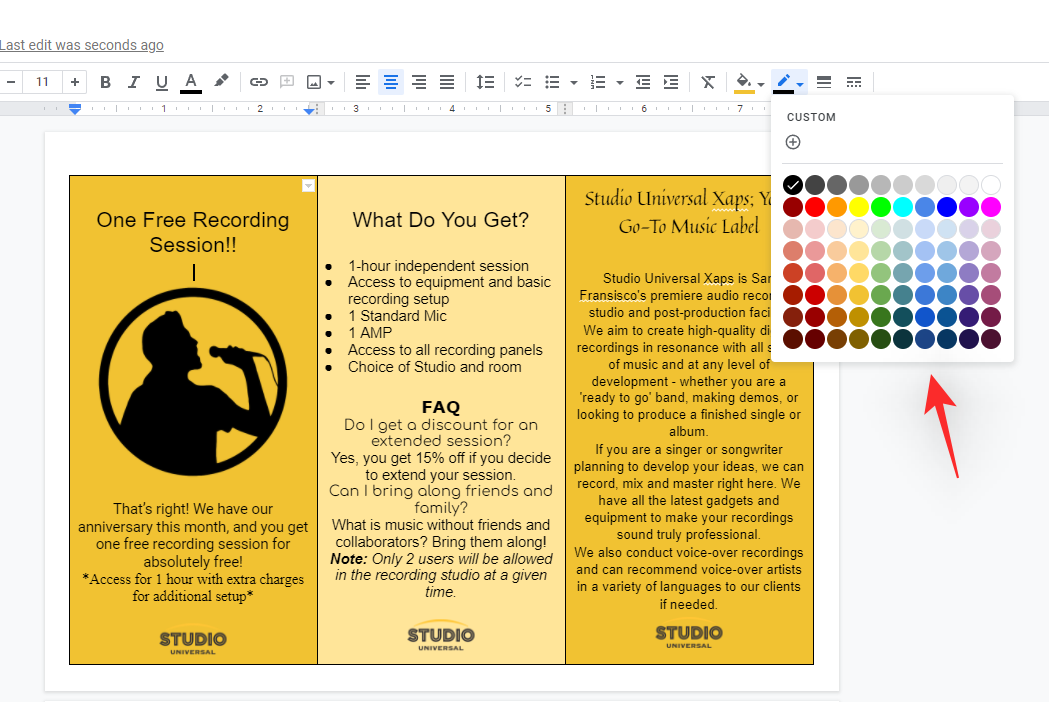
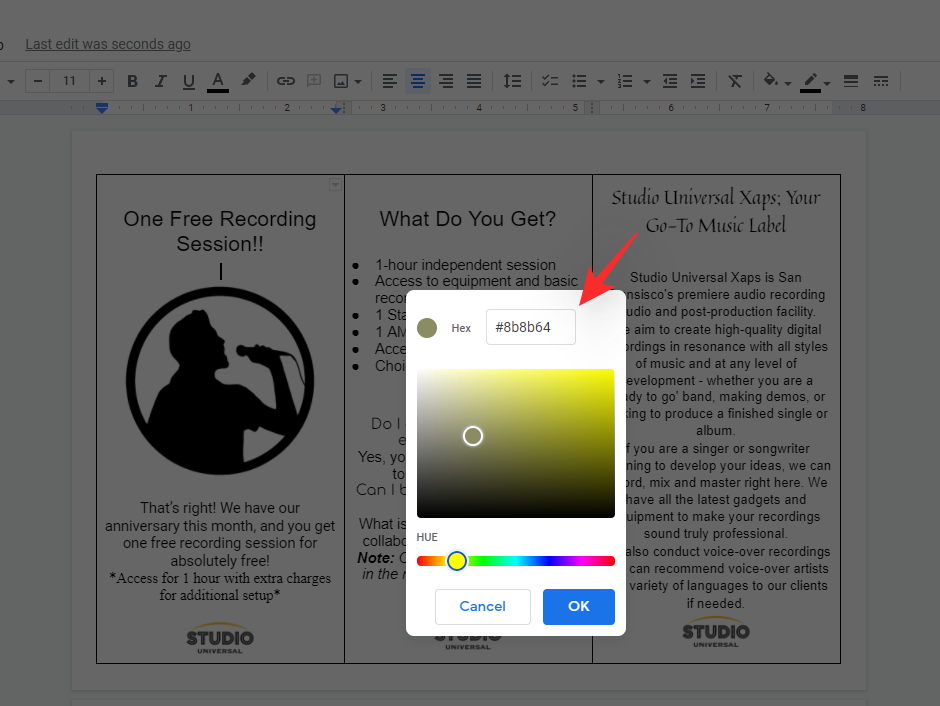
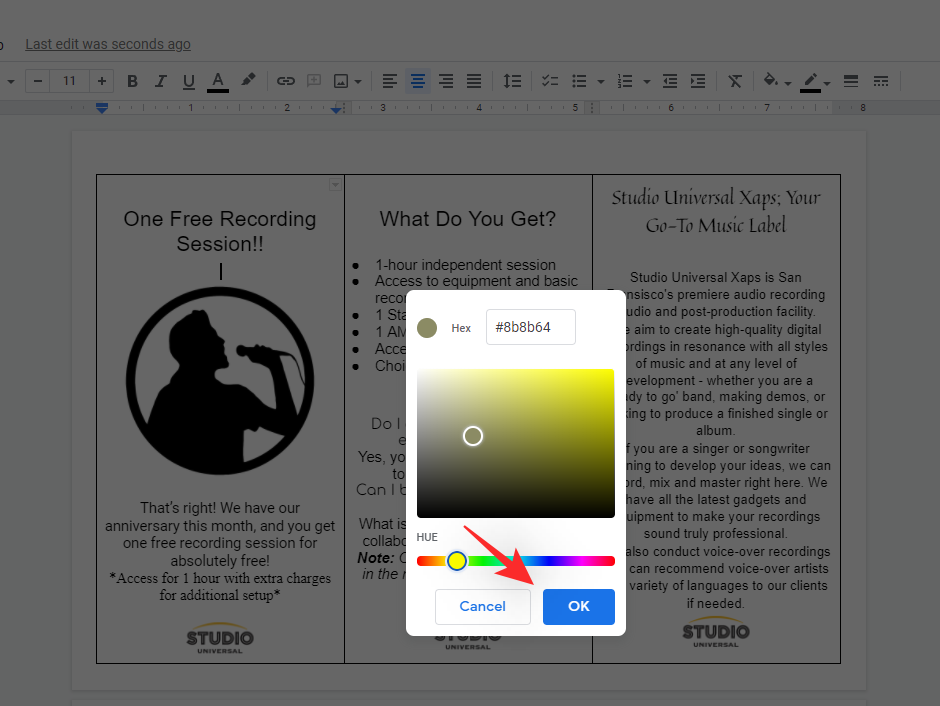
Click on ‘CUSTOM’ in case you want to use a customized colour.
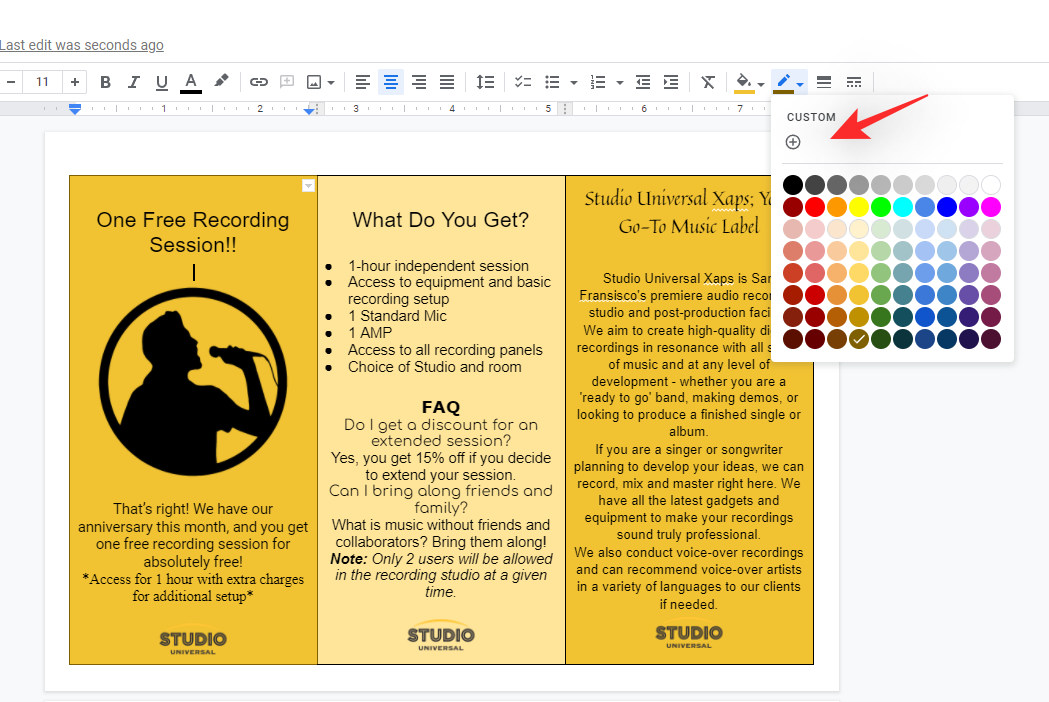
Enter the specified Hex code or use the sliders on the backside to enter your customized colour.
Click on ‘OK’ as soon as you might be executed.
You can equally change the border colour for different cells as effectively.
2.9 Change desk border measurement and magnificence
You can even alter the width and magnificence of your border. Use the steps beneath that can assist you together with the method.
Place your cursor within the cell for which you want to change the border’s width. Click on the ‘Border width’ icon in your toolbar.

Now choose the specified width by clicking on it.
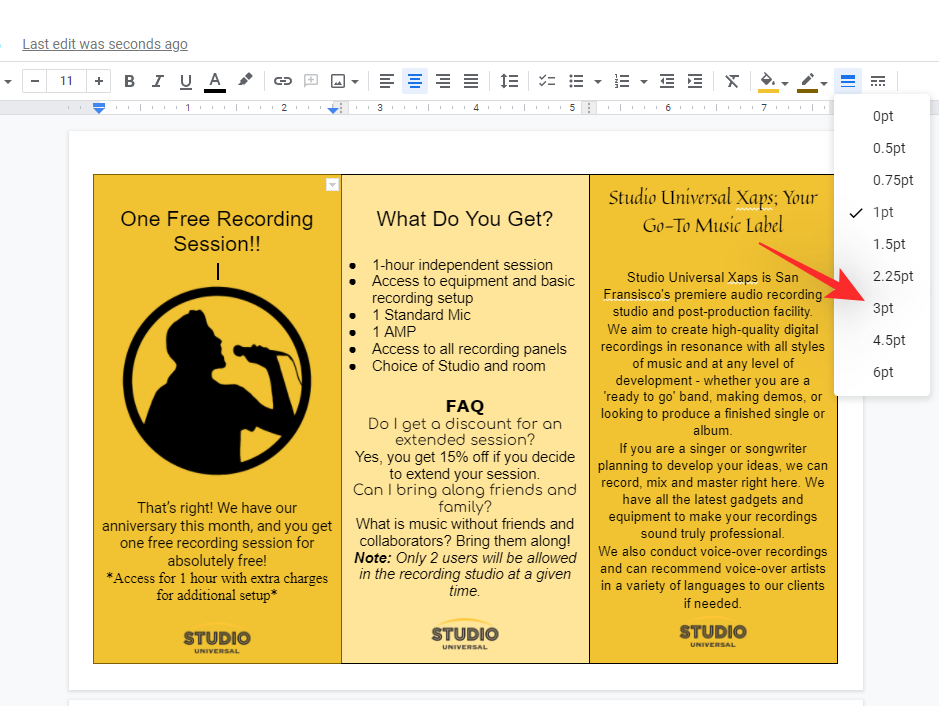
You can now view the modifications to your border’s width in real-time.
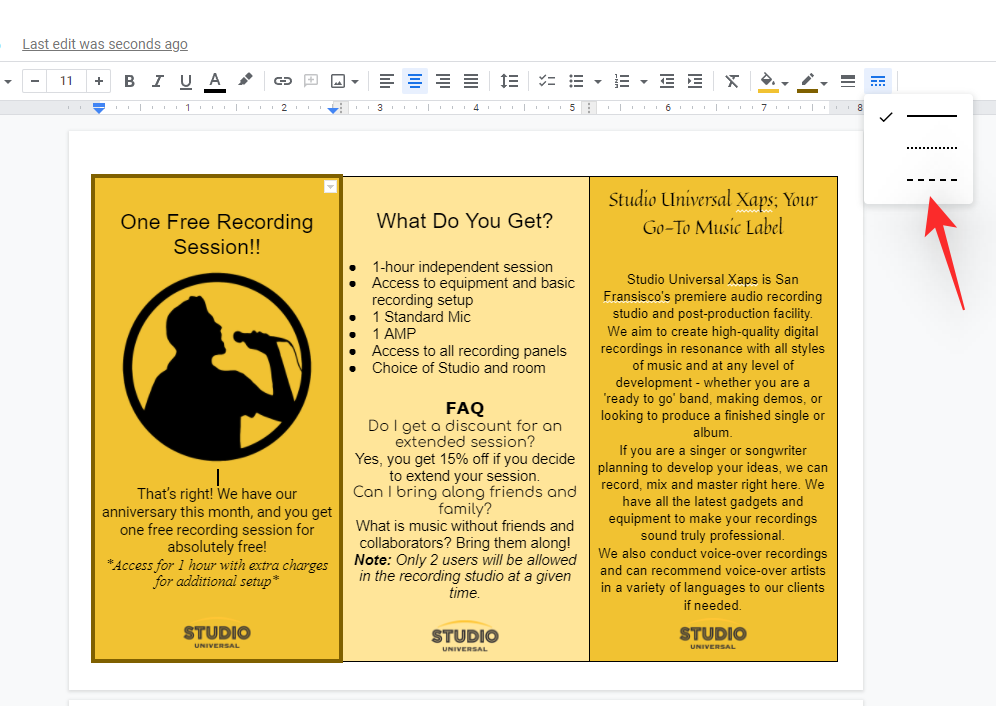
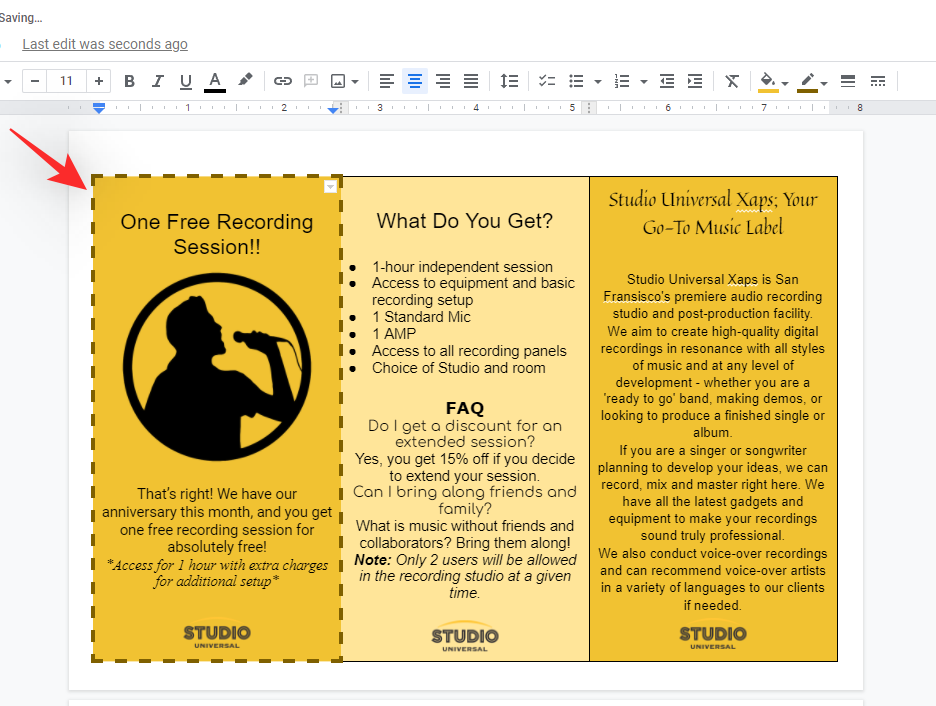
Now click on on the ‘Border dash’ icon within the excessive proper of the toolbar.
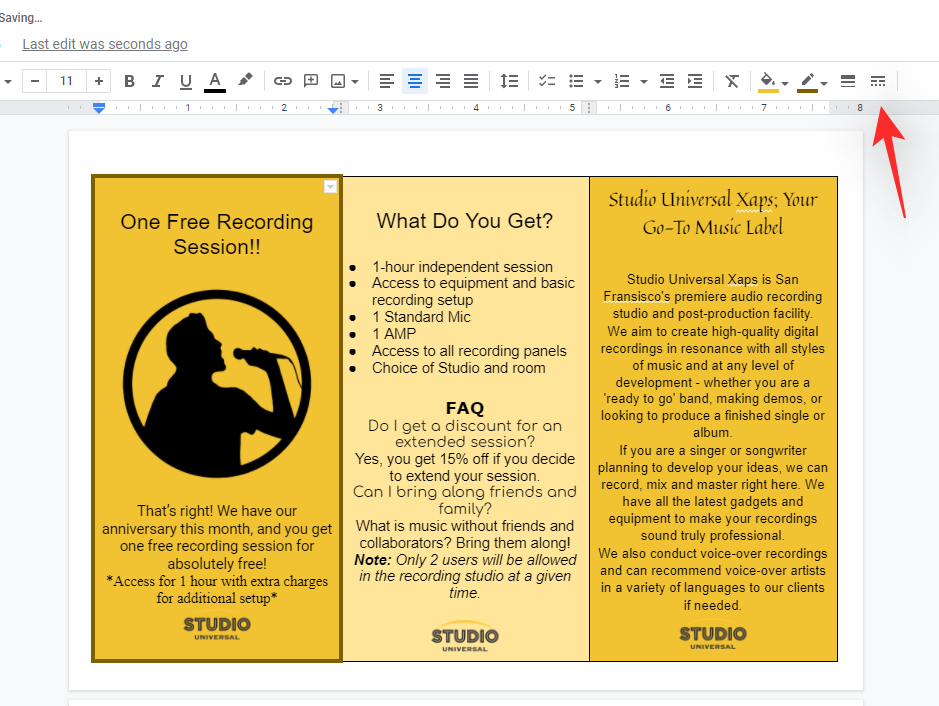
Click and choose a sample you want to use for the cell.
And that’s how one can customise the border measurement and magnificence for every web page of your brochure.
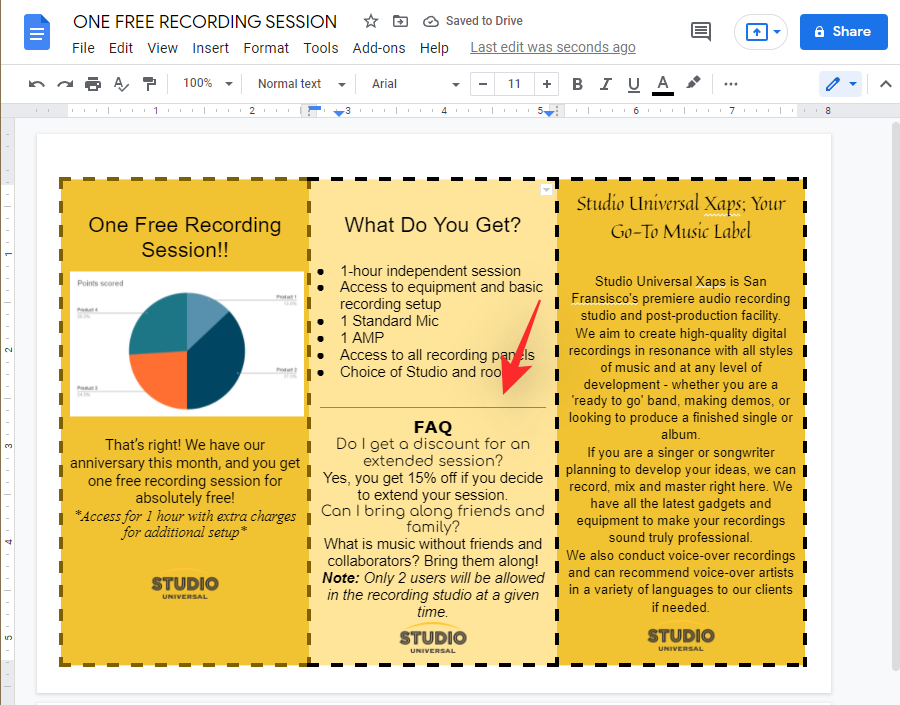
Step #03: Add Images and Graphics
Adding graphics and pictures to your paperwork is pretty simple in Google Docs. Follow both of the guides beneath that can assist you add images and graphics to your brochure.
3.1 Add a picture
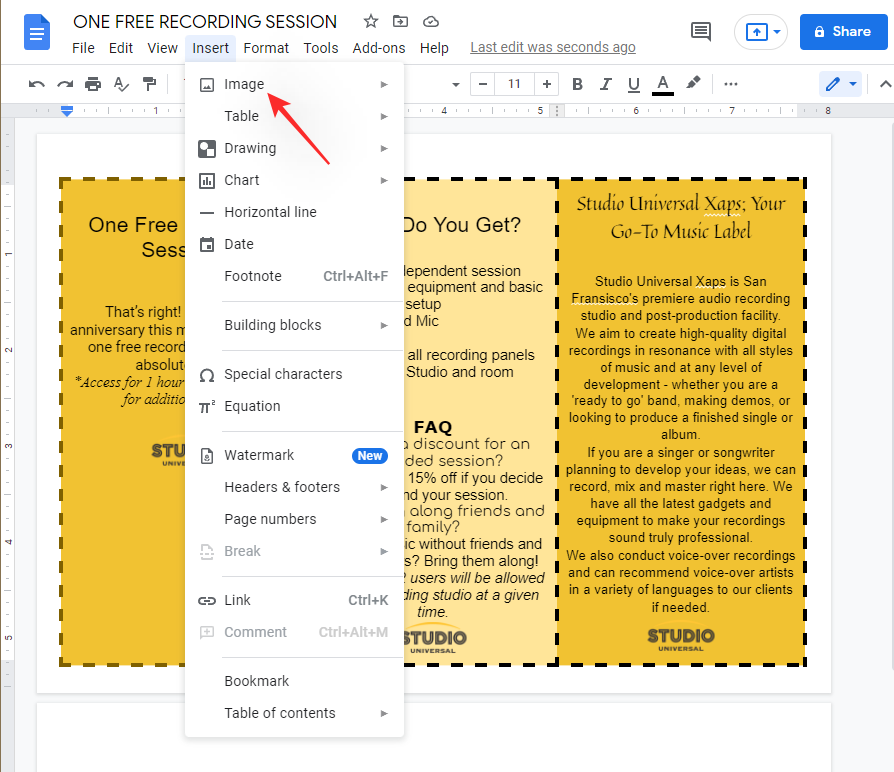
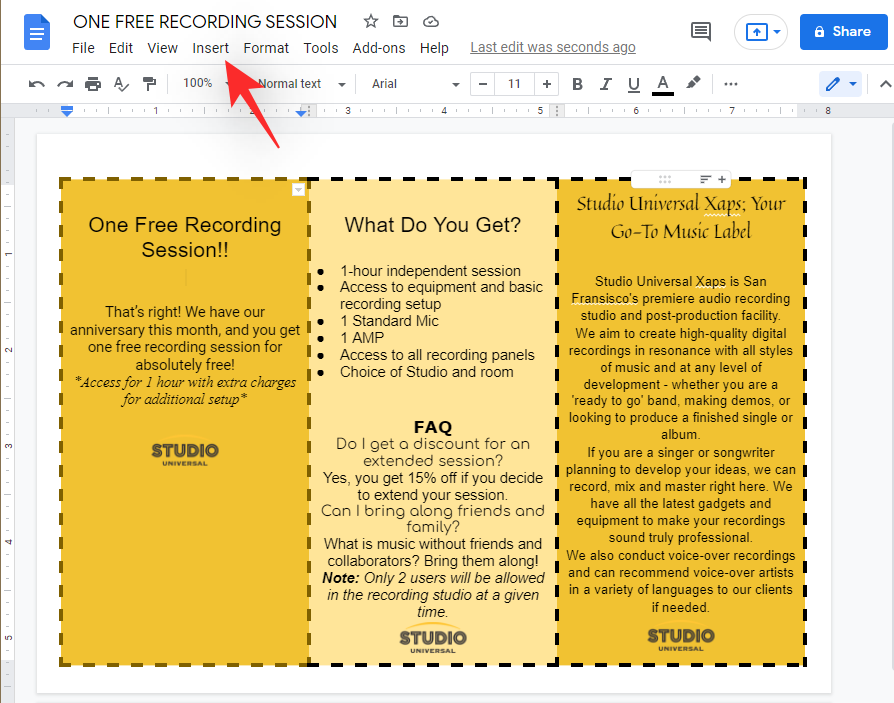
Place your cursor within the desired place the place you want to add a picture. Click on ‘Insert’ on the high as soon as executed.
Select ‘Image’, then choose your supply and at last choose and open the specified image in your browser.
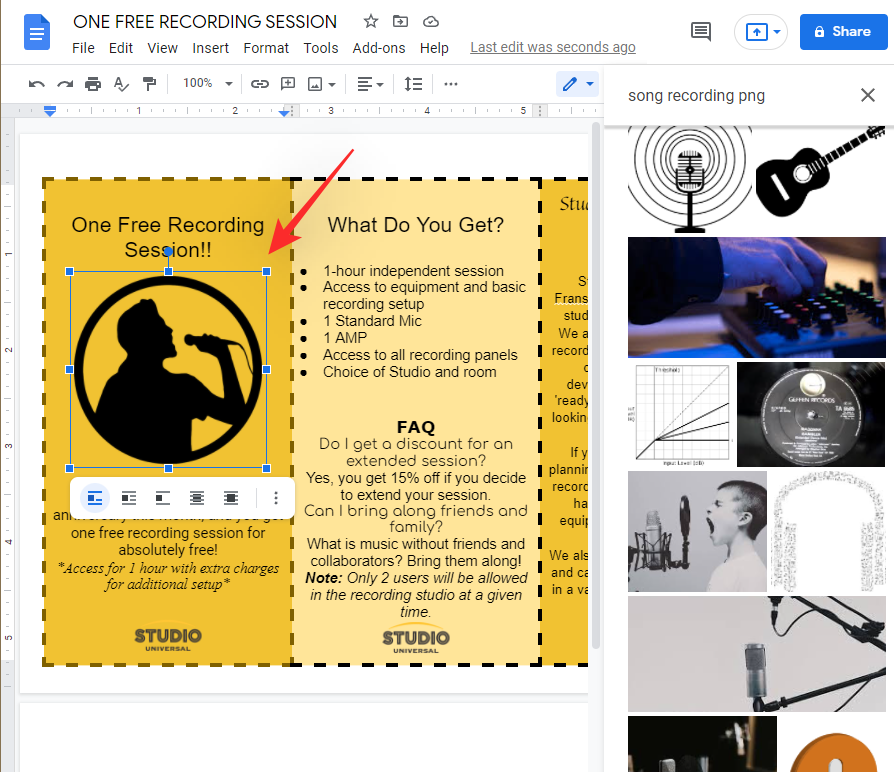
- If you’re using ‘Search the web’ then enter the search time period in your proper and hit Enter. Once you discover the specified image, double click on on it or click on on ‘Insert’ on the backside so as to add it to your brochure.
- If you’re using ‘By URL’ then you’ll need to make sure that the URL instantly hyperlinks to the image and never a thumbnail preview. Additionally, images from some on-line sources won’t be supported by Google Docs.
Once your image has been added, hit the ‘Spacebar’ to maneuver your image linearly. You can even click on and drag the image round to your required place or use the alignment choices to mechanically align it.
3.2 Add a drawing
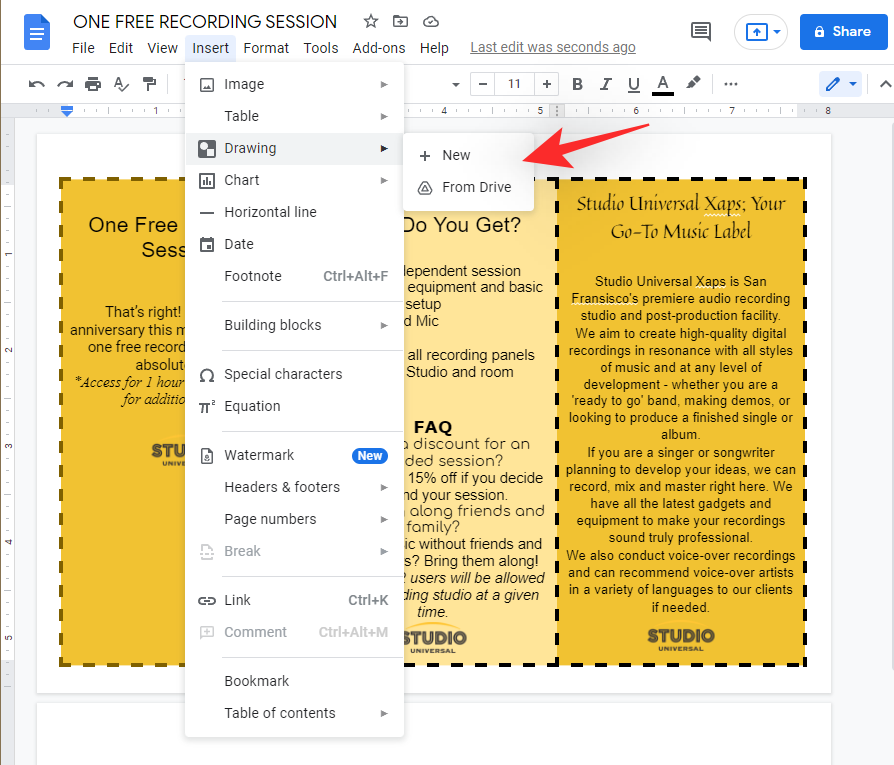
Drawings will also be simply added to Google Docs. Start by putting your cursor the place you want to place your Drawing and click on on ‘Insert’ on the high.
Select ‘Drawing’ and choose a supply in your drawing. Follow one of many sections beneath relying in your alternative.
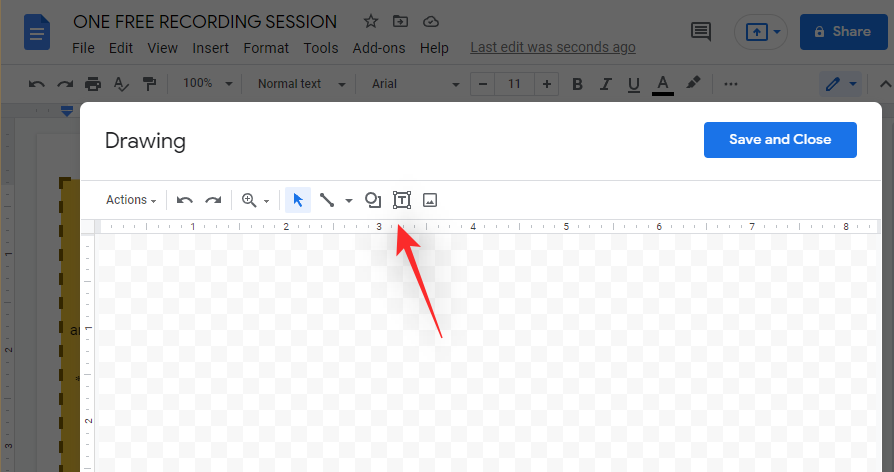
3.2.1 New
If you chose ‘New’ then you’ll now have a clean canvas the place you possibly can create your customized drawing. Click and use the instruments within the toolbar to create the drawing you want.
You can have the next instruments at your disposal.
- Shapes
- Arrows
- Callouts
- Equations
- Lines
- Arrows
- Elbow connectors
- Curved connectors
- Curves
- Polylines
- Scribble
If you want any assist, you should utilize this complete information from us that can assist you together with the method.
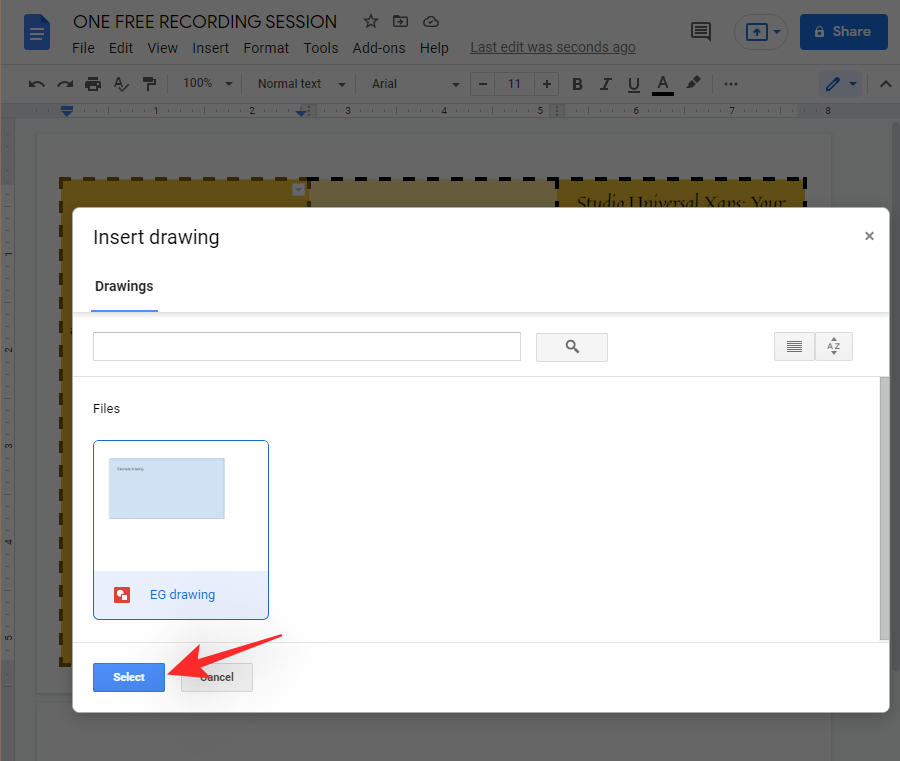
3.2.2 From Drive
Once you click on and choose ‘From Drive’ a brand new pop-up will open displaying all of the contents of your Google Drive. Click and choose the drawing you want to add after which click on on ‘Select’.
Now select ‘Link to source’ if this can be a collaborative venture that doesn’t must be printed instantly. If you want to print the doc and wish the unique drawing within the doc then choose ‘Insert unlinked’. Keep in thoughts that including an unlinked drawing will permit collaborators to make edits to your drawings as effectively.
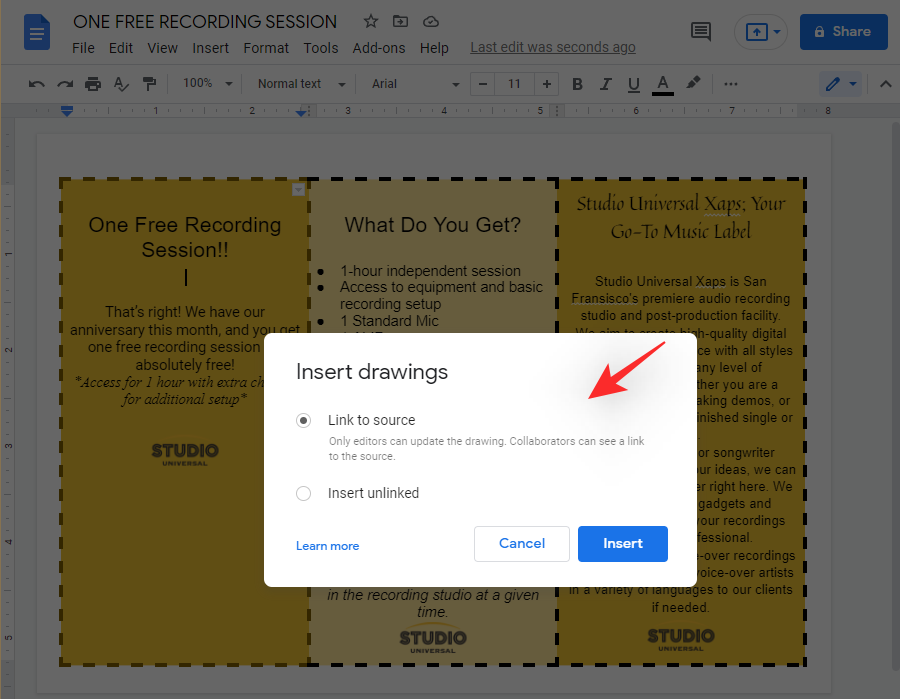
Click on ‘Insert’ as soon as you might be executed.
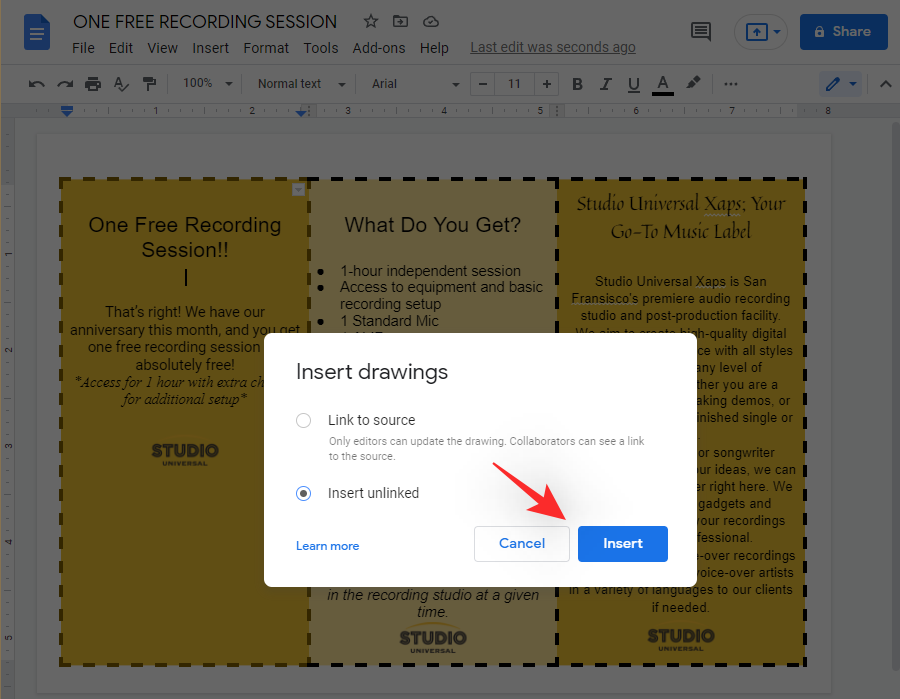
The drawing will now be added to your brochure. You can resize it to suit the scale of your brochure.
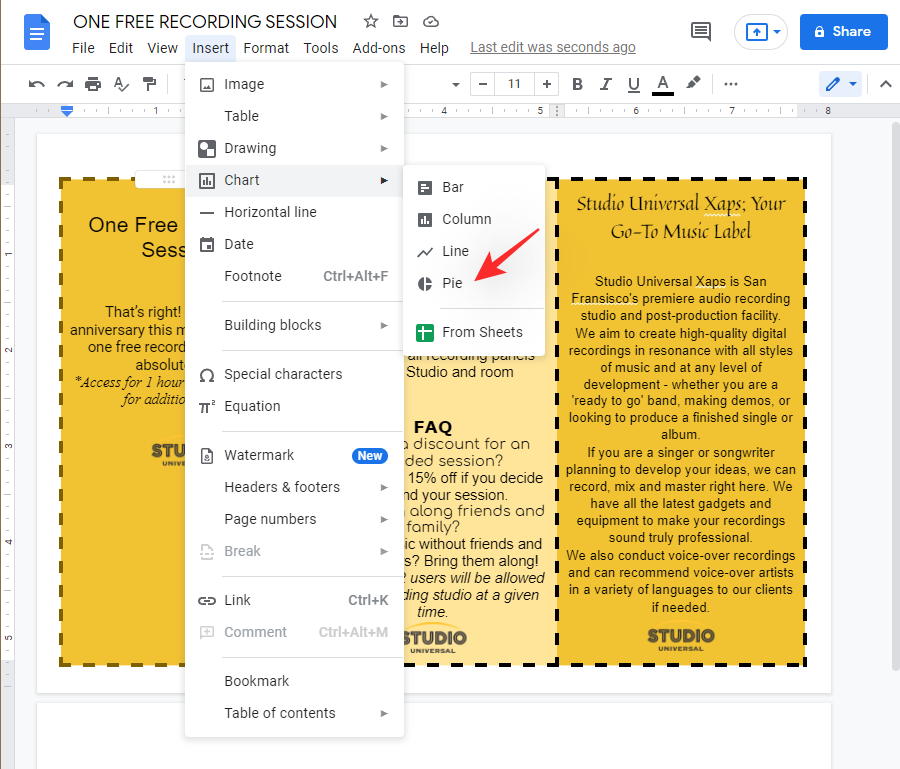
3.3 Add a Chart
You can even add charts to your brochure. Place your cursor within the desired location and click on on ‘Insert’ on the high.
Now click on on ‘Chart’ and choose the sort of chart you want to add to your brochure. You can even add a chart from an excel spreadsheet saved in Google Sheets.
Once you select your supply, the graph can be mechanically added to your brochure. Click and resize the graph using the corners to suit your brochure.
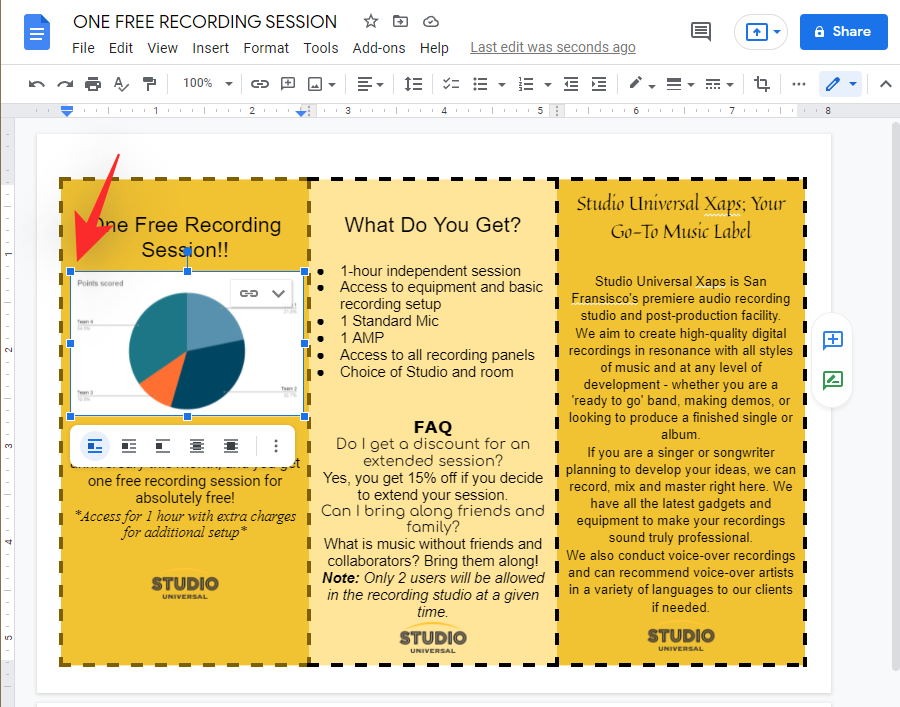
Now click on on the drop-down arrow within the high proper nook.
Select ‘Open source’.
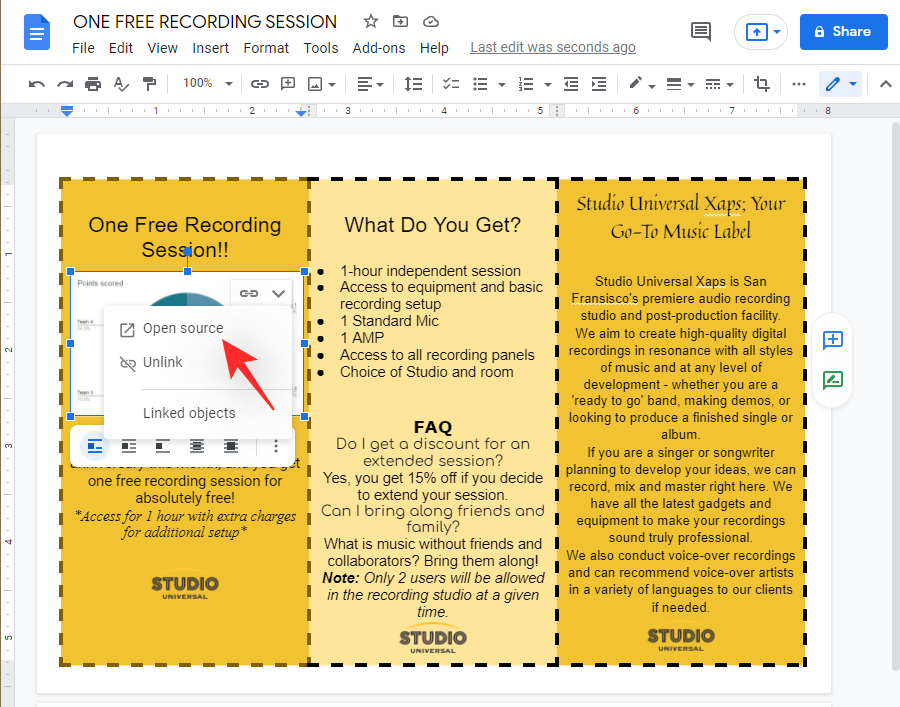
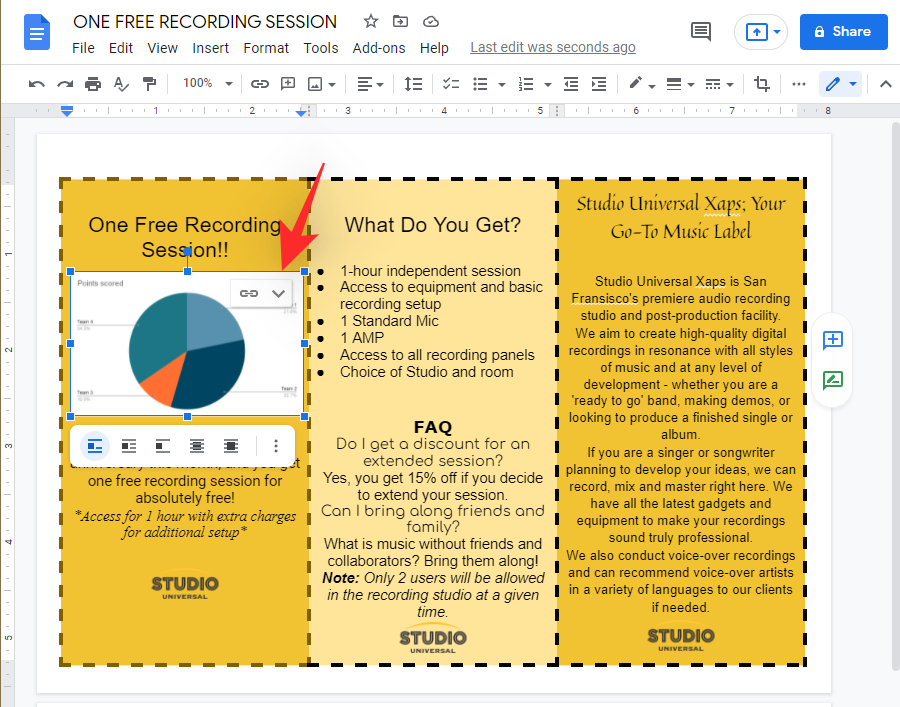
You will now be taken to a spreadsheet. You can now enter your required information and make modifications to the graph as wanted.
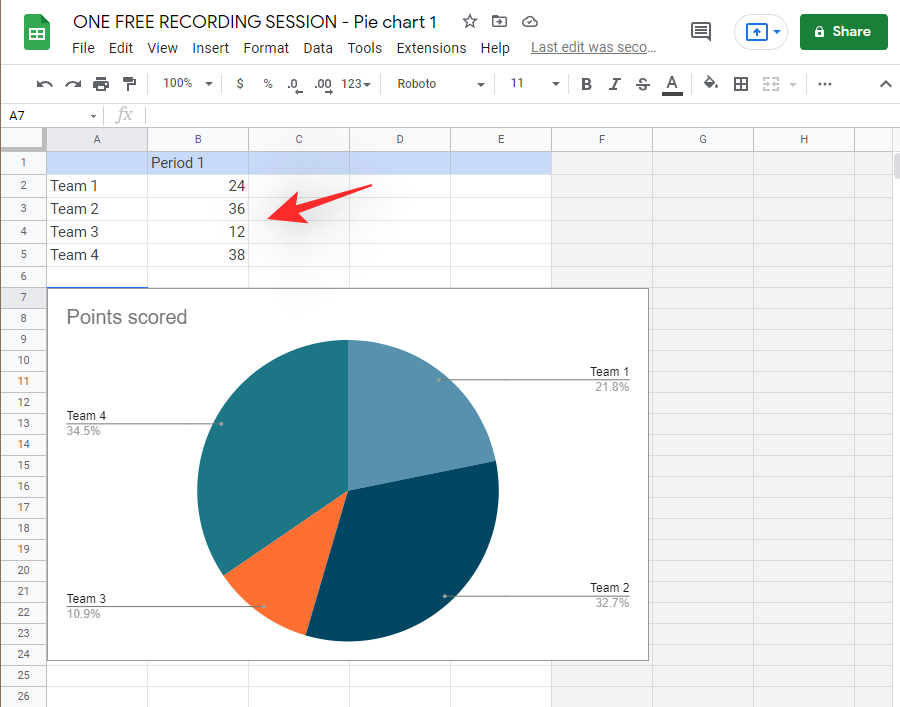
Changes can be mirrored in real-time within the graph in your display screen.

Once you’ve finalized your graph, swap back to Docs and click on on ‘UPDATE’.
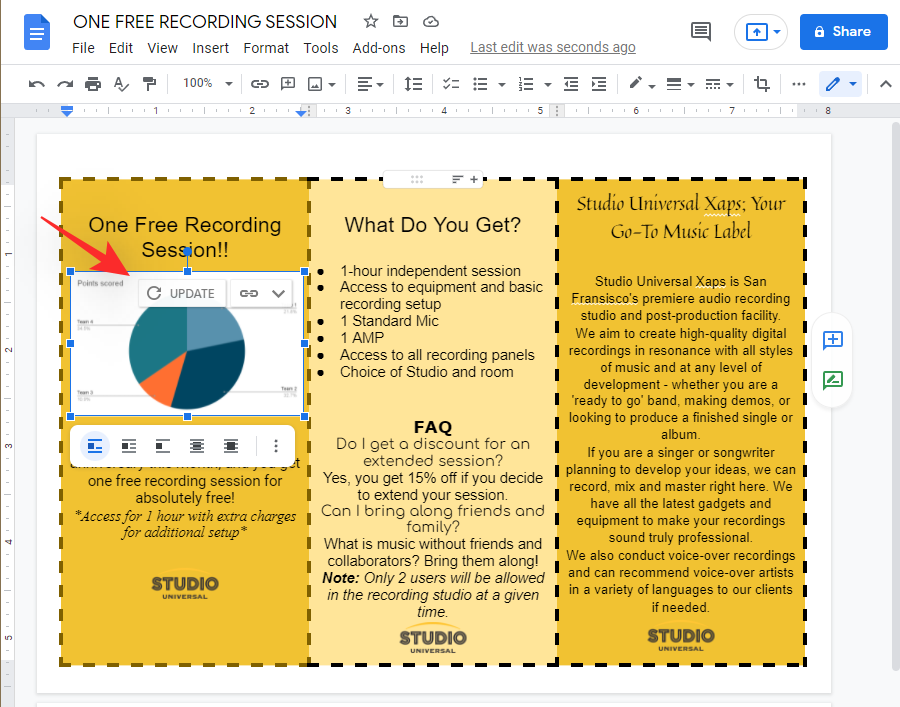
And that’s it! The graph will now be up to date and it is best to now have the ability to view the up to date graph in your brochure.
3.4 Add a separator
A separator will help you streamline and make your brochure more readable. It can even assist you to divide sections and textual content physique primarily based in your liking. To add a separator to your brochure, observe the steps beneath to get you began.
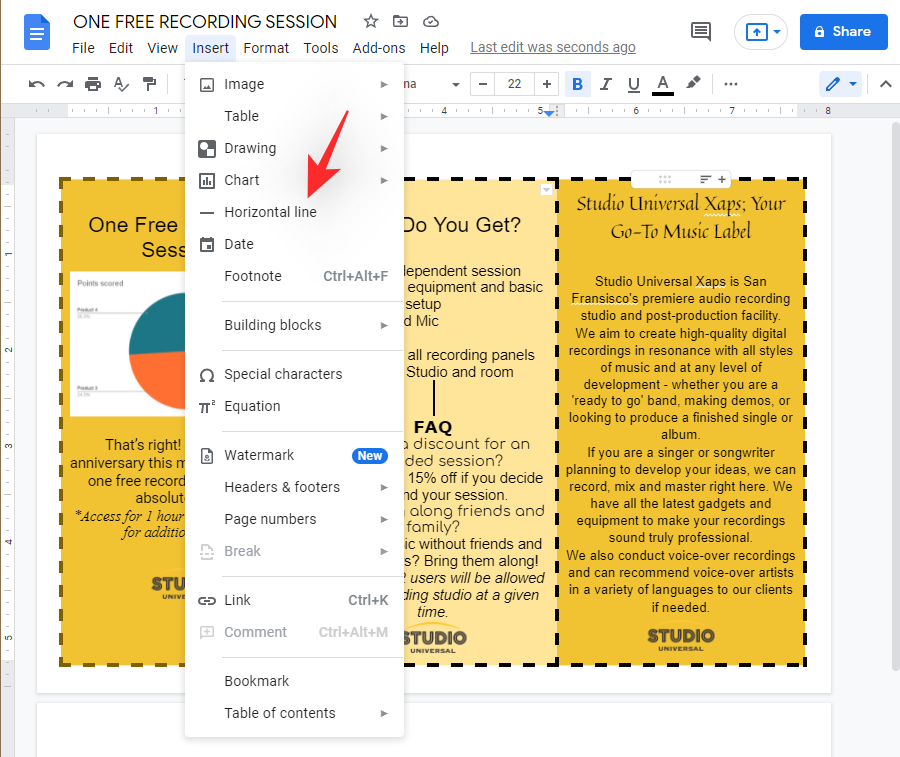
Click on ‘Insert’ on the high.
Now choose ‘Horizontal line’.
And that’s it!
You will now have a horizontal line separating sections of your brochure.
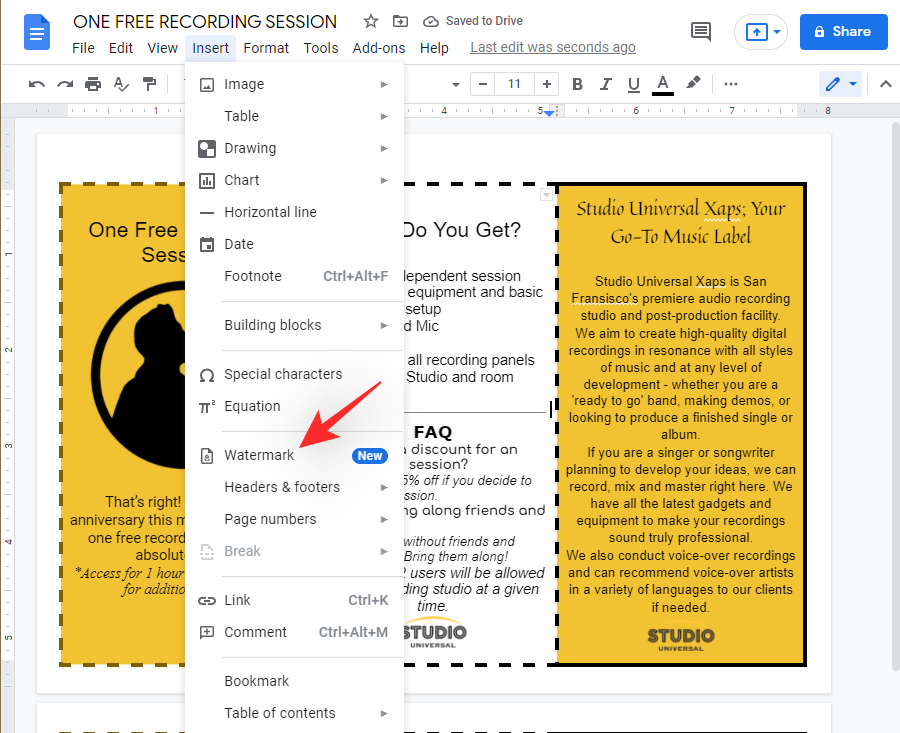
Step #04: Add Watermark (optionally available)
Watermarks usually assist you to forestall copyright infringement whereas retaining your rights secure. However, when making a brochure in Google Docs, they will help you add a light image to the background in your brochure. This will help you get more artistic management over your brochure. Needless to say that the performance can be barely restricted as Google Docs isn’t meant for such duties. Follow the steps beneath to profit from your watermark in Google Docs.
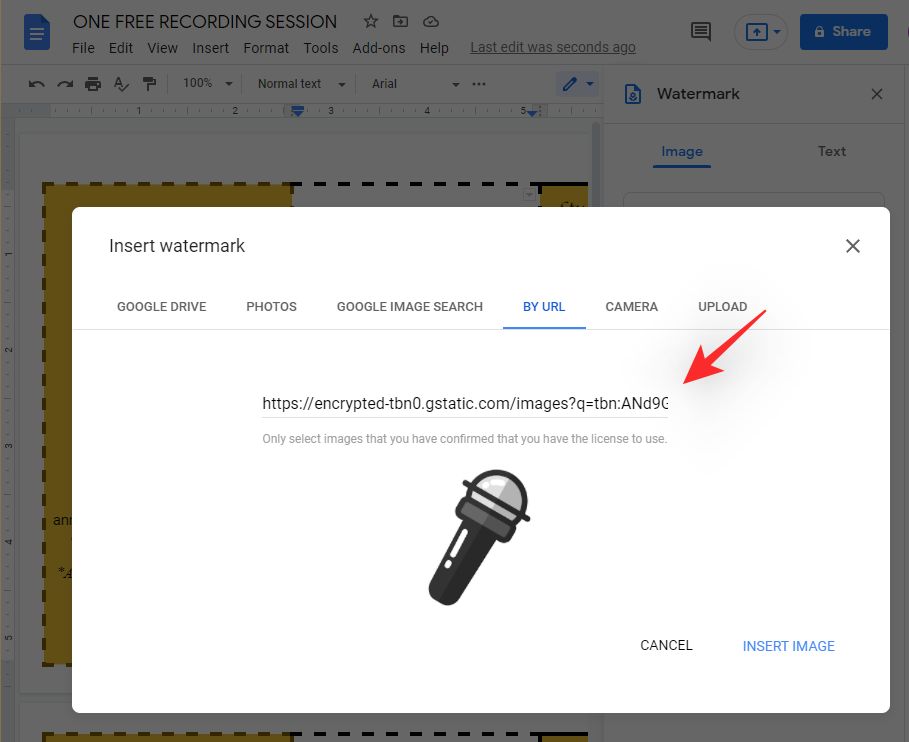
Click on ‘Insert’ within the toolbar on the high after which choose ‘Watermark’.
Click on ‘Select Image’.
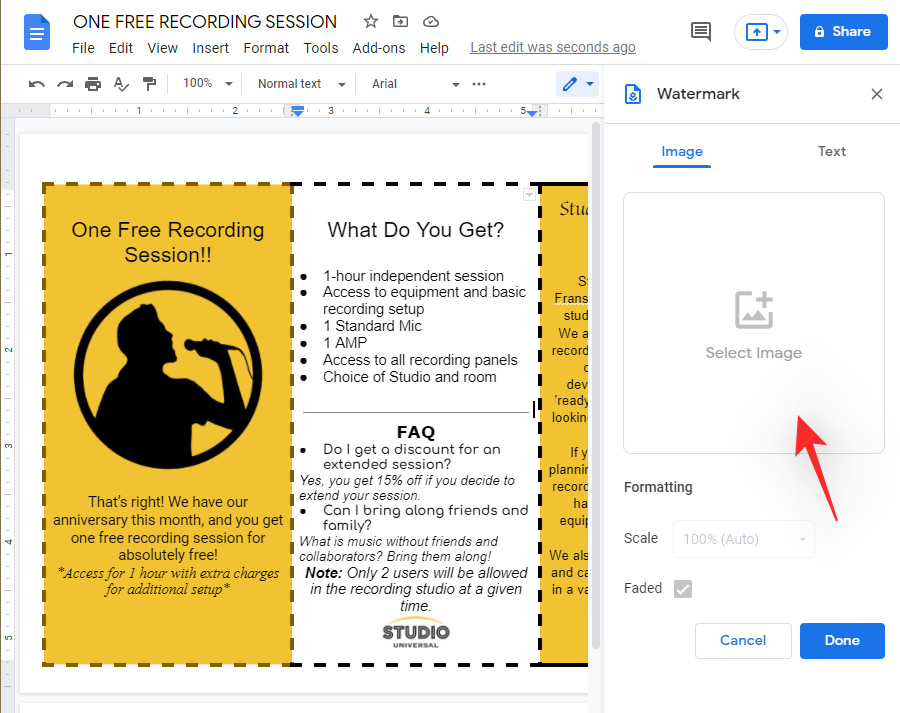
Now select the specified supply in your image by clicking in your alternative on the high. We can be using a URL for this information.
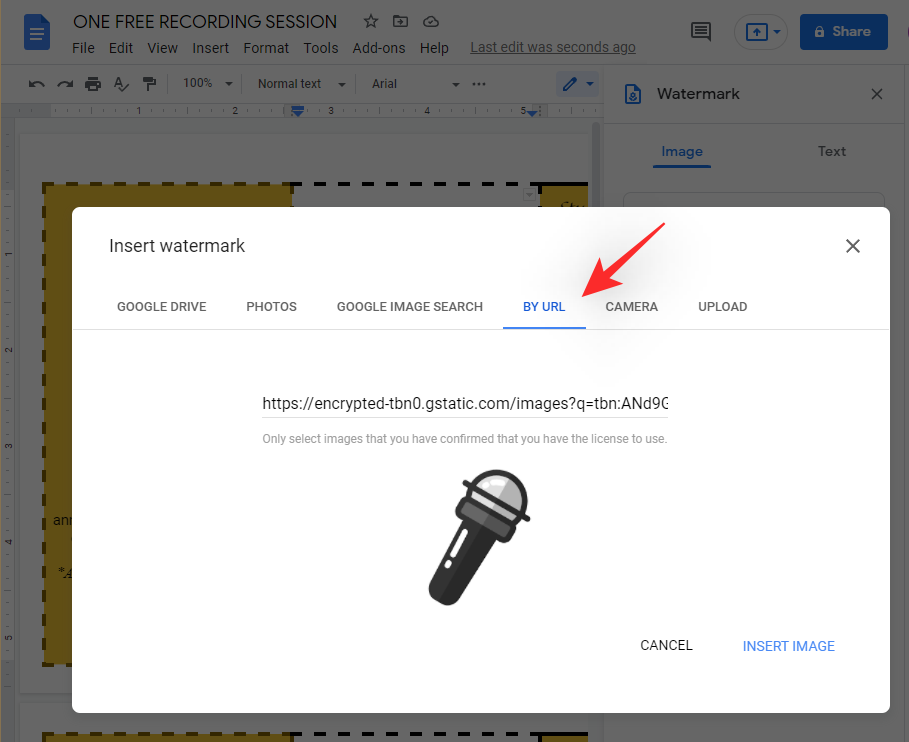
Paste the URL and it is best to have a preview of the image in your display screen.
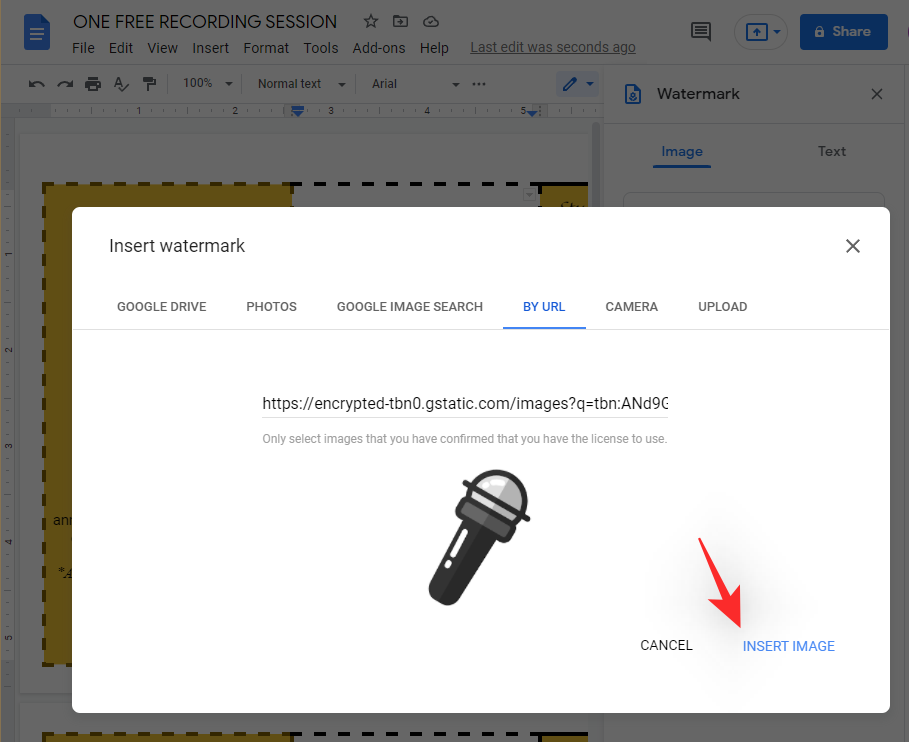
Click on ‘INSERT IMAGE’ within the backside proper nook as soon as you might be executed.
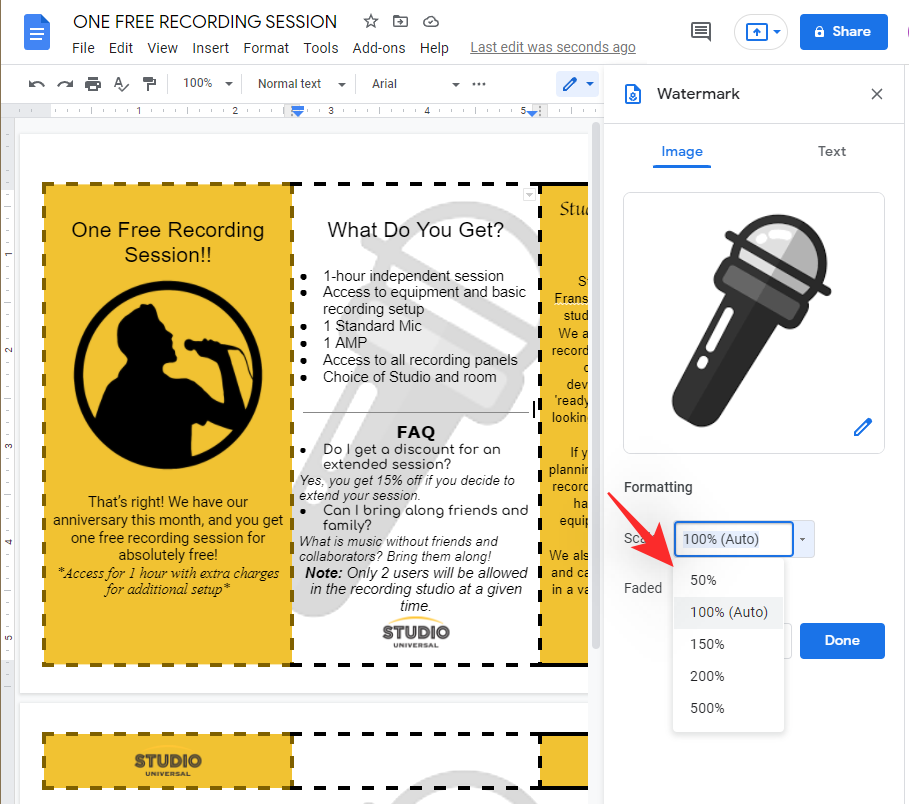
A 100% scale doesn’t work for trifold brochures in Google Docs. We discover the ‘50%’ scale to at all times give the perfect expertise, even when printing. Click on the drop-down menu for a similar and click on on ‘50%’.
Note: We extremely advocate using a excessive dpi image in case you want to print this brochure with out forwarding it to a design division.
Uncheck the field for ‘Faded’ in case you don’t need transparency added to your image.
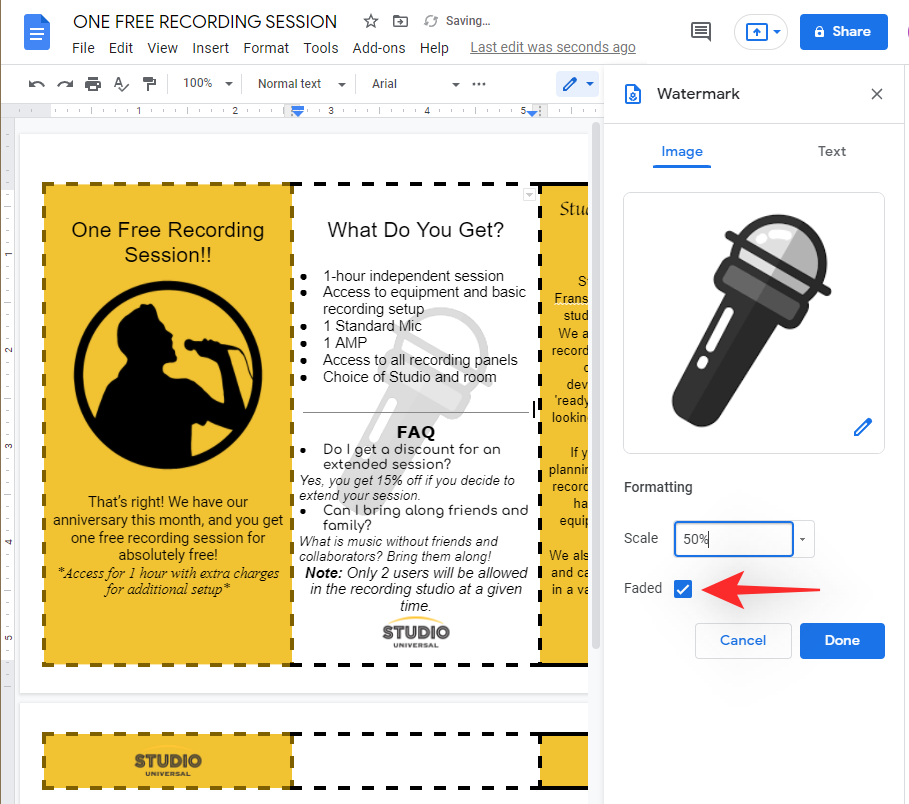
Click on ‘Done’ as soon as you might be executed.
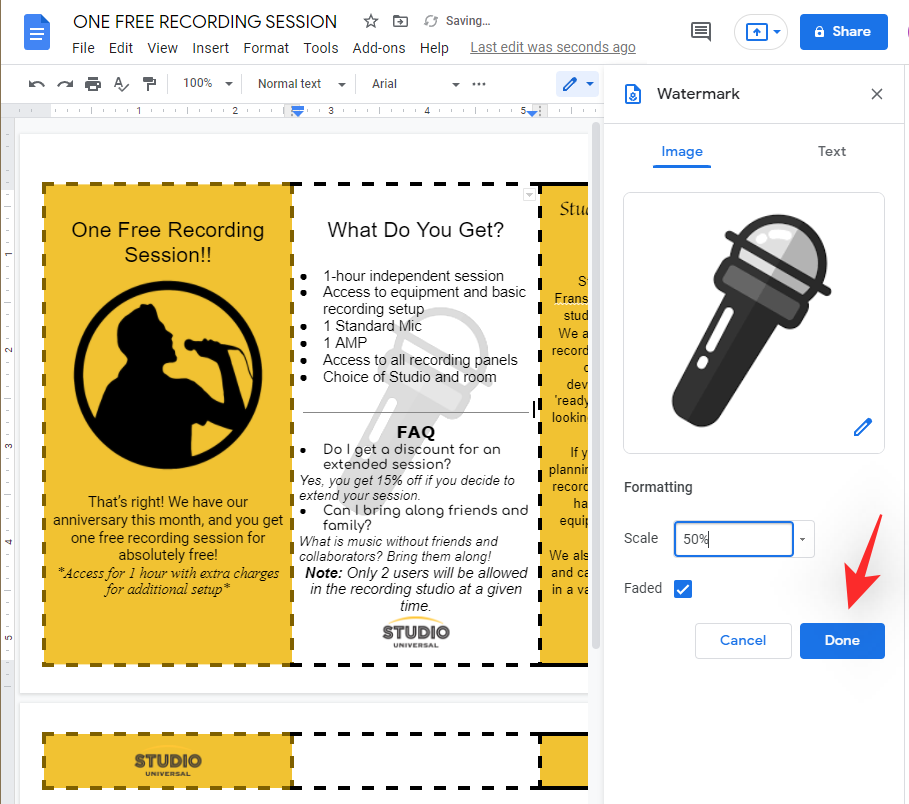
And that’s it! You will now have added a watermark to your brochure which in flip ought to seem as a light background in your center web page.
Step #05: Perform ultimate checks
By this level, we’ve coated most formatting and image instruments at our disposal. We now advocate you go forward and add all of the textual content and pictures you want to add to your brochure and format them in keeping with your wants. Once you’ve your ultimate imaginative and prescient at hand, we advocate you carry out the checks beneath to make sure that the whole lot is so as.
5.1 Check the textual content
Check your textual content for spelling errors, make sure that it doesn’t overlap with images, and add paragraph breaks wherever doable. Ensure that your textual content follows a constant alignment and make sure that your fonts present up as meant.
5.2 Check your formatting
We now advocate you examine your formatting. You can find yourself lacking a number of issues just like the alignment and wrapping of your images, placement of your graphics. We additionally advocate you search for any unfavourable areas in your brochure and care for them accordingly. You can add firm appears to be like, or a pretty CTA to cowl up extreme unfavourable areas in your brochure.
5.3 Check web page numbers
If you’re making an expert brochure or a B2B instrument then we extremely advocate together with web page numbers. You should improvise and place them manually on every web page to get the right look as using the native function will solely add a quantity to your complete web page. You can use the subscript choice by going to Format > Text > Subscript. This will assist you to add web page numbers simply even in cramped areas.
5.4 Graphic structure
We now advocate you examine your structure and make sure that your web page structure matches the printer and paper at hand. Check your margins and guarantee that you’ve the whole lot centered as meant. Additionally, we advocate you make sure that you shouldn’t have any web page breaks in your brochure. This will mess up your printer and make the printer skip the chosen web page solely.
Step #06: Print
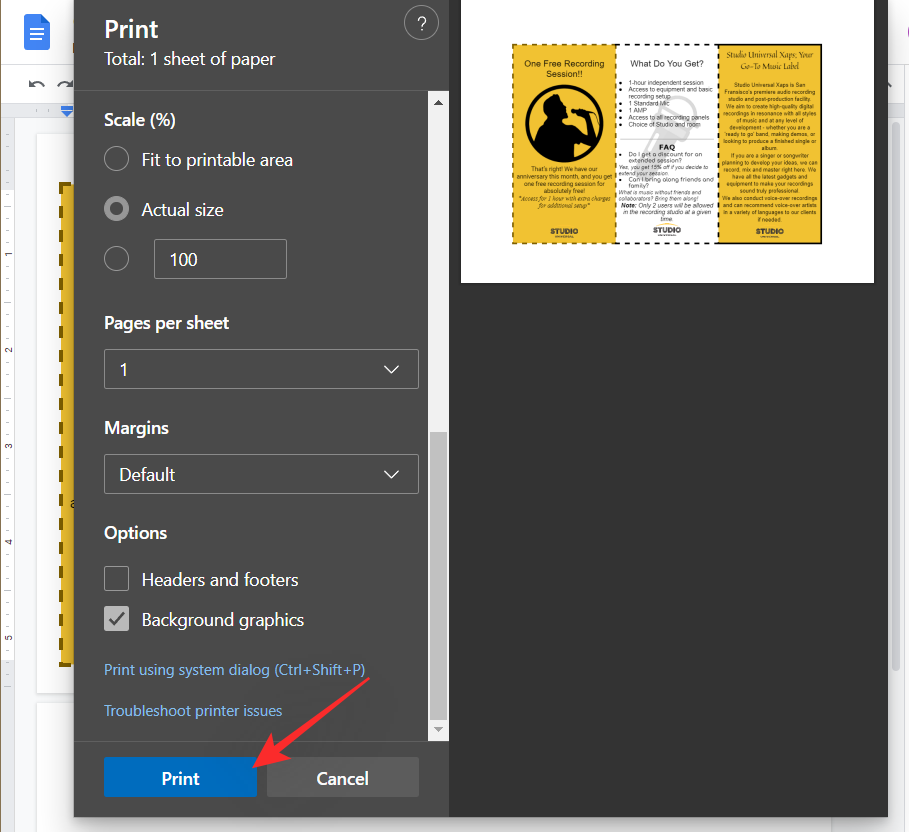
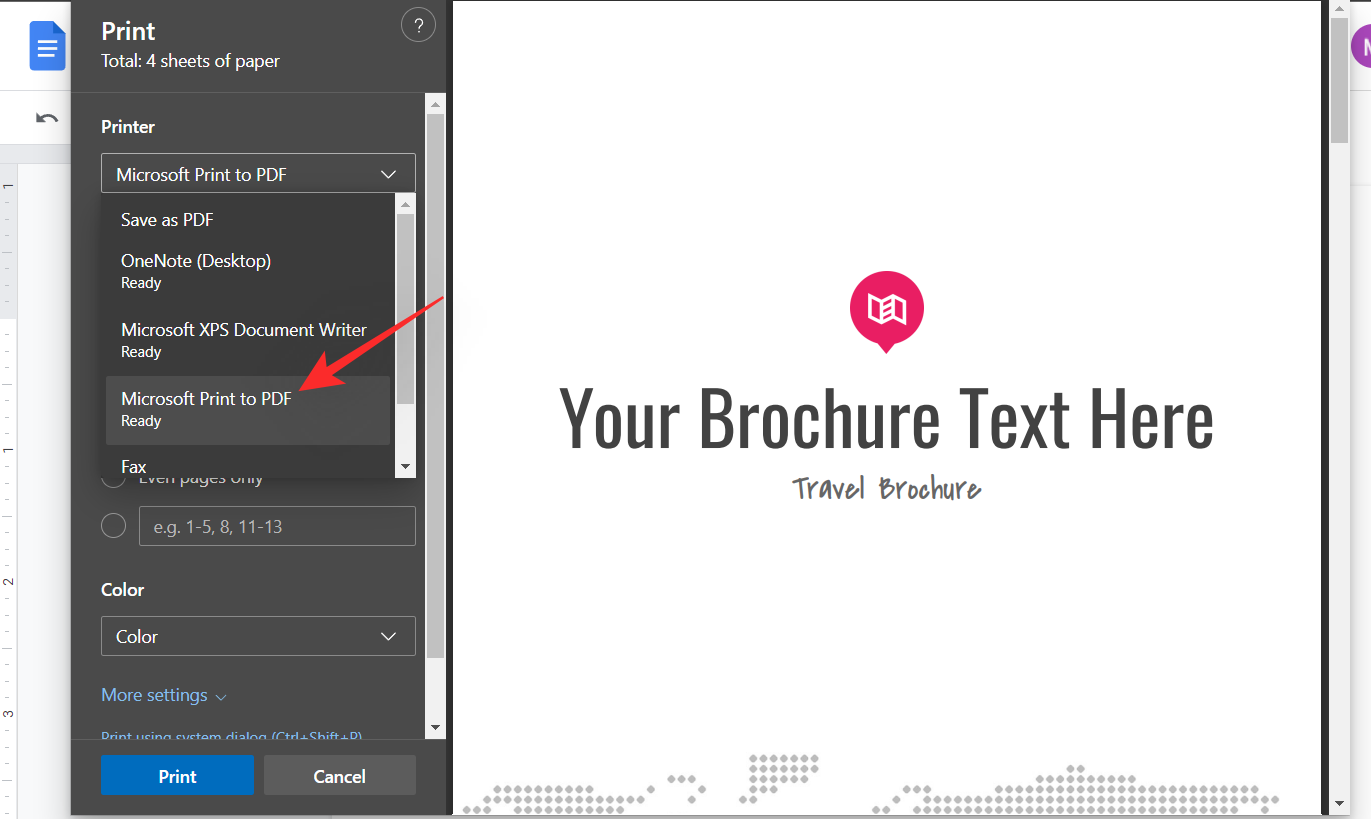
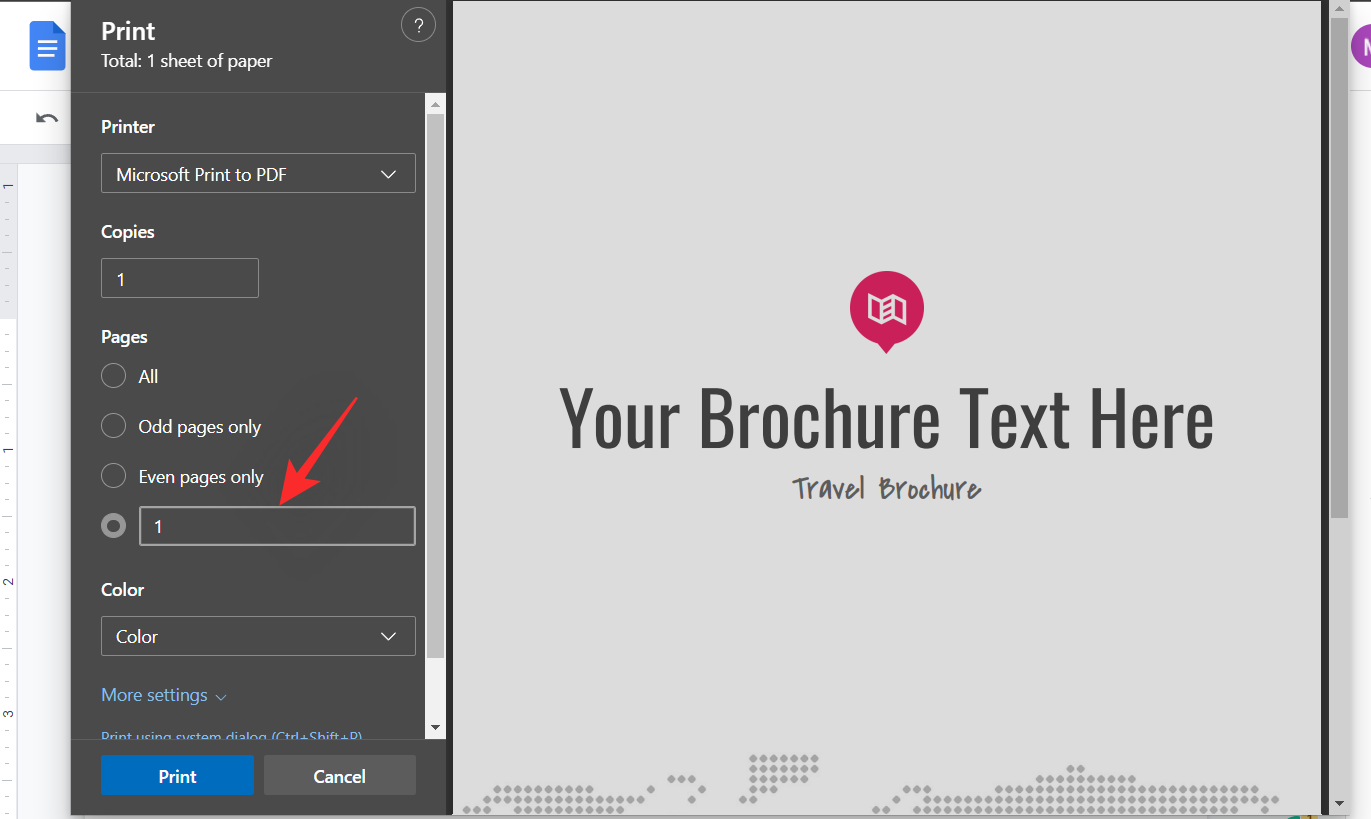
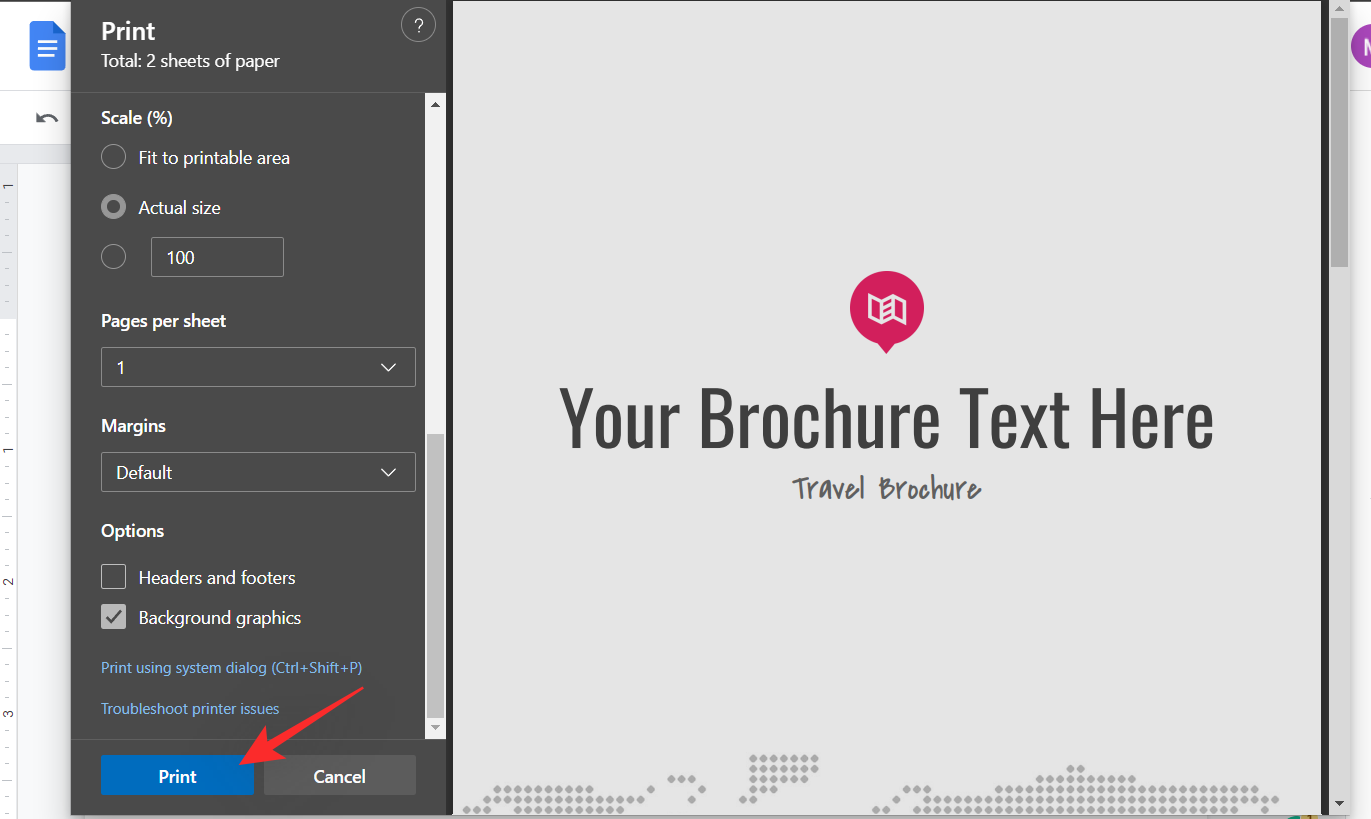
We can now print your brochure. Press Ctrl + P in your keyboard to open the Print window. Click on the drop-down menu in your left and choose the specified printer.
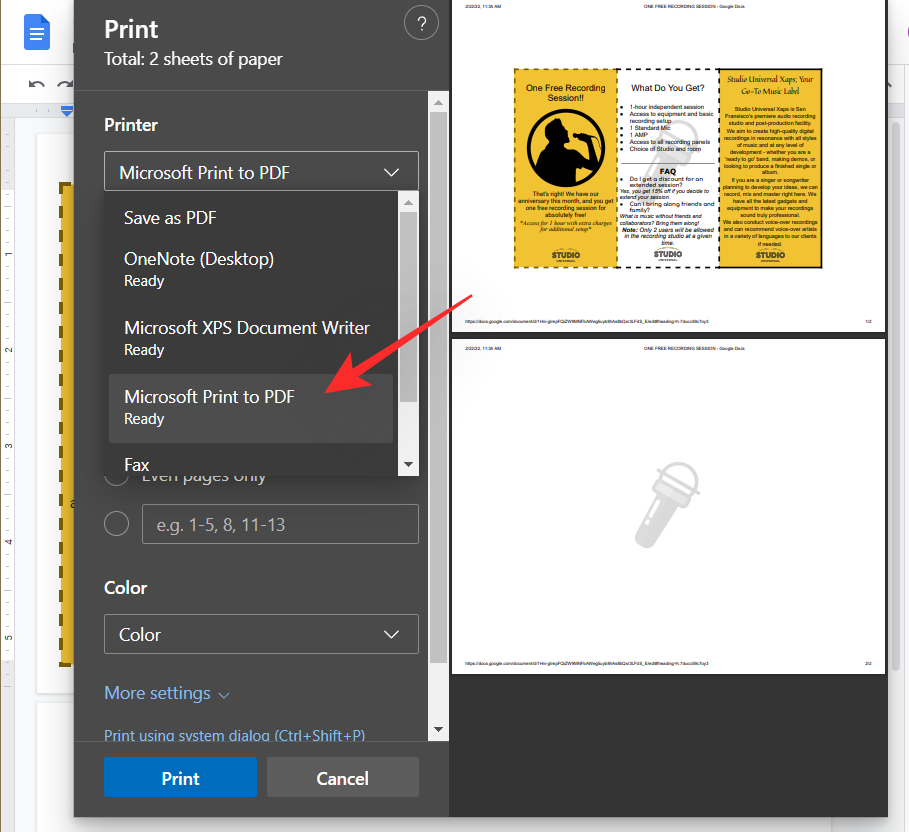
Define the web page you want to print. As I’ve a messed-up doc with plenty of tough components, I can be defining the web page quantity for the ultimate brochure I want to print.
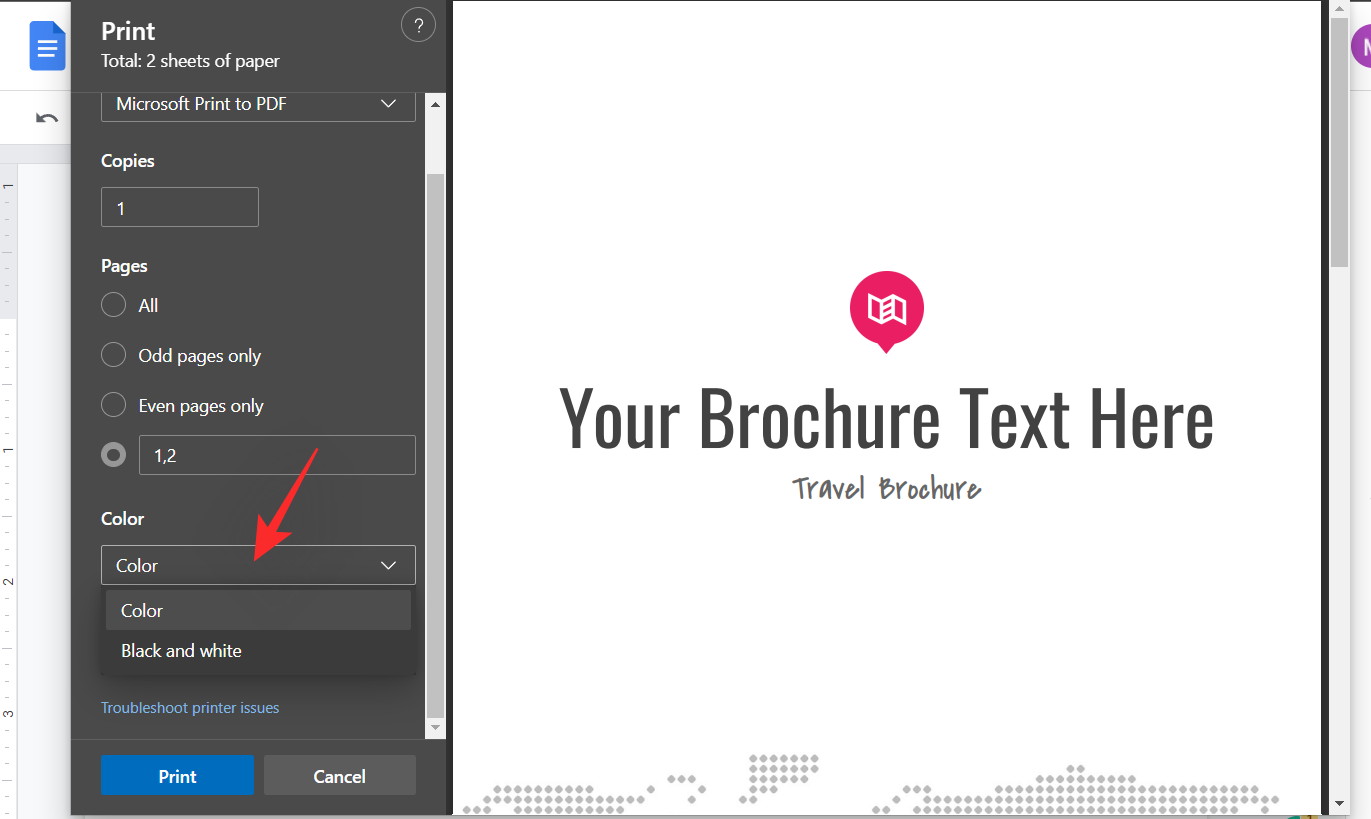
Click and choose your print colour from the following drop-down menu.

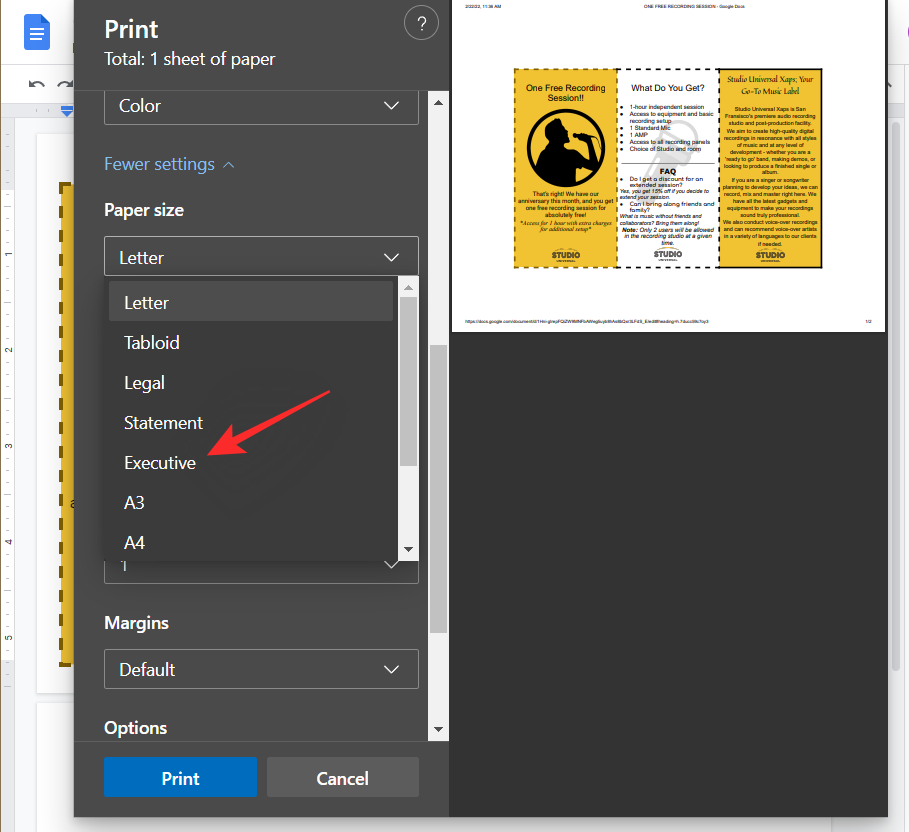
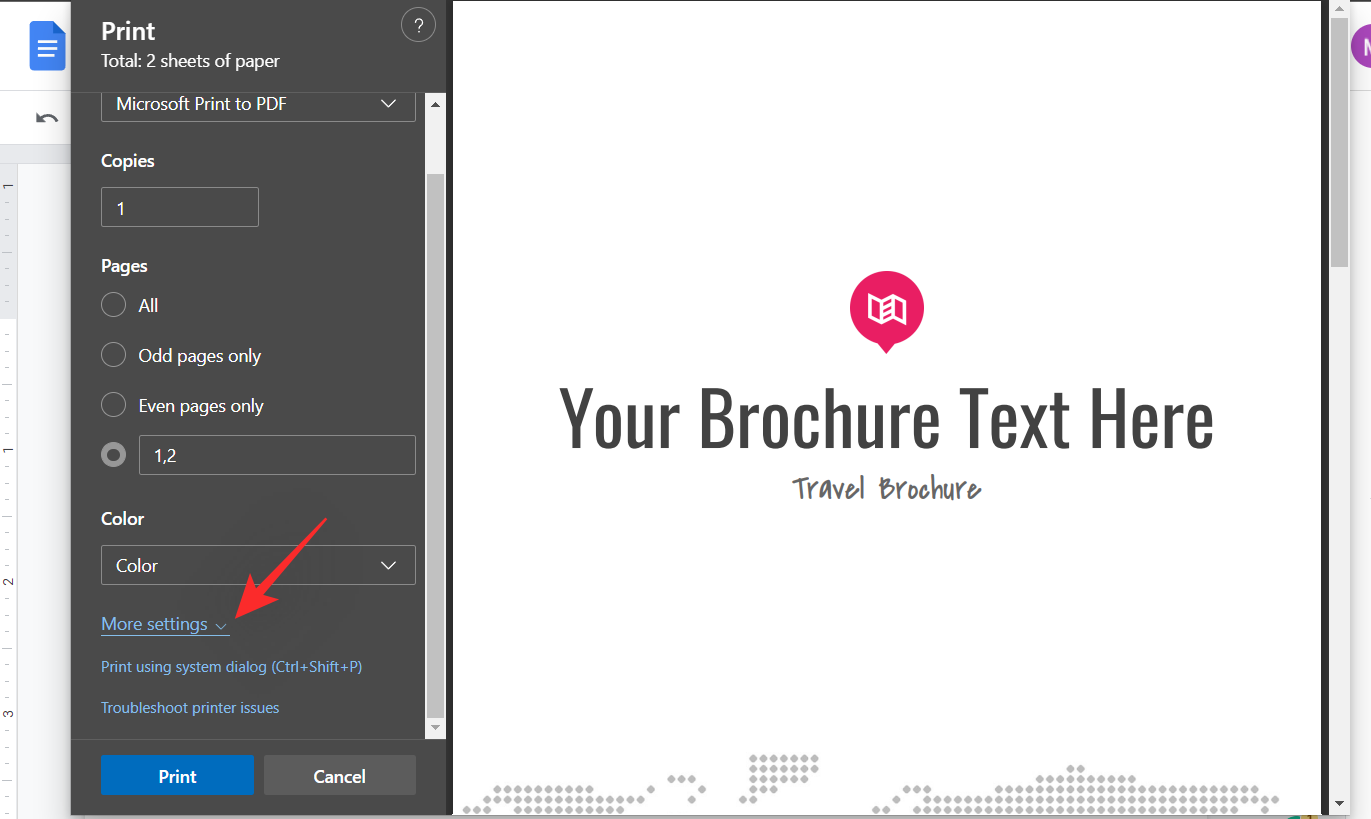
Click on ‘More Settings’.
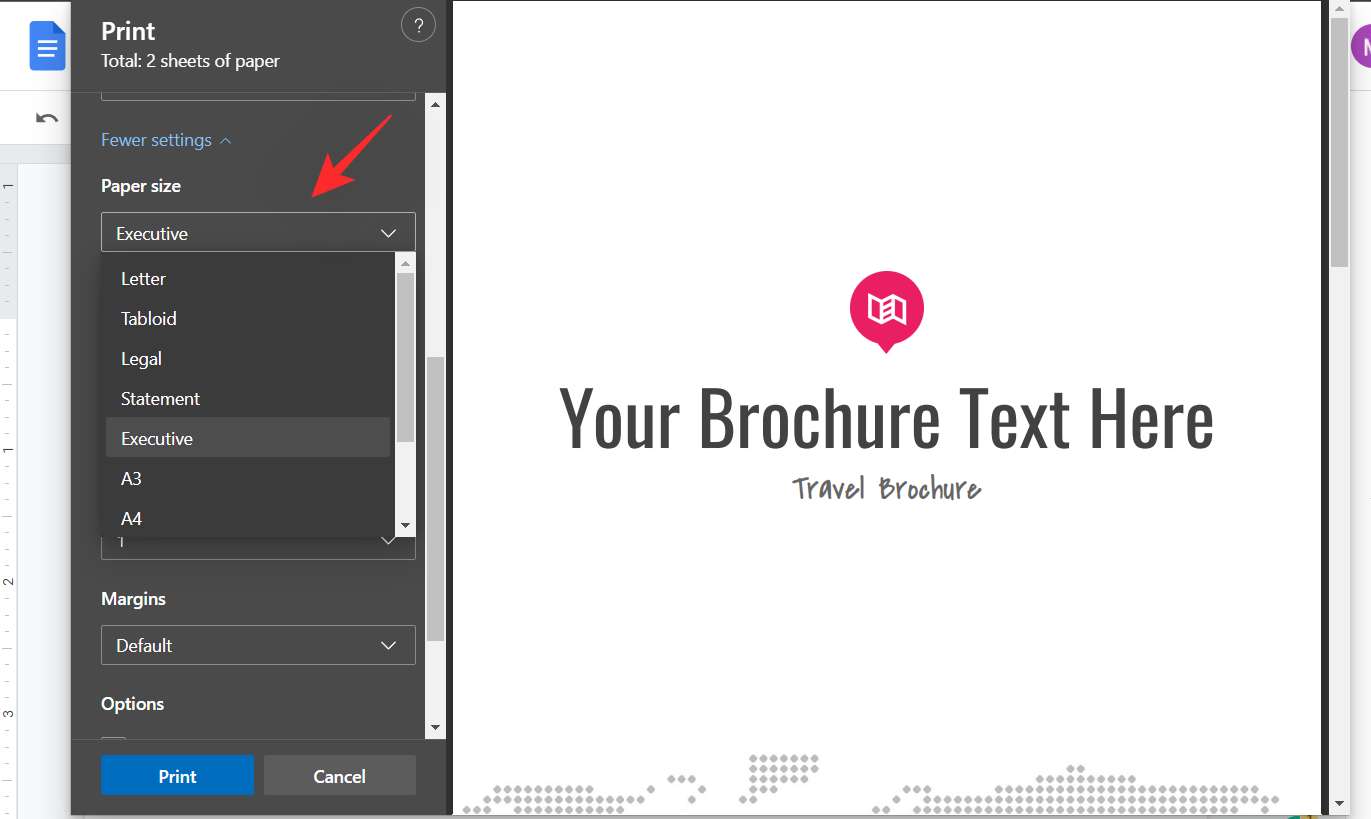
Now choose your ‘Paper Size’. This will help you print your brochure on completely different paper sizes and supplies. You can use this to your benefit to print your brochure to bigger and thicker landscape-sized papers for a greater brochure.
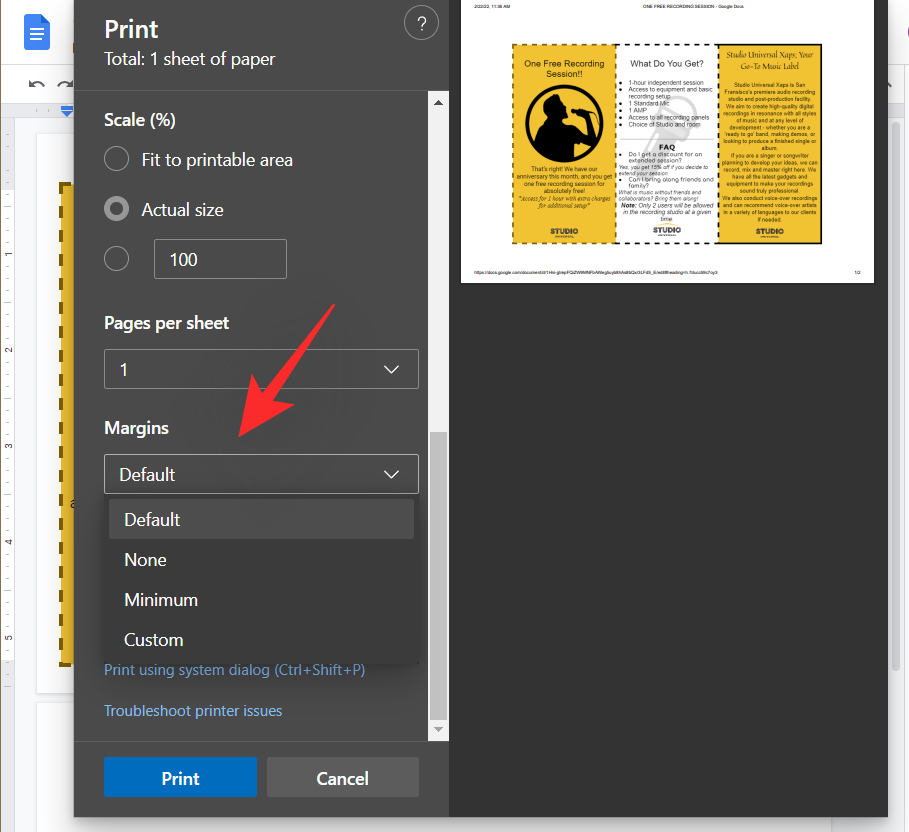
Click on the following drop-down menu and choose ‘None’ for margins in case you want to print the largest doable brochure. You can even outline your margins by deciding on ‘Custom’.
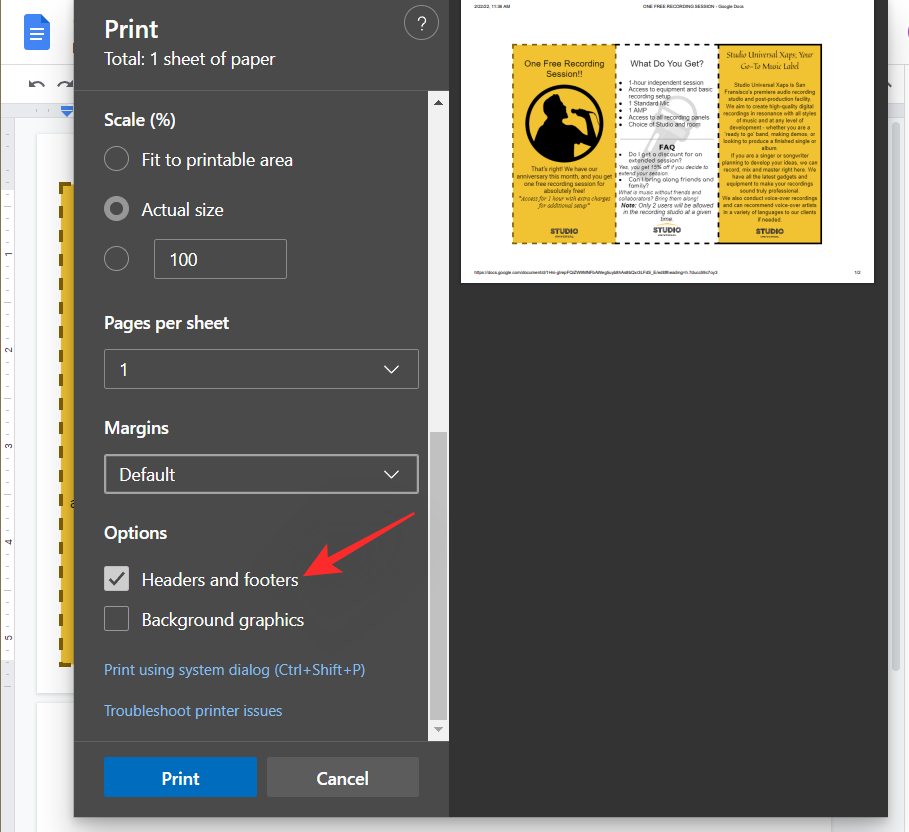
We now advocate you uncheck the field for ‘Headers and Footers’. You can select to print them if they’re part of your ultimate brochure.
Check the field for ‘Background graphics’.
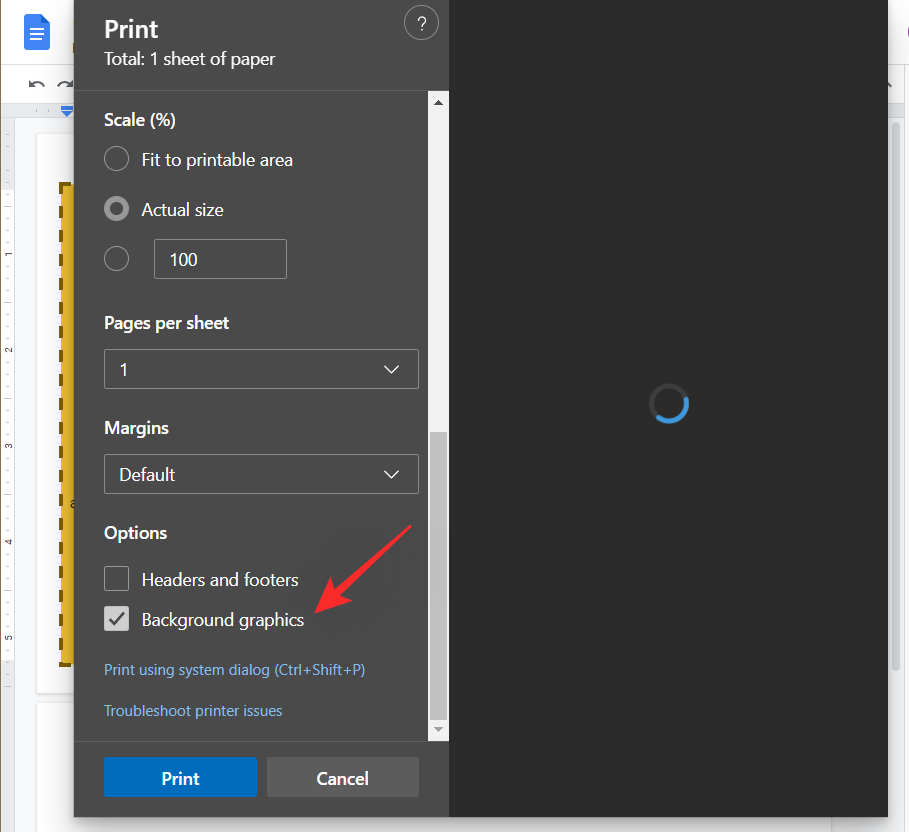
Now click on on ‘Print’.
And that’s it! You will now have printed a trifold brochure using Google Docs! If you want to add a second web page, use the trick on the high and print a second web page on the back of your brochure.
How do I create a portrait or panorama two-page brochure
Two-page brochures are a lot less complicated to create in Google Docs because the service even affords you a pre-made template that can assist you together with the method. Not solely this, you possibly can obtain third-party templates as effectively for Google Docs and use them simply with out having to fret about incompatibility points. Follow the steps beneath that can assist you simply create a two-page brochure in your PC or Mac.
Step #01: Select and use a template
Let’s first choose the Google Docs template. Open Google Docs in your most well-liked desktop browser and click on on ‘Template gallery’ on the high.
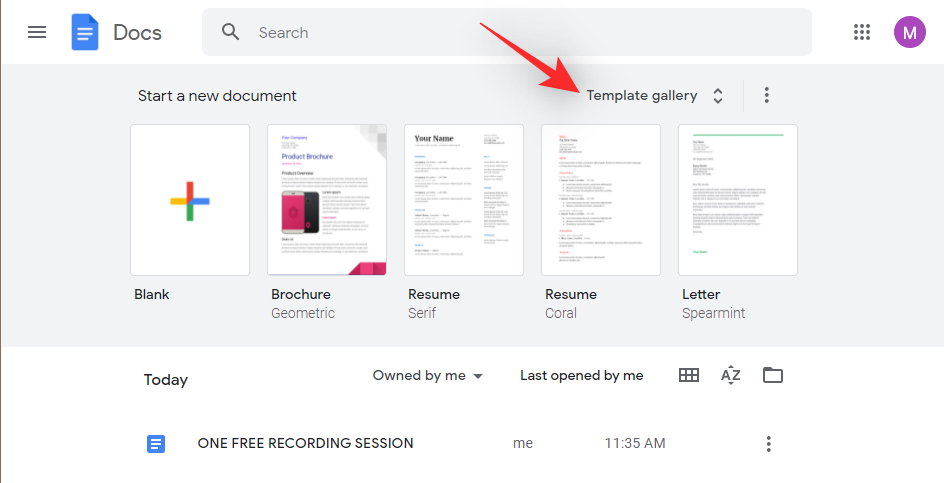
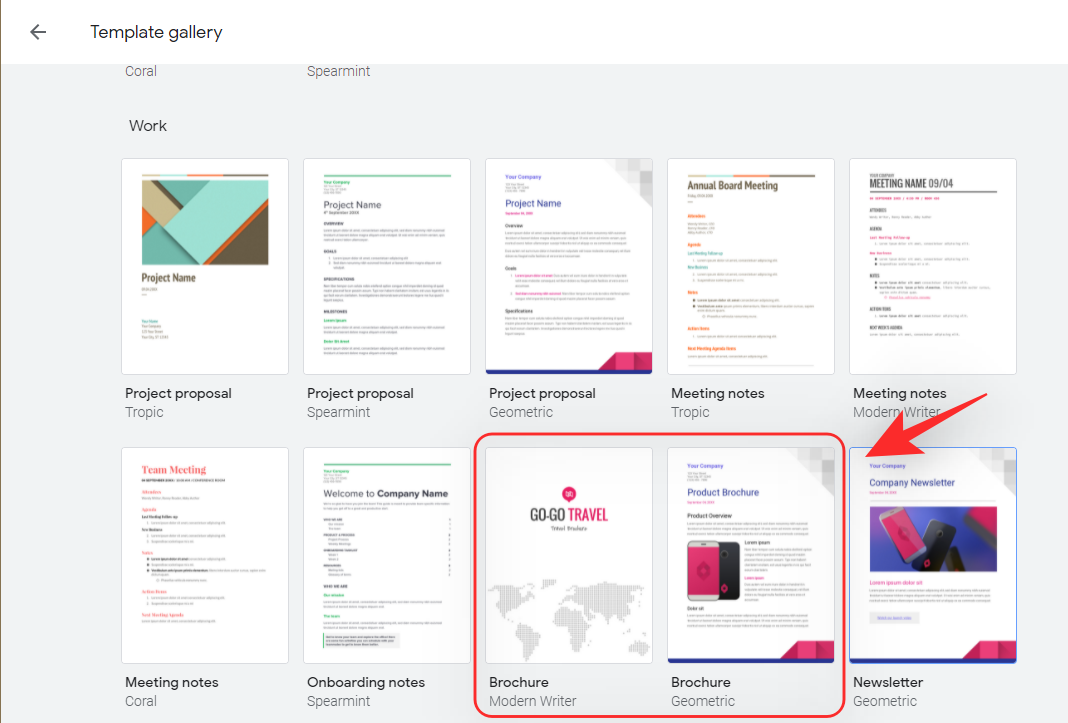
Scroll right down to the ‘Work’ part and it is best to have two templates for ‘Brochure’. Click and choose the one you want to use.
The template will now be open in your display screen. You can now use the following part to tune in your web page sizes.
Third-party Brochure templates:
If the default templates appear too bland then listed here are some third-party brochure templates that ought to assist you to spice issues up. You can exchange and alter colours, take away or add images and exchange the textual content with your individual for a more formal or informal look relying in your wants. Use the hyperlinks beneath to seek out the perfect brochure templates relying in your present venture.
Step #02: Tune in your web page sizes
Let’s create a web page setup primarily based on the printer at present accessible to you in addition to the sheet measurement you propose on using. Follow the steps beneath that can assist you together with the method.
Open the template you chose above after which click on on ‘File’ within the high proper nook.
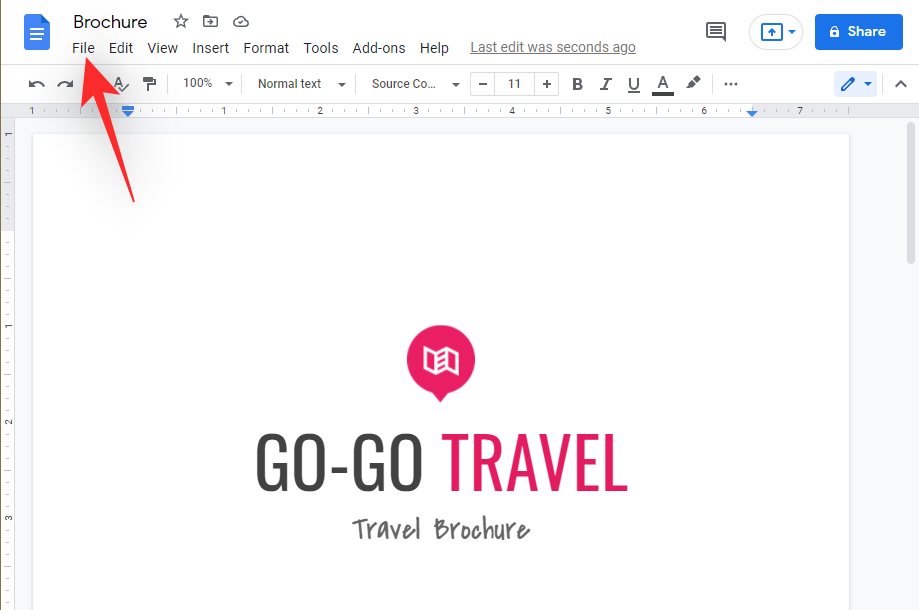
Click on ‘Page setup’.
Select your orientation by clicking on the identical.
If you want to apply modifications solely to the chosen web page of the doc then you possibly can change the identical by utilizing the drop-down menu on the high.
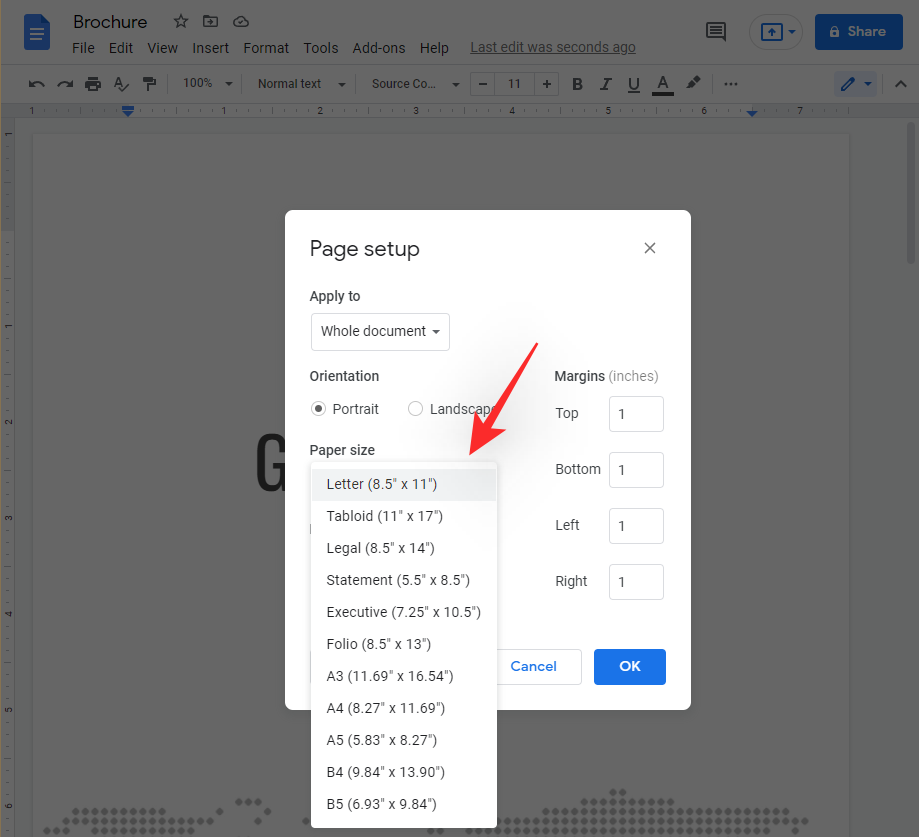
Select your paper measurement from the following drop-down menu.
Now select a web page colour in case you want to use a customized web page colour. You can add colours to your brochure later as effectively, nevertheless, this selection is really helpful in case you want to use a single colour all through your brochure.
Enter the respective margins you want to use in your doc. If you propose to fold your brochure then we advocate using the bottom margins to acquire the utmost actual property in your paper.
Click on ‘OK’ as soon as you might be executed.

The modifications ought to now be mechanically utilized to your doc. We can now customise the brochure template in keeping with your wants. Click and exchange the weather within the template along with your brochure’s textual content, title, and more.
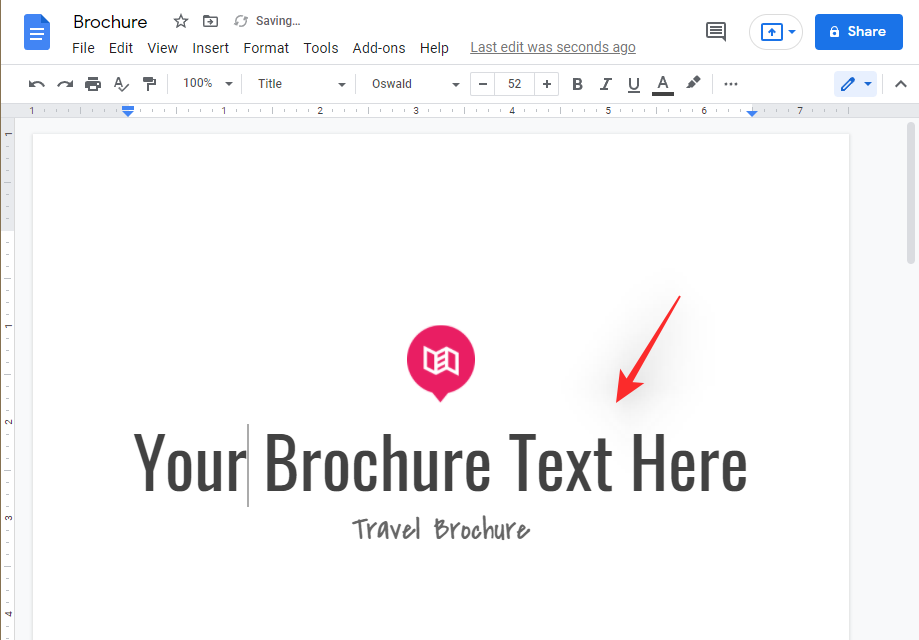
And that’s it! Once you’ve changed all of the content material, you should utilize the following part to format the brochure in keeping with your liking.
Step #03: Format your brochure
We have coated in size all the fundamental choices supplied by Docs to edit your brochures above. You can use this hyperlink to seek advice from the identical. You can change your textual content colour, add highlights, images, watermarks, and even devoted third-party add-ons. These instruments ought to assist you to create the right brochure primarily based in your wants.
Step #04: Print
We will now print your brochure. Follow the steps beneath that can assist you together with the method.
Hit Ctrl + P in your keyboard to print the present doc.
Note: We advocate you examine your doc for any pointless pages or misaligned components at this level. If you solely want to print sure pages out of your doc, we advocate you keep in mind their web page numbers.
Click on the drop-down menu on the high and choose the printer you want to use.
 Click and enter the variety of copies you want to print for the present brochure.

Note: We advocate printing a number of copies after printing a check copy to keep away from losing paper.
Select ‘All’ in case you want to print all of the pages from the present doc. If you want to print solely explicit pages, click on on the final choice and enter the respective web page numbers.
Select in case you want to print in Color or Black and White from the following drop-down menu.
Click on ‘More settings’ next.
Select the dimensions of the paper you want to print on from the following drop-down menu.
Ensure ‘Actual size’ has been chosen for ‘Scale’.
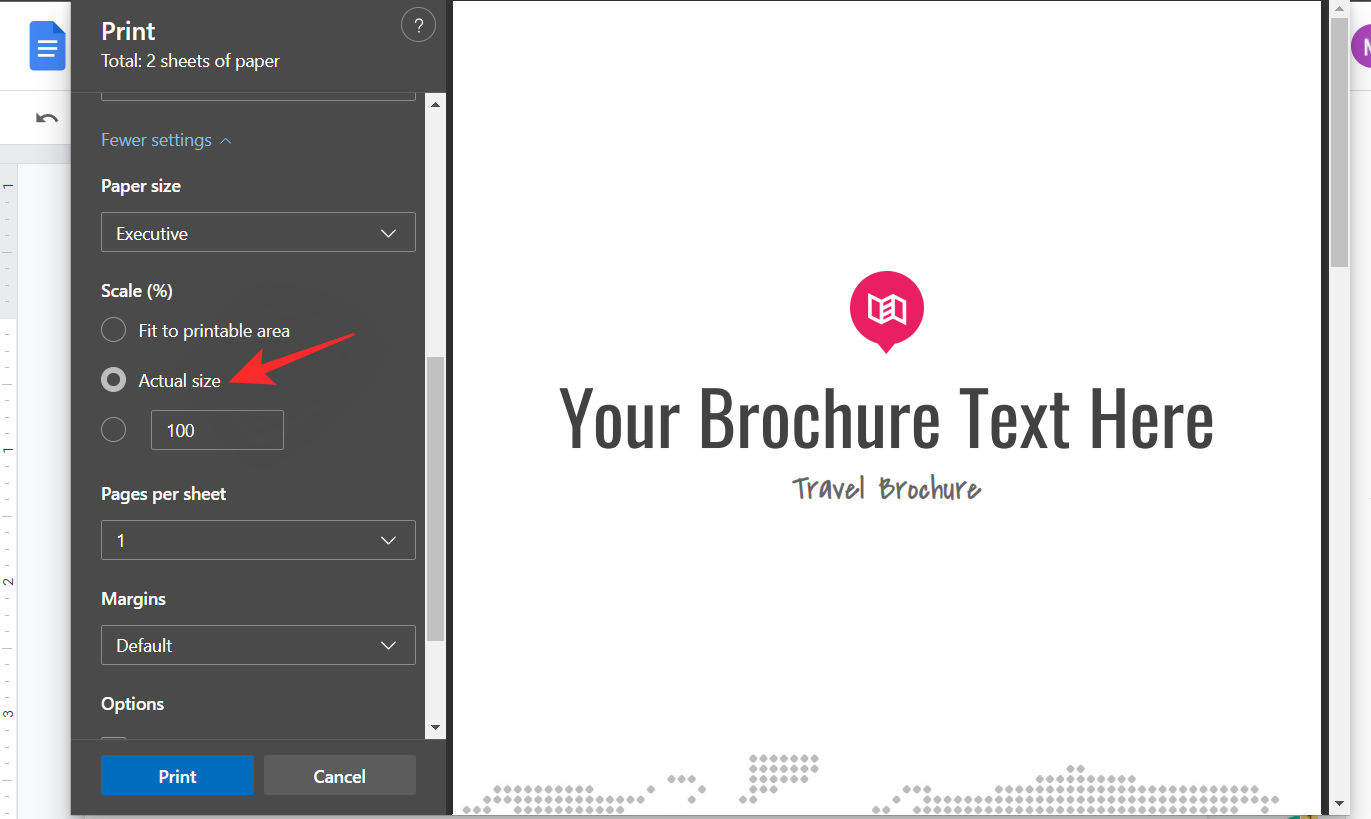
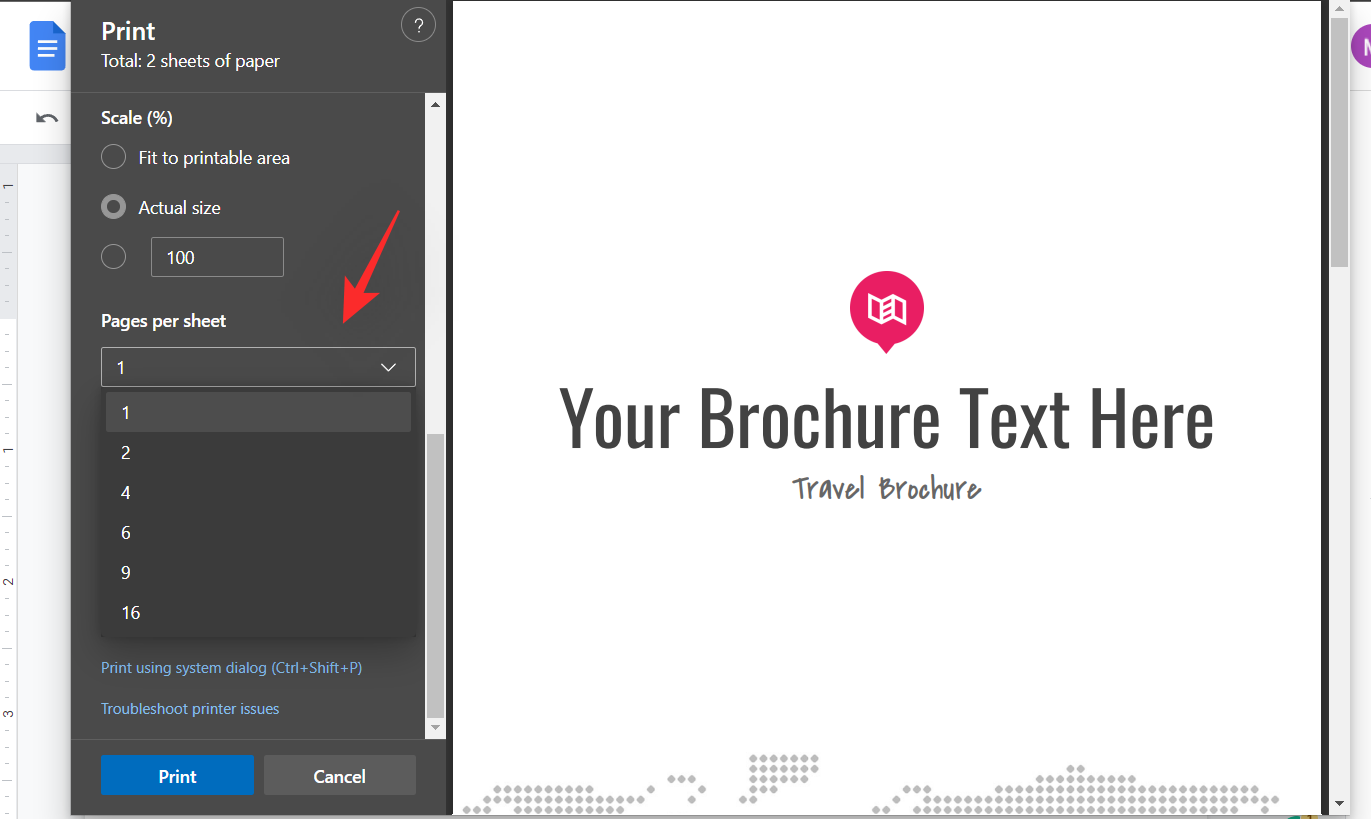
Select the variety of pages you want to print for ‘Pages per sheet’.
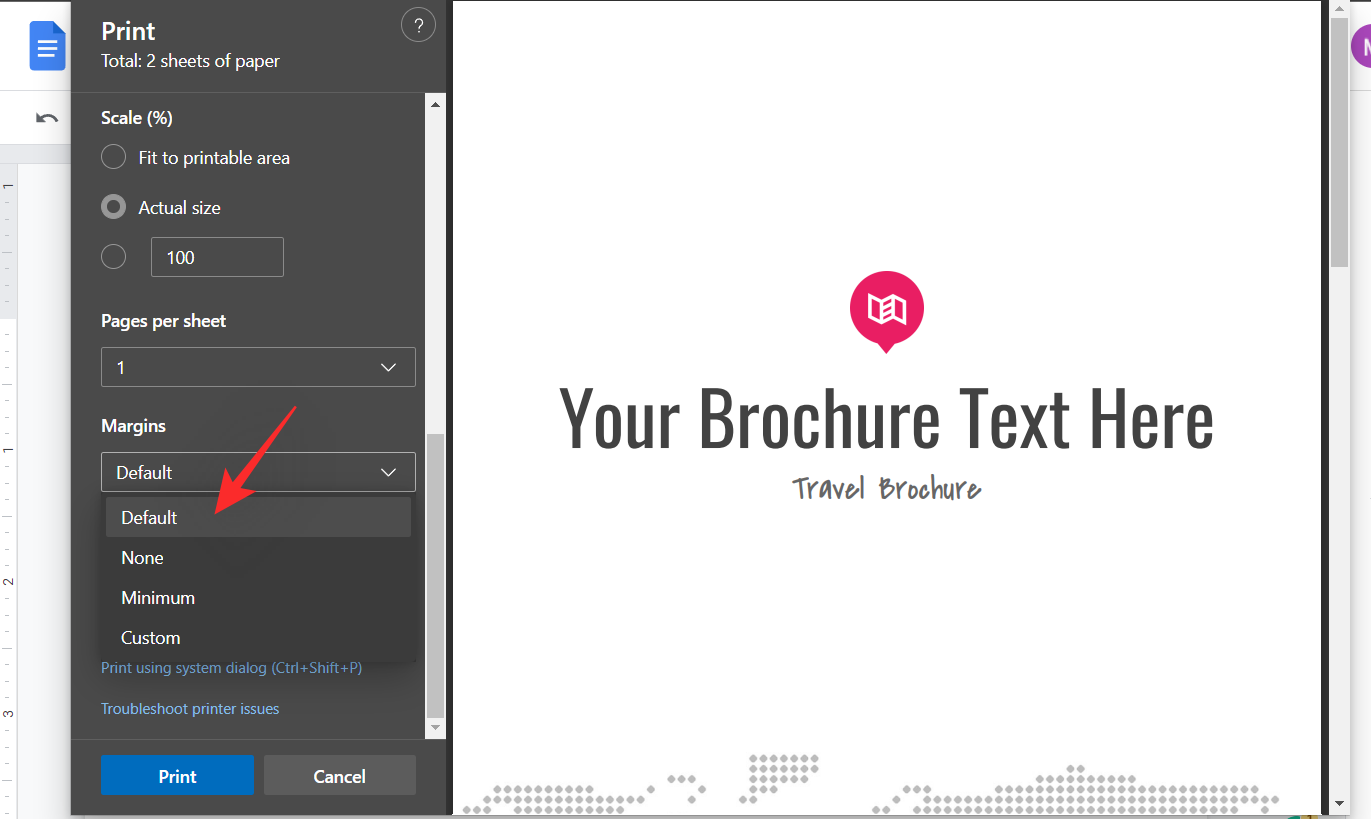
Click on the drop-down menu for ‘Margins’ and guarantee ‘Default’ has been chosen.
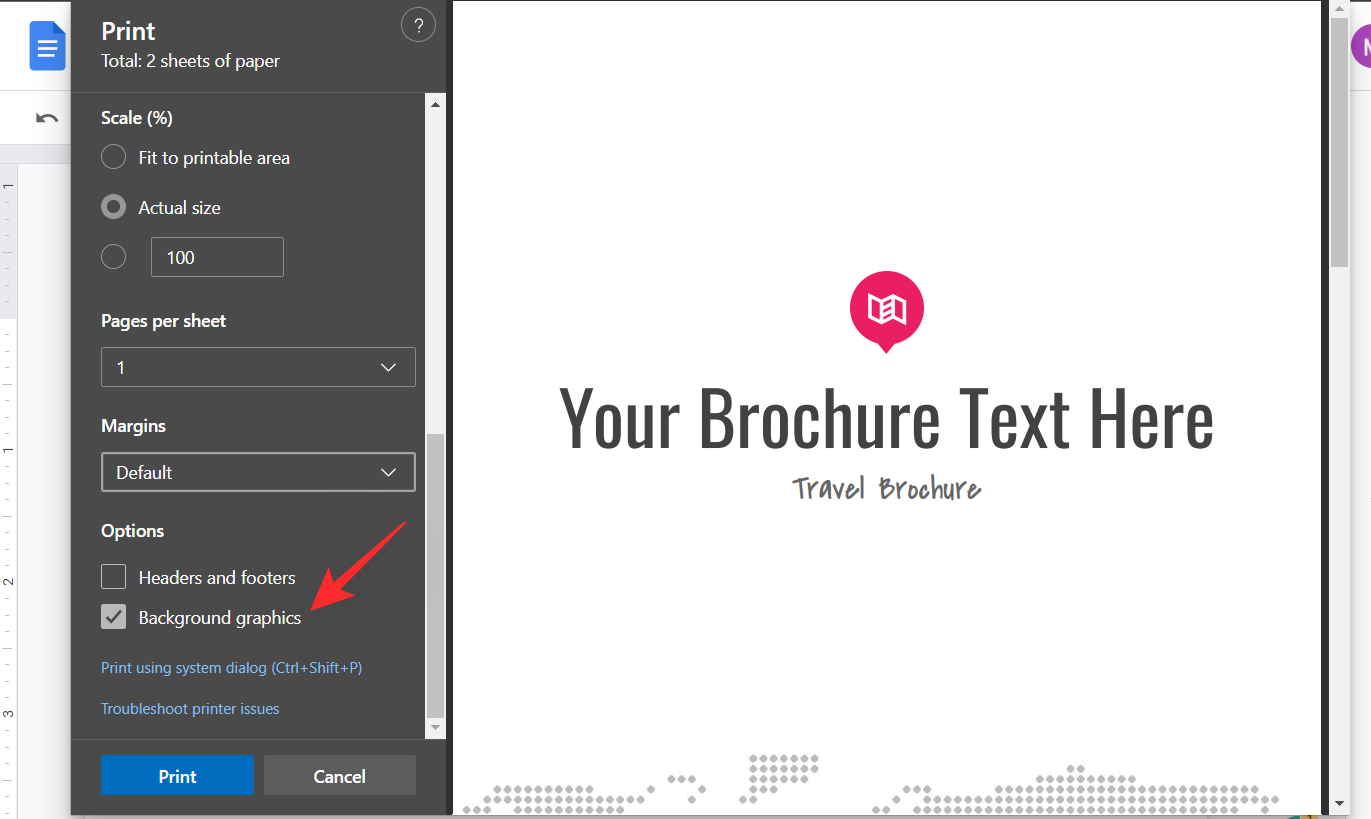
Check the field for ‘Background graphics’.
Finally, click on on ‘Print’ as soon as you might be completely satisfied along with your settings.
And that’s it! You will now have printed your just lately created brochure.
How do I create bi-fold and tri-fold brochures using columns in panorama orientation
There are different methods you possibly can create bi-fold and tri-fold brochures in Google Docs and that’s by utilizing the Column formatting choice in your doc. This can turn out to be useful in case your brochure is closely text-based and desires to speak plenty of data in a smaller space. Use both of the guides beneath that can assist you together with the method.
1. Create a bi-fold brochure
First, begin by going to docs.google.com and creating a brand new doc. On the top-left of your display screen, click on on the ‘File’ menu.
When it expands, click on on ‘Page setup.’
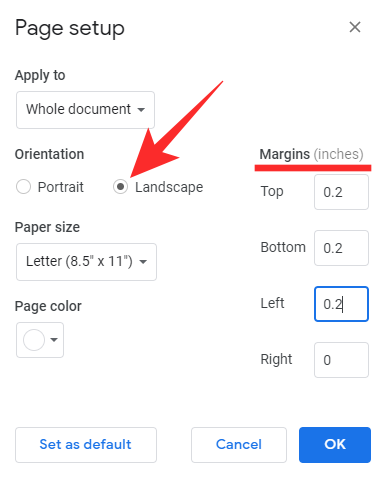
By default, each Google Docs doc is about in ‘Portrait’ mode. Since you’d be folding the doc, you want as a lot area as doable. So, we’ll be altering the orientation of the doc in addition to the margins. Set the ‘Orientation’ to ‘Landscape’ and scale back the dimensions of all margins.
Now, return to the doc you have been modifying and click on on ‘Format’ on the menu bar.
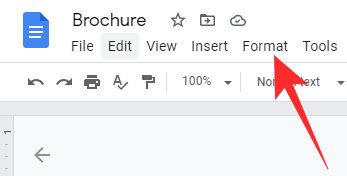
Then, develop the ‘Columns’ part. Since you’re going for a bi-fold, you’ll have to choose the 2 columns choice.

After you set your column format to 2, it dictates Google Docs to leap to the second column after exhausting the primary — as an alternative of going to the following web page.
Now, add acceptable sections and fill them with images and textual content. Before hitting the ‘Print’ button, be sure that to preview it first. Go to ‘File’ > ‘Print preview’ to have a sneak peek.
2. Create a tri-fold brochure
Three-fold pamphlets are much more densely packed than two-folds, which suggests it’s much more tough to get the formatting proper. However, making them isn’t a lot of a problem.
Head over to docs.google.com. Now, open the file you need to flip right into a brochure and click on on the ‘File menu.’
Then, go to ‘Page setup.’
Change the ‘Orientation’ to ‘Landscape’ and reduce margins. Changing your orientation from portrait to panorama means that you can have more horizontal display screen real-estate, though on the expense of some vertical area. Margins, too, are overrated relating to brochures, because it’s not nearly readability, it’s additionally about cramming as a lot data in as little area as doable.
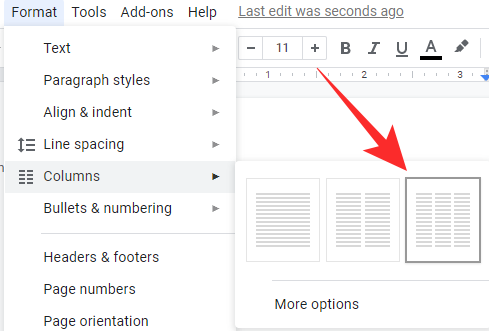
After you’ve modified the orientation and margin settings, discover the formatting choices by clicking on ‘Format’ on the menu bar.
Now, go to ‘Columns’ and select the three-column choice.
When you select to have three columns, your doc would take you to the following column when the earlier one is exhausted, not go to a brand new web page. When you’re executed, populate the columns with images and textual content and your three-fold brochure could be able to print. If you want to pack in additional data, do make the print double-sided.
How do I make a brochure on Mobile (iPhone or Android telephone)
Launch the Google Docs cellular app. Considering you might be already signed in to Google, you’d be taken to the Docs dashboard, the place your entire present paperwork could be listed. Unlike the net shopper, you don’t get the checklist of presets. So, you’d need to search for a workaround.
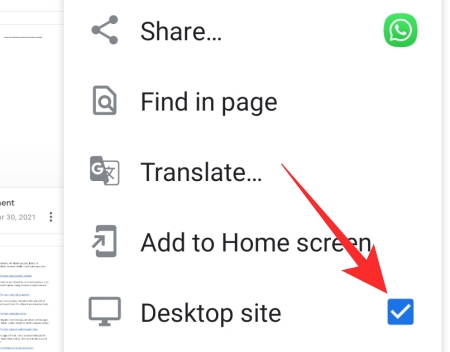
Google’s famed browser, Chrome, can serve you effectively on this state of affairs. Thanks to its capacity to show desktop websites in all their glory, you should utilize Google Chrome to open Google Docs, simply as you do on the net shopper.
So, first, go to docs.google.com. You’d be requested to open Google Docs using the app, as an alternative of the web site. To bypass that, hit the vertical ellipsis button on the top-right nook of the display screen and examine the choice ‘Desktop site.’
Now, reload the web page. You ought to have the ability to see a mini model of the Docs net shopper in your cellular display screen. Tap on ‘Brochure’ to start out working in your doc.

Tips to assist enhance your brochure in Google Docs
Now that you already know just about all about creating single, double, and even triple-sided brochures, let’s take a look at how you can make them as impactful as doable.
1. Use crisp headers
When you’re making a brochure, you possibly can’t afford to make it a slow-burn. You’ll need to guarantee that the whole lot you’re attempting to convey is just about on the floor and may be accessed with out studying an excessive amount of into the doc.
For instance, in case you’re speaking a couple of cellphone, you can provide slightly image of the particular product, inform customers about its essential options, properties that make it stand aside, and possibly even concerning the manufacturing firm. The headers or titles of the actual sections have to be effectively thought out and never really feel like a drag. Readers of your brochure are unlikely to take a position their treasured time studying lengthy, obscure titles.
2. Don’t skimp on image high quality
They say a picture is value a thousand phrases, and it most undoubtedly stands true for brochures or pamphlets. To create intrigue and pleasure, you need to make your doc as eye-catching as doable, and including high-quality images is the best approach to do this. While including images, be sure that the formatting is finished accurately. The image should work with the following part, not eclipse or contradict it.
3. Don’t make it bland
Brochures need to be participating and hopefully enjoyable to learn. You ought to attempt to be updated with the most well liked catchphrases and popular culture references, if doable, which might assist you to hook up with your viewers. However, since each brochure is completely different, there’s no one-size-fits-all philosophy in right here. Just keep experimenting along with your vocabulary and see what suits.
Google Docs add-ons to boost your brochure making expertise
The native instruments supplied by Docs is perhaps loads sufficient for some customers. But in case you need to publish or market one thing, you would possibly want inventory photos and more management in your fingers.
Thankfully Google Docs has now the power to put in add-ons that may improve your expertise and assist you to create more detailed diagrams, improve your textual content and add inventory images from well-liked free inventory photograph web sites.
Here are our high picks for the must-have add-ons in Google Docs.
Disadvantages of using Google Docs for Brochures
There are a number of restrictions that you’ll have to work round when using Google Docs to create your brochure from begin to end. Here’s a listing of a very powerful ones that you need to be conscious of.
- Limited Placement: Adding graphics is pretty simple and whereas Docs now help drawings and graphical representations, shifting them round to your liking can be powerful. We advocate using a picture editor after you have created the preliminary draft in case you’ve a graphic intensive brochure in thoughts.
- Page Setup: Docs has a restricted set of Page Types and sizes accessible in case you need to create one thing distinctive. This would possibly maintain you back and pressure you to make some design modifications if Google Docs is your solely choice.
- Custom fonts: Google has an enormous library of Fonts to select from. However, if you’re making a model brochure you then probably have your customized Font at hand. Sadly, Google Docs doesn’t have the choice to add and use your customized fonts.
You can nonetheless profit from your expertise by utilizing some nifty tips to your benefit. This will assist you to circumvent these disadvantages and make the right brochure primarily based in your present wants and necessities.
: How do I Alphabetize on Google Docs
Alternatives to Google Docs for creating brochures
There are many free options on the market that may assist you to create brochures with more ease. Some may need higher templates, others may need higher instruments to cater to your creativity.
If you discover that Google Docs is just not up to speed then you possibly can attempt one of many companies beneath. These are free companies that give you on-line design instruments similar to Google Docs that can assist you to design the brochure that you’ve in thoughts.
FAQs
You may need a number of questions relating to creating brochures in Google Docs. Here are some steadily requested questions that ought to assist you to rise up to hurry.
Can I overlay Images on my textual content?
Yes, you possibly can overlay images over your textual content if you want. Use the ‘Text Wrapping’ choice in ‘Image Options’ and set it to ‘In front of text’. You may even alter its transparency by clicking on ‘Adjustments’ and adjusting the slider for a similar.
And that’s how one can overlay images in your textual content in Google Docs when creating your brochure.
Can I add icons and different file codecs to Google Docs?
Unfortunately Google Docs doesn’t help icon codecs together with .svg, .ico and .icons. However, you possibly can convert and add your recordsdata in .png format which ought to, to an extent, protect your decision and background transparency.
Will the brochure use .docx format?
Yes, the brochure by default will use the .docx format to help all the newest options supplied by Google Docs. However, you even have the choice to obtain it in one of many following codecs of your alternative.
- .docx
- .odt
- .rtf
- .txt
- .html (zipped)
- .epub
Simply click on on ‘File’ and hover over ‘Downloads’ to entry these choices.
And that’s how one can create a brochure in Google Docs. If you face any points or have any questions for us, be happy to drop them within the feedback beneath.
Check out more article on – How-To tutorial and latest highlights on – Technical News