
Why Install Chrome OS Flex on a Windows PC and How to Do It.
The pandemic introduced on a slew of recent expertise products to assist us focus and enhance our do business from home expertise. In these occasions many customers had been riddled with the confusion of shopping for a brand new device or reviving an previous one. If you too have been on the lookout for a strategy to spark some new life into your previous desktop or laptop computer, then Google’s Chrome OS Flex would possibly simply be the reply to all of your prayers.
Let’s take a fast take a look at this new OS from Google and the way you should use it to your benefit.
What is Chrome OS Flex?
Chrome OS Flex is a brand new desktop OS from Google that’s targeted on straightforward deployment and a strategy to cut back e-waste internationally. Chrome OS Flex is a light-weight desktop OS that provides modern-day safety and efficiency on older gadgets due to its design.
Chrome OS Flex is impressed by Google’s Chrome OS and provides the power to run most net apps successfully and effectively. This thus provides you the power to carry out 90% of modern-day workflow duties in your older device with out having to improve/buy a brand new one.
Why it is best to set up Chrome OS Flex?
There are many the reason why it is best to get Chrome OS Flex on your PC however there are additionally a number of limitations that you have to be conscious of. If these limitations are options that you just closely depend on, then Chrome OS Flex won’t be the most suitable choice for you.
Features
- Enhanced and up to date safety
- Blocked executables and sandboxing
- Comprehensive IT controls
- Easy cloud deployment
- Huge library of net apps
- Google Admin Console appropriate
- Highly power environment friendly
- Support for Secure Boot (Supported gadgets solely)
Who ought to get Chrome OS Flex?
If you may have an previous device struggling to run Windows 10 or 11 then Chrome OS Flex is for you. Additionally, you probably have an unsupported Mac system, then you may also reap the benefits of Chrome OS Flex for up to date and enhanced safety in your system.
Chrome OS Flex, nevertheless, just isn’t really helpful for customers that depend on 64-bit apps unsupported by Chromium for his or her each day workflow. Additionally, in case you are somebody who makes use of Virtual Machines regularly, then sadly Chrome OS Flex doesn’t assist them but.
Limitations of Chrome OS Flex
Here are all of the notable limitations of Chrome OS Flex that you have to be conscious of.
- No verified boot & Google Security Chip (Secure Boot assist on choose fashions)
- No automated BIOS & UEFI updates
- Devices with out TPM are weak regardless of having encryption
- Google Play and Android apps aren’t supported
- Some keyboard shortcuts and hotkeys is likely to be inactive when using Chrome OS Flex
- Unsupported Ports with restricted performance on choose gadgets
- CD & DVD drives
- FireWire ports
- IR & different facial recognition methods
- Other proprietary ports
- Stylus assist and enter
- Thunderbolt port
- Biometric scanners
- Unsupported SCEP protocol
- Forced Re-enrollment unsupported
If you’re an IT admin seeking to deploy Chrome OS Flex on your group then these restrictions is likely to be good or unhealthy relying in your setup. If you had been on the lookout for the improved safety and admin controls of Chrome OS, then sadly Flex won’t be one of the best match for you.
How to put in Chrome OS Flex in your PC
Now that we’re aware of Chrome OS Flex, let’s check out how one can get it in your system.
Required
- A Windows, Mac, or Linux device
- CPU: Intel or AMD x86-64-bit processor
- RAM: 4GB or more
- Drive Space: 16GB or more
Note: You will even want administrator entry to the system together with entry to the BIOS.
- A USB Drive: 8GB or more
- Google Chrome | Download Link
- A network connection
Note: The firm recommends using methods manufactured after 2010 for max compatibility. Chrome OS Flex additionally doesn’t assist Intel GMA 500, 600, 3600, and 3650.
What it is best to know?
Before continuing we advocate you retain the next drawbacks in thoughts. These would possibly make it tough so that you can carry out duties that had been a lot simpler in your earlier OS.
- Chrome OS Flex doesn’t assist Google Play apps and Android apps
- While you could find various net apps for many desktop apps, they may not carry out as effectively or successfully.
- You gained’t have the ability to run third-party executables and packages except choosing workarounds
- You will obtain restricted safety on sure gadgets as a consequence of restricted assist for TPM and Secure Boot.
- This is a DEV channel construct which implies it’s nonetheless in its early days of growth. You will face points and bugs that may break your system, forcing a reinstall for now.
Step 1: Create your boot USB
Note: Installing Chrome OS will wipe the chosen drive. We hope you may have backed up all of your important knowledge earlier than continuing with this information.
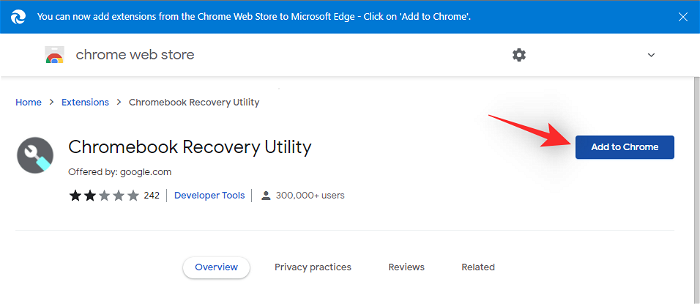
- Chromebook Recovery Utility | Download Link
Open Chrome and click on on the hyperlink above to obtain the Chromebook Recovery Utility extension. Click Add to Chrome.
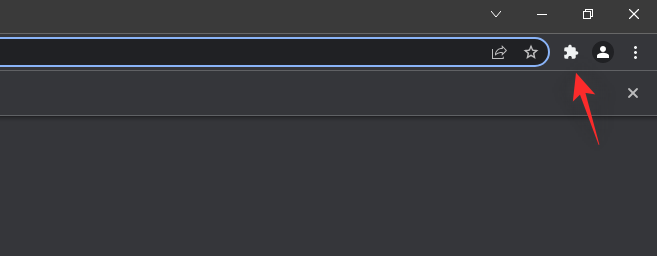
Now plug in your USB and click on the icon for Extensions.
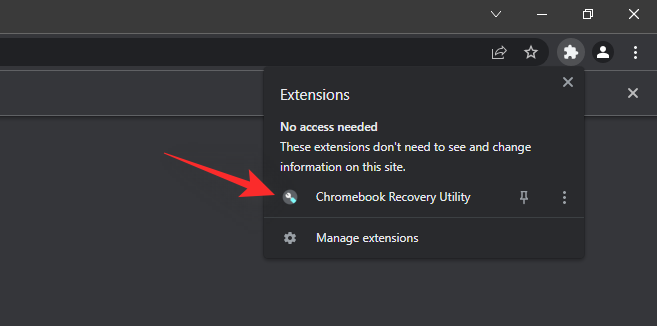
Select Chromebook Recovery Utility.
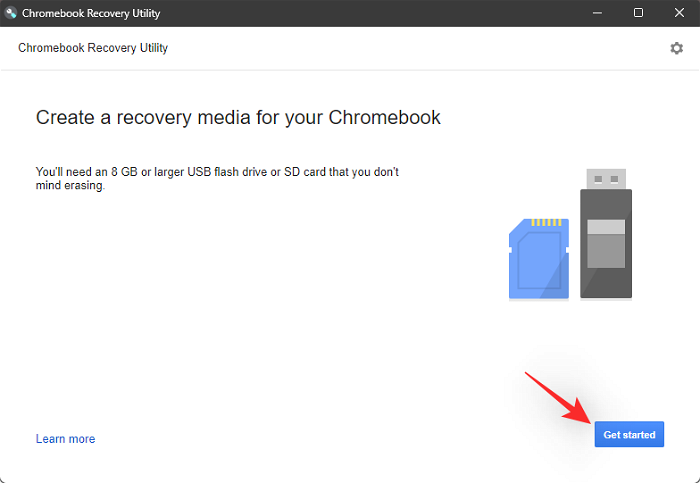
Select Get Started.
Click Select a mannequin from a listing as an alternative.
Click the primary drop-down menu and choose Chrome OS Flex.
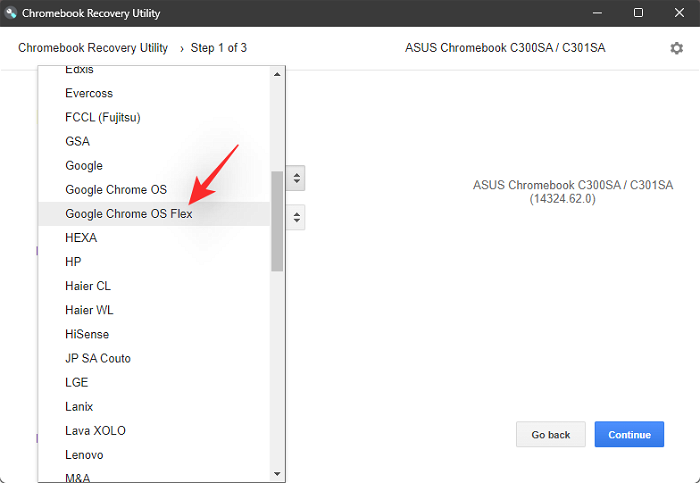
Now choose Chrome OS Flex (Developer-Unstable) from the following drop-down menu.
Click Continue.
Select your USB drive within the next drop-down menu.
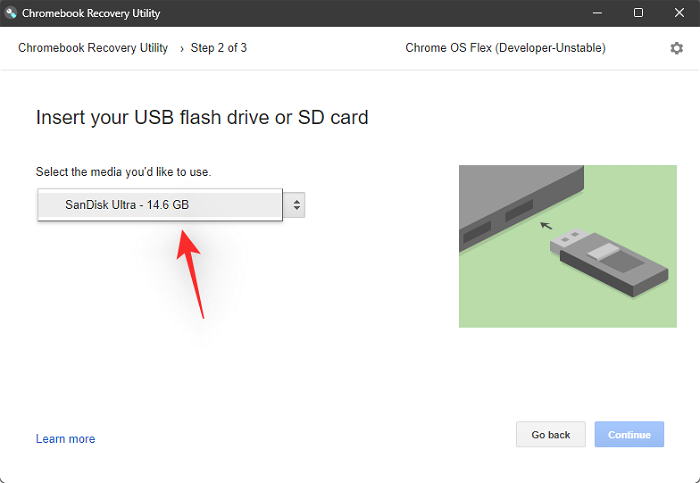
Note: If you haven’t backed up your USB knowledge then we extremely advocate you accomplish that at this level. Past this, all of your knowledge on the USB drive will probably be deleted completely.
Select Continue.
Click Create now. Keep your device related to the wall throughout this course of.
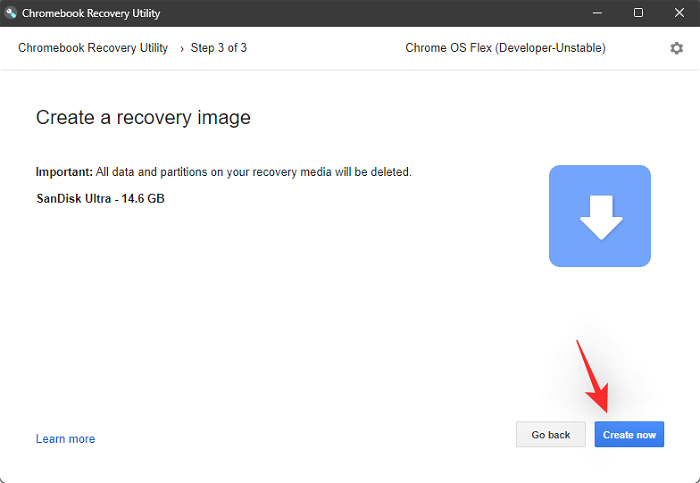
The utility will now obtain the mandatory recordsdata and create your USB. This can take a while relying in your setup and network pace.

Once accomplished, you can be requested to confirm your identification to put in writing recordsdata to your USB. Click Done as soon as accomplished.
You will now have created a Chrome OS Flex boot USB. Use the following step that will help you set up the identical in your PC.
Step 2: Install Chrome OS Flex
Ensure your USB is plugged into the system and restart your system.
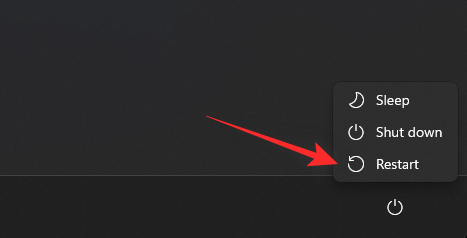
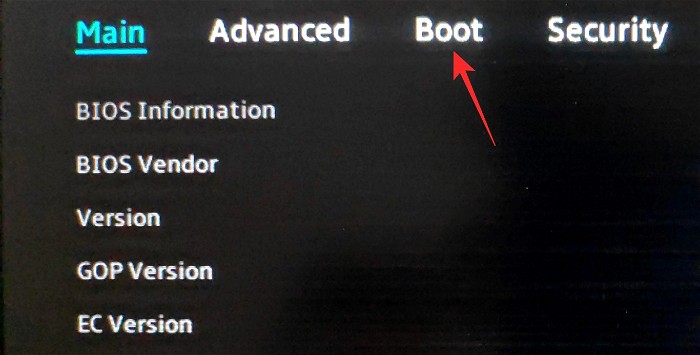
Most methods will boot into the BIOS by holding down F2 through the restart course of. If your system makes use of a unique key, then use the identical to enter the BIOS menu. Mac customers can maintain down the Option key as an alternative. Navigate to the Boot part as soon as you’re within the BIOS menu.
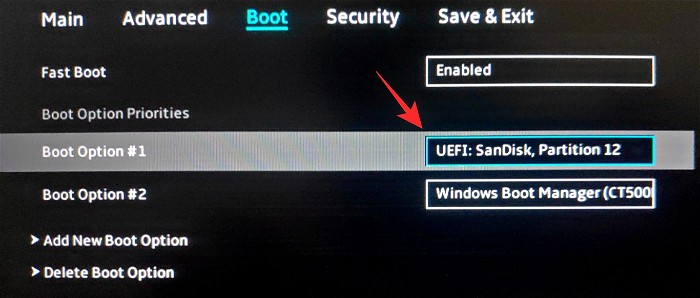
Now set your USB drive as your boot device precedence.
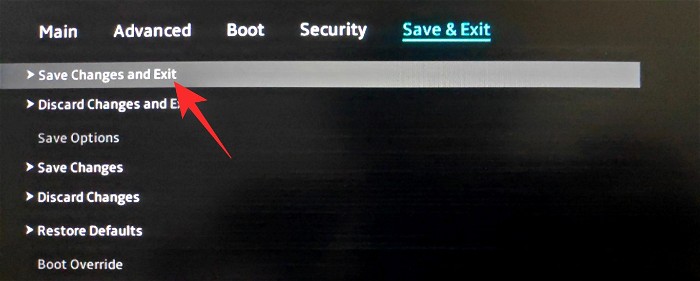
Save your modifications and exit the BIOS menu. Your system will now immediately boot from the USB drive.
Note: In case your BIOS seems completely different and you’re unable to search out the specified choices, then we advocate you check with your OEM’s assist web site for more assist.
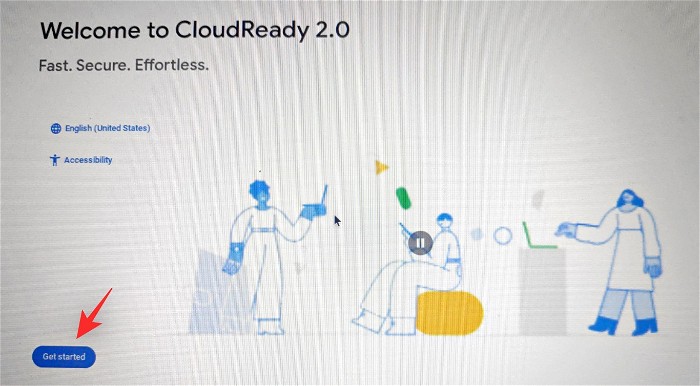
Once you may have booted from the USB, click on Get Started.
Select Install CloudReady 2.0 and click on Next.
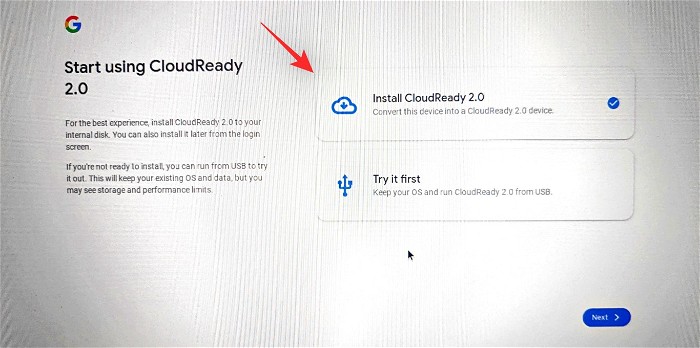
The setup will now warn you that each one your knowledge will probably be deleted. Click Install CloudReady 2.0 to provoke the method.
Click Install once more to verify your alternative. You can now depart your device and go seize a espresso. The course of ought to be executed in 20 to half-hour.
Once the method finishes, click on Get began.
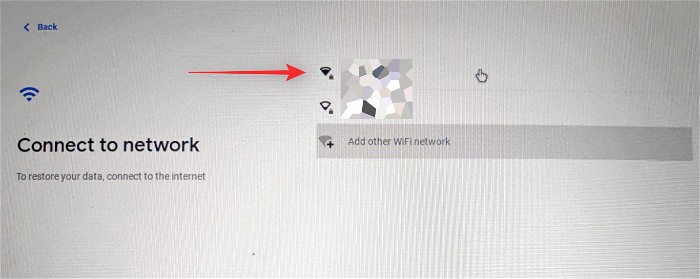
Connect to a network by deciding on a desired one from the checklist in your display screen. Click Next as soon as executed.
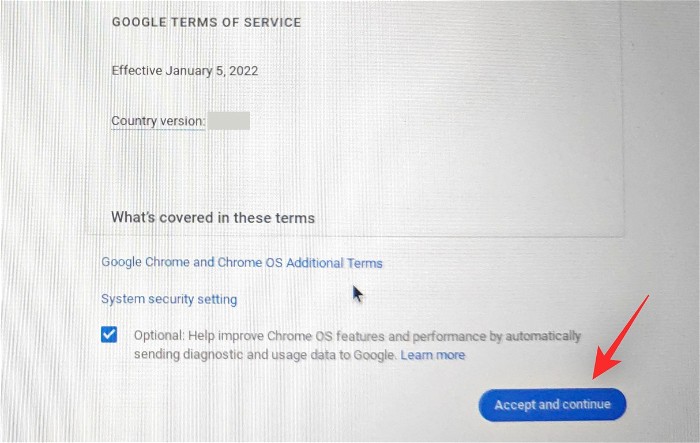
You will now be proven Google’s TOC and privacy policy. Click on Agree and proceed.
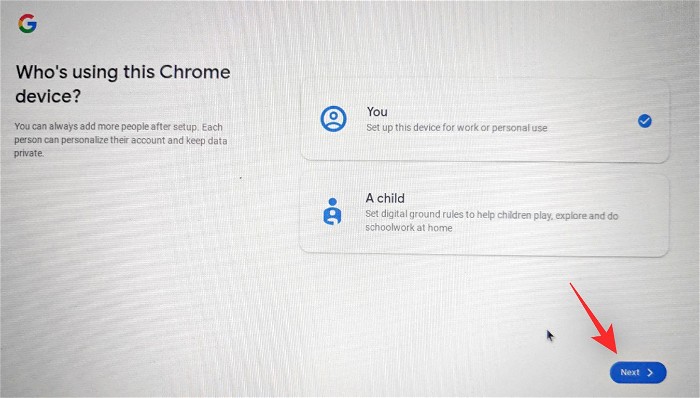
Click on You should you plan to make use of the PC your self. If you propose to present it to a youthful consumer then you possibly can choose A baby as an alternative. This will activate parental controls on your PC and help you limit actions and behaviors on the system.
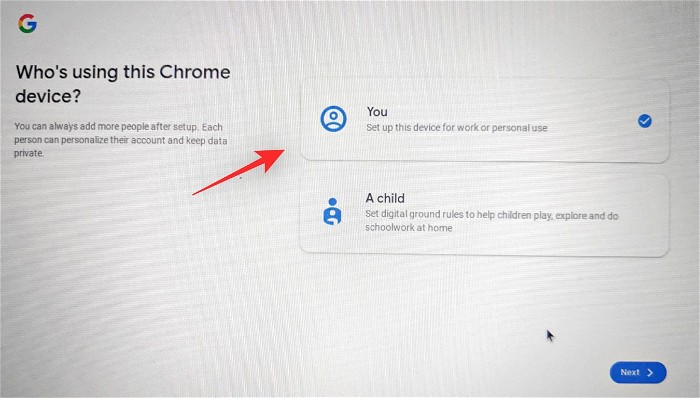
Now click on Next.
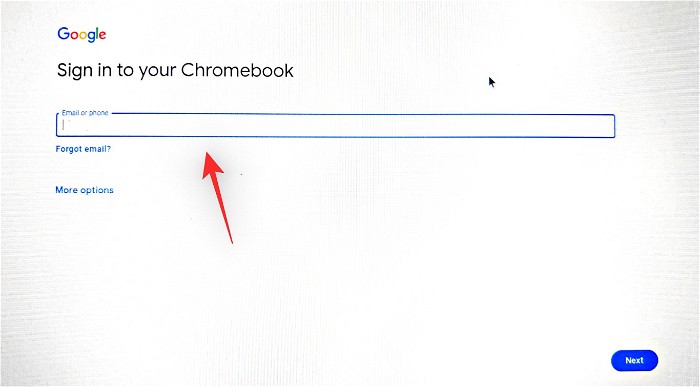
Sign in to your Google account now. This account will probably be used to arrange your system. Enter your e-mail ID on the prime and click on Next as soon as executed.
You will now be proven the sync settings on your account. Turn on the toggles for the gadgets you want to sync and click on Accept and proceed.
Choose the information you want to enable Google to gather out of your system and click on Accept and proceed.
If you want to use Google Assistant then click on I agree. Click No thanks should you want to disable it.
All will now be arrange and you can be greeted by the OOBE. Click Get Started to arrange Chrome OS Flex in your PC.
FAQs
Here are a number of generally requested questions on Chrome OS Flex, that ought to enable you rise up thus far with the newest data.
Does Chrome OS Flex include the Google Play Store?
No, Chrome OS Flex doesn’t assist Android and Google Play apps. Chrome OS Flex solely helps net apps and is a CloudReady successor quite than a ChromeOS successor.
What is the distinction between Chrome OS and Chrome OS Flex?
ChromeOS is the native Google OS that helps Android Apps and Google Play. It comes with Google’s enhanced safety and is barely accessible on Google Hardware.
Chrome OS Flex is a cloud OS skew of the identical platform supporting net apps for Windows, Mac, and Linux. Chrome OS Flex gives enhanced safety relying in your system however falls brief when in comparison with ChromeOS and its hardware-based safety.
Is Chrome OS Flex completely different from CloudReady?
CloudReady and its dad or mum firm had been acquired by Google not too long ago. Chrome OS Flex is a successor to CloudReady with modifications and enhancements from Google.
We hope this submit helped you get aware of and set up Chrome OS Flex in your PC. If you face any points or have any more questions, be at liberty to succeed in out using the feedback part beneath.
Check out more article on – How-To tutorial and latest highlights on – Technical News