
What is it? How to Use & Easier Alternatives.
Windows 11’s current launch has introduced alongside its justifiable share of controversies and debates. One of the primary ones being round its inherent {hardware} and software program necessities. This primarily signifies that although the OS on the base is suitable with 1GHz dual-core processors, the requirement for TPM, Secure Boot, and UEFI primarily means you can’t use parts launched a couple of years in the past.
A registry worth known as ‘AllowUpgradesWithUnsupportedTPMorCPU’ has come to gentle just lately because it was endorsed by Microsoft itself, permitting person to bypass the Windows 11 necessities. Let’s discover out more about this registry worth.
What is the EnableUpgradesWithUnsupportedTPMorCPU?
‘AllowUpgradesWithUnsupportedTPMorCPU’ is a brand new registry worth created by your Windows 11 setup on the time of improve. If you discovered this worth by likelihood then you definitely have been seemingly making an attempt to update your system whereas booted into Windows. Editing this worth manually may also help you bypass compatibility checks through the improve course of which may also help you put in Windows 11 on unsupported PCs.
However, you may create this entry manually within the speficied location within the registry (see beneath) and set its worth to 1 to let system ignore the necessities for Windows 11. This method, you’ll be able to set up Windows 11 on unsupported {hardware}.
What occurs if you use EnableUpgradesWithUnsupportedTPMorCPU?

Manually modifying the ‘AllowUpgradesWithUnsupportedTPMorCPU’ worth bypasses compatibility checks carried out through the Windows 11 setup. Enabling the worth permits the setup to improve your system even in the event you wouldn’t have TPM or Secure Boot.
This registry worth is a background toggle for ‘Install Anyway’ that exhibits up on techniques that fulfill fundamental compatibility however are lacking both of the improved safety features like TPM or Secure Boot.
Is it protected to make use of EnableUpgradesWithUnsupportedTPMorCPU?
For now, enabling, disabling, or deleting this registry worth doesn’t appear to have any adversarial impact on techniques. After all, Microsoft themselves shared this little registry bypass so that folks trying to strive Windows 11 on their in any other case unsupported techniques can achieve this.
The worth appears to be created on the time of your setup and must be robotically deleted after you have upgraded to Windows 11. However, you may create it manually to pressure set up Windows 11 on a unsupported PC.
You can manually delete the worth as properly after putting in Windows 11. No bugs, crashes, BSODs have been reported but when modifying the ‘AllowUpgradesWithUnsupportedTPMorCPU’ registry worth.
How to make use of EnableUpgradesWithUnsupportedTPMorCPU?
If you want to bypass TPM and CPU checks when putting in Windows 11 then you should utilize the ‘AllowUpgradesWithUnsupportedTPMorCPU’ using the information beneath.
Option 1: Disable the TPM check-in Registry manually
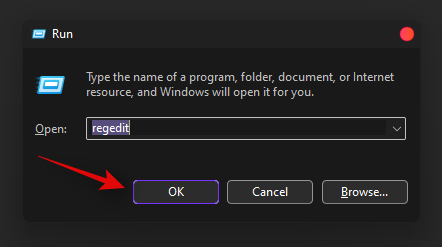
Press Windows + R in your keyboard, kind regedit after which hit Enter in your keyboard to open the Registry Editor.
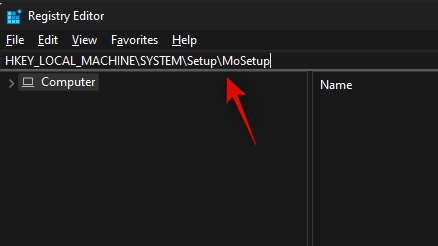
Navigate to the next path. You can even copy-paste the tackle beneath in your tackle bar on the high.
HKEY_LOCAL_MACHINESYSTEMSetupMoSetup
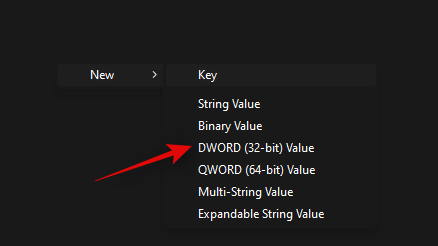
Now right-click on the empty space in your proper and choose ‘New’.

Select ‘DWORD (32-bit) Value’.
Enter the next identify on your new worth and press Enter in your keyboard to substantiate the modifications.
EnableUpgradesWithUnsupportedTPMOrCPU
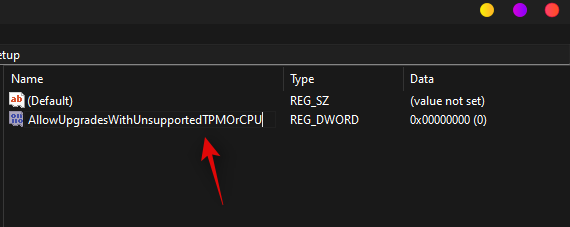
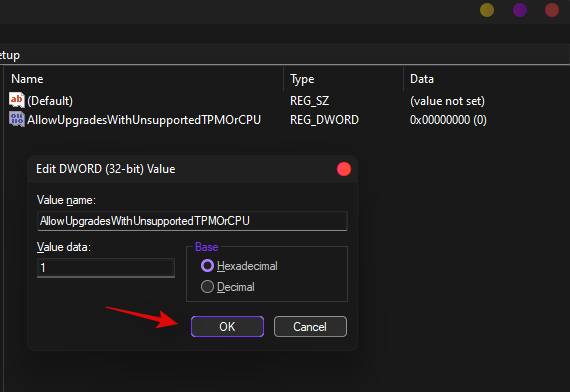
Double click on on the newly created worth and enter ‘1’ as your Value Data.
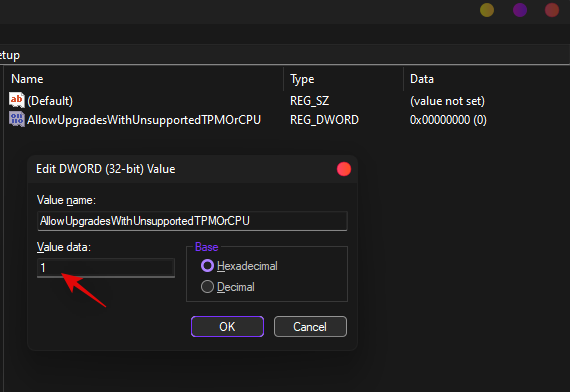
Click on ‘Ok’ to save lots of your modifications.
You can now set up Windows 11 in your system and it is best to now not be restricted through the setup.
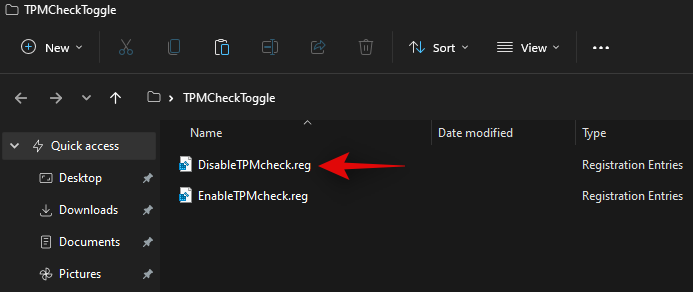
Option 2: Disable the TPM check-in Registry robotically with a registry script
If you want to edit your registry values robotically then you may merely use the file linked beneath.
Download the file in your PC and run the ‘DisableTPMcheck’ file.
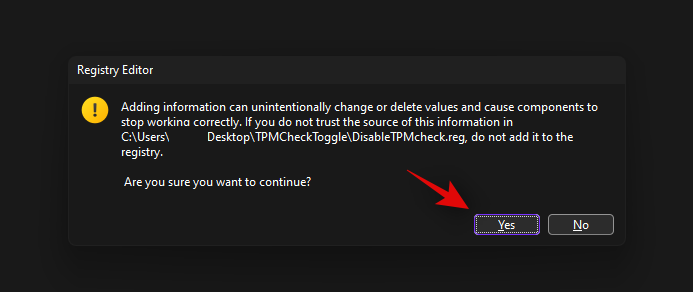
Click on ‘Yes’ to substantiate your modifications.
You can now set up Windows 11 in your PC and it is best to now not be restricted because of TPM necessities. If you ever want to revert your modifications, merely run the ‘EnableTPMcheck’ file within the .zip archive linked above.
Next step: Upgrade to Windows 11
You can now simply improve to Windows 11 with out worrying concerning the TPM verify. You can set up Windows 11 using both of the 2 strategies given beneath:
Alternatives to EnableUpgradesWithUnsupportedTPMorCPU (registry bypass)
Alternative 1: If you don’t wish to play with registry or its entries, you may bypass the system verify for TPM and Secure Boot by merely eradicating a file known as appraiserres.dll from Windows 11’s ISO after which use it to put in Windows 11 on any unsupported PC. See the information hyperlink proper beneath.
Read: How To Remove or Replace appraiserres.dll in Windows 11 Setup
But wait, there’s more.
Alternative 2: If eradicating the appraiserres.dll manually can be an excessive amount of for you, then you should utilize Rufus (model 3.16 beta2) to create a Windows 11 bootbale USB drive that may ignore TPM and Secure boot necessities and allow you to set up Windows 11 on unsupported {hardware}. Once you have got the bootable drive made with this technique, you may can set up Windows 11 by BIOS/UEFI by utilizing this information. So, it’s a two-step course of:
- Create bootable Windows 11 USB drive with Rufus 2.16 BETA2 that ignores system necessities (information)
- Install Windows 11 using the bbotable USB drive you created above (information)
Is it protected to take away EnableUpgradesWithUnsupportedTPMorCPU after putting in Windows 11?
Yes, it’s fully protected to take away the ‘AllowUpgradesWithUnsupportedTPMorCPU’ registry worth after you have got upgraded to Windows 11.
How to take away EnableUpgradesWithUnsupportedTPMorCPU
You can manually delete the file, or use the registry file linked above to delete the ‘AllowUpgradesWithUnsupportedTPMorCPU’ registry worth out of your system. Navigate to the trail beneath and delete the registry worth for a similar in your proper.
HKEY_LOCAL_MACHINESYSTEMSetupMoSetup
Alternatively, you can even use the ‘DisableTPMcheck’ registry script given above to robotically delete the worth out of your system.
We hope this put up helped you be taught more about ‘AllowUpgradesWithUnsupportedTPMorCPU’. If you face any points or have any more questions, be at liberty to drop them beneath.
:
Check out more article on – How-To tutorial and latest highlights on – Technical News