How to Use Threads on PC Using WSA and BlueStacks.
What to know
- You can get and use the Android model of Threads in your PC. You can both use Windows Subsystem for Android or an Android emulator for PC like Bluestacks to run the app.
- You can obtain Windows Subsystem for Android from the Microsoft Store whereas there are tons of Android emulators to select from and yow will discover them on their official web sites.
Threads is a brand-new social media platform that appears to be taking the world by storm. Developed by Meta, Threads is a microblogging platform built-in with Instagram to reap the benefits of its massive person base which appears to be going fairly properly contemplating it has crossed 100M+ customers.
Threads permits you to be part of public conversations and publish replies or your individual threads. You can use this to attach with like-minded customers and discover folks with related pursuits. However, Threads is at the moment solely out there by way of cellular apps for Android and iOS. This has discouraged many all over the world that want to keep using the platform when using their PC. So for those who’re in the identical boat, then listed here are two workarounds that will help you use Threads in your PC.
How to make use of Threads on a PC
To use Threads, it’s essential to set up the Android app in your PC. To do that, you should utilize Windows Subsystem for Android (WSA) or an Android emulator. We’ve lined each of those strategies beneath. You can select both to make use of Threads in your PC.
We suggest using WSA as it’s natively out there for Windows 11 and is sort of environment friendly when it comes to useful resource utilization. However, the method generally is a bit tedious. So for those who’re searching for a comparatively straightforward method the place you get to make use of Threads with a couple of easy clicks, then we suggest you go for using an Android emulator as a substitute.
Method 1: Using Windows Subsystem for Android
Windows Subsystem for Android permits you to run Android apps natively on Windows 11. Use the steps beneath to put in and use WSA to make use of Threads in your PC. Let’s get began.
Step 1: Install WSA
Here’s how one can set up WSA in your PC.
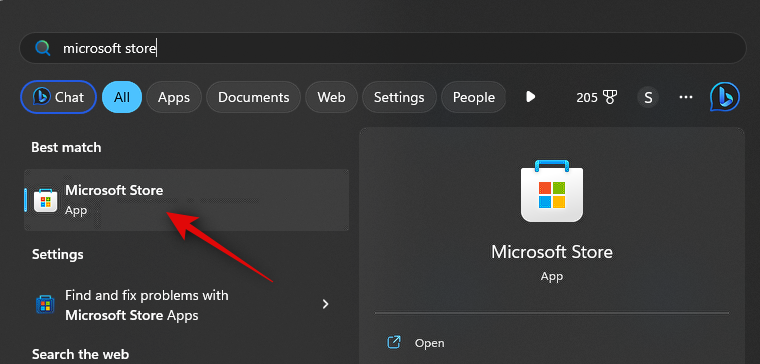
Open Microsoft Store in your PC.
Now click on the search bar on the prime and seek for Amazon Appstore.

Click and choose the identical from the search outcomes.

Click Install.

You will now learn that you simply want WSA to make use of the Appstore. Click Download within the backside proper nook to get began.

Windows Subsystem for Android will now be downloaded and put in in your PC.

Once executed, you should utilize the following part to put in and use Threads in your PC.
Step 2: Install and use Threads
Now that Windows Subsystem for Android has been put in in your PC, we will sideload and use Threads in your PC. Follow the steps beneath that will help you together with the method.
Open the Start menu, search, and launch Windows Subsystem for Android.

Now click on Advanced settings in your left.

Click and allow the toggle for Developer mode.

Click Manage developer settings. This will launch WSA and can help you entry developer settings.

Scroll developer settings and examine the toggle for USB debugging below Debugging. Click and activate the toggle whether it is turned off.

Now shut WSA and developer settings and re-launch WSA from the Start menu.
Click Advanced settings within the left sidebar once more.

Now examine the itemizing for Developer mode in your proper. You ought to see 127.0.0.1:58526 because the deal with at which we will join ADB.

Next, go to the hyperlink beneath to obtain Threads from APKMirror.

Scroll down and click on the newest launch below All variations.

Now click on the obtain icon beside the APK for x86_64 structure.

Next, click on DOWNLOAD APK. A obtain will now be initiated for the APK. Save the file in a handy location in your PC.

Once executed, go to the hyperlink beneath to obtain Google’s SDK Platform Tools.
Scroll down and click on the obtain hyperlink related to your PC, whether or not you’re using Windows, Mac, or Linux.

You will now be proven the phrases and circumstances for SDK platform instruments. Scroll to the underside and examine the field for I’ve learn and agree with the above phrases and circumstances.

Once you’re executed, click on Download Android SDK Platform-Tools for Windows. This possibility will differ for those who’re using a Mac or a Linux machine.

SDK Platform Tools will now be downloaded in your PC. Save the archive to a handy location. Once downloaded, extract the archive using your most popular software. If you’re on Windows, you are able to do the identical using Extract all within the right-click context menu or the ribbon menu on the prime.

Click Browse… and select the place you want to extract the archive.

Check the field for Show extracted recordsdata when accomplished whether it is unchecked.

Click Extract.

Once the archive is extracted, navigate to the platform-tools folder and right-click on an empty space.

Now click on Open in Terminal.

Type the next command and press Enter.
adb gadgets

Next, use the next command to connect with your PC.
adb join 127.0.0.1:58526

You will now be requested to authenticate the connection in a brand new WSA window. Check the field for Always enable from this laptop for those who want to grant indefinite entry to your PC.

Click Allow to grant the mandatory permission.

Now use this command once more to examine linked gadgets. Your PC ought to present up now if every little thing went as meant.
adb gadgets

Next, open the file explorer and navigate to the APK we had downloaded earlier. Select the APK and press F2 in your keyboard.

Rename the APK to Threads and press Enter in your keyboard.

Now copy or lower the APK and paste it into the platform-tools folder.

Switch back to Terminal and use the next command to put in the APK.
adb set up Threads.apk

Threads will now be put in in your PC. You ought to see Success as proven beneath if every little thing went properly and the app was put in efficiently.

Use the Start menu to seek for Threads. Once the app exhibits up within the search outcomes, click on on it to launch it in your PC.

The app will now be put in. You can now click on Log in with Instagram and log in using your credentials.

And that’s it! With the APK put in in your PC, now you can use Threads everytime you like.
Method 2: Using an Android emulator
There are tons of Android emulators on the market that you should utilize to get and use Threads in your PC. We shall be looking at Bluestacks for this instance. However, you possibly can select to make use of another Android emulator that you simply favor.
Step 1: Get and set up Bluestacks
Here’s how one can obtain and set up Bluestacks in your PC. Follow the steps beneath that will help you together with the method.
Open your browser and go to bluestacks.com/obtain.html. Once the tab is open, click on Download Bluestacks 5.

A obtain will now be initiated. Save the setup in your PC and double click on and launch the identical as soon as it has been downloaded.

Click Customize set up within the backside proper nook.

Click Change folder.

Now select the place you want to set up Bluestacks.

Once you’ve chosen the popular folder, click on OK.

Click Install now when you’re executed.
Bluestacks will now be downloaded and put in in your PC. This can take a couple of minutes relying in your present network.

Once put in, you ought to be greeted by the house web page.

And that’s it! Bluestacks will now be put in in your PC and now you can use the following step to obtain and use Threads in your PC.
Step 2: Install and use Threads
Now that Bluestacks has been downloaded and put in in your PC, now you can set up and use Threads. While Bluestacks has its personal app retailer, we shall be downloading and putting in an APK as a substitute. This is as a result of using the App Center in Bluestacks requires you to log in along with your Google account. This generally is a bit sketchy and we thus suggest avoiding the identical. Follow the steps beneath that will help you together with the method.
Visit the hyperlink beneath to obtain the APK for Threads.
Now click on on the newest Threads launch below All variations.
Next, scroll down and click on on the obtain icon beside the APK developed for x86_64.
Click DOWNLOAD APK on the prime.
A obtain will now be initiated. Save the APK to a handy location in your PC. Once downloaded, open the Start menu, seek for Bluestacks, and launch the identical from the search outcomes.

With Bluestacks open in your display, press Ctrl + Shift + B.
Now navigate your native storage and choose the APK we downloaded within the steps above.

Click Open as soon as chosen.

The app will now be put in. You can observe its progress on the backside.

Once put in, the app will present up on your property display. Click on it to launch Threads.

Threads will now be launched in your PC. You can now click on Log in with Instagram and use your credentials to log into Threads.

And that’s how you should utilize Bluestacks to make use of Threads in your PC.
We hope this publish helped you simply get and use Threads in your PC. If you face any points or have any more questions, be at liberty to achieve out to us using the feedback beneath.
Check out more article on – How-To tutorial and latest highlights on – Technical News