Troubleshooting Gigabyte Error / Debug LED Codes.
Gigabyte boards use completely different strategies like audible beep codes, LED indicators, and Debug LED Codes to point completely different system states or errors. The first two strategies are frequent, whereas the debug LED is simply discovered on higher-end Gigabyte boards.
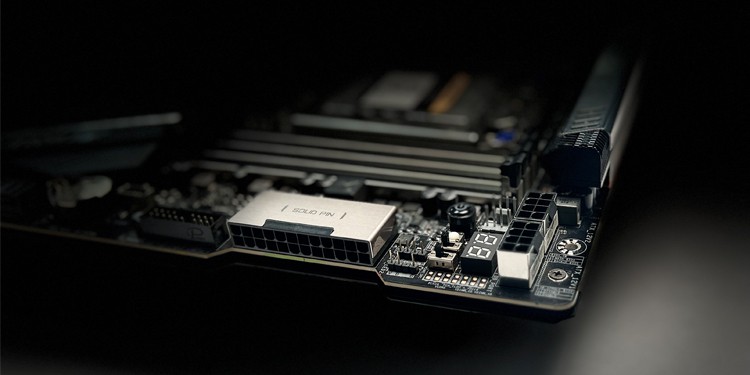
This LED (known as the Debug Port or DB_PORT) shows hexadecimal codes like 55, D9, and so on. If your motherboard is displaying such codes and never booting in the meanwhile, you’ll be able to use the code to diagnose and repair the issue.
This is simpler mentioned than performed, although. A number of the documented codes are described very vaguely. Speaking from private expertise, the guide was principally ineffective when diagnosing the debug code 25 on my TRX40 Aorus Master board.
So, I’ll cowl the commonest Gigabyte debug codes, what they imply, and the way you should use this data to repair your precise downside on this article.
What Do the Gigabyte Debug Codes Mean?
Gigabyte boards can show over 100 completely different codes, however most of those are innocent. About ⅔ of the codes merely point out common boot, S3 resume, and recovery states.
For instance, the board cycles via completely different codes throughout POST and ultimately settles on A0. This simply signifies that it efficiently accomplished POST and has handed over management of the {hardware} to the OS.

Or, you would possibly see the E0 code after placing your system to sleep mode. This simply signifies that the system is resuming from the S3 Sleep State.
I’ve seen a number of customers anxious about such codes which are indicating regular system states. My level right here is that it is best to verify the code within the guide. If it’s not an error code, your system is probably going working high-quality and there’s nothing to fret about.
Around ⅓ of the debug codes are certainly error codes, although. These are principally deadly, which means your system gained’t boot till you diagnose and repair the issue. I’ll listing them right here in response to Gigabyte’s documentation after which clarify the troubleshooting course of within the next part.
| Code | Description |
| 50~55 | Memory initialization error happens. |
| 56 | Invalid CPU kind or pace. |
| 57 | CPU mismatch. |
| 58 | CPU self take a look at failed or attainable CPU cache error. |
| 59 | CPU micro-code shouldn’t be discovered or micro-code update is failed. |
| 5A | Internal CPU error. |
| 5B | Reset PPI is failed. |
| 5C~5F | Reserved. |
| D0 | CPU initialization error. |
| D1 | IOH initialization error. |
| D2 | PCH initialization error. |
| D3 | Some of the Architectural Protocols aren’t accessible. |
| D4 | PCI useful resource allocation error. Out of Resources. |
| D5 | No Space for Legacy Option ROM initialization. |
| D6 | No Console Output Devices are discovered. |
| D7 | No Console Input Devices are discovered. |
| D8 | It is an invalid password. |
| D9~DA | Can’t load Boot Option. |
| DB | Flash update is failed. |
| DC | Reset protocol is failed. |
| DE~DF | Reserved. |
| E8 | S3 resume is failed. |
| E9 | S3 Resume PPI shouldn’t be discovered. |
| EA | S3 Resume Boot Script is invalid. |
| EB | S3 OS Wake name is failed. |
| EC~EF | Reserved. |
| F8 | Recovery PPI is invalid. |
| F9 | Recovery capsule shouldn’t be discovered. |
| FA | Invalid recovery capsule. |
| FB~FF | Reserved. |
Note: If you’re going through a Reserved error code, you’ll both want to achieve out to Gigabyte or take a look at on-line boards to determine what that precise code signifies.
For instance, my board was displaying the 25 debug code some time back. This is simply marked as Reserved on this guide.
I had to determine myself that there was a battle for the RAM’s LED management between Gigabyte’s RGB Fusion 2.0 and iCUE. Eventually, I uninstalled the Gigabyte App Center, which fastened the difficulty.
Troubleshooting Using Gigabyte Debug Codes
Once you determine the defective element via the code, you’ll be able to comply with the troubleshooting steps from the suitable part.
Fixing RAM Issues
RAM points principally come all the way down to defective {hardware} (i.e., faulty slots or modules). This makes troubleshooting it pretty easy. Try every step and transfer on to the subsequent if it doesn’t assist:
- First, merely reseat the RAM sticks. When reinstalling them, be certain to orient them appropriately and insert them absolutely such that the latches lock in place. You can even clear the RAM slots or sticks if required.

- Remove the sticks. Grab one in all them and take a look at it on all of the slots one after the other. Repeat the identical for some other sticks.

- If attainable, you’ll be able to even take a look at the sticks on one other system. Eventually, it is best to be capable of slim down the defective element to the RAM sticks or the slots.


Troubleshooting the CPU
CPU-related error codes normally point out bent CPU pins or energy provide points. In the worst case, you is also coping with a useless processor or faulty socket/motherboard.
- First, strive booting with out the CMOS battery. This ought to reset the BIOS to defaults and resolve any CPU voltage points.

- Next, reseat all the facility connections. You may even instantly take a look at the CPU energy connector with a multimeter to make sure it’s receiving sufficient voltage.

- Carefully take away the CPU cooler, after which the CPU. Check if any of the pins are bent. It’s normally attainable to restore a number of bent pins, but when a number of them are broken, you might want to switch the CPU.

- If attainable, you could possibly additionally take a look at the CPU on one other system. This ought to assist you decide whether or not the CPU or the socket is flawed.


Troubleshooting the Motherboard Components
Your Gigabyte board has a number of probably faulty elements from the BIOS chip and CMOS ROM to the PCIe, SATA and USB slots. To troubleshoot these,
- I like to recommend that you simply begin by booting with out the CMOS battery like earlier. This will resolve any misconfigured BIOS settings associated in addition gadgets, BIOS passwords, unstable overclocks, and so on.
- If you’re using an older BIOS model, updating the BIOS is more likely to repair any compatibility points with PCIe and USB gadgets.
- On the hardware-end, you could possibly take away all PCIe and USB gadgets and solely boot the board with the naked minimal. This may also help determine any faulty peripherals.
- Reinstall the gadgets one after the other. Do so correctly and take a look at the boot course of after including every one.
- The troubleshooting course of from earlier can be helpful right here (strive the gadgets on completely different slots, or on a distinct system).
- Finally, for show points particularly, keep in mind to strive completely different show cables too (e.g., DP as an alternative of HDMI this time).
What If The Problem Persists
I’m repeating myself right here however that’s as a result of these steps are simply that essential/efficient. Make positive you at the very least strive these earlier than transferring additional:
- Remove the CMOS battery to reset the BIOS.
- Update your Gigabyte BIOS model.
- Reseat the RAM modules, or exchange them if required.
At this level, the motherboard itself could also be faulty. In this case, there’s not a lot most customers can do.
I like to recommend reaching out to Gigabyte assist or taking your system to a neighborhood restore skilled. They will advise you on whichever element is the issue and whether or not you may get it repaired/changed.
Check out more article on – How-To tutorial and latest highlights on – Technical News