How To Install AMD CPU On A Motherboard?.
Although AM5 sockets and the 7000 sequence processors have shifted the pins from CPUs to the socket, the CPU set up course of hasn’t modified.
You begin by lifting the retention lever to unlock the socket. Then, align the CPU accurately and insert it straight into the socket. It ought to match completely with no further power required.
It’s straightforward to bend the pins and injury the CPU if it’s carried out incorrectly. Additionally, the previous CPU might grow to be caught to the cooler, an issue that’s notably widespread in AMD methods.
This information will enable you to correctly set up your AMD CPU so that you simply don’t must cope with such issues.
Preliminary Steps
Uninstall the Components
If you’re changing the CPU on an current system, you’ll must disassemble every little thing first.
- Shut down the PC and disconnect the facility cable.
- Unscrew the nuts and open the case’s aspect cowl.
- Start by disconnecting the CPU fan connector.


AMD’s Wraith coolers use both spring screws or retention clips to lock themselves in place. The system I’ve received with me has a Wraith Stealth cooler with spring screws. To take away such coolers,
- Partly unfasten one of many screws (give it 3-4 twists). Then, repeat this on the reverse screw as proven within the image.

- Repeat this till all 4 screws have come unfastened.
- Grab the cooler and slowly pull it straight up and out.

- If it feels caught, wiggle it a bit whereas pulling it out. Running the CPU at excessive temps for a short time beforehand also can make this simpler because the thermal paste will loosen.


If you have got a special kind of cooler, you’ll be able to take a look at this detailed information on eradicating CPU coolers.
Take Out the Old CPU
- It’s best to scrub the thermal paste off the CPU whereas it’s nonetheless within the socket. So, seize a microfiber material or tissue and get to work.

- When you’ve cleaned the CPU, push down on the retention arm to unlock the socket. It ought to come out and up.

- Hold the CPU from the perimeters and thoroughly pull it straight out. Make certain you don’t press on the pins when doing so.

- If the CPU is a working piece that you simply plan to make use of sooner or later, retailer it safely in a CPU clamshell.


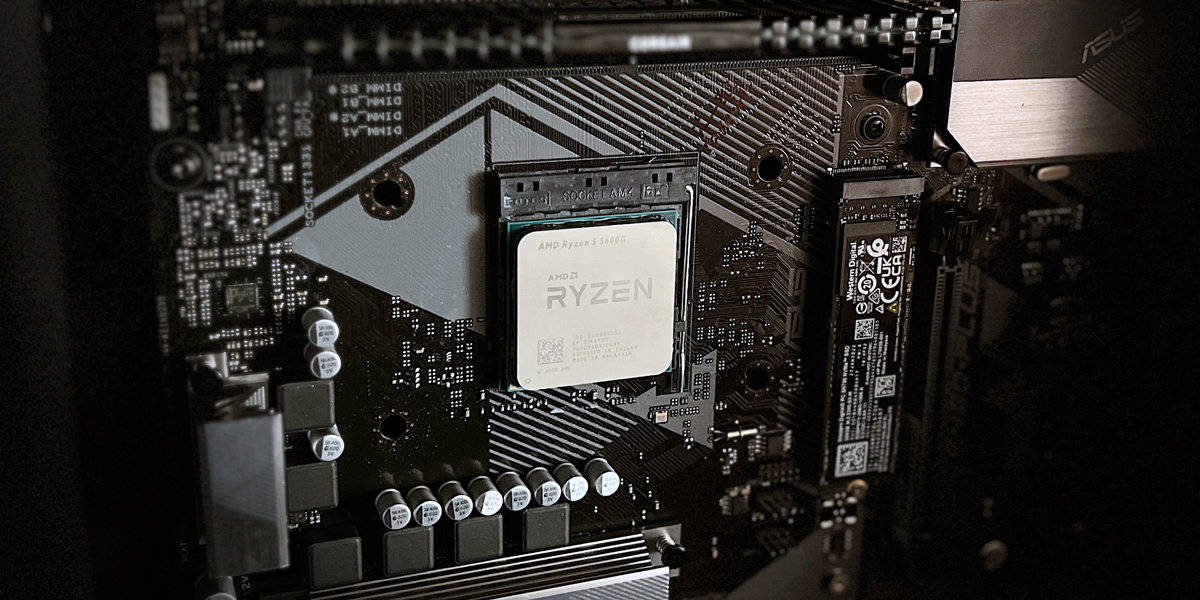
Install the New CPU
Once the socket is prepared, the precise set up part could be very easy. All it’s essential to do is align the CPU accurately and place it in.
- Verify that the locking deal with is lifted up.

- Grab your AMD CPU and discover the nook with the distinctive marking (normally a triangle). Identify the identical marking on the socket to search out the proper orientation (normally the lower-left nook).

- After aligning the CPU accurately, rigorously place it straight into the socket. It ought to match completely.

- Pull the deal with down and lock it in place.

- AM5 boards additionally embody a socket cowl that may robotically pop off at this level. Store it safely as it’s possible you’ll want it for motherboard guarantee functions sooner or later.


Install the CPU Cooler
The precise steps will fluctuate relying on the kind of cooler you’re using. This article on putting in CPU coolers covers the commonest sorts. But generally,
- If you’re reusing an previous cooler, you’ll need to wipe the previous thermal paste off the cooler and reapply a brand new layer on the CPU.

- For Wraith Stealth coolers, ask somebody to insert the backplate and maintain it in place.

- Connect the cooler’s screws and partly flip one of many screws (3-4 twists).

- Do the identical with the diagonally reverse screw. Repeat the order proven within the image till all of the screws are tight.
- Finally, join the CPU fan plug to the CPU_FAN header.


Make Sure the System Works
After you reassemble the remainder of the system, you should boot it to confirm that every little thing is working wonderful.
Check out more article on – How-To tutorial and latest highlights on – Technical News