How To Configure RAID On Gigabyte Motherboard.
If you need to arrange a RAID array in your system, the best technique to get began is with onboard RAID applied sciences like AMD RAIDXpert2 or Intel RST.
You’ll first must enter the Gigabyte BIOS, choose the specified RAID stage, and create the array. After you put in the RAID drivers, you’ll be capable to boot together with your RAID quantity.
This sounds easy on paper, however there are a variety of variables to contemplate throughout the precise setup – which RAID stage is best, what further settings do it is advisable configure, how to manually load RAID drivers, and so forth. So, I’ll cowl the complete course of intimately on this article.
Before You Start
RAID may be applied by devoted RAID controllers or software program elements. Things like AMD RAIDXpert2 or Intel RST are a mixture of the 2. These use the onboard storage controller with RAID drivers to arrange a FakeRAID array.
RAID is meant to supply numerous advantages from knowledge redundancy and uptime to efficiency enhancements.
FakeRAID negates many of those advantages, which is why I extremely suggest using a RAID controller or software program RAID implementations like RAID-Z or Linux MD RAID over it.
If you determine to go together with onboard RAID, keep a few issues in thoughts earlier than you proceed:
Configuring Storage Controller
I’m assuming you’ve already put in all of the SATA or NVMe drives onto your system. Use drives with the identical specs (measurement/velocity) for optimum efficiency. You’ll need to begin by enabling RAID mode within the BIOS.
- Power in your PC and press F2/Del to enter the Gigabyte BIOS.
- Press F2 (if required) to modify to Advanced Mode.
- On AMD boards,

- For SATA RAID, go to the Chipset tab. Set SATA Mode to RAID and Chipset SATA Port Enable to Enabled.
- For NVMe RAID, set NVMe RAID mode to Enabled.
- On Intel boards,
- Go to Peripherals > SATA and RST Configuration. Set the SATA Mode to Intel RST Premium.

- For NVMe RAID, set NVMe Mode to Intel RST. If your BIOS doesn’t assist this selection, set PCIe Storage Devices to RST Controlled as an alternative. The latter will allow you to create an NVMe RAID array by the PCIe Remapping characteristic.

- Go to Peripherals > SATA and RST Configuration. Set the SATA Mode to Intel RST Premium.
- (Situational) If you’re using a PCIe growth card for NVMe RAID, be sure to’ve related it to a PCIex16 slot. You’ll additionally must allow PCIe Bifurcation to separate the x16 lane to 8x4x4 or x4x4x4x4, relying on what number of drives you’re using. The system received’t detect the entire drives till you do that.

- Go to the BIOS tab and disable CSM for UEFI RAID.

- Press F10 to save lots of the modifications and exit the BIOS.


Creating a RAID Array
At this level, you’ve ready your BIOS for establishing a RAID array. You can skip forward to the suitable part relying on whether or not you may have an AMD or Intel processor.
On AMD Boards
- In the Gigabyte BIOS, go to the Peripherals tab and choose RAIDXpert2 Configuration Utility.

- Select Array Management.

- If any arrays exist, choose Delete array > Check All > Delete Array(s) > YES to delete them.
- If there aren’t any preexisting arrays, choose Create Array.
- Start by selecting the RAID stage. The choices obtainable will depend upon which ranges your board helps and what number of drives you’re using.

- Volume – JBOD config that allows you to mix a number of disks right into a single massive logical disk.
- RAIDABLE – Marks a disk as RAIDABLE, that means it may be transformed to a RAID 0 or RAID 1 array later.
- RAID 0 – Stripes knowledge throughout a minimum of 2 disks. Provides efficiency advantages however no redundancy. Good for non-critical information like web page information or video games the place efficiency is essential however redundancy just isn’t.
- RAID 1 – Mirrors knowledge of 1 disk onto one other. Good for knowledge redundancy however no efficiency enhancements.
- RAID 5 – Stripes knowledge and parity throughout the disks, that means you get each efficiency and redundancy advantages. Can tolerate one disk failure.
- RAID 10 – Combines RAID 1 and 0 to supply each efficiency and redundancy advantages. Can tolerate one disk failure.
- Click on Select Physical Disks. Select the disks, use Check All to allow and initialize them, then apply the modifications.

- You can depart the array parameters to default. Or, you may optionally configure the Array Size, CacheTagSize (quantity of knowledge per disk in a stripe), and Read/Write Cache Policies.
- Finally, click on on Create Array to create the quantity. Then, press F10 to save lots of the modifications and exit.


On Intel Boards
- In the Gigabyte BIOS, go to Peripherals > Intel(R) Rapid Storage Technology > Create RAID Volume.

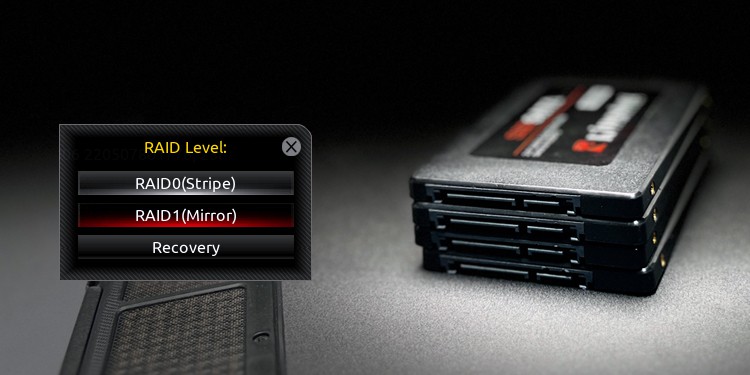
- You can identify the RAID quantity if you need. More importantly, choose the RAID stage. The choices obtainable will depend upon which ranges your board helps and what number of drives you’re using.

- RAID 0 – Stripes knowledge throughout a minimum of 2 disks. Provides efficiency advantages however no redundancy. Good for non-critical information like web page information or video games the place efficiency is essential however redundancy just isn’t.
- RAID 1 – Mirrors knowledge of 1 disk onto one other. Good for knowledge redundancy however no efficiency enhancements.
- RAID 5 – Stripes knowledge and parity throughout the disks, that means you get each efficiency and redundancy advantages. Can tolerate one disk failure.
- RAID 10 – Combines RAID 1 and 0 to supply each efficiency and redundancy advantages. Can tolerate one disk failure.
- Recovery – Uses Intel Rapid Recover Technology to create a recovery disk for knowledge redundancy.
- Matrix RAID – Allows you to create two RAID volumes on a single array.
- RAID-ready – Lets you migrate one non-RAID SATA drive to a RAID array with out knowledge loss.
- Select the disks you need to use within the chosen array and set their worth to X.

- You can optionally configure the array parameters. When you’re performed, choose Create Volume to create the array.

- Finally, press F10 to save lots of the modifications and exit the BIOS.


Using EZ RAID
Some high-end Gigabyte boards assist the EZ RAID characteristic that simplifies the method of establishing a RAID array. If your board supplies this utility, you should utilize it to create your RAID array.
- In the Gigabyte BIOS, go to the Peripherals tab and choose EZ RAID.

- Select the drive kind and press Enter.

- In the Mode tab, choose the RAID stage and press Enter. Depending on what number of drives you’re using, you may select from RAID 0, 1, 5, and 10.

- Click on Proceed to create the RAID quantity.

- Finally, press F10 to save lots of the modifications and exit the BIOS.


Loading RAID Drivers
After establishing the RAID array, you’ll need to set up an OS on this quantity. This is a three-step course of.
- Create an set up media together with your most popular software.
- Download and transfer the RAID drivers (AMD or Intel) to this drive.
- Finally, load the drivers from the set up wizard. This’ll make the RAID quantity selectable when putting in the OS.
Download AMD Drivers
The RAID drivers from AMD work nicely for many customers. If wanted, you may all the time obtain different drivers out of your motherboard assist web page. But that probably received’t be mandatory.
- Go to AMD’s assist web page, choose your Chipset from the record, and click on on Submit.

- Download the AMD RAID Driver on your Windows model.

- Extract this archive and replica the suitable driver folder to the set up media you created earlier.

RAID_SATA– SATA RAID driver.NVMe_CC– NVMe RAID driver for 1st Gen Threadrippers, Ryzen 2000 and older processors, and desktop processors with out iGPUs.NVMe_DID– NVMe RAID driver for remaining AMD processors.


Download Intel Drivers
Intel is a little more divided. The Intel RAID drivers didn’t work for me on any of my Gigabyte programs. Even when our staff was testing RAID on ASUS and different boards, the Intel drivers didn’t work. So, I like to recommend attempting out the RAID drivers from Gigabyte first.
- Open your motherboard’s assist web page. In the Downloads tab, broaden Driver > SATA RAID/AHCI.

- Download a latest Intel SATA Preinstall driver from right here.
- Extract the downloaded archive and replica the extracted folder to the set up media.


On the off likelihood that Gigabyte’s drivers don’t work, you should utilize the drivers from Intel as an alternative:
- Identify your CPU technology. The first or second quantity after the processor identify is its technology. (e.g., i7-7900X – seventh technology, i9-12900HX – twelfth technology).
- Search for the IRST Driver for your processor technology as proven within the image.

- Download the driving force from the official Intel supply.

- Go to the folder the place SetupRST bought downloaded. Right-click and choose Open in Terminal right here.

- Extract the contents of the archive with the
./SetupRST.exe -v EXTRACTDRIVERS=SetupRST_extractedcommand.
- Go contained in the extracted folder and open your Windows model.

- Copy the
iaStorAC.inffolder from right here to your set up media.


Load Drivers When Installing Windows
Now, that you just’ve ready the set up media with the RAID drivers, all that’s left is to load the drivers and set up the OS.
- Boot to the set up media and undergo the set up wizard. Once you get to the drive choice web page, click on on Load driver.

- Click on Browse, discover the driving force folder that you just copied earlier within the
C:partition and press Ok. - This’ll load the obtainable drivers.

- For Intel, merely choose the one obtainable driver and press Next.
- For AMD, choose the primary driver (
rcbottom.inf) and press Next. Repeat this course of two more occasions to load the second (rcraif.inf) and third (rccfg.inf) drivers as nicely.
- After loading the drivers, you’ll be capable to choose the RAID quantity and set up Windows on it.


Final Words
RAID’s most important function is uptime by way of safety towards {hardware} failure. It ought to by no means be thought of a substitute for backups, and that is particularly vital to grasp with FakeRAID.
I discussed at the beginning how FakeRAID is far much less dependable in comparison with correct {hardware} or software program RAID. The probabilities of knowledge loss with FakeRAID are important, so I strongly encourage you to maintain a separate offsite backup of your vital knowledge.
Check out more article on – How-To tutorial and latest highlights on – Technical News