
How to Deauthorize Your Mac – An Extensive Guide.
Want to know how one can deauthorize your Mac?
Suppose you’re planning to promote your Mac to a brand new proprietor or give it away to a colleague or a member of the family. In that case, it’s important to deauthorize your Mac. Deauthorizing removes entry to protected purchases and prevents it from persevering with to depend as one among your licensed computer systems.
It’s additionally essential to notice that Apple permits 5 computer systems to make use of one single Apple ID. This contains any laptop that’s able to working iTunes. If together with different iOS or iPod gadgets, the restrict of associations is as much as 10.
There are alternative ways to deauthorize your Mac using a number of apps, and we’ll focus on these strategies on this article.
Let’s get proper into it!
1. Deauthorize on iTunes.
The first step that you could do is to deauthorize on iTunes. It’s very important to deauthorize using iTunes as a result of it incorporates your Apple ID abstract. This can also be the place all of the downloads and purchases are saved. Most of the content material of your Mac is positioned right here, as effectively.
To deauthorize on iTunes, do the next steps:
- First, open iTunes. Make positive you’re logged in to your account. If you’re using the most recent macOS model, open Music as an alternative.
- On the menu bar on the prime of the iTunes window, click on Account.
- Select Authorizations, after which click on Deauthorize This Computer.
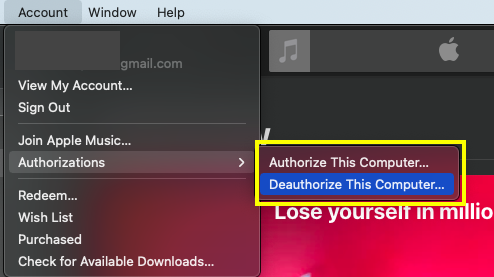
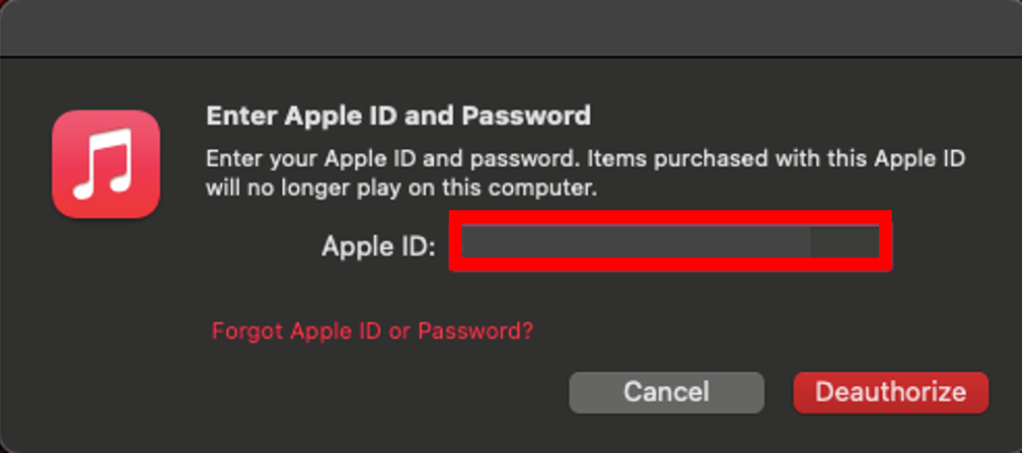
- Finally, enter your Apple ID and Password, and faucet the Deauthorize button.
2. Sign Out of iCloud.
Removing the connection between your iCloud and your Mac will make the saved and synced recordsdata now not accessible. To do that, you could signal out of your iCloud account.
Here are the steps to signal out of iCloud:
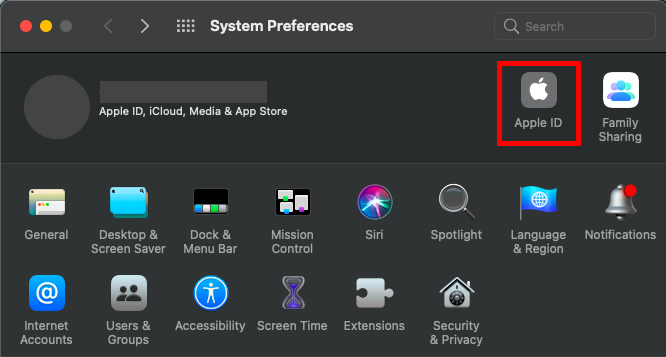
- First, click on on the Apple menu on the higher left of your display and go to System Preferences.
- On the higher proper facet of the window, you will notice Apple ID. Click on that icon.
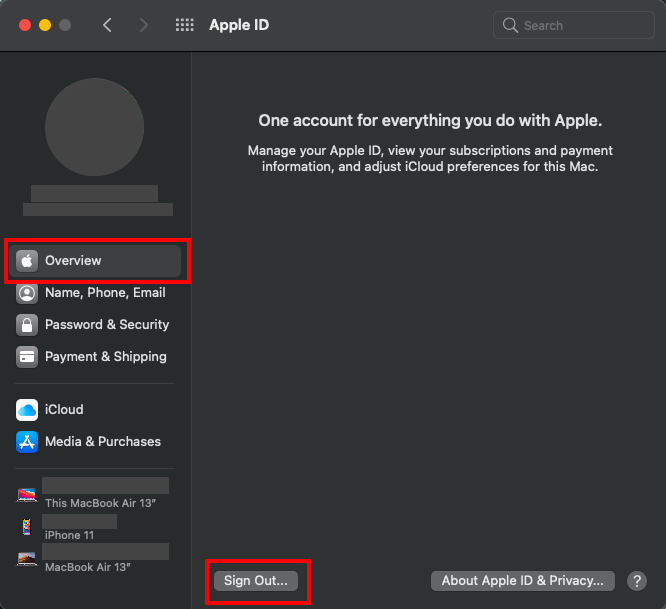
- Then on the Apple ID window, click on Overview.
- Finally, click on the Sign Out button.
Wait for a couple of minutes, and it’s executed! All of your iCloud paperwork and recordsdata will now not be accessible to your Mac.
3. Sign out of Messages.
It’s important to cowl all apps when deauthorizing Mac. This ensures that every one knowledge will likely be inaccessible to the next person. So, we’re additionally going to show you ways to signal out of Messages in your Mac.
- Launch the Messages app in your Mac.
- Then click on on Menu and go to Preferences.
- On the highest of the window, click on iMessage after which Sign Out.
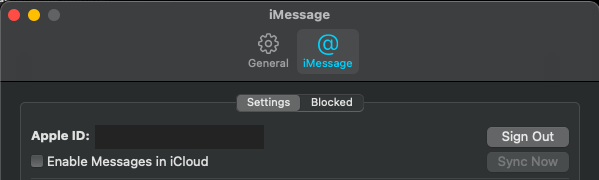
Once you click on ‘Sign Out‘, your Mac will now not be receiving any messages.
4. Deauthorize on Apple TV.
Since we wish to deauthorize our Mac in lots of apps, Apple TV is one other option to deauthorize it. This will stop a brand new person from accessing your AppleTV account.
You can deauthorize using the Apple TV app in your Mac by doing the next steps:
- First, open the Apple TV app in your dock or use Spotlight Search.
- Next, log in to your account should you haven’t but.
- On the menu bar on the prime of the iTunes window, click on Account.
- Select Authorizations, after which click on Deauthorize This Computer.
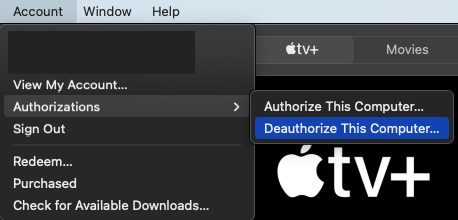
- Finally, enter your Apple ID and Password, then click on the Deauthorize button.
The entry to Apple TV in your Mac is now revoked. Quite easy, proper?
5. Deauthorize All Devices.
If you already reached the restrict of allowed gadgets related to your Apple ID or now not using these gadgets, there’s an choice to deauthorize all gadgets. Before we present you the steps to deauthorize all gadgets, it’s possible you’ll wish to test first which computer systems you’ve licensed.
Here are the steps to try this:
- Open the iTunes or Music app.
- On the Menu bar, click on Account, then View My Account.
- You will likely be taken to the Account Information window, the place yow will discover all of your account particulars.
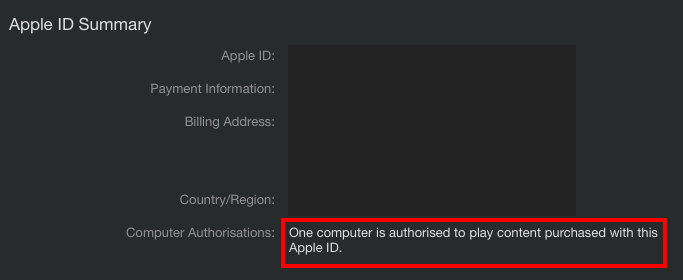
- Under Apple ID Summary, you may see Computer Authorisations. All licensed computer systems are listed there.
Now, let’s discover ways to deauthorize all.
- First, open the iTunes or Music app.
- On the Menu bar, click on Account, then View My Account.
- On the Account Information window, search for Apple ID Summary.
- Under Apple ID Summary, yow will discover ‘Computer Authorisations‘ the place you may see what number of gadgets are related to your Apple ID.
- Click the Deauthorize All button. This choice will solely seem you probably have two or more gadgets related to your Apple ID.
Be cautious on clicking the deauthorize all button since you may solely do that every year.
6. Remove Mac as a Trusted Device.
Now that we talked in regards to the completely different apps the place you may deauthorize your Mac let’s go to the deletion of the particular device. If you could have enabled the two-factor authentication, you must take away your Mac as a trusted device.
Just comply with the steps beneath:
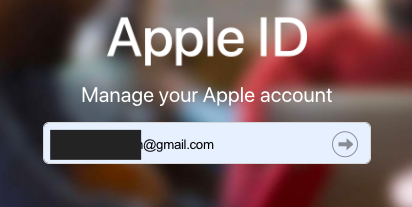
- First, open a browser and go to My Apple ID’s web site.
- Log in by coming into your Apple ID and Password.
- There will likely be a immediate for two-factor authentication. Enter the code that you simply obtained to proceed.
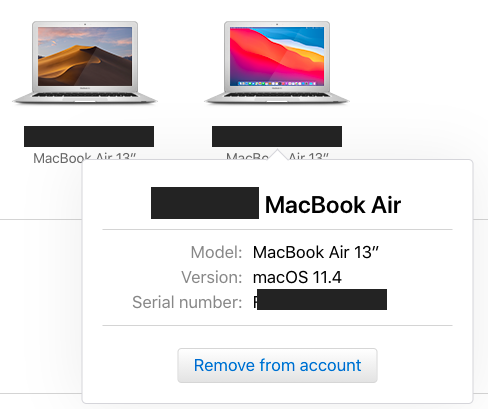
- Scroll right down to see the gadgets which can be signed in using your Apple ID.
- Click on the device that you simply now not wish to use, after which click on Remove from Account.
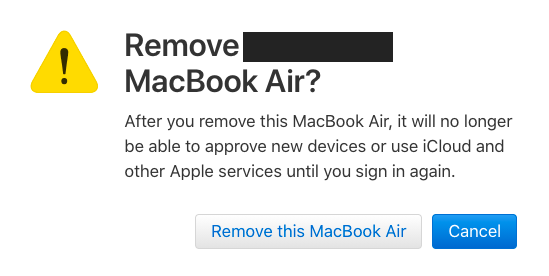
- Then, a pop-up window will seem to substantiate. If you agree, it’s possible you’ll proceed by clicking Remove This [Device].
7. Deauthorize Third-party Apps.
For the final part, every third-party utility could have a special set of procedures to deauthorize. If you could deauthorize a third-party utility, it’s best to comply with the developer’s directions on how to do that.
Going to every utility’s official help web page or contacting their staff could be the best choice to know the precise steps to deauthorize their purposes.
This ends our information on how to deauthorize your Mac. We hope you realized a factor or two! If you could have clarifications on the strategies, please tell us within the remark part beneath, and we’ll be able to reply them.
If this information helped you, please share it. 🙂

Check out more article on – How-To tutorial and latest highlights on – Technical News, Apple Products