How do I Set Up and Use Microsoft OneDrive on a Mac.
Learn how to make the most of the file storage options of OneDrive in your Mac and collaborate with recordsdata shared throughout platforms.
Companies use Microsoft OneDrive to handle file shares throughout areas and customers and provides crew members the flexibility to collaborate more successfully throughout a number of platforms comparable to Windows, iOS, iPadOS, Android and macOS. Most organizations steeped within the Microsoft ecosystem select OneDrive as a result of it really works so effectively with Office 365 and Windows.
For many enterprise customers, OneDrive is constructed into Windows 11 and accessible by default, however on Macs, there are some steps you’ll must take to rise up and working with OneDrive. We’ll stroll via these on this article and get OneDrive working within the Finder, so you may collaborate with different OneDrive customers and simply retailer your paperwork within the cloud.
Jump to:
Creating an account and downloading OneDrive
The first step to organising OneDrive is getting an account. If your group makes use of OneDrive for Business, use your present work electronic mail login and it’s best to have entry to the mandatory account.
PREMIUM: OneDrive Cloud Usage Policy.
If you’re using OneDrive for private use, you’ll must create an account by heading to the Microsoft OneDrive web page and signing up free of charge — the free model offers you 5GB of cloud storage. Once you will have an account, obtain the software program and arrange the app on the Mac.
With account credentials in hand, obtain the OneDrive app for Mac. The best approach to get OneDrive is that if your group permits the Mac App Store; you may go to the OneDrive web page on the Mac App Store and obtain and set up the app with one click on.
Another approach to obtain and set up the app is by visiting the OneDrive obtain web page and clicking Download. Be positive to go to this web page in your Mac, so it downloads for the right platform.
Setting up OneDrive on Mac
Once you’ve downloaded the software program, open the installer out of your Downloads folder — named OneDrive.pkg — and observe alongside within the OneDrive installer (Figure A).
SEE: Avoid these frequent errors when working OneDrive on Apple gadgets.
Figure A
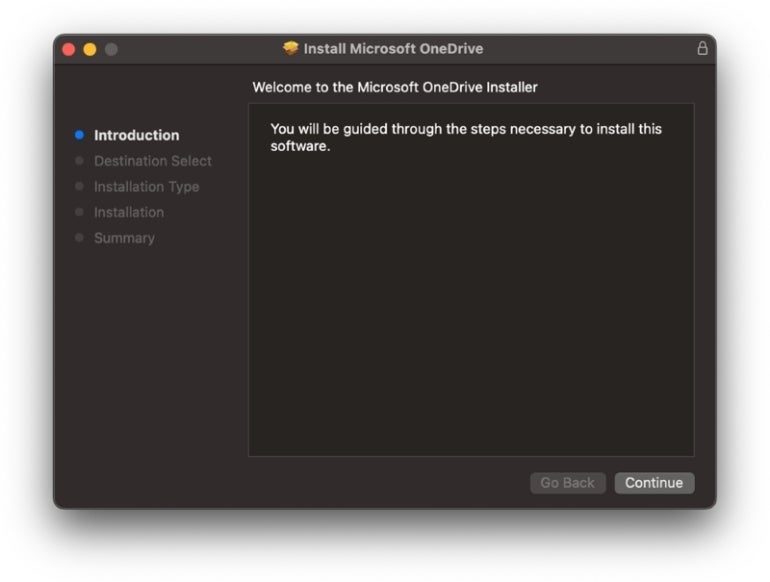
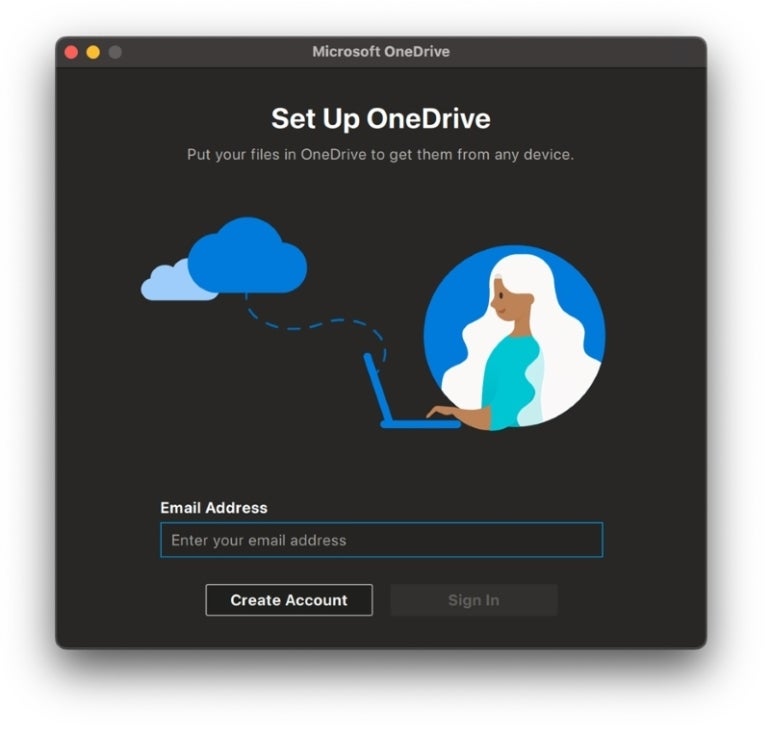
After putting in the software program, you’ll see a OneDrive icon within the Applications folder in your Mac. Double-click to open the app. At the primary display screen within the Set Up OneDrive program (Figure B), enter your account’s electronic mail handle and click on the Sign In button.
Figure B
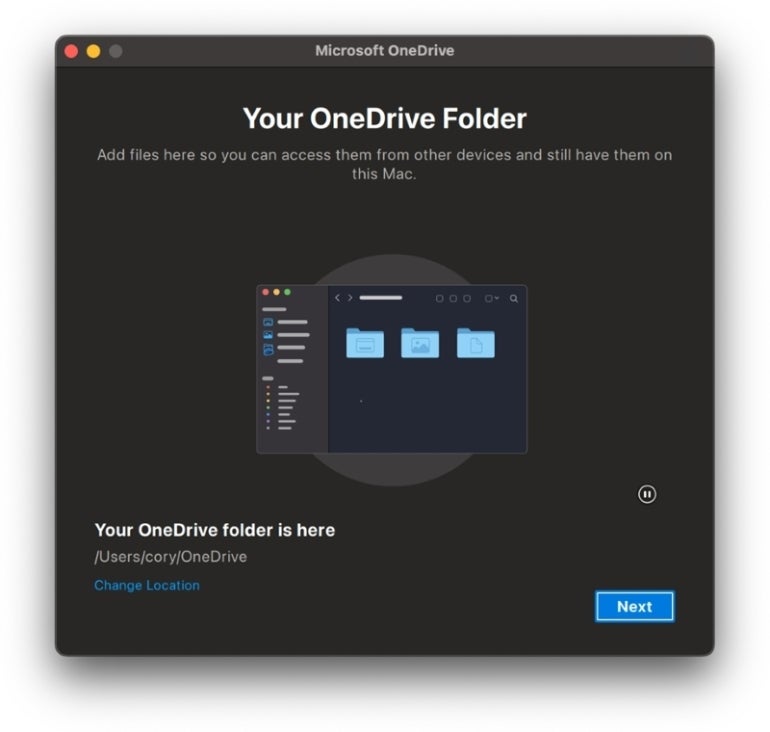
Follow the setup assistant via the primary few screens, answering the questions on your account. The display screen for Your OneDrive Folder shows the placement that will probably be used to retailer your synced folders and recordsdata. You can change it to a unique location by clicking the button titled Change Location; in any other case, click on Next (Figure C).
Figure C
The next few screens present fundamental data on how to arrange and use OneDrive. Click Next at every display screen. At the Get The Mobile App display screen, click on the Later button — you may all the time obtain the iOS or Android app one other time.
SEE: Here’s how to make use of Microsoft OneDrive in your iOS or Android device.
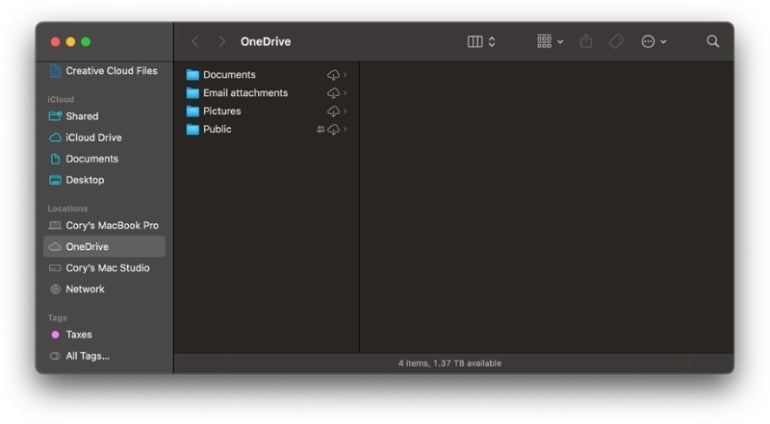
At the ultimate setup display screen, click on the button to Open OneDrive Folder. If you’ve already been using OneDrive on a Windows pc or different device, your synced folders and recordsdata will begin showing within the OneDrive folder in your Mac. If not, then the folder will include a couple of default folders and recordsdata (Figure D).
Figure D
Customizing your OneDrive setup
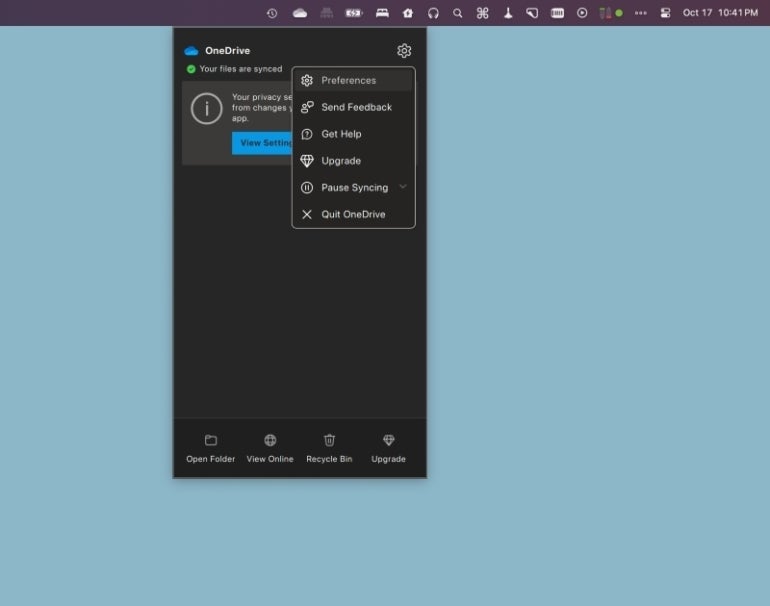
Next, you’ll need to customise OneDrive in your Mac to make it work the way in which you count on. Click the OneDrive menu bar icon on the prime proper of the display screen, then choose the Preferences button from the window that seems (Figure E).
Figure E
General preferences
Some of the General preferences you’ll need to contemplate toggling embrace:
- Open at Login: OneDrive routinely begins every time you signal into your Mac.
- Hide Dock icon: You can decide to cover or not hide the Dock icon and determine if it’s essential see notifications about sharing or modifying.
- Warn me earlier than my recordsdata I deleted are faraway from the cloud: This can operate as a precaution towards unintentional file deletions.
You’ll additionally need to select whether or not or to not use Files On-Demand. With this feature turned on, any folders and recordsdata synced via OneDrive are saved on-line however not saved in your Mac. Any such file from OneDrive is downloaded to your pc solely when it’s essential entry it.
The benefit right here is that you simply save on disk area. The drawback is that it’s essential be on-line to entry your recordsdata. If your Mac is low on storage, it’s possible you’ll need to keep Files On-Demand enabled.
To make sure that recordsdata are downloaded to your Mac and never saved solely within the OneDrive cloud:
1. Open the Preferences part of the OneDrive app from the menu bar.
2. Click the button to Download recordsdata as you employ them (advisable) (Figure F).
Figure F
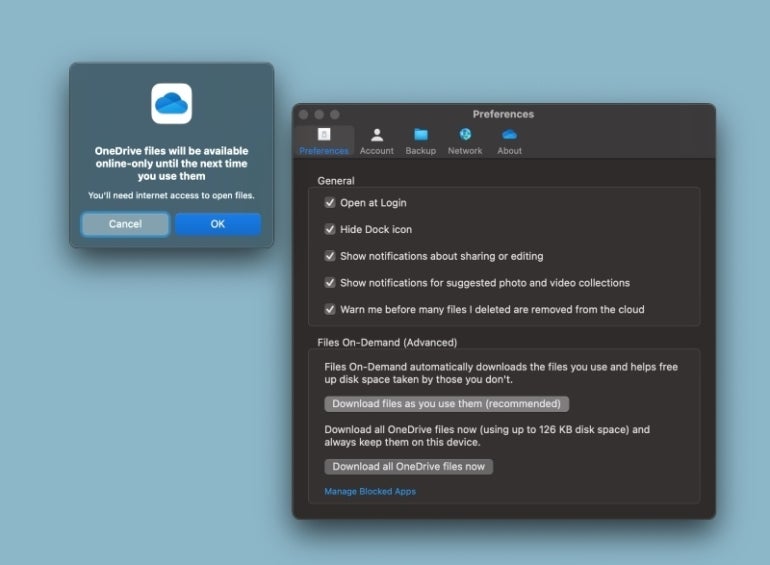
3. Click the button for Download all OneDrive recordsdata now, and your whole OneDrive recordsdata will probably be downloaded to your Mac.
Account preferences
Under the Account part for Preferences, you may see the identify of your OneDrive account and the way a lot area your OneDrive recordsdata are using within the cloud. Here, you may select the place your recordsdata are saved in your device. To accomplish that:
1. Click the Choose Folders button. This part reveals you which ones folders are being synced between your Mac and your cloud storage.
2. Select or deselect any folder or file (Figure G). Any that you simply deselect will probably be eliminated out of your Mac and saved solely on-line. You could need to deselect any folders you don’t want in your Mac however need to keep in OneDrive.
Figure G
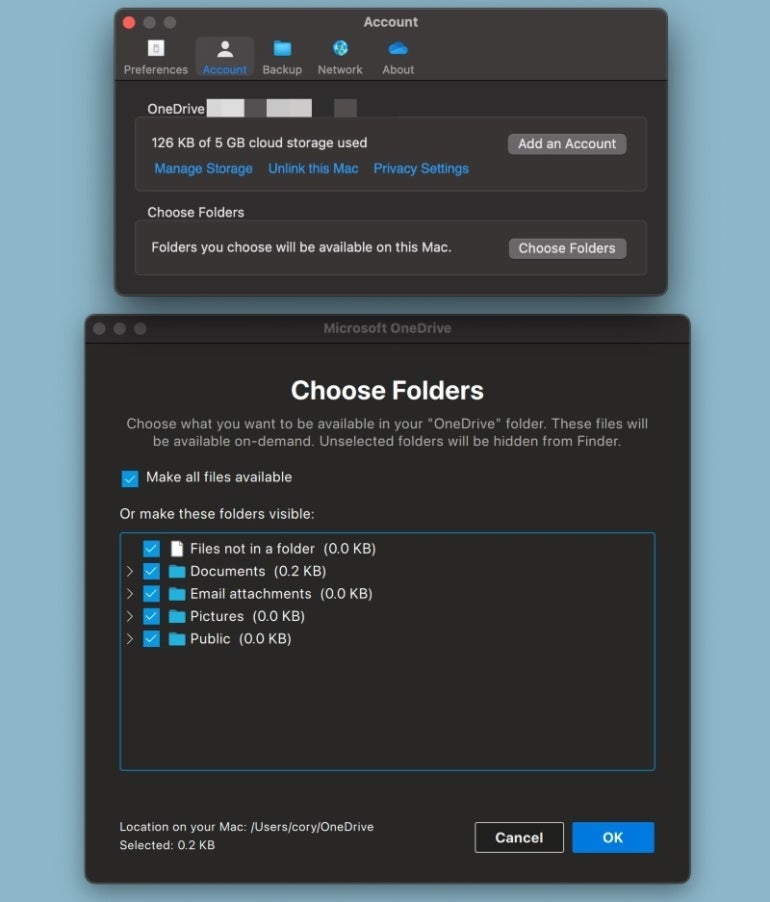
3. Click OK when carried out.
Backup preferences
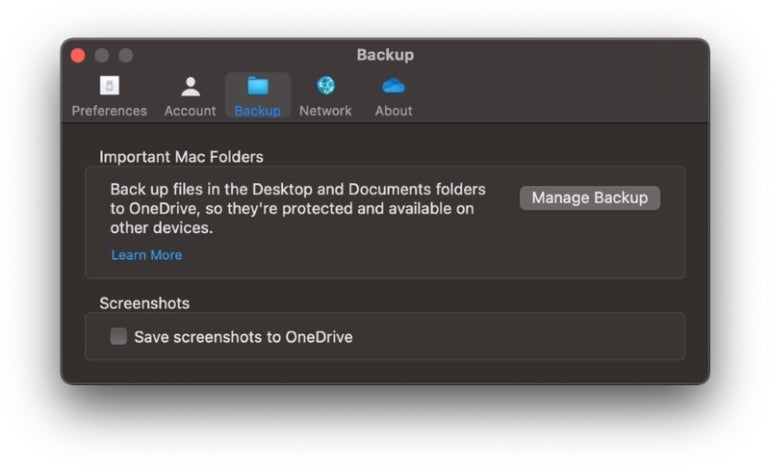
From the Backup part for Preferences, you may select to backup and retailer recordsdata and folders in your Desktop and Documents folder in your Mac to OneDrive routinely. To accomplish that, you’ll must click on the Manage Backup button and select to retailer any taken screens in OneDrive routinely (Figure H).
Figure H
When carried out, shut the OneDrive Preferences window. Based in your customizations, OneDrive will now work within the background to back up and synchronize your chosen folders and recordsdata.
Check out more article on – How-To tutorial and latest highlights on – Technical News