How to Import Photos from iPhone to Windows 11/10: 4 Solutions [2023].
“How to transfer photos from iPhone to Windows? I have got a new phone, but I can’t seem to import photos from iPhone to Windows 10 now.”
If you might have additionally acquired an iPhone and wish to switch its information to a Windows system, you then might need the same doubt. Since iOS units don’t work like Android telephones at instances, some individuals can encounter these conditions. The excellent news is that there are a number of methods to switch photos from iPhone to Windows that anybody can strive. In this publish, I’ll train you the way to import photos from iPhone to Windows 10 through 4 hassle-free strategies.

Method 1: How to Import Photos from iPhone to Windows 10 Directly?
Well, for those who merely must switch photos from iPhone to Windows, then you are able to do it using Explorer. While it gained’t allow you to switch another sort of information, you may straight import photos from iPhone to Windows 10 on this means. To discover ways to import photos from iPhone to Windows 10, the next steps will be taken.
Step 1: Connect your iPhone to the pc
To begin with, simply join your iPhone to the system using a working lightning cable. If you might be connecting it for the primary time, then it’s essential faucet on the “Trust” button when you get a immediate in your device. Also, enable the related PC to entry photos and movies in your iPhone.

Step 2: Transfer photos from iPhone to Windows
Now, launch Explorer in your Windows and from its house (This PC), you may see your iPhone’s icon below the External Devices part.

Just open the iPhone storage and browse to its Internal Storage > DCIM folder to discover the out there photos and movies. You can now right-click, copy this content material, and paste it in your Windows storage.

Method 2: How to Import Photos from iPhone to Windows 10 with iCloud?
Lots of people additionally sync their iOS units with their iCloud account. Since Apple supplies solely 5 GB of free storage for every iCloud account, you should utilize it to maintain a few of your photos secure. Later, you may sync the iCloud Photo Library to your Windows 10 laptop using its devoted software. Here’s how to import photos from iPhone to Windows 10 with the assistance of iCloud.
Step 1: Sync iPhone photos with iCloud
The very first thing to do could be the importing of your iPhone photos to iCloud. To do this, go to its Settings > Photos and activate the “iCloud Photo Library” function. This will add your iPhone photos to iCloud. Just make certain that you might have sufficient out there house in your iCloud.

Step 2: Sync iCloud photos on Windows 10
Great! Once your information is uploaded to iCloud, you may import photos from iPhone to Windows. For this, it’s essential set up and launch the iCloud software in your Windows system. Log-in to the identical iCloud account that’s synced to your telephone and allow the syncing for Photos.

You also can click on on the “Options” button adjoining to the Photos tab. Now, ensure that the sync function for “iCloud Photos Library” is turned on. You also can choose a location the place you want to save the synced photos in your laptop right here.

Method 3: How to Transfer Photos from iPhone to Windows 10 with the Photos App
Windows 10 customers also can take the help of the Photos app to switch photos from iPhone to Windows. It is an inbuilt software to handle photos on Windows 10, however also can import photos from iPhone to Windows. To discover ways to switch photos from iPhone to Windows, you may observe these easy steps:
Step 1: Connect your iPhone
Firstly, you may simply join your iPhone to your Windows PC using working cables and belief it. Furthermore, you must enable the system to entry your iPhone photos and movies.

Step 2: Import photos from iPhone to Windows 10
Once your iPhone is related, simply launch the Photos app in your system from the Start menu. Here, it’s essential go to its top-right nook and click on on the import icon.

Now, simply select your iPhone from the record of the related media units in your Windows. This will robotically show the thumbnail view of your photos with the intention to choose what you want to import. After choosing photos, click on on the “Continue” button and wait as your photos could be moved to your Windows system.

Method 4: Perform a One-click Transfer of Photos from iPhone to Windows 10
If you might have lots of photos to switch, then you may simply take the help of MobileTrans – Backup. With only a single click on, you may take an intensive backup of your iPhone in your Windows laptop. Apart out of your photos and movies, the backup will even embody your contacts, messages, name logs, calendar, reminders, and different kinds of information. Here’s how to import photos from iPhone to Windows 10 within the easiest way:
You can watch the video at first:

Step 1: Launch MobileTrans – Backup
You can obtain and set up MobileTrans – Backup by visiting its official web site in your laptop. Afterward, launch MobileTrans and from the record of choices on its house, choose the “Backup” function.

Step 2: Import photos from iPhone to Windows
Connect your iPhone to the system and let MobileTrans detect it robotically. You can now view the snapshot of your device and see the varieties of information it can save you. Select “Photos” or another sort of information from right here and click on on the “Start” button.
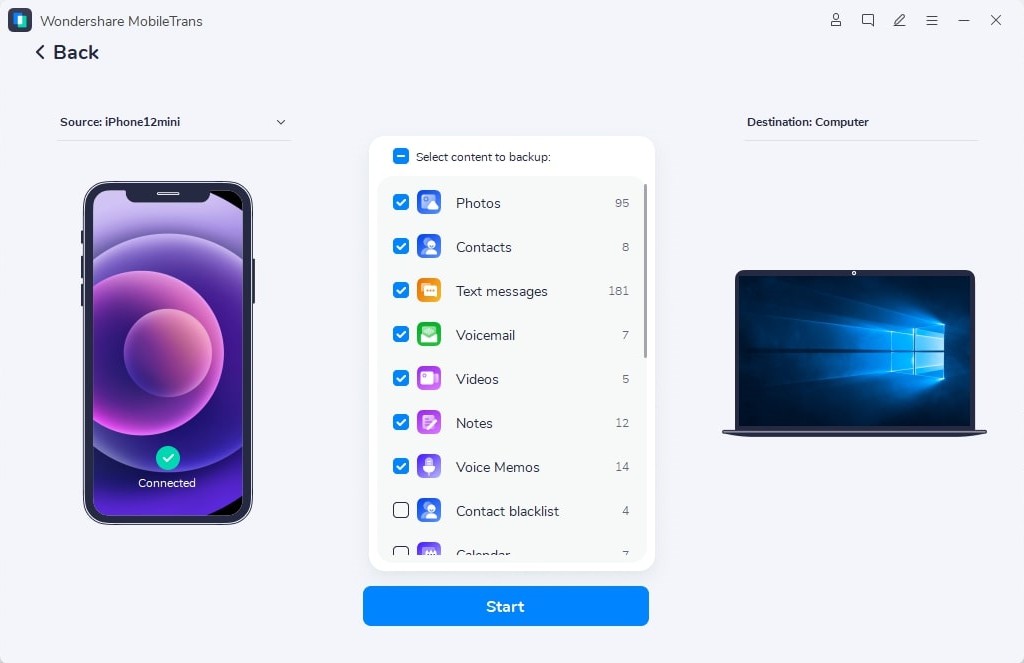
That’s it! This will begin the method to import your photos and can let you already know as soon as it’s accomplished efficiently with the intention to take away your device.
Now when you understand how to switch photos from iPhone to Windows in 4 alternative ways, you may simply transfer your information to your laptop. To make issues simpler for you, I’ve included steps to import photos from iPhone to Windows 10 using native strategies and different instruments. You can use iCloud to switch a couple of photos wirelessly, however in case you have lots of information to maneuver, then an software like MobileTrans – Backup could be a great alternative.
Check out more article on – How-To tutorial and latest highlights on – Technical News