
How to create and use Safari Profiles on iOS 17.
What to know
- Safari Profiles enable you create distinctive profiles based mostly in your workflow, pursuits, niches, and more. History, Extensions, Cookies, Tab Groups, and Favorites are separate for all of your Safari Profiles and aren’t shared throughout them.
- You can create new Safari Profiles by going to Settings > Safari > New Profile.
- To use Safari Profiles, Open Safari > Tabs icon > Menu icon > Profile after which select the profile you want to use.
Apple has been consistently bettering Safari’s looking expertise over the previous few releases. We received the flexibility to make use of tab teams, reposition the URL bar, Safari backgrounds, tab teams, and more. iOS 17 has been targeted on personalizing the general OS expertise in line with the consumer’s wants and necessities which is why we now have Safari Profiles.
This new function means that you can create totally different profiles for the native browser for various workflows. You can create profiles to your work, private looking and even based mostly in your pursuits, be it leisure, science, information, and more. But how are Safari Profiles distinctive and the way do they differ from tab teams? Let’s discover out!
What are Safari Profiles and why use them?

Safari Profiles are a brand new means of personalizing your looking expertise by permitting you to create totally different profiles based mostly in your workflows, pursuits, and more. These profiles are self-contained and keep your historical past, extensions, cookies, tab teams, and favorites separate throughout totally different profiles.
This is the place Profiles differ from Tab teams in Safari. While Tab teams can comprise totally different looking classes, they nonetheless share historical past, cookies, extensions, and favorites throughout all teams. However, Profiles assist you to create distinctive looking experiences which will be particular to your pursuits and workflows.
For instance, you may create a piece profile the place you’re logged into providers and web sites to your work that you just repeatedly use. Your work profile also can comprise extensions that you just use whereas working repeatedly however are fairly redundant when looking the net for private use. Similarly, you may have a novel Home profile the place you may keep tab teams and keep logged into providers you employ at residence whereas conserving them separate out of your work Safari Profile. This might help you keep targeted whereas working and guarantee that you may get back to your looking classes as quickly as you get residence.
You can use this new function in quite a few methods relying in your pursuits, wants, and preferences. You can create Profiles for various subjects, workflows, places, niches, and more.
How to create and use Safari Profiles on iOS 17
Here’s how one can create distinctive Safari Profiles on iOS 17. Follow the steps under that can assist you together with the method.
Note: Safari Profiles are distinctive to iOS 17 which suggests you’ll need iOS 17 or larger to make use of this new function. If you haven’t up to date your device but, you are able to do so by going to Settings > General > Software Update and putting in the newest obtainable update to your device.
Step 1: Create a brand new Safari Profile
Open the Settings app and faucet Safari.

Scroll down and faucet New Profile beneath PROFILES.

Now sort a most popular identify to your new profile beneath NAME AND ICON on the high.

Next, faucet and select the popular icon you want to assign to your new profile.

Now faucet and select the popular colour to affiliate along with your new Safari Profile. You can faucet the 3-dot () icon to view more colour selections.

Tap Favorites.

Now select a folder you want to assign as Favorites for the present profile. You also can faucet New Folder within the high proper nook to create a brand new folder with the identical identify as your Safari Profile. You can then assign tabs as favorites when using the brand new Profile. The marked favourite tabs can be added to this folder as an alternative.

Next, faucet Open New Tabs and select the place you want to open new tabs when using this Safari Profile.

Tap Done when you’re proud of the customization of the brand new Profile.

And that’s it! You can now use the subsequent part to find out how you need to use the brand new Safari Profile in your device.
Step 2: Use and swap between totally different Safari Profiles on iOS 17
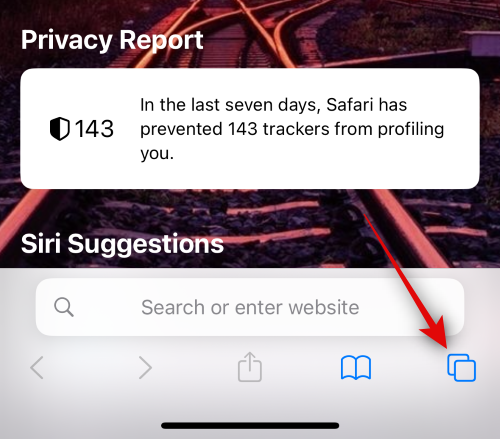
Open Safari and faucet the tabs icon within the backside proper nook.
Tap the Menu icon on the backside of your display.

Now faucet Profile on the backside to decide on the profile you want to use presently.

Tap and select your most popular profile.

You will now be switched to the chosen profile. The identical can be mirrored by a coloured background within the new tab web page which would be the identical as the colour you determined to assign to your Safari Profile.

And that’s it! You can now browse, add extensions, create tab teams, and mark tabs as favorites within the present Profile. All this stuff can be distinctive to your present profile and won’t be shared with different Safari Profiles in your device.
How to browse usually and not using a Safari Profile
You can browse usually in your device by choosing No Profile when switching profiles. Here’s how you are able to do that in your device. Follow the steps under that can assist you together with the method.
Open Safari and faucet the tabs icon within the backside proper nook.
Now faucet the presently assigned Profile icon on the backside of your display.

Tap the possibility for Profile on the backside.

Tap and choose No Profile.

And that’s how one can browse usually and not using a Safari Profile in your device.
How to delete Safari Profiles on iOS 17
You can delete Safari Profiles using the Settings app. Follow the steps under that can assist you delete a Safari Profile in your device.
Open the Settings app and faucet on Safari.
Scroll down and faucet on a Profile you want to delete beneath PROFILES.

Tap Delete Profile on the backside.

Tap on Delete to verify your selection.

And that’s it! The chosen Safari Profile will now be deleted. You can repeat the steps above to delete more Safari Profiles out of your device as wanted.
We hope the put up helped you simply create and use Safari Profiles on iOS 17. If you face any points, be happy to succeed in out to us using the feedback under.
Check out more article on – How-To tutorial and latest highlights on – Technical News