
How to Blur Text and Faces Inside Videos on iPhone.
You can share virtually any type of media together with your family and friends however relating to sharing your private stuff with the general public, you’ll have to assume twice. This is particularly necessary when the stuff you’re sharing comprises delicate particulars like photos, contact particulars, or social safety numbers of your self and your family members.
While you’ll be able to blur or scratch out faces and delicate textual content inside photos simply, hiding such information inside movies or display recordings will be fairly arduous, particularly for these not well-equipped with high-end software program or skilled to take action. In this publish, we’ll assist you to blur texts and faces inside these movies instantly out of your iPhone within the easiest method attainable.
How to blur one thing in a video on an iPhone
Apple doesn’t provide a local instrument to blur delicate content material like textual content and faces inside movies on an iPhone. There are a number of third-party apps that supply this performance however for simplicity and ease-of-use, we’ll be using the Blur-Video app from the App Store. This app permits you to obtain blur or pixelation results to cover textual content or faces inside a video totally free and the spotlight is that every one of its options can be found for everybody with out extra prices.
Short information:
To blur parts of a video, go to the Blur-Video app > Start > choose a video > pinch outwards to increase the video into a number of frames > find the body the place the item first seems > select Blur or Pixelate > Add Blur and regulate the dimensions, form, and place of the blur field. For shifting objects, use Keyframes to regulate the blur form and measurement for a number of frames.
GIF information:

Step-by-step information:
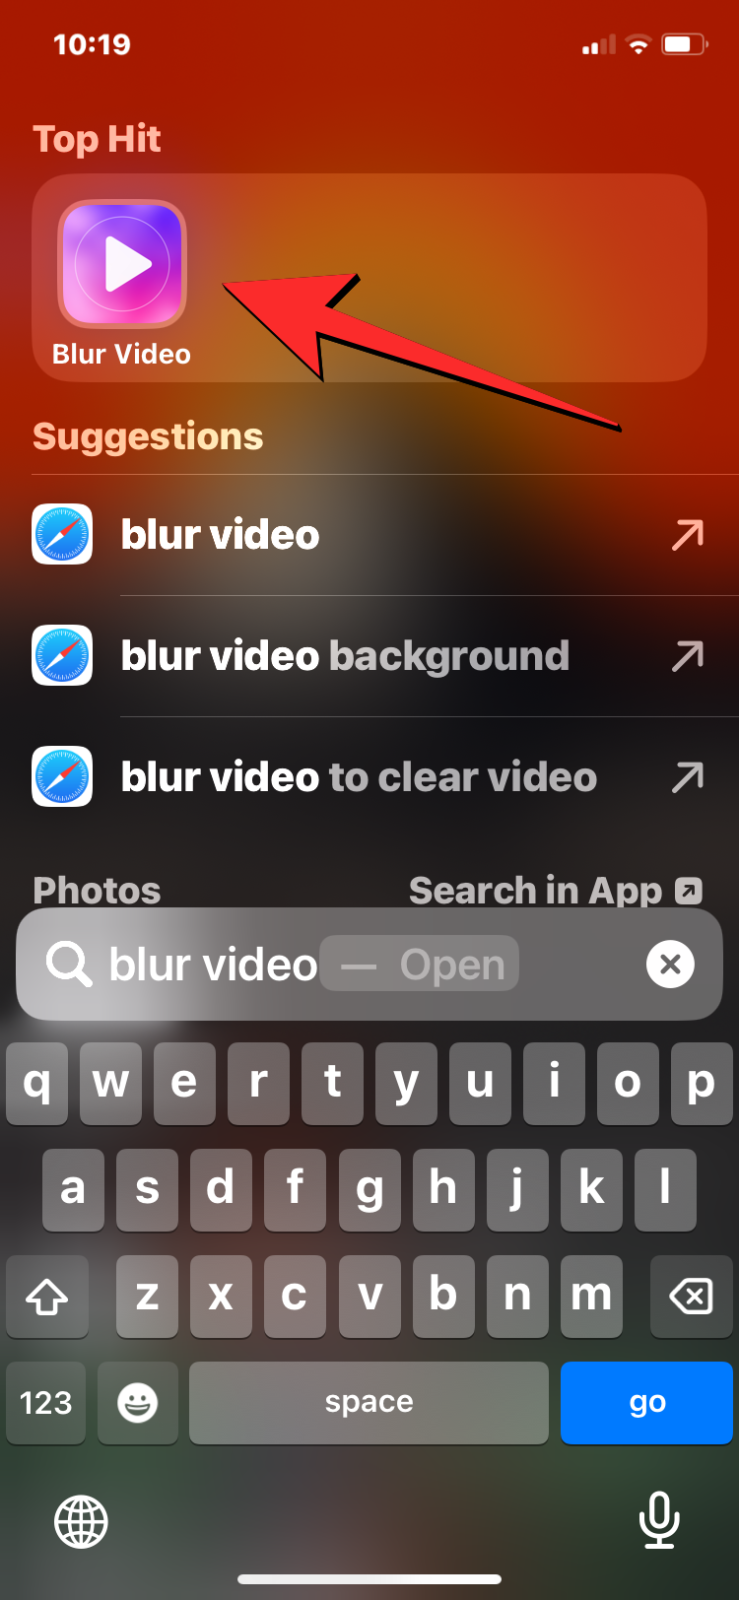
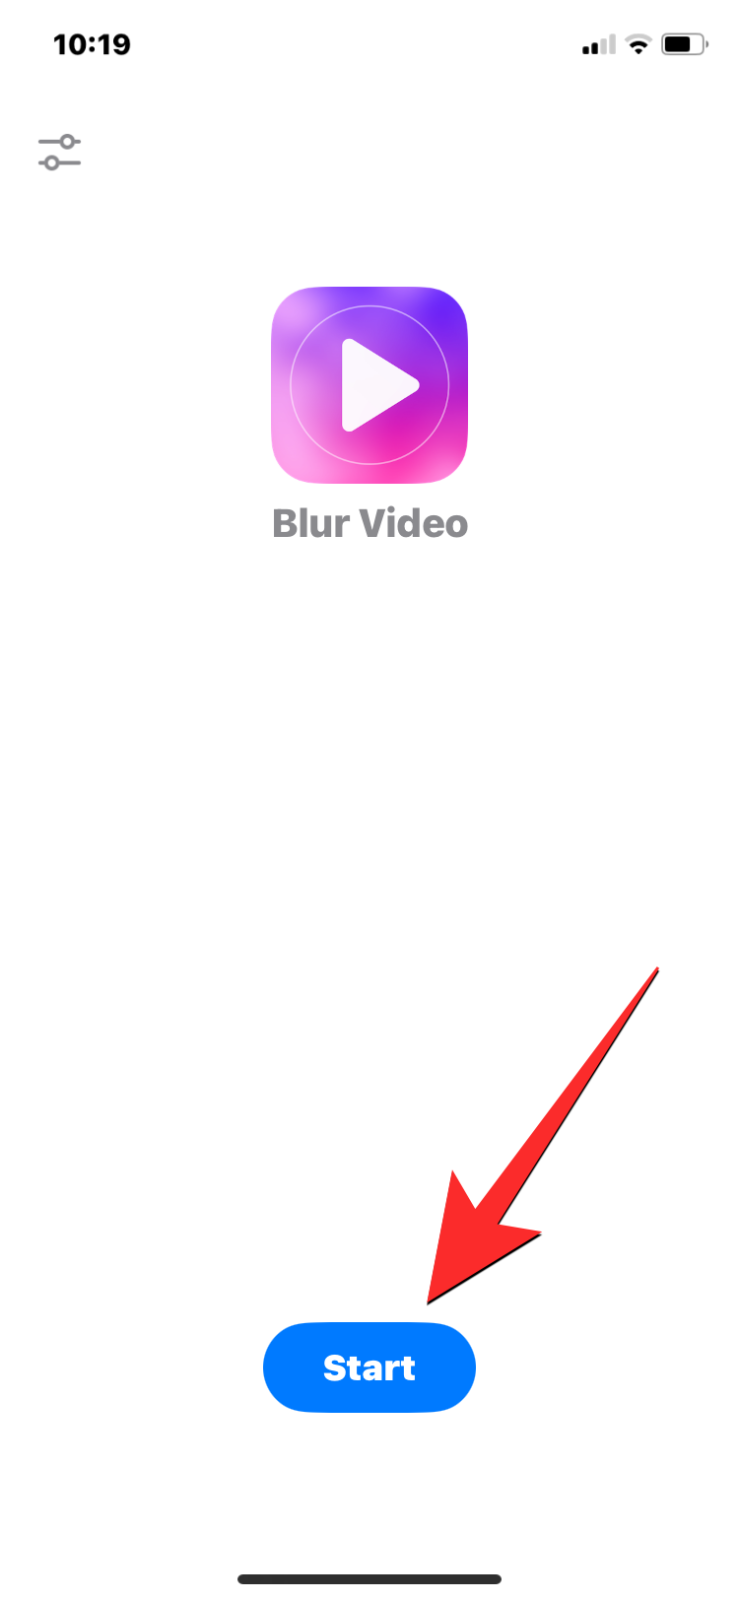
- Before you’ll be able to blur components of a video, be sure to obtain the Blur-Video app from the App Store. Once it’s downloaded, open the Blur-Video app from the App Library. Inside Blur-Video, faucet on Start on the backside.
-
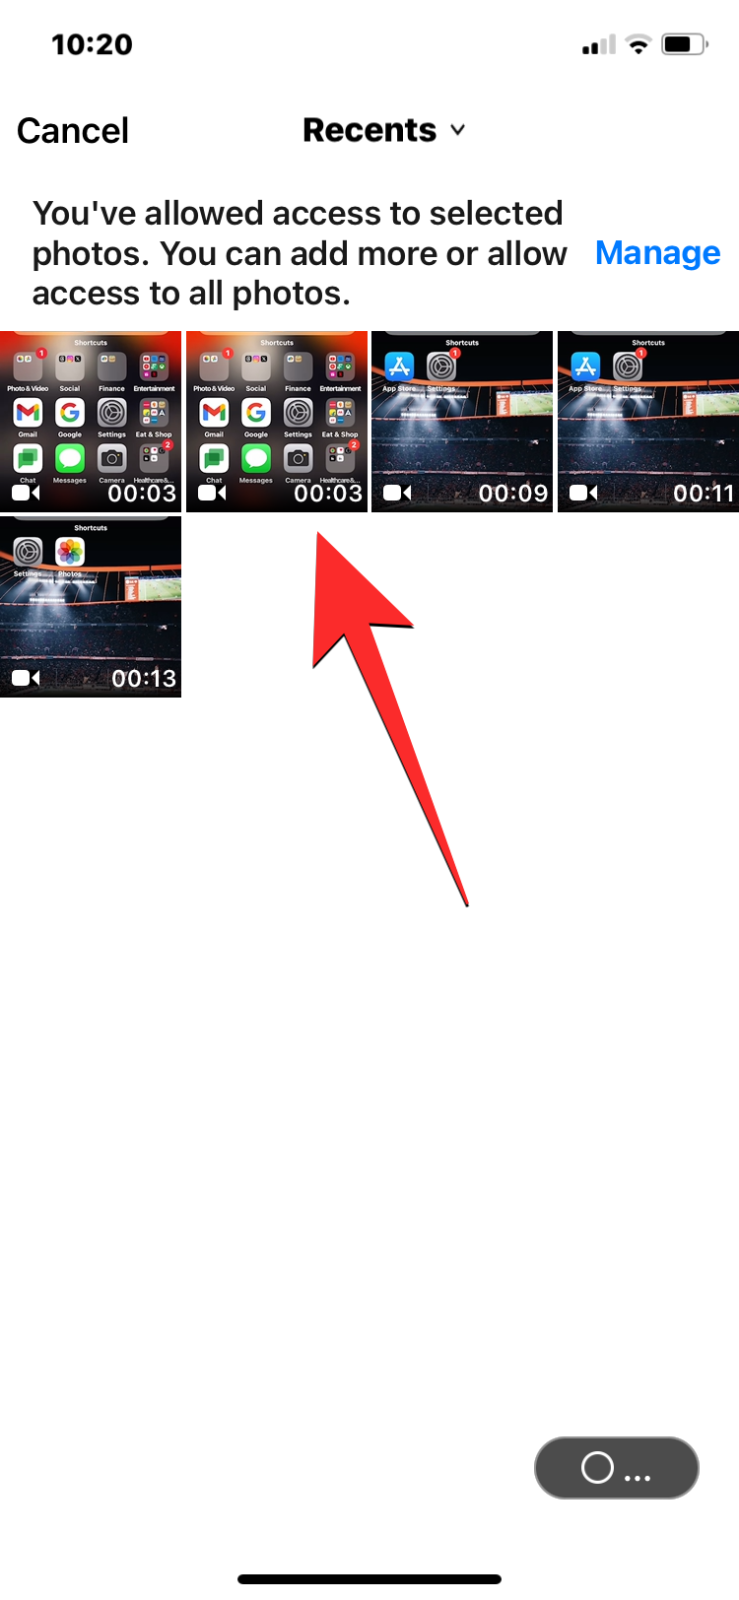
- You’ll be requested to decide on a video out of your Camera roll to edit it. From this display, faucet on the video you wish to edit. The chosen video will now be proven within the preview on the prime. At the underside, you’ll see a video seeker with thumbnails for every of the frames that can assist you discover the portion of the video the place you wish to add the blur. You can faucet on the Play icon to play the video as soon as earlier than you add the blur field.
-
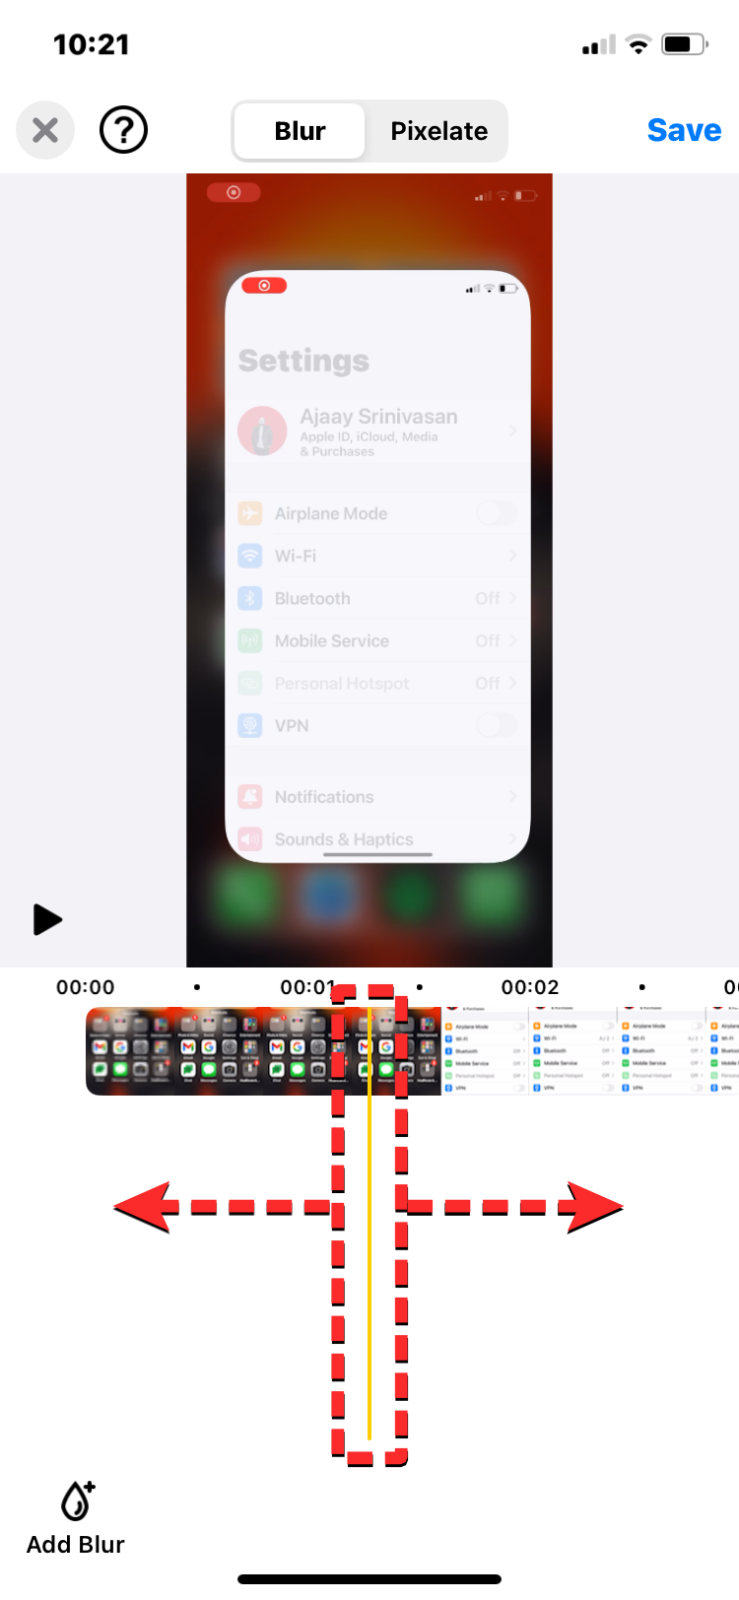
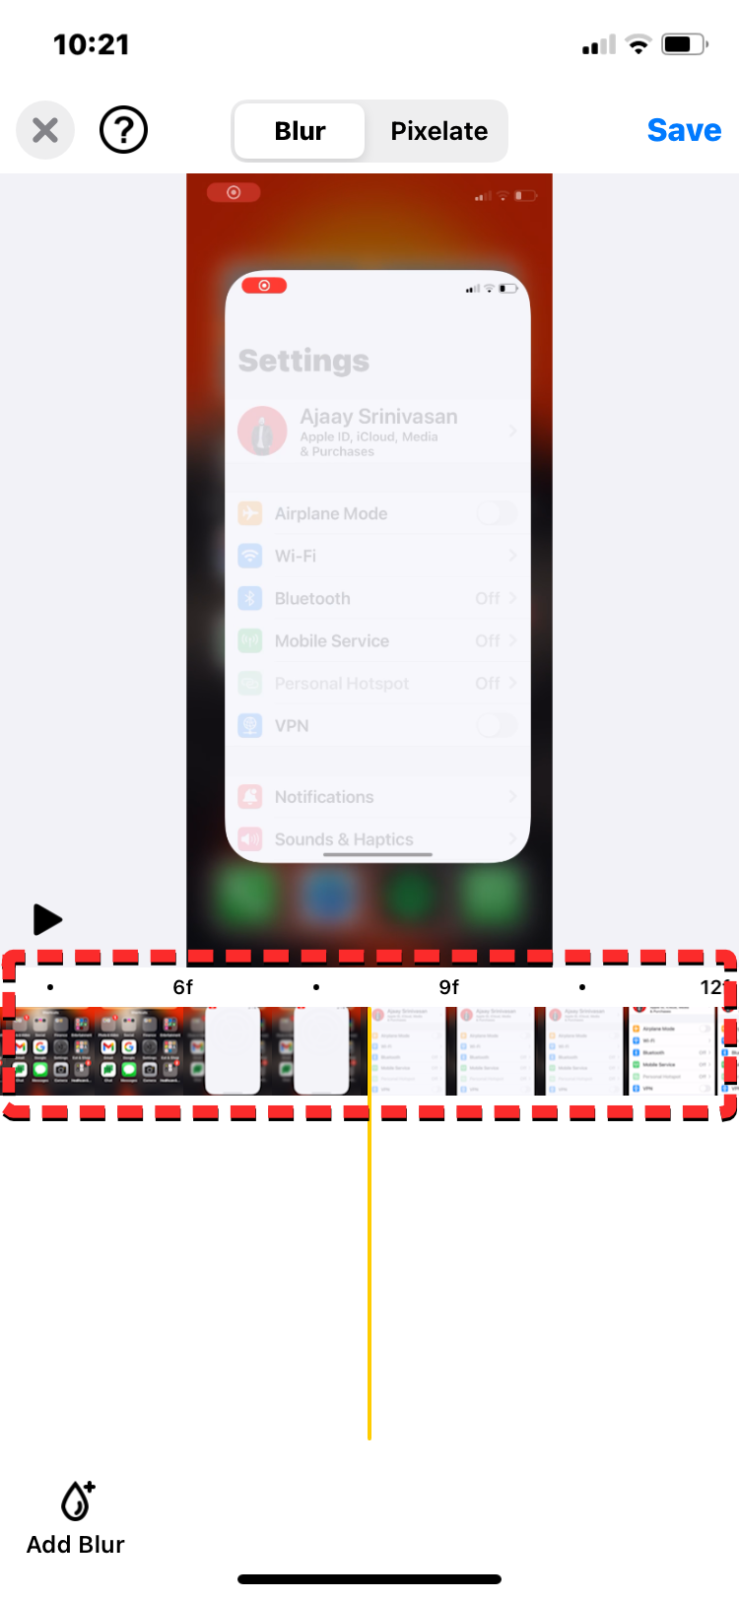
- When you find the body the place the blur must be added, pinch outwards on the seeker instrument to increase the video into a number of frames to make it simpler so that you can find the precise body from the place the content material you wish to hide begins showing. We suggest you pinch outwards as a lot as attainable to land on the precise body. Doing so will break up 1 second of your video into 30 frames, making it simpler to cover content material from the second it seems. This will probably be evident once you have a look at the body labels above the thumbnails that learn “3f”, “6f”, “9f”, and so forth.
-
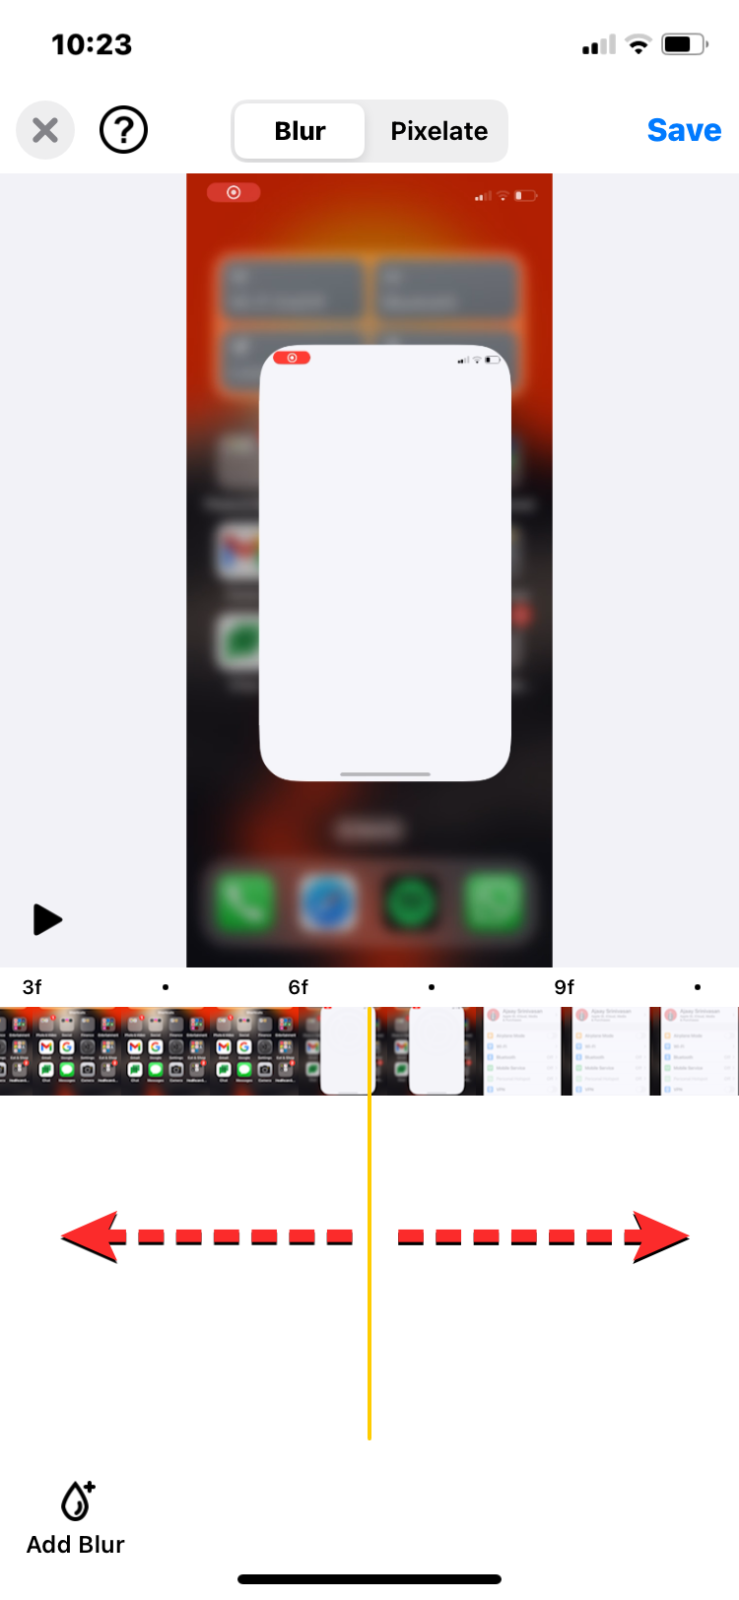
- Once you increase the video into a number of frames, swipe leftwards or rightwards using the seeker instrument on the backside to get to the precise beginning body the place you wish to apply the blur instrument. In this explicit video, we’re attempting to cover the title and picture that seems once you open the Settings app on iOS. So, we try to seek out the body the place the title begins being seen.
-
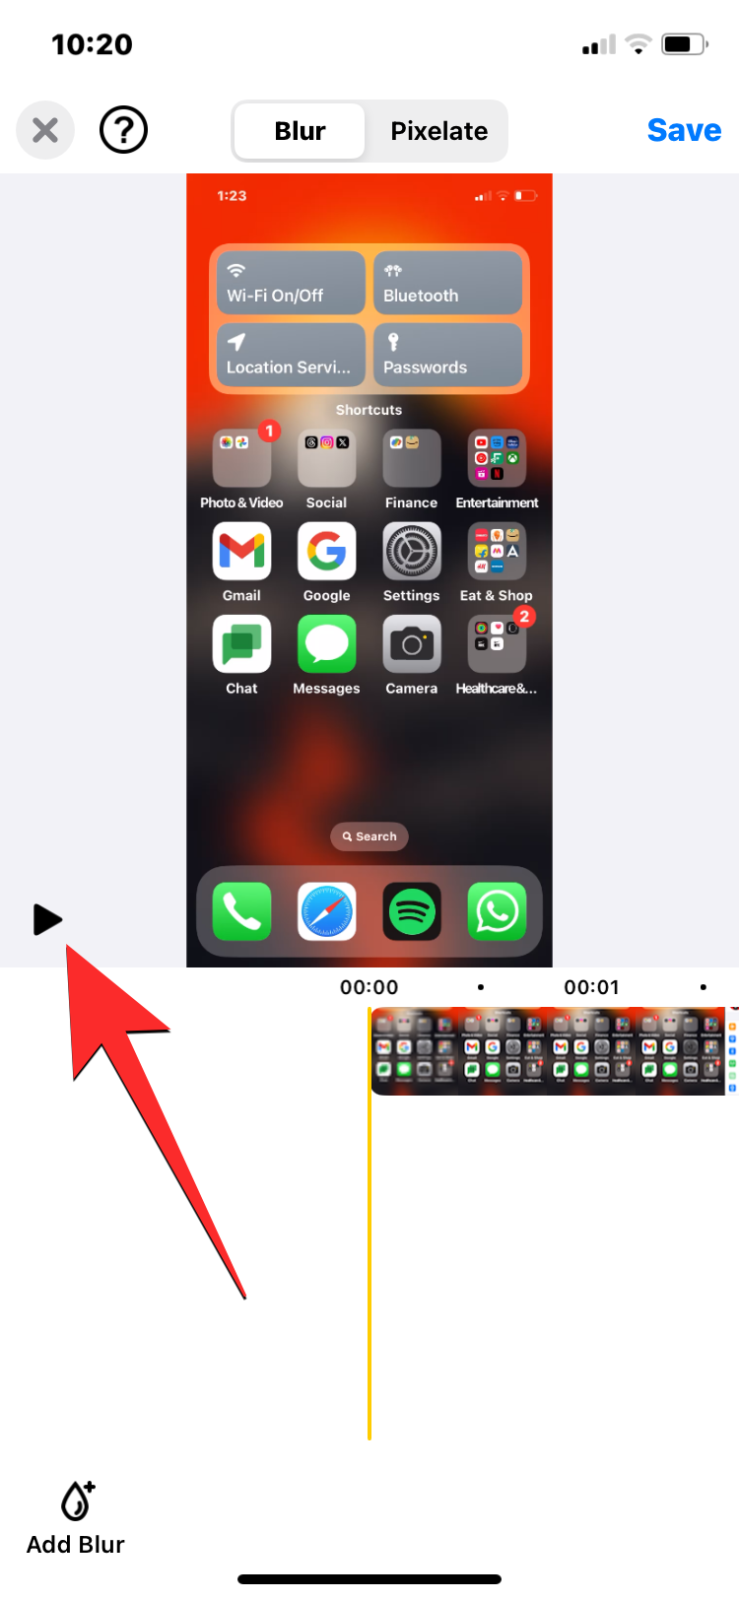
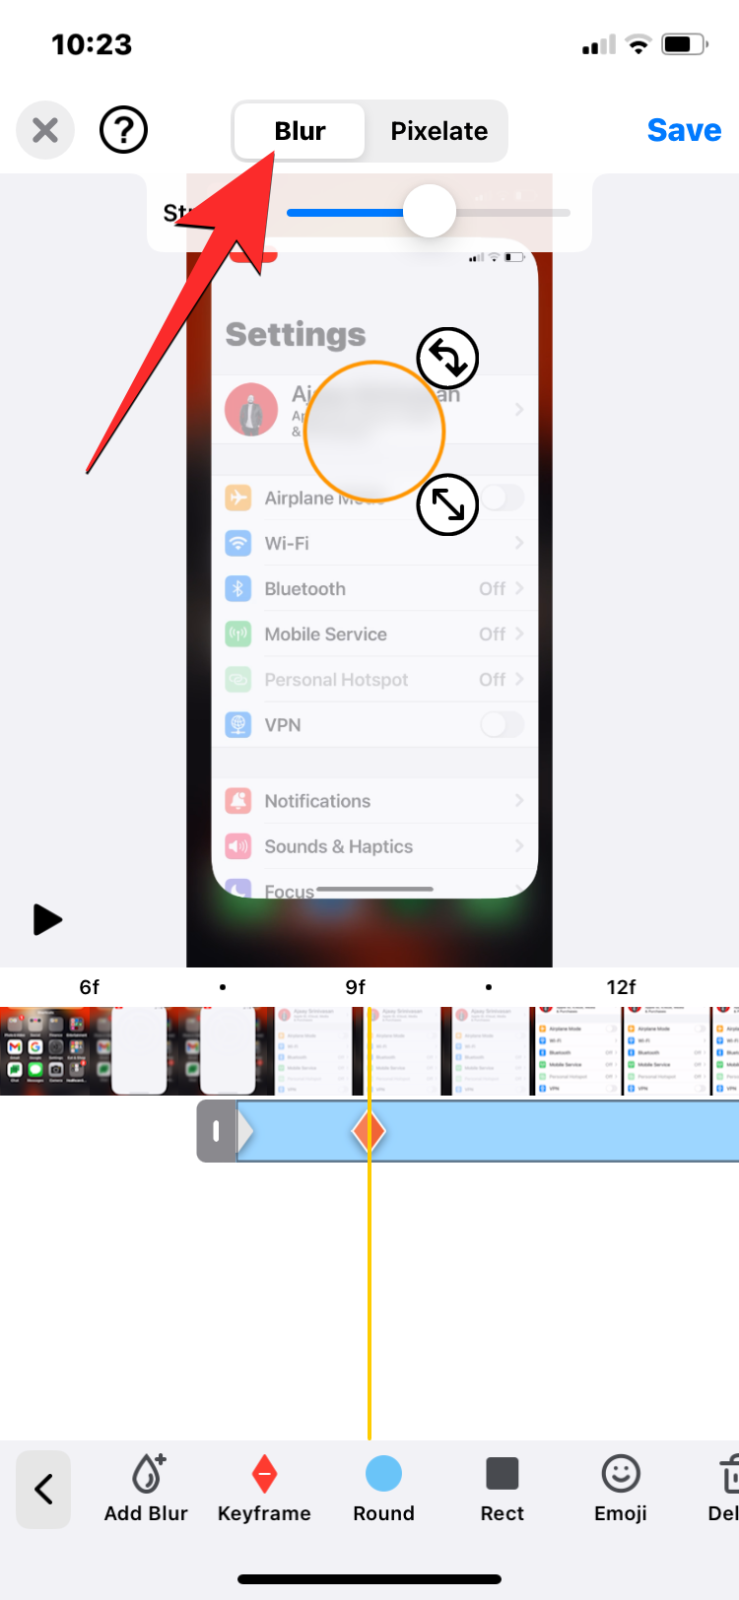
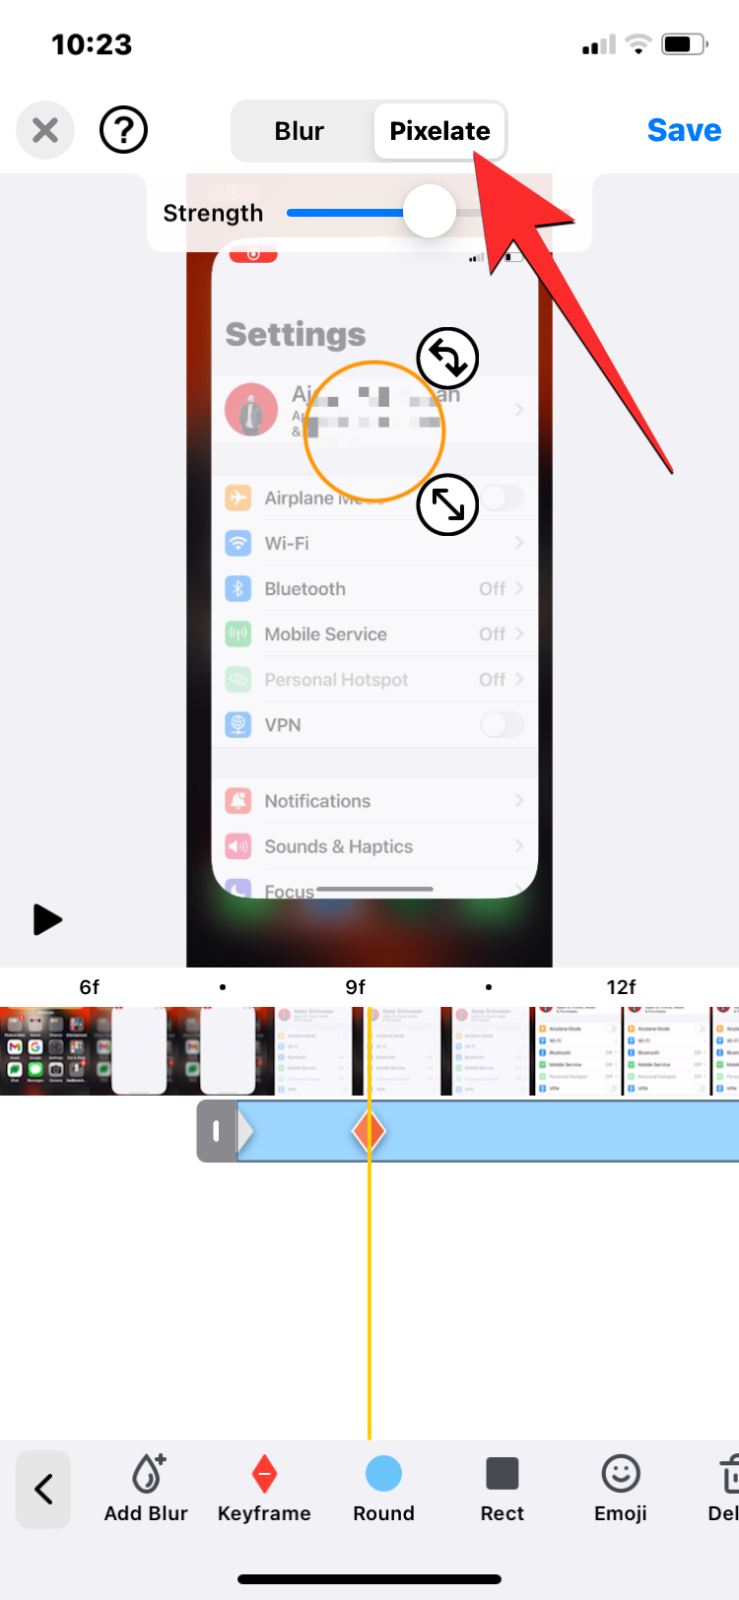
- When you get to this stage, choose the Blur tab or Pixelate tab from the highest to use your most well-liked blur impact. Blur provides you with a gentle overlay that may be good for hiding textual content parts in a video whereas Pixelate can disguise photos and textual content with massive blocks of pixels.
-
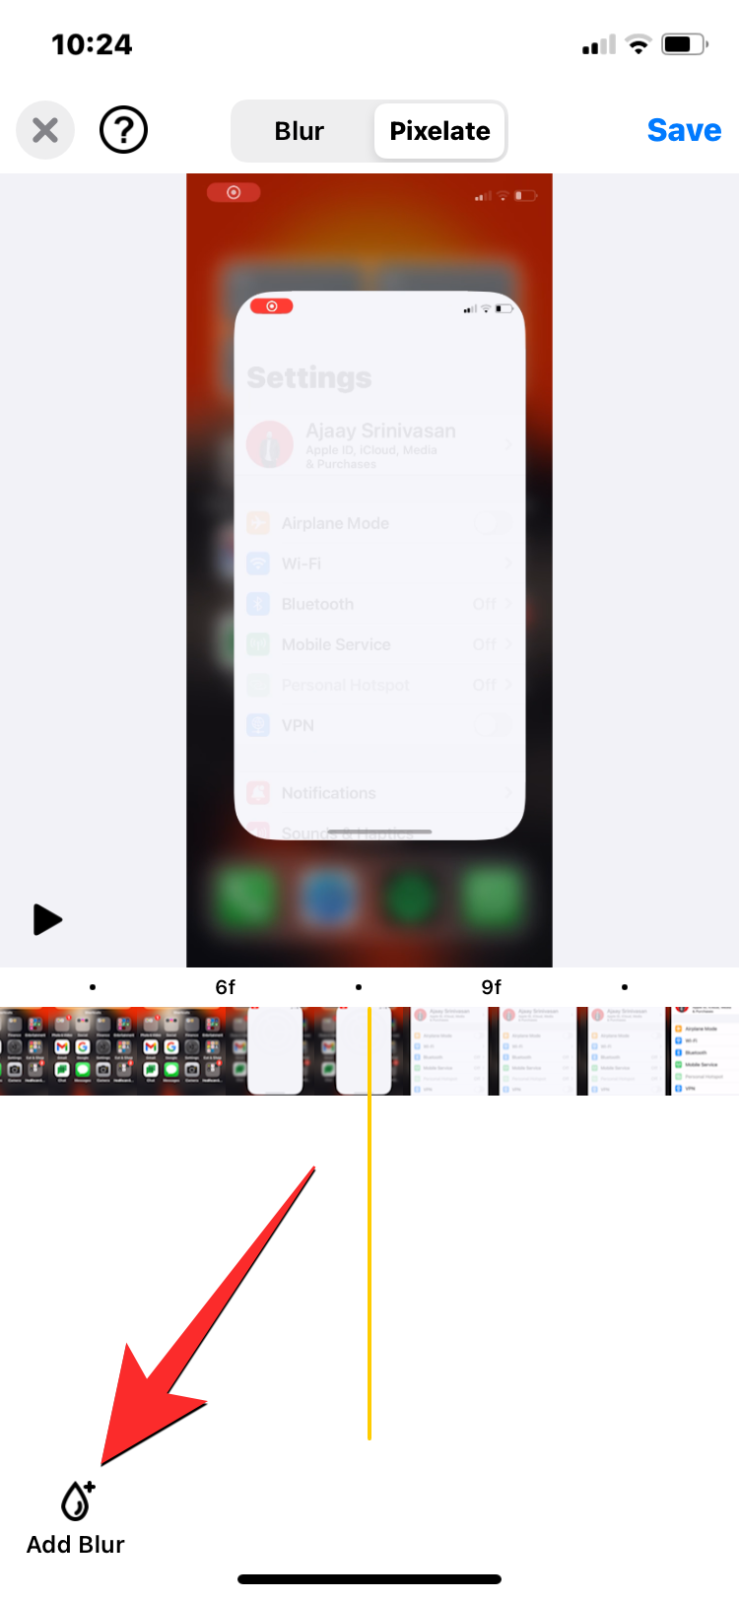
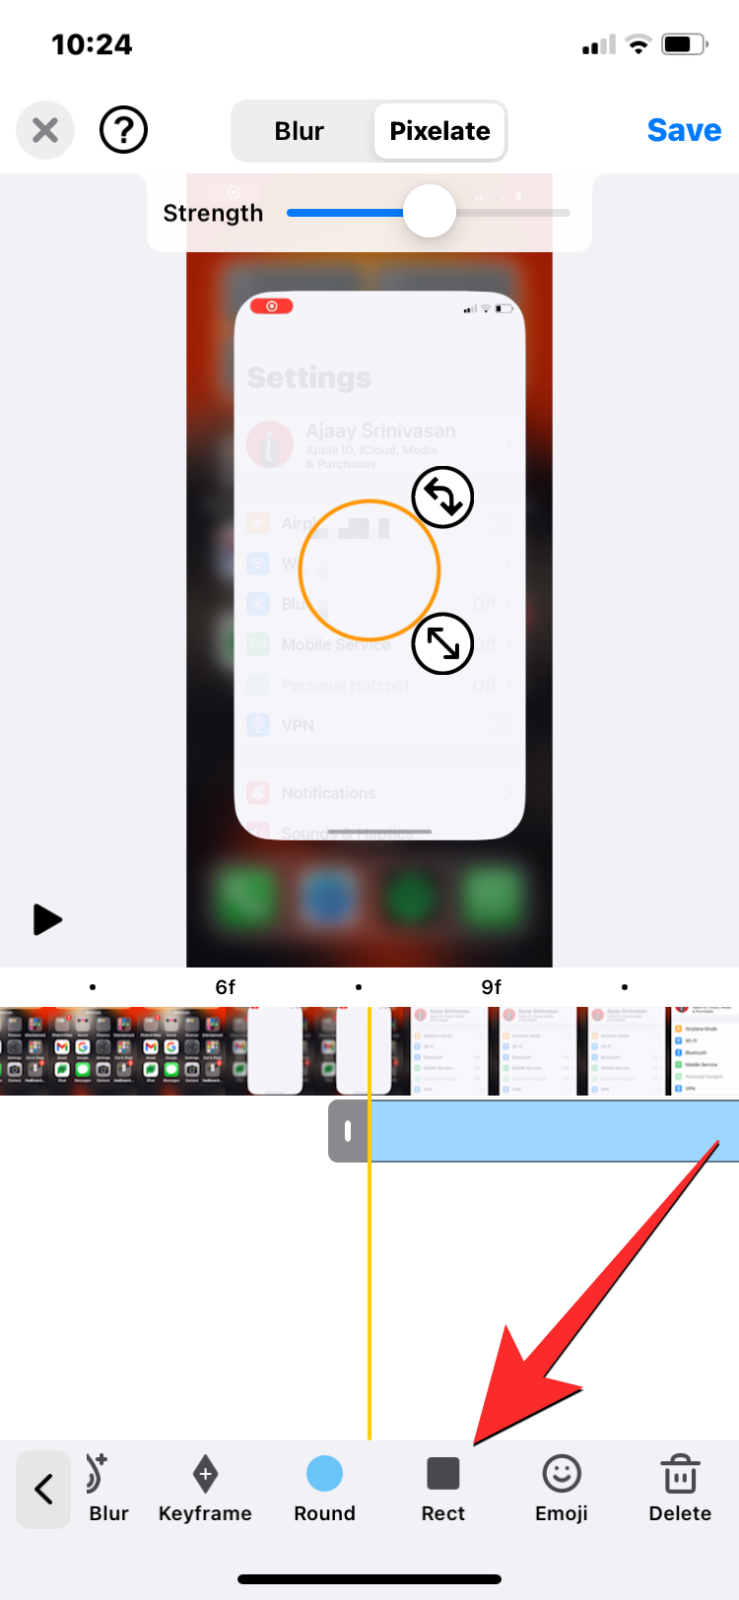
- Now, faucet on the Add Blur button on the backside left nook so as to add a blur overlay from this body. You’ll now see a blur circle seem on the display together with a brand new blur layer under the body thumbnails to characterize its timeline. If you want to change this round blur field right into a rectangle, you’ll be able to faucet on the Rect choice from the underside row.
-
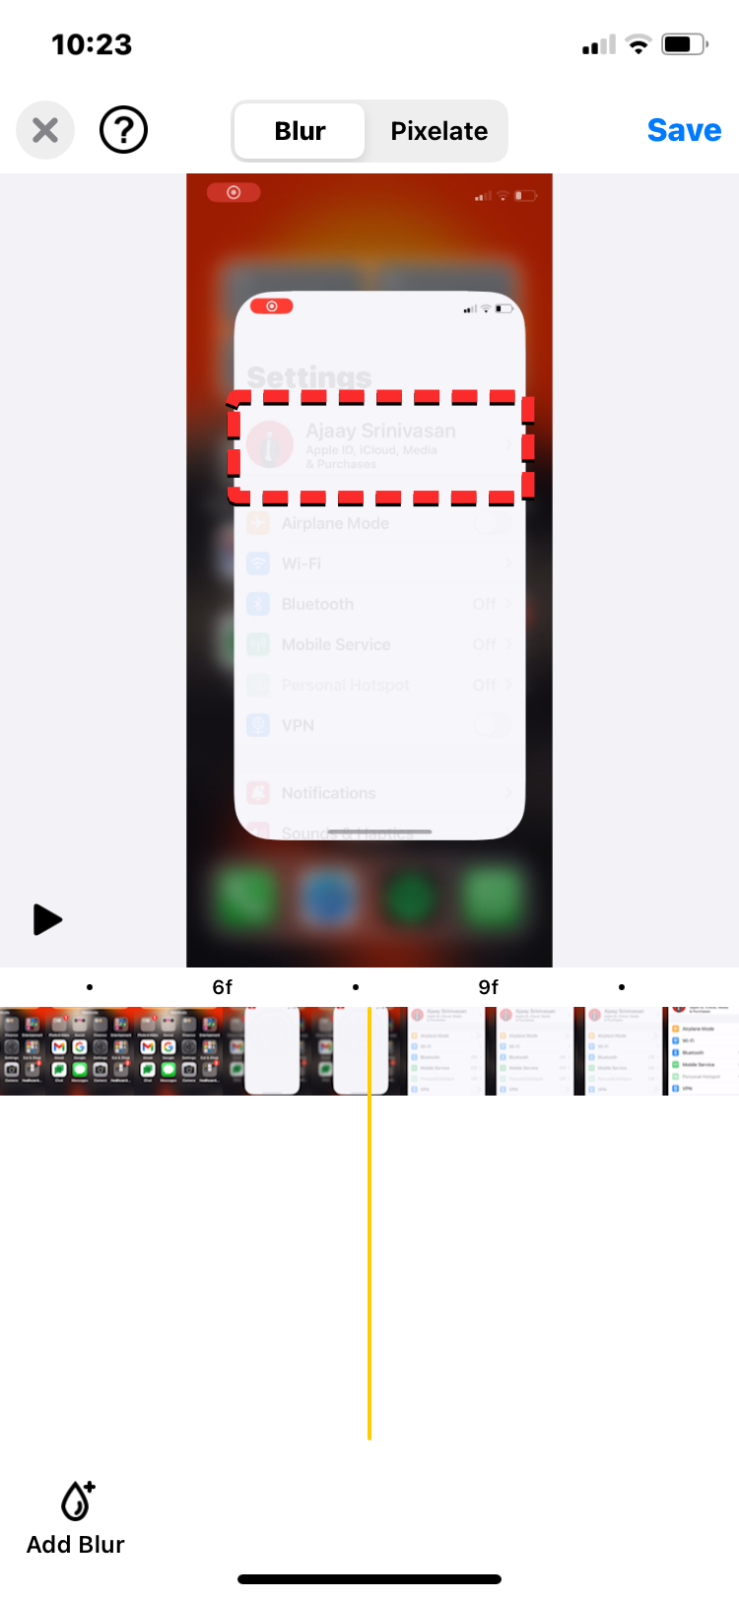
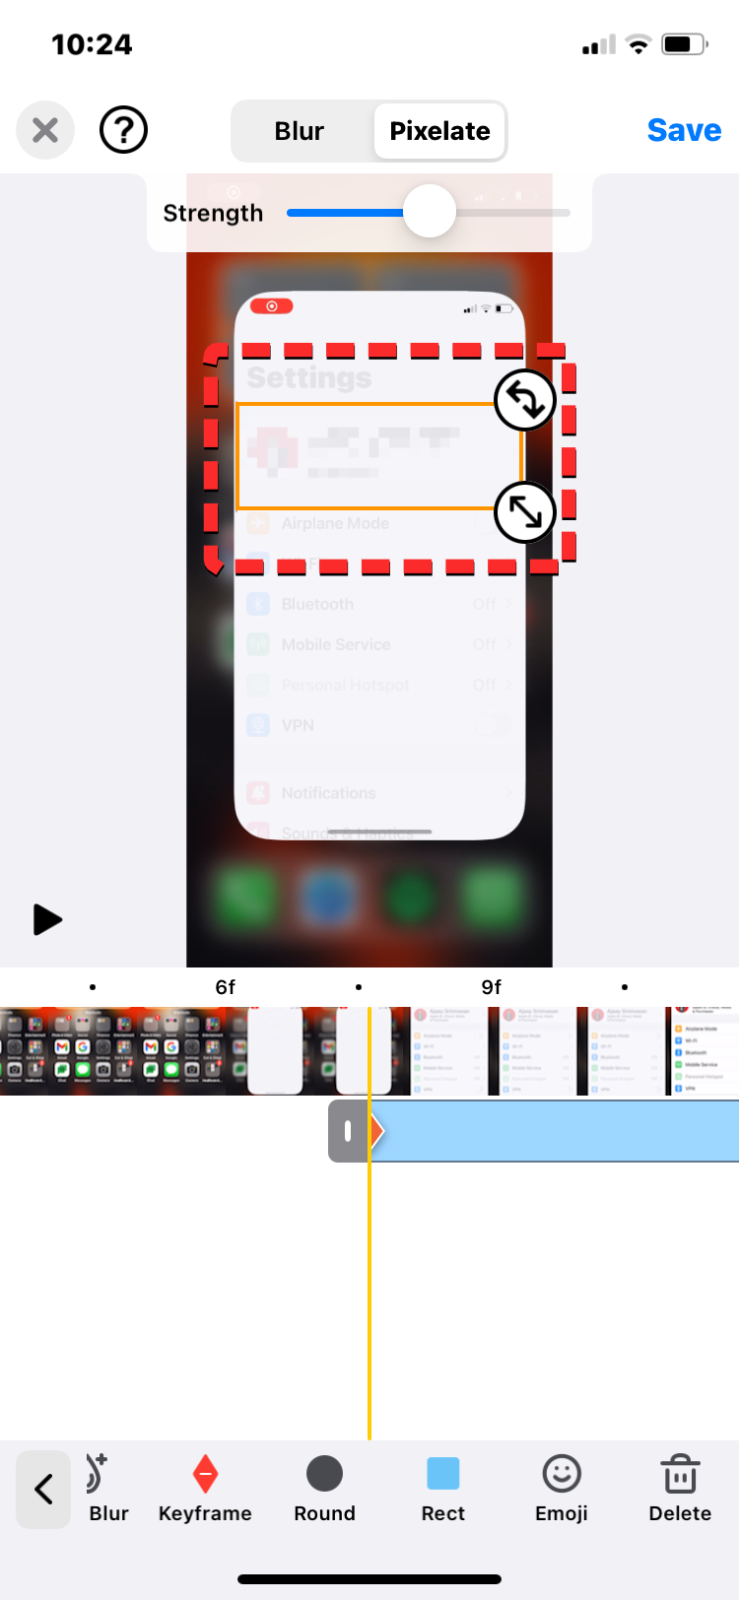
- Once you choose the specified blur form, drag the blur field on the video preview to the portion of the video that you just want to blur. For best outcomes, apply the blur overlay from the primary body the place the item begins showing as defined in steps 3-4 above. You can resize this field by dragging the diagonal arrow icon inwards and outwards till you get the specified form and measurement. Once resized, drag this field to re-adjust its place relative to the portion you wish to hide.
-
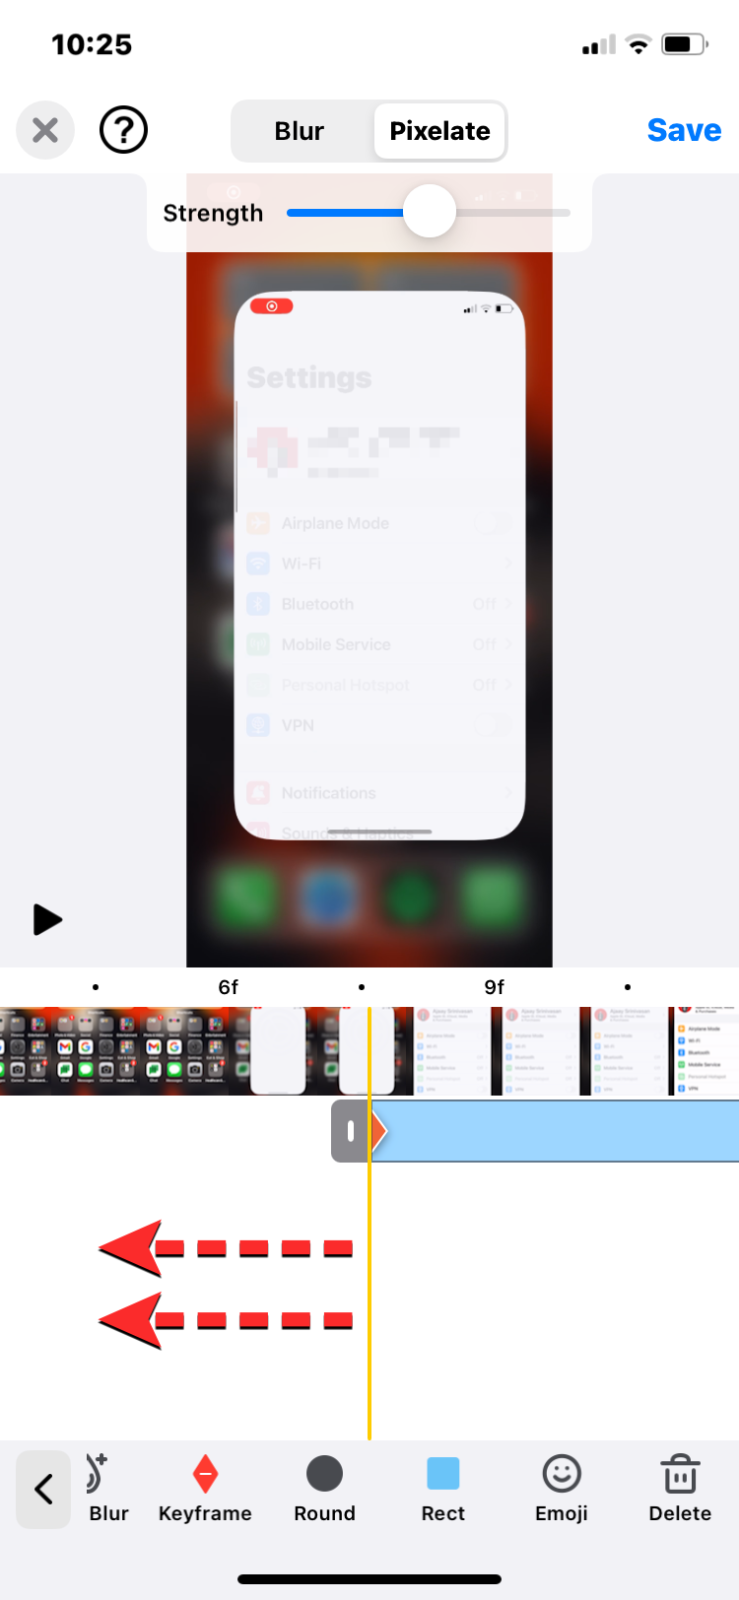
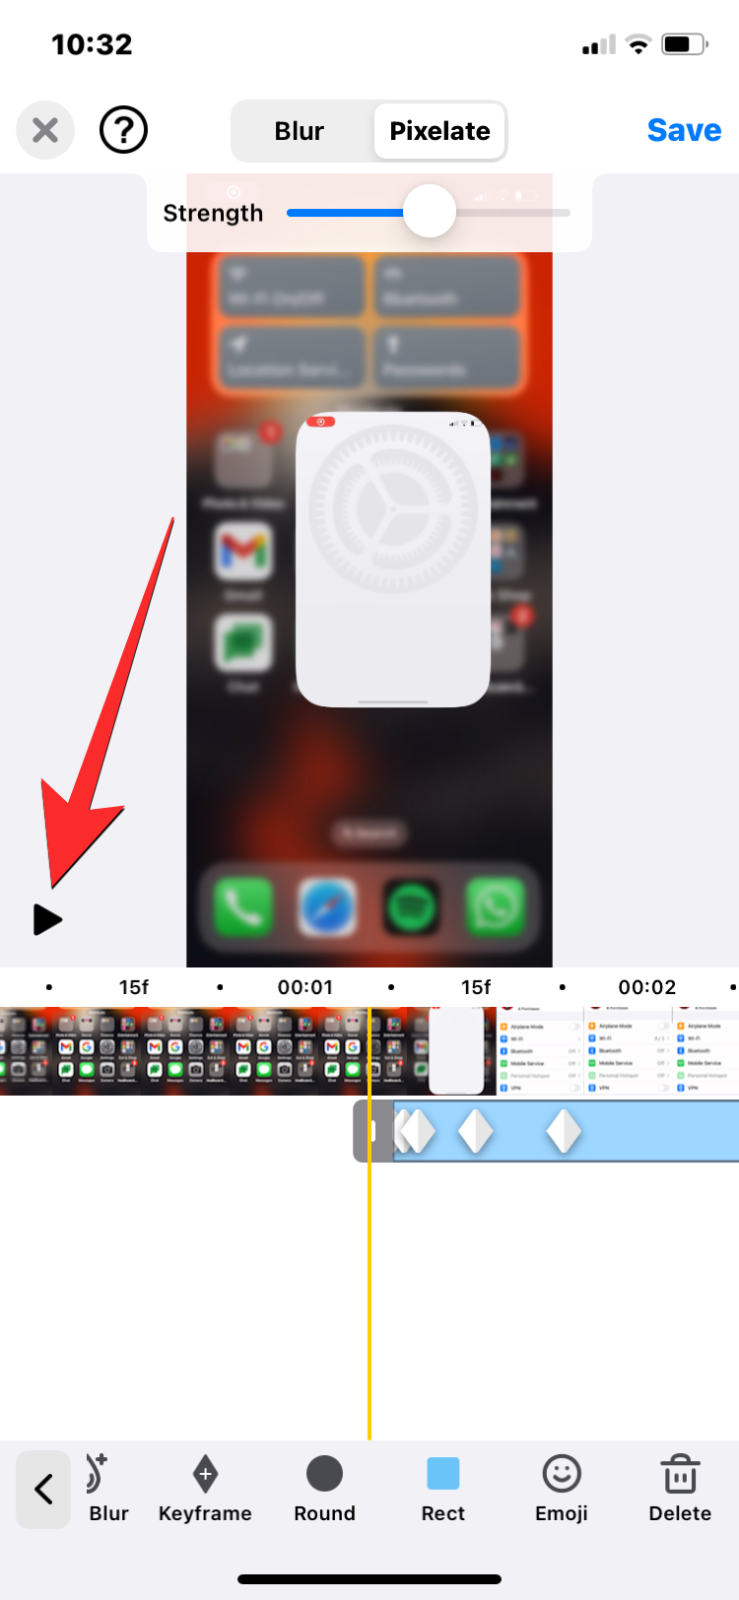
- Now, swipe the seeker leftwards to the next frames to see if the face or textual content portion strikes. If the content material you wish to blur is stationary, you’ll be able to skip the remainder of the steps under and bounce on to step 12 of this information. But in the event you’re coping with shifting content material, you’ll have to apply the blur impact to every body using the Keyframes instrument.
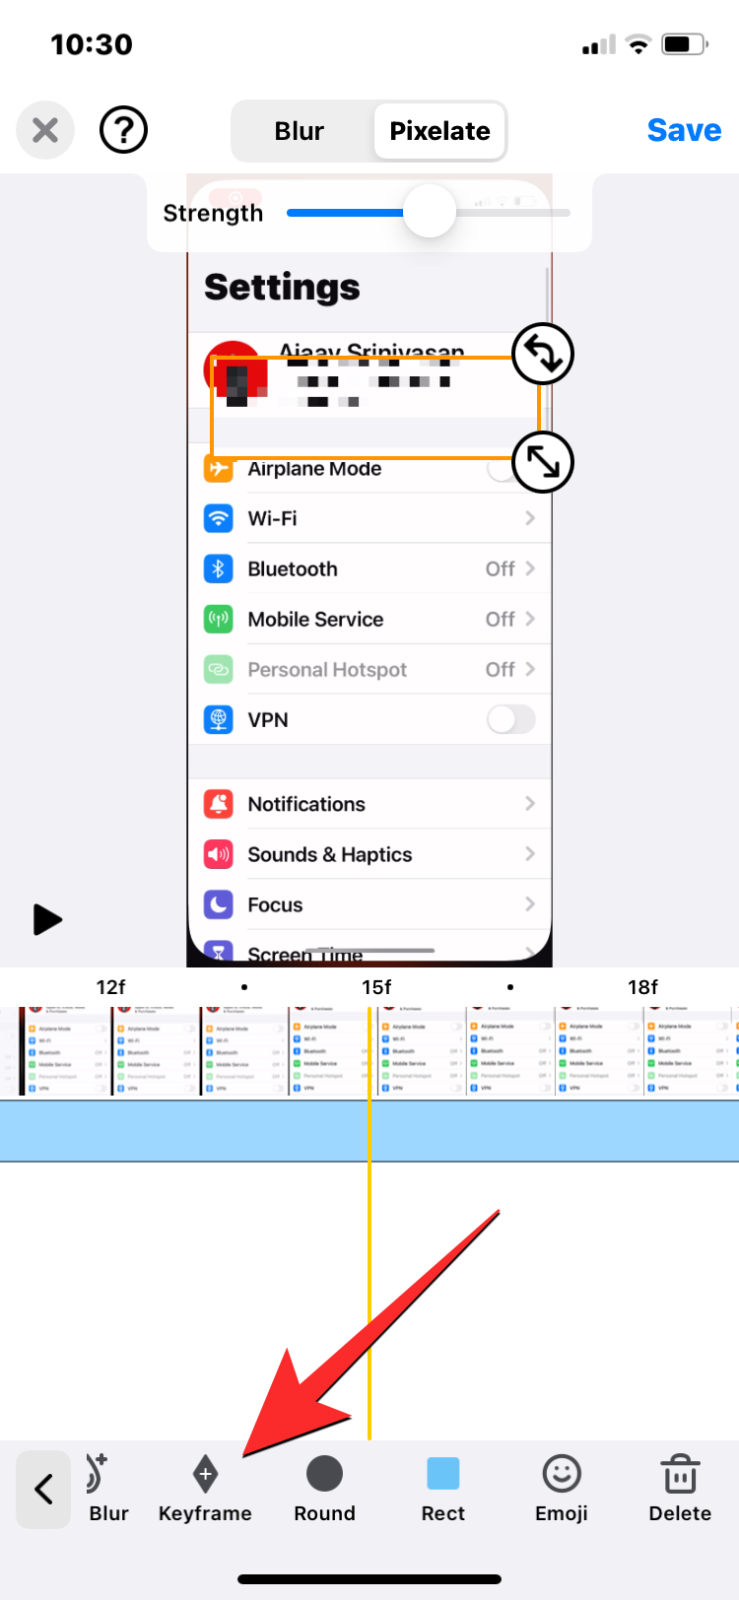
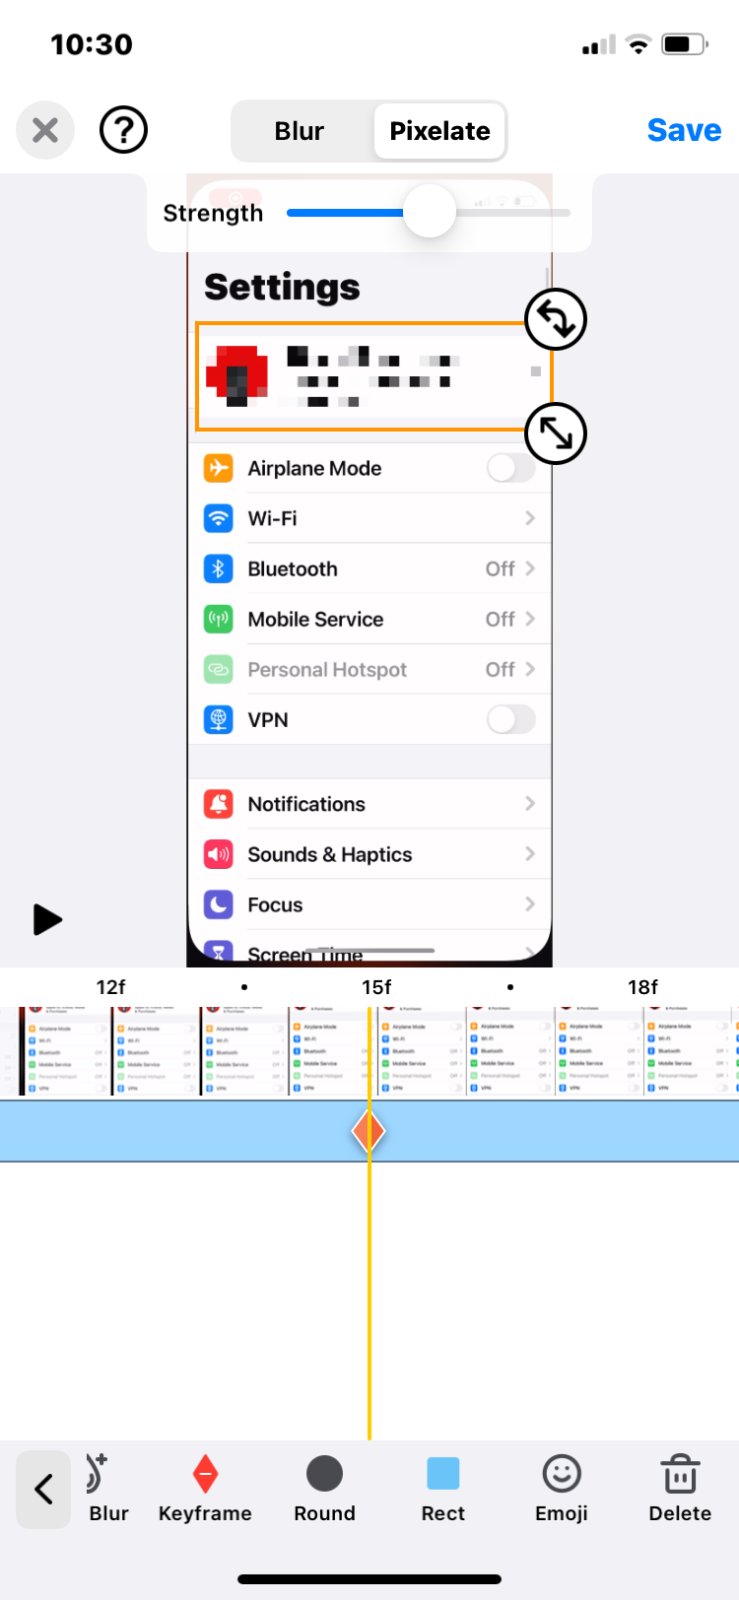
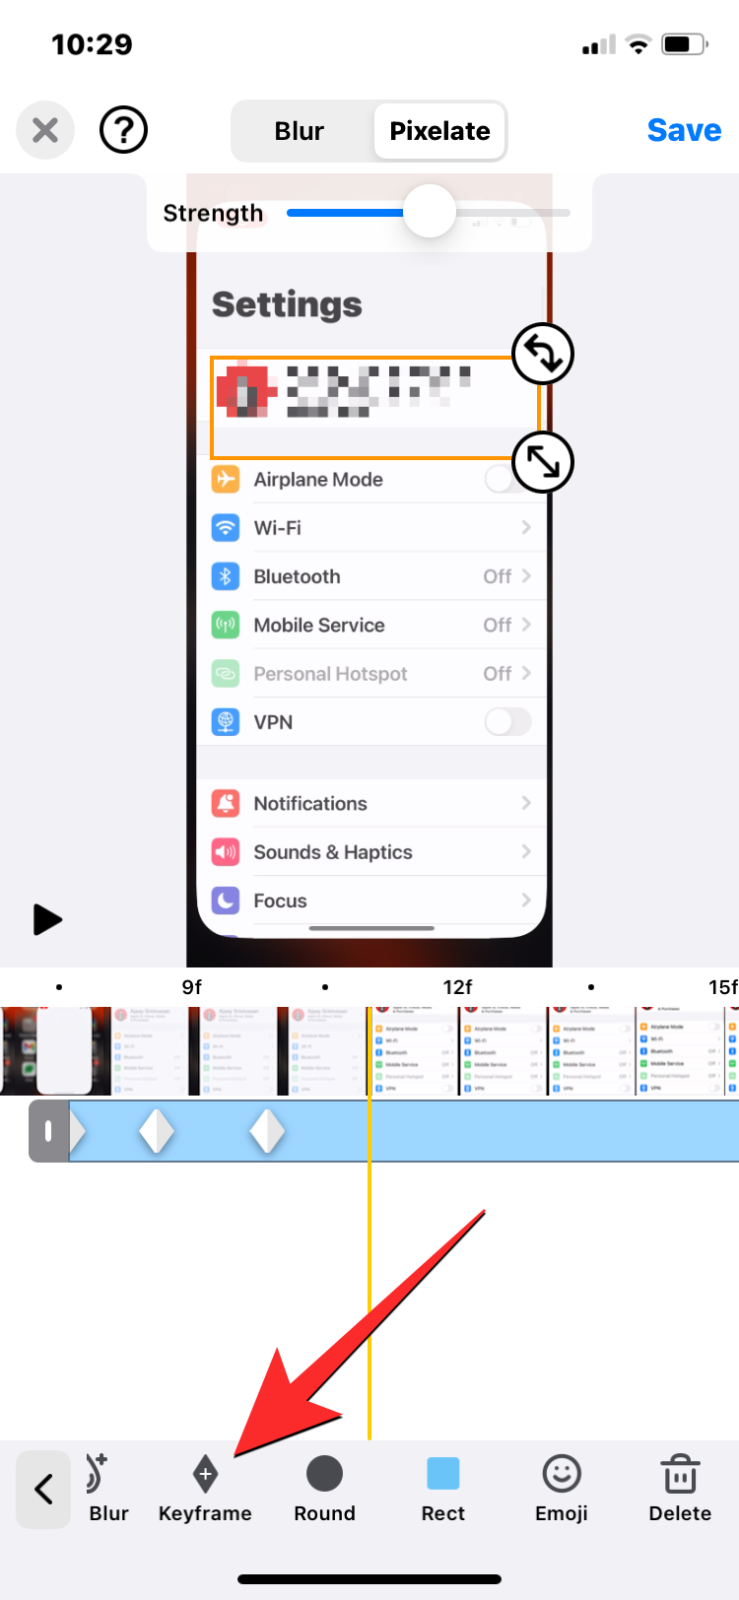
Keyframes enables you to apply blur throughout completely different frames in order that when the video performs usually, the merchandise you wish to obscure stays hidden all through the video. Once you’ve positioned the blur field for the primary body, you’ll be able to transfer to the body the place this merchandise strikes to a special location. On this body, faucet on the Keyframe choice from the underside bar. -
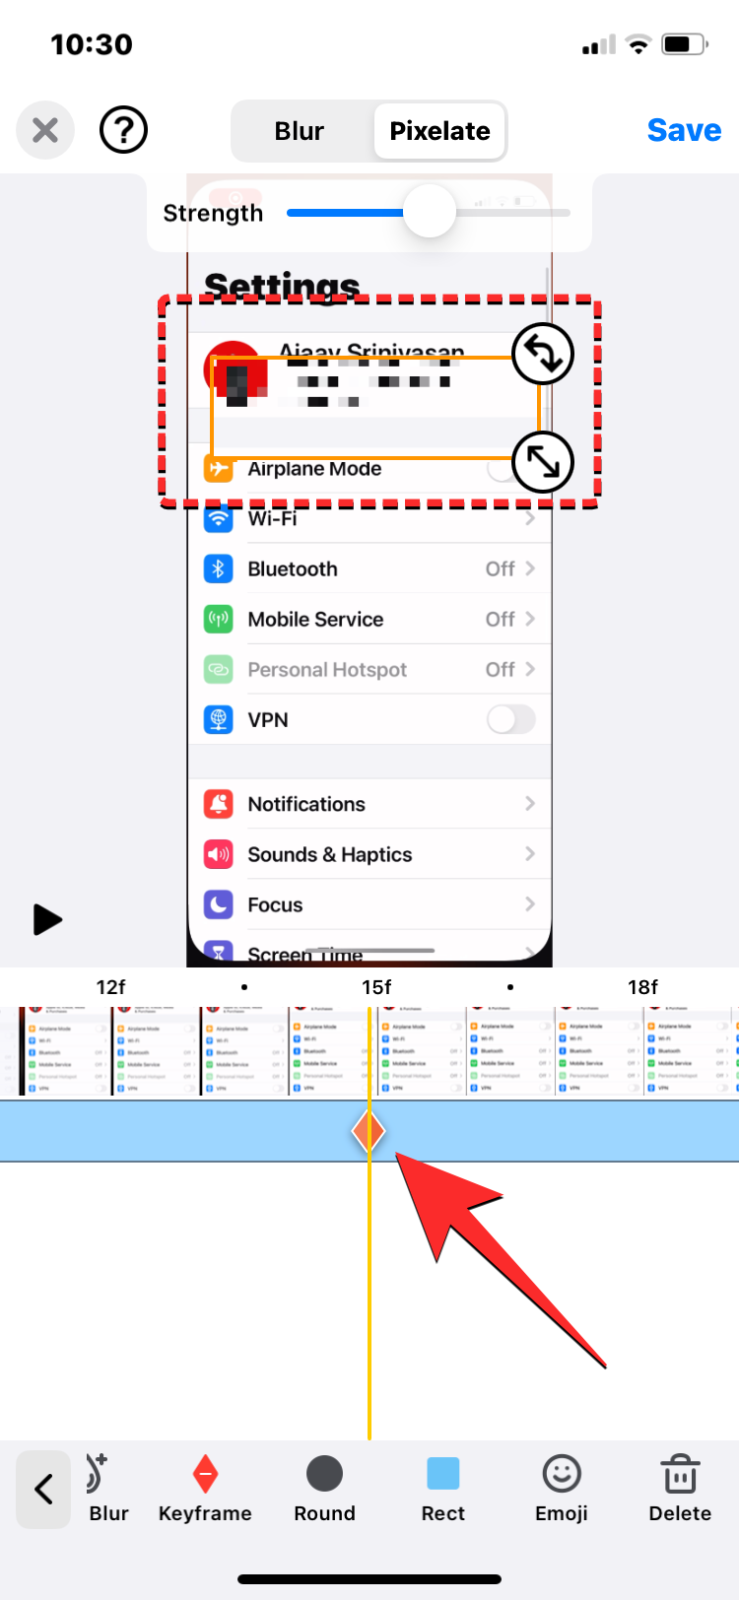
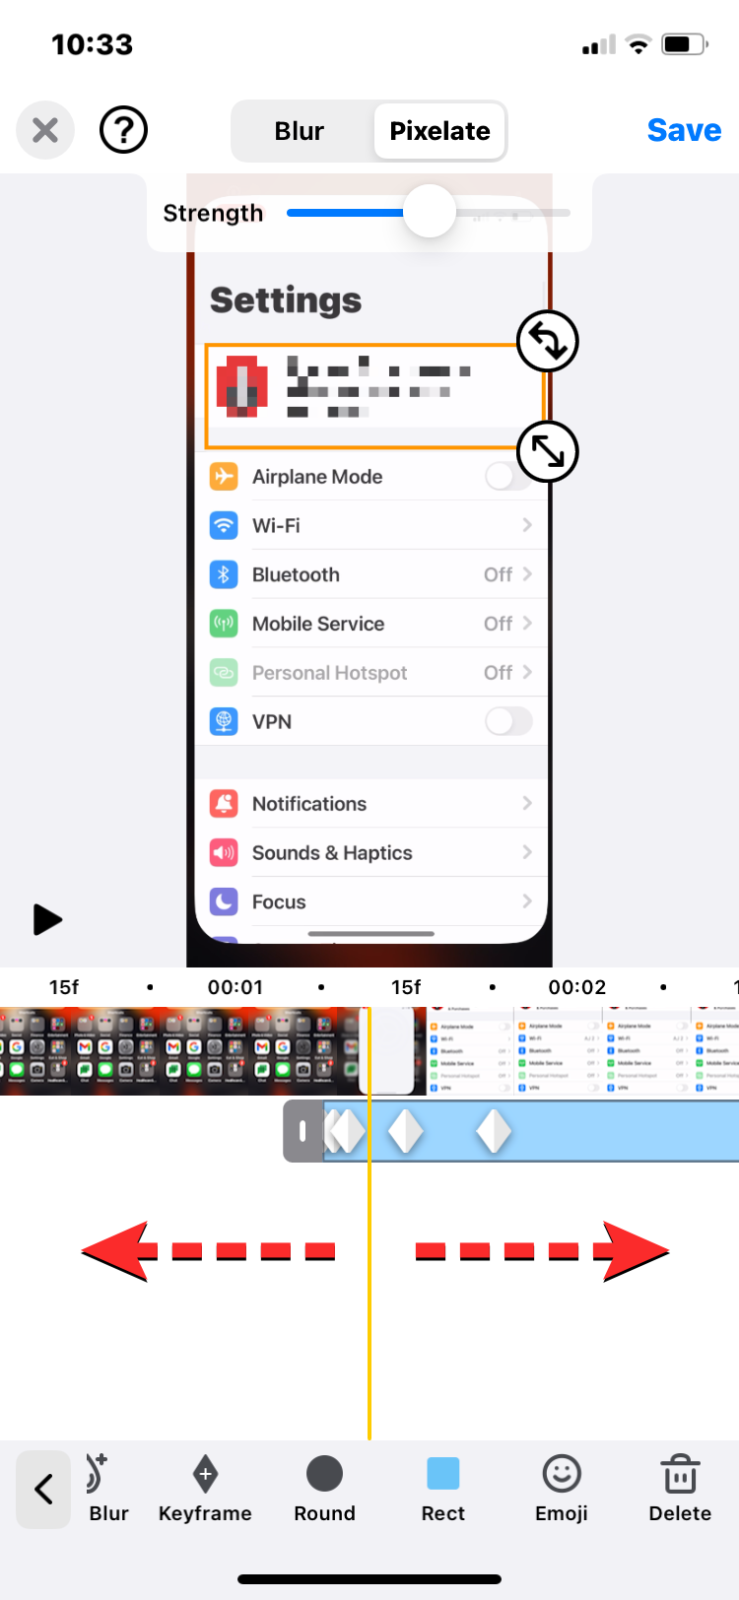
- When you faucet on Keyframe, you’ll see a pink diamond icon seem contained in the blur timeline beneath the thumbnail of the respective body. With a keyframe created, you’ll be able to regulate the blur field’s place, form, and measurement accordingly to cover solely the specified portion of the video.
-
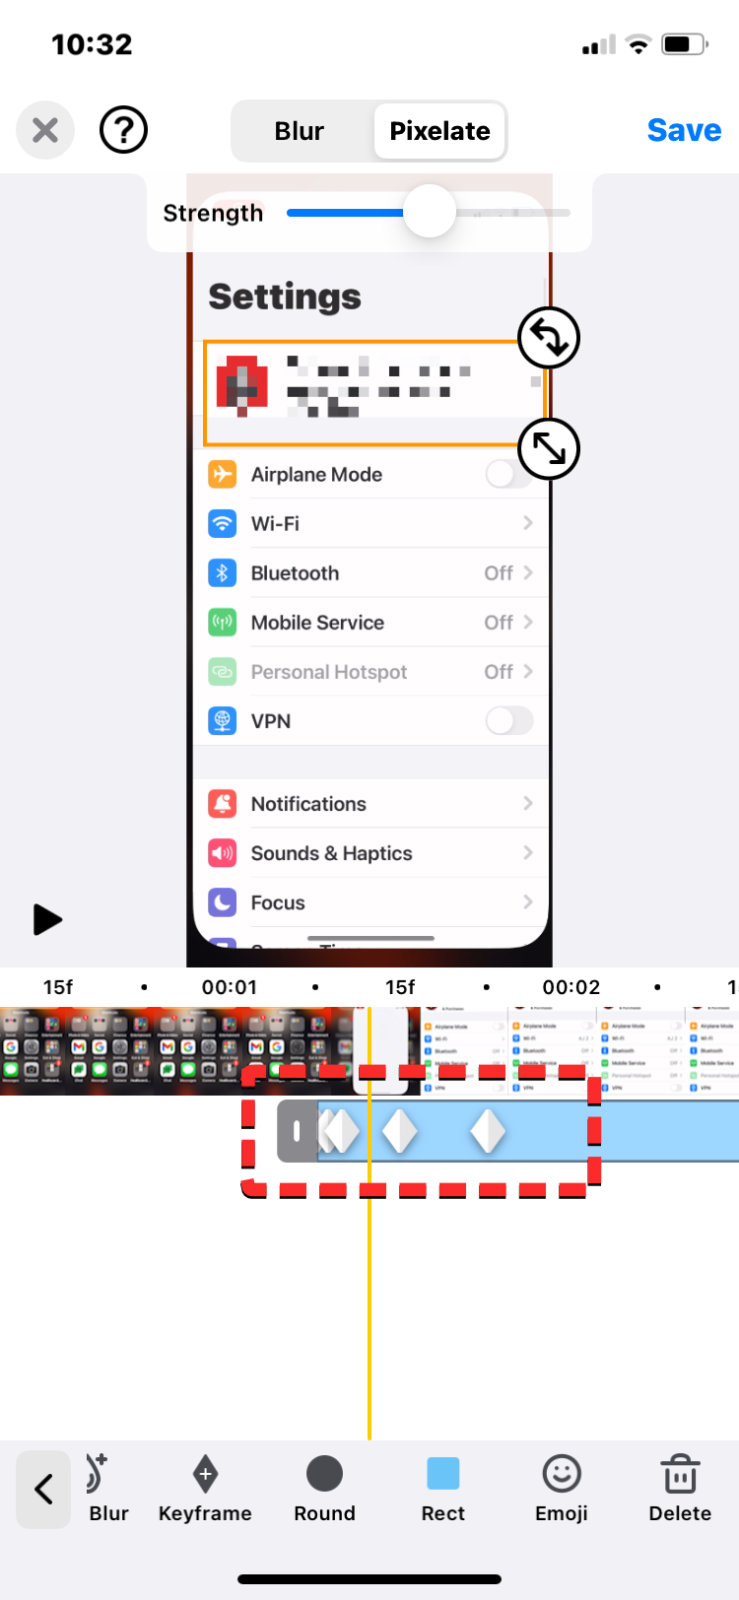
- You might want to repeat steps 8-9 so as to add more keyframes all through the video and regulate the blur’s form and measurement for every of the keyframes you create. The variety of keyframes you add is proportional to how a lot the item you wish to hide strikes.
-
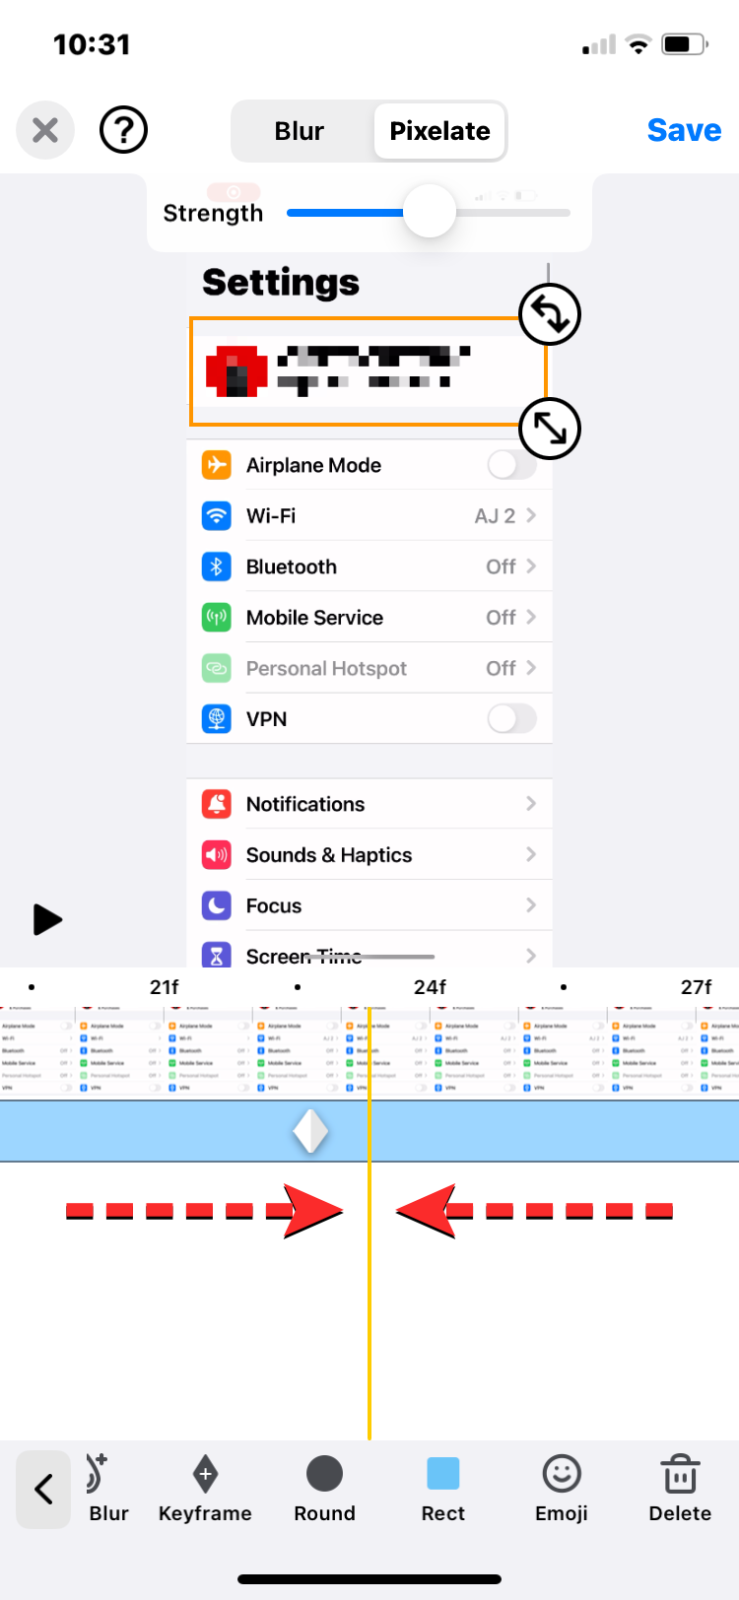
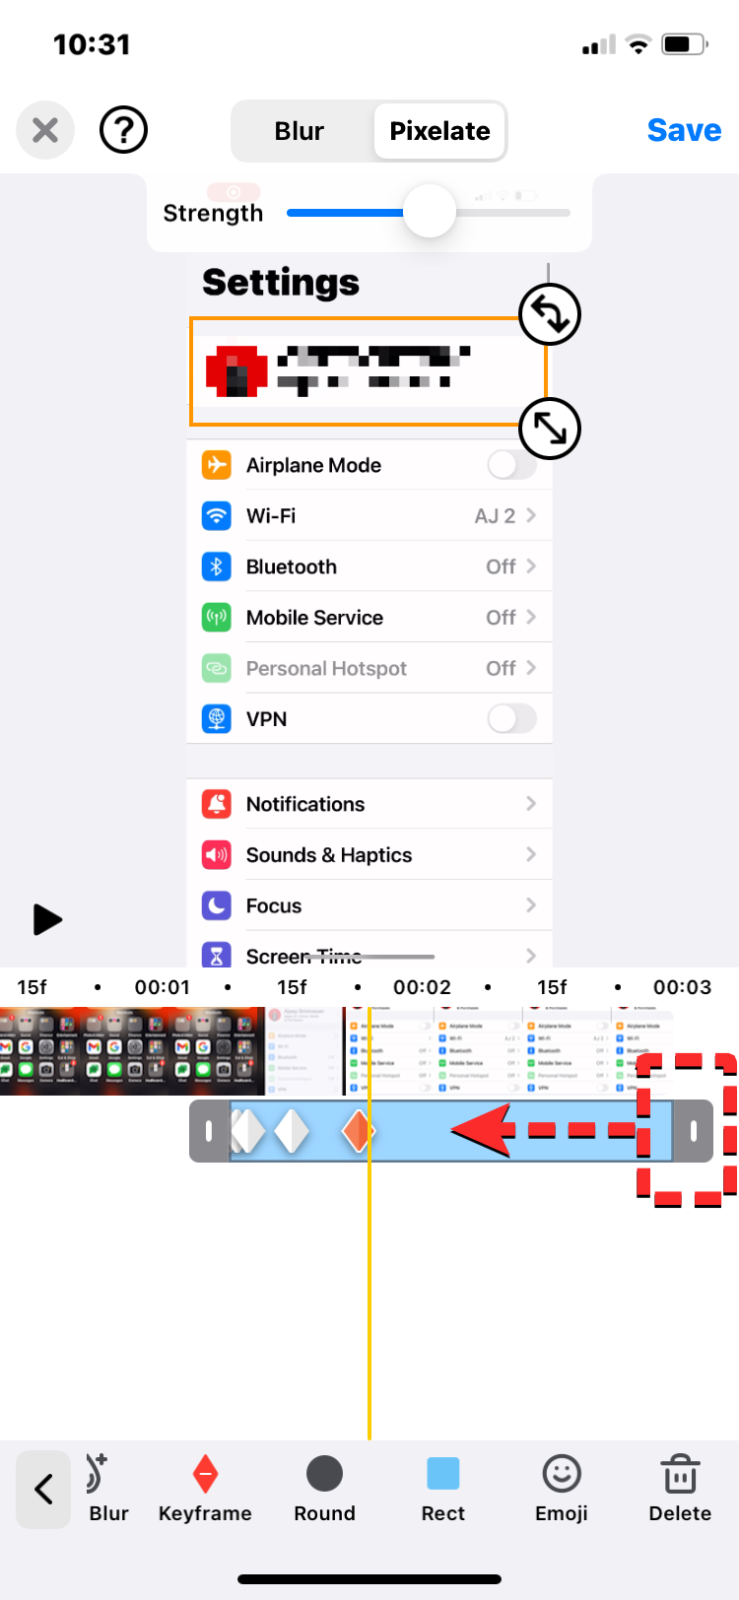
- Once you’ve added the required keyframes for hiding the shifting object, you’ll be able to change the period of the blur impact in order that it doesn’t seem inside undesirable frames contained in the video. You can skip this step if the item you’re blurring stays in place until the very finish. If not, search to the body the place this object disappears from the video. Now, pinch inwards till the gray finish on the best facet of the blur timeline is seen. When it does, drag this gray finish leftwards and drop it to the final body you need the blur to seem.
-
- If there are a number of objects to blur, you’ll be able to repeat steps 4-11 to use the blur to different objects. If not, you’ll be able to bounce to the following step instantly.
- Once you’ve added the blur impact to the specified objects with keyframes, you’ll be able to recheck how nicely the blur has been utilized by tapping on the Play icon or by looking for by the frames manually.
-
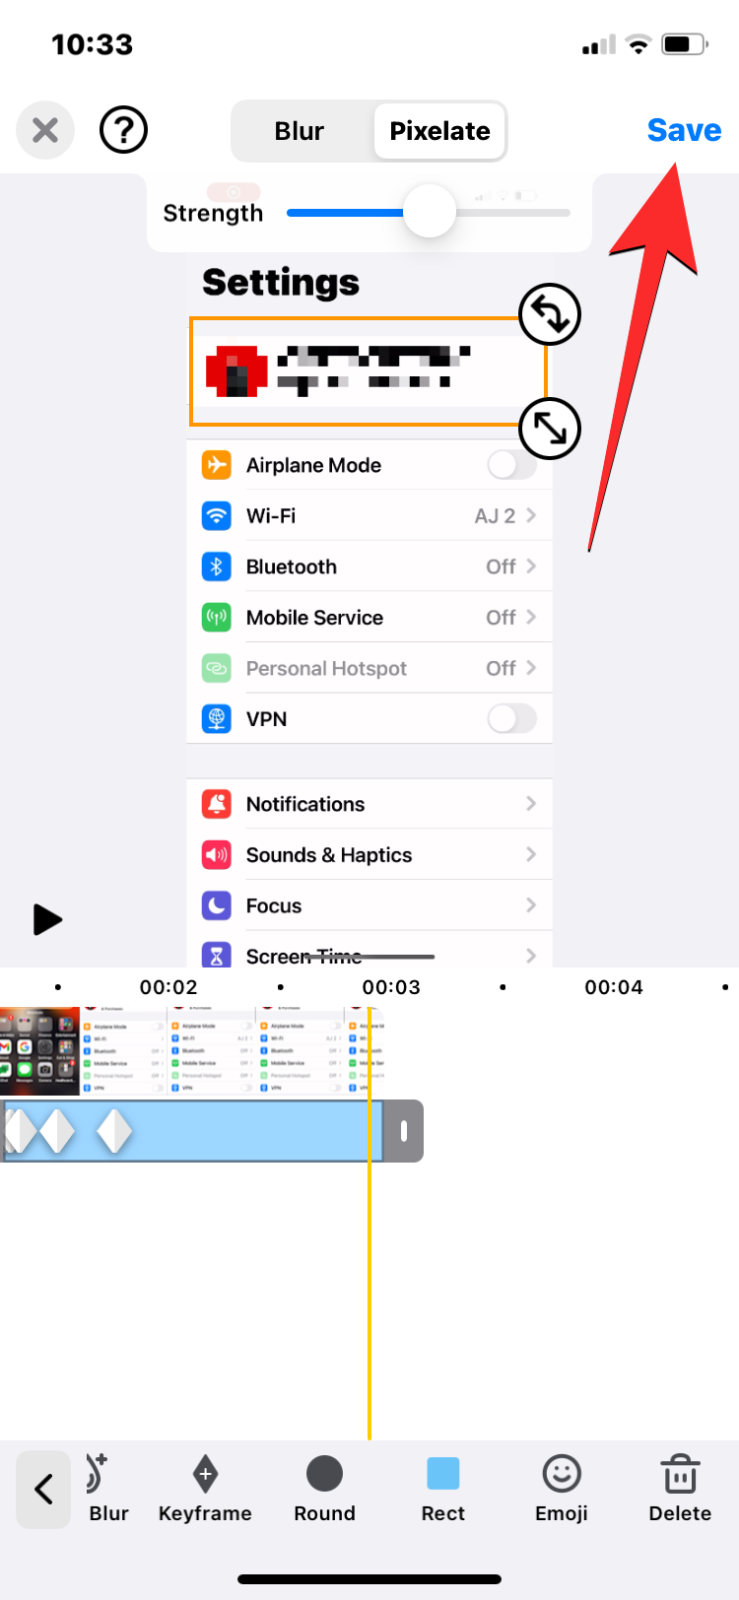
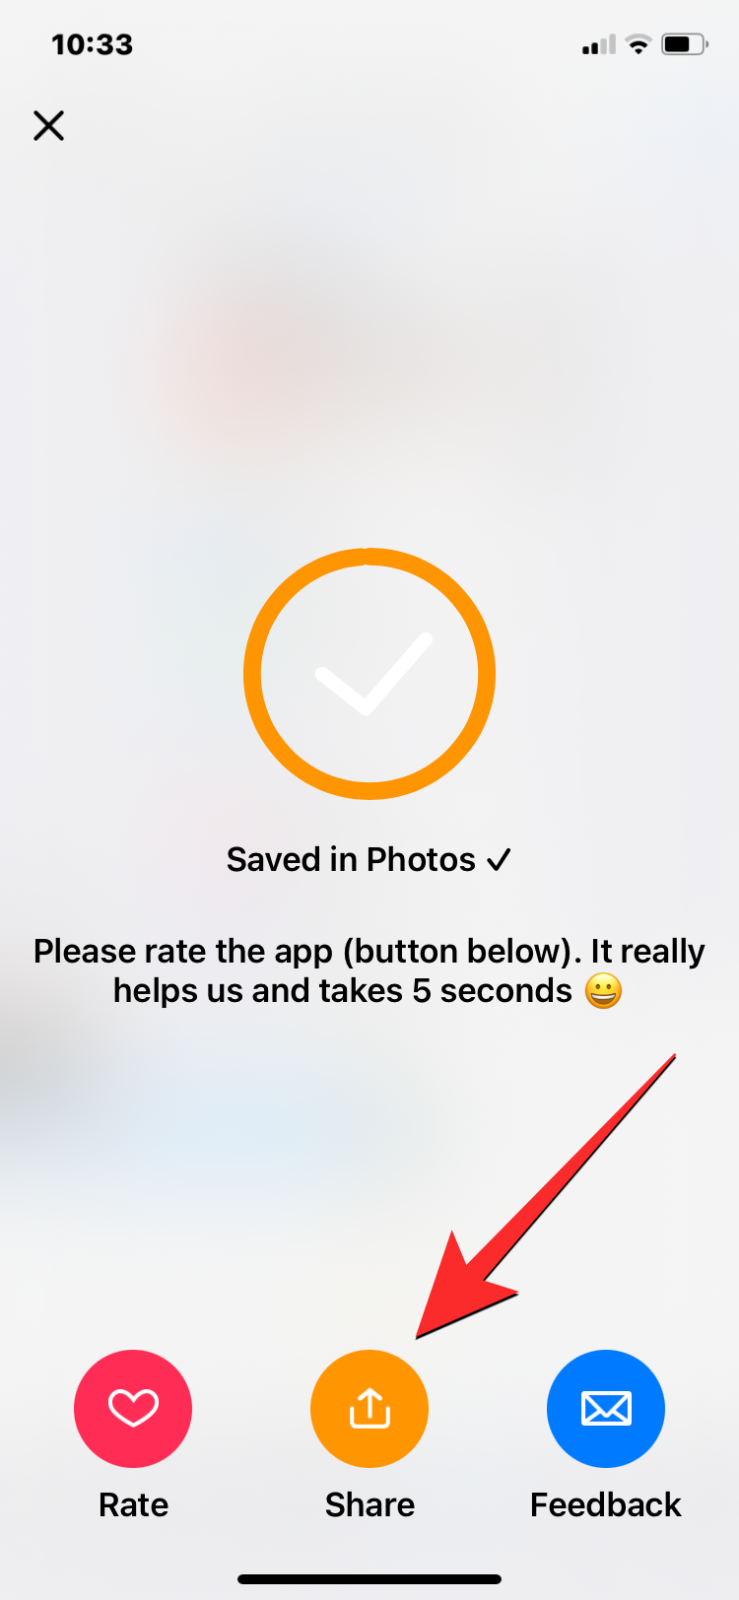
- When all the things is ready, faucet on Save on the prime proper nook to avoid wasting this edited video. Your video will now be processed after which saved instantly in your iPhone’s Camera roll. You can view it by opening the Photos app in your cellphone or share this video by tapping on Share.
-

That’s all it’s essential learn about blurring textual content and faces inside movies on an iPhone.
Check out more article on – How-To tutorial and latest highlights on – Technical News