How do I Turn Text to Speech with OpenAI.
OpenAI has lately launched the Audio API that features a textual content to speech function known as speech, primarily based on their TTS (text-to-speech) know-how. This function affords six built-in voices named Alloy, Echo, Fable, Onyx, Nova, and Shimmer.

These voices might be extremely helpful for duties reminiscent of narrating weblog posts, creating spoken audio in numerous languages, including voiceovers to video tutorials, or delivering real-time spoken suggestions. In my expertise, the output is impressively natural-sounding. If you aren’t using any text-to-speech instruments, then this providing by OpenAI is one thing you need to take into account making an attempt.
In this text, we’ll discover how to arrange OpenAI’s TTS and create your first text-to-speech utility. For this demonstration, we will likely be using the next setup:
- Operating System – macOS
- Application – Terminal
- Programming Language – cURL
This information can also be relevant to Windows customers. Where needed, I’ll point out any instruments and instructions that differ from these used on macOS.
Step 1 – Set Up cURL
Many working programs include cURL pre-installed. If not, we are going to first set up Homebrew, a package deal supervisor for macOS, which we are going to then use to put in cURL.
Check if cURL is Installed
To examine if you have already got cURL in your system, ensure you’re linked to the Internet, then kind the next command in your Terminal:
Windows customers: Use Command Prompt or Windows PowerShell
curl https://platform.openai.com
If cURL is ready up appropriately and you’ve got an Internet connection, it’s going to ship an HTTP request to retrieve the contents of platform.openai.com, and you need to see output much like this screenshot:

How do I Install cURL
If you encounter an error indicating that cURL is just not put in, you’ll be able to set up it by following the offered steps.
Windows customers: How do I set up cURL on Windows.
Open a brand new Terminal window, and enter the instructions beneath to first set up Homebrew:
/bin/bash -c "$(curl -fsSL https://raw.githubusercontent.com/Homebrew/install/HEAD/install.sh)"
After putting in Homebrew, use the next command to put in cURL:
brew set up curl
Lastly, run the command beneath to set the Homebrew model of cURL because the default one in your shell:
echo 'export PATH="$(brew --prefix)/opt/curl/bin:$PATH"' >> ~/.zshrc
supply ~/.zshrc
Step 2 – Get API Key from OpenAI
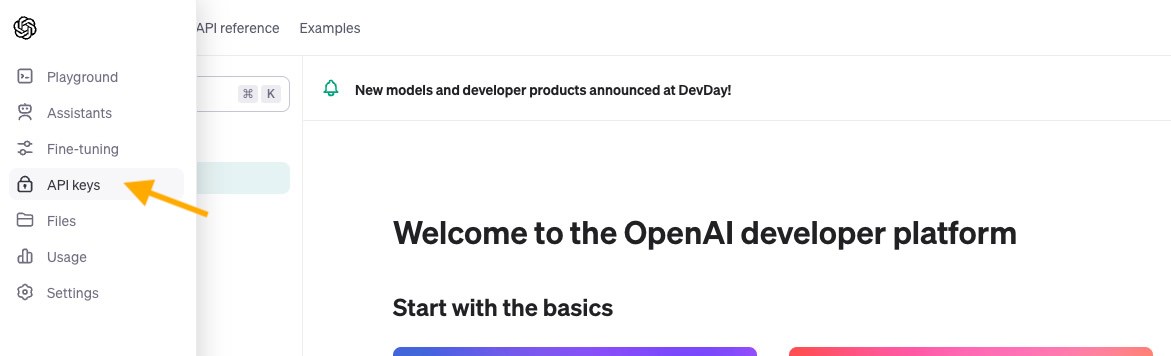
To get hold of your API key, first go to openai.com, log in, after which click on on “API keys” within the sidebar.
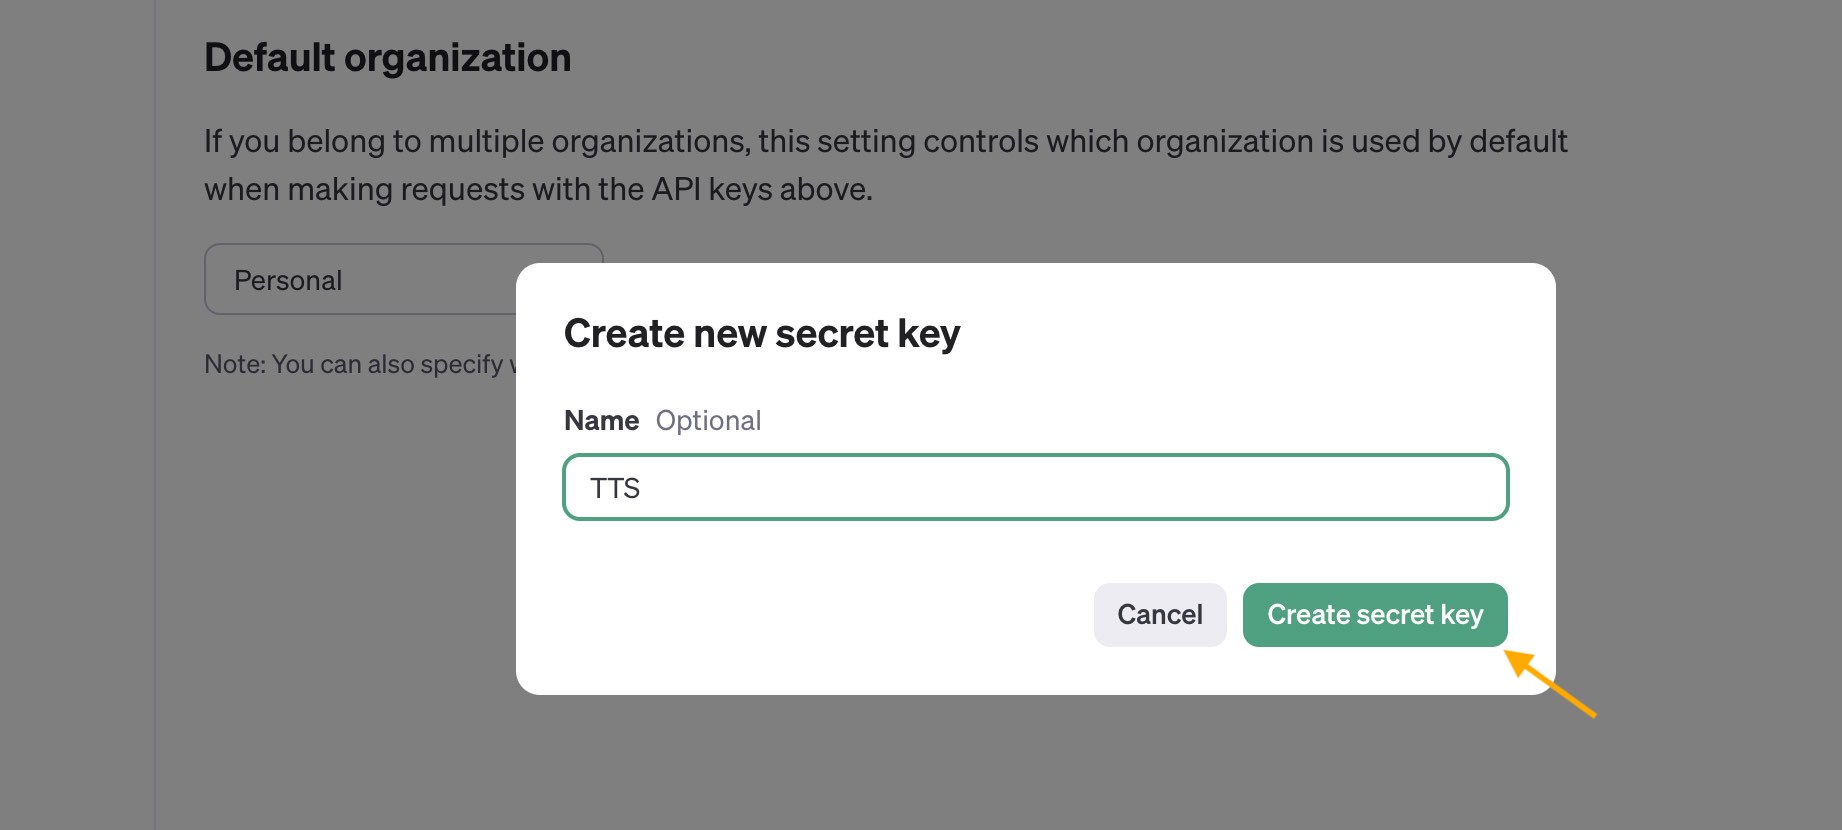
On the API keys web page, click on “+ Create new secret key“, give it a reputation, after which click on “Create secret key“.
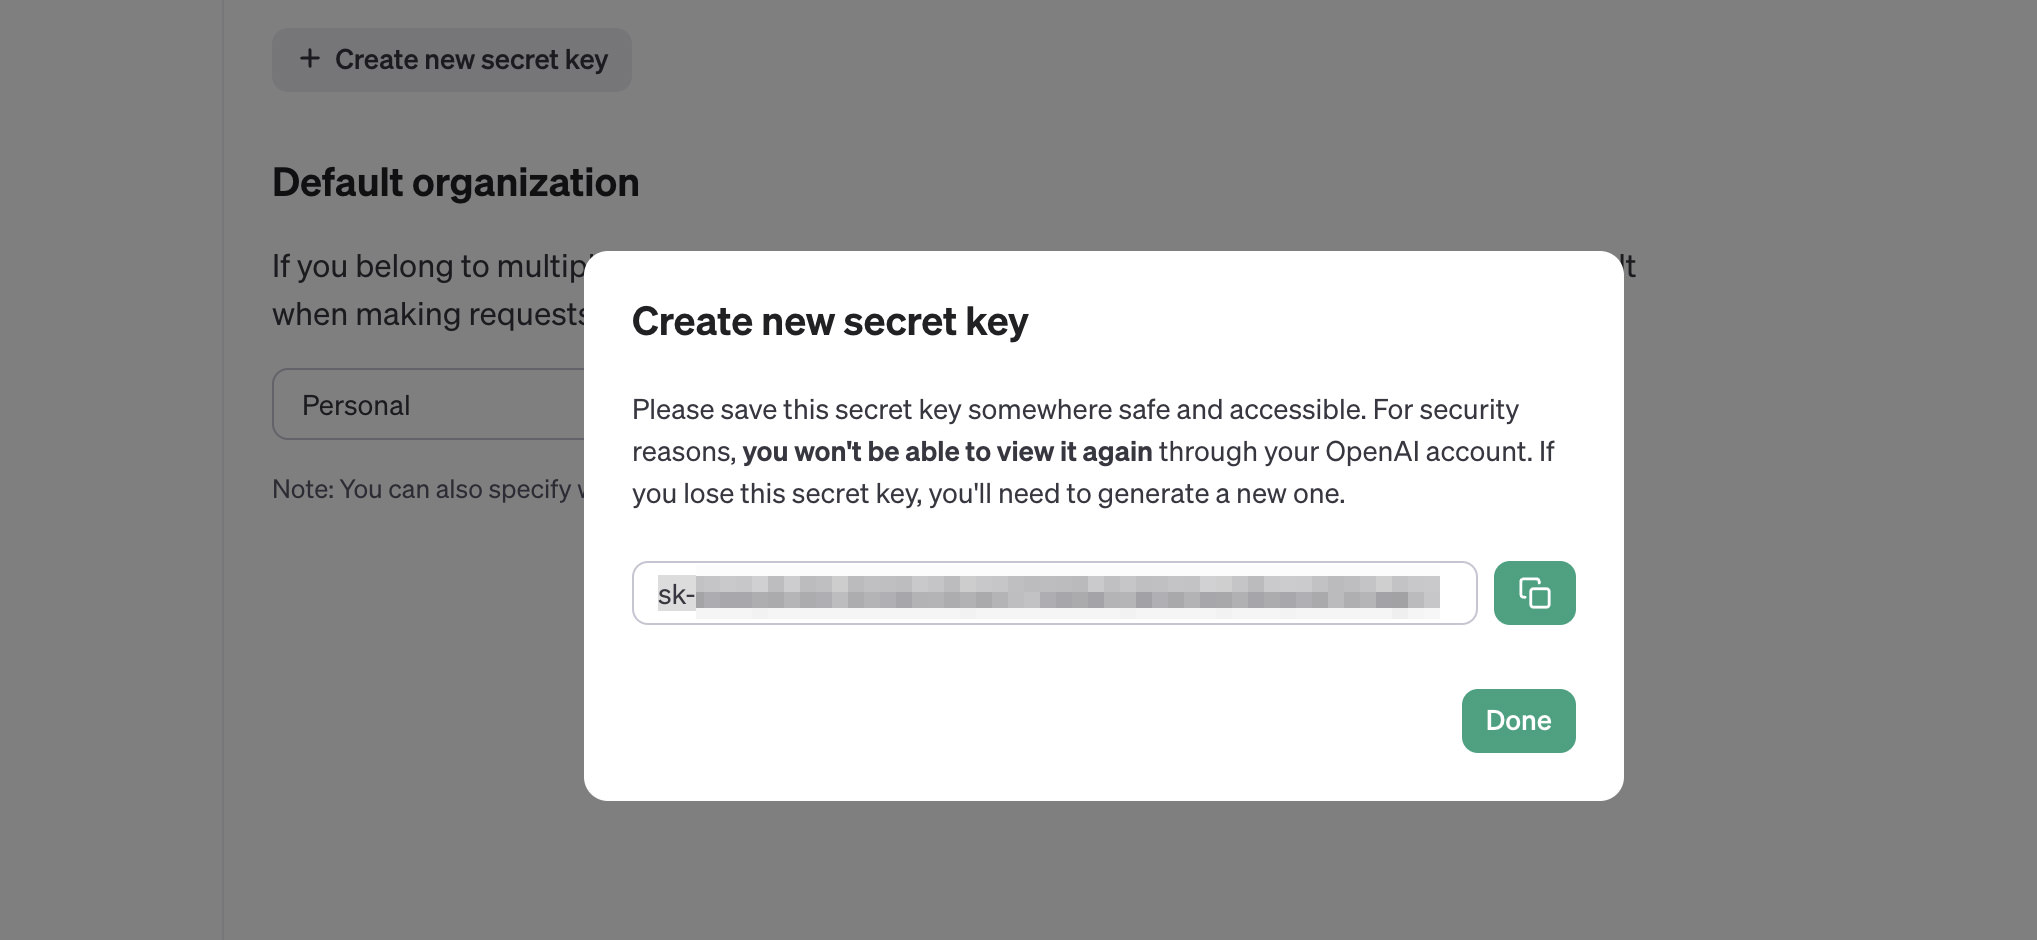
Afterward, you’ll obtain a brand new secret key. Make certain to repeat and keep it someplace secure as a result of we are going to use it later.
Store this secret key in a safe and accessible location. You will be unable to view it once more via your OpenAI account. If you lose this secret key, you’ll have to create a brand new one.
Step 3 – Create Your First Text-to-Speech
Now it’s time to create your first text-to-speech. Refer to the code beneath, and substitute YOUR_API_KEY_HERE along with your precise API key.
curl https://api.openai.com/v1/audio/speech
  -H "Authorization: Bearer YOUR_API_KEY_HERE"
  -H "Content-Type: application/json"
  -d '{
    "model": "tts-1",
    "input": "hello world",
    "voice": "alloy"
  }'
  --output instance.mp3
Example:
curl https://api.openai.com/v1/audio/speech
  -H "Authorization: Bearer sk-IfClJS63a7Ny3v6yKncIT3XXXXXXXXXXXXXX"
  -H "Content-Type: application/json"
  -d '{
    "model": "tts-1",
    "input": "hello world",
    "voice": "alloy"
  }'
  --output instance.mp3
Copy your entire code, paste it into your terminal (Windows customers can use Command Prompt or PowerShell), and press Enter.
That’s it! This motion will create an audio file known as instance.mp3 that claims “hello world”.
Other Changes You Can Make
Now that you just’re aware of changing textual content into lifelike spoken audio using the OpenAI Audio API, let’s delve into further changes you can also make that can affect the standard and elegance of your TTS output.
Essentially, you’ll be able to modify the next:
1. Model
The default mannequin is tts-1, which supplies fast response instances however at a barely decrease high quality. You can swap to the tts-1-hd mannequin for larger definition audio output.
Example:
"model": "tts-1-hd"
2. Input
Any textual content enclosed inside double quotes will likely be transformed into spoken audio.
Example:
"input": "hello there, how are you doing today?"
3. Voice
Currently, there are six completely different voices obtainable: alloy, echo, fable, onyx, nova, and shimmer.
Example:
"voice": "nova"
4. Output
By default, the output will likely be in .mp3 format. However, you’ll be able to change the filename or select from different supported audio codecs. The presently supported codecs embrace:
- Opus .opus: Ideal for web streaming and communications with low latency.
- AAC .aac: Used for digital audio compression, most popular by platforms like YouTube and units like Android and iOS.
- FLAC .flac: Provides lossless audio compression, favored by audiophiles for archiving functions.
Example:
--output myspeech.aac
FAQ
Where do I discover the created audio file?
The output file is situated in the identical folder or path the place you executed the cURL script. To discover out the present listing of your terminal (Windows customers: PowerShell or Command Prompt), use the next command:
- macOS Terminal –
pwd - Windows PowerShell –
pwd - Windows Command Prompt –
cd
Can I create and use a customized copy of my voice?
This function is just not presently supported by OpenAI.
How do different voice choices sound like?
You can generate audio using completely different voice parameters to listen to how different voices sound, or you’ll be able to go to this web page to take heed to samples.
Does it help different languages?
Yes, it does help a number of languages. I’ve examined it with Japanese, Chinese (Mandarin), Vietnamese, and Spanish, and so they appear to sound fairly affordable.
Check out more article on – How-To tutorial and latest highlights on – Technical News