How do I Select a Photo for a Location in Collaborative Lists in Google Maps.
Collaborative lists in Google Maps have been fairly the fashion since Google launched them some time in the past. Users all over the world have been using this function to collaborate on itineraries and locations they want to go to on their holidays. Did you recognize, you too can assign particular photos to a location in a collaborative checklist? This is a straightforward strategy to spotlight an attraction or a part of a location that you just’re excited to go to. The photograph you assign will probably be seen to everybody to allow them to make amends for it. Here’s how one can assign a photograph for a location in collaborative lists in Google Maps.
: How do I Use Emoji Reactions in Google Maps
How do I select a photograph for a location in collaborative lists in Google Maps on Android
You can simply assign a selected image to a location in a collaborative checklist with a number of easy steps. Follow one of many guides beneath that you just favor, that can assist you together with the method.
Short information:
- Google Maps > Saved > Select collaborative checklist > Find the involved location > Tap ‘Choose photo’ or Tap on the Ellipsis after which choose ‘Choose Photo’ > Select the photograph you want.
GIF information:

Step-by-step information:
Here’s a step-by-step information that can assist you assign a selected photograph for a location in a collaborative checklist. Let’s get began!
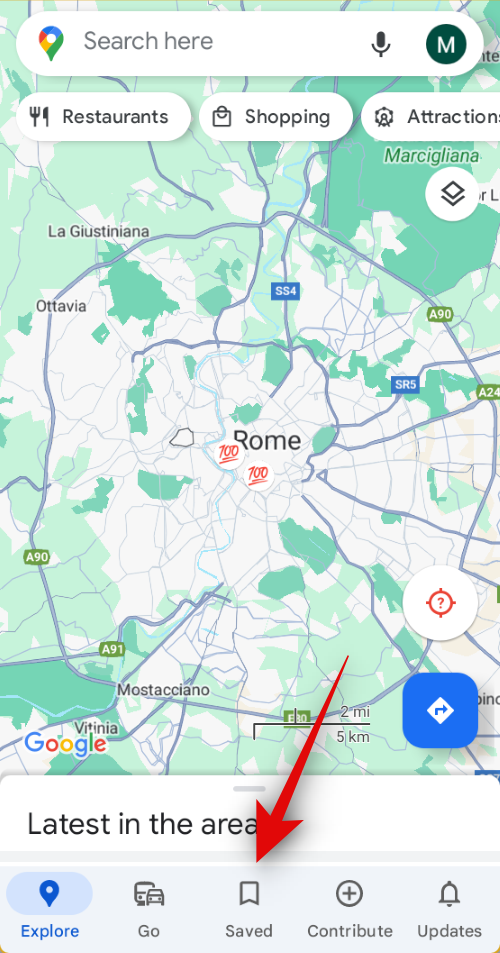
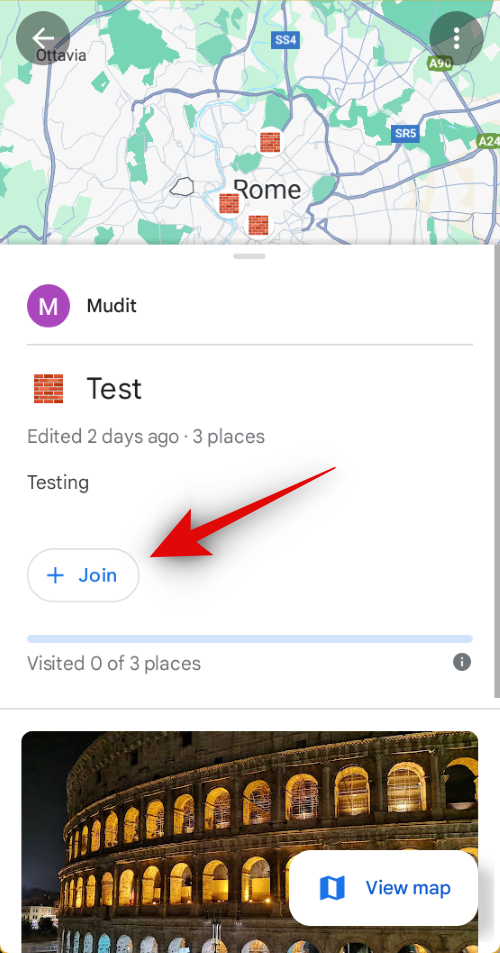
- Open the Google Maps app in your device. Once opened, faucet on Saved on the backside of your display screen.
-
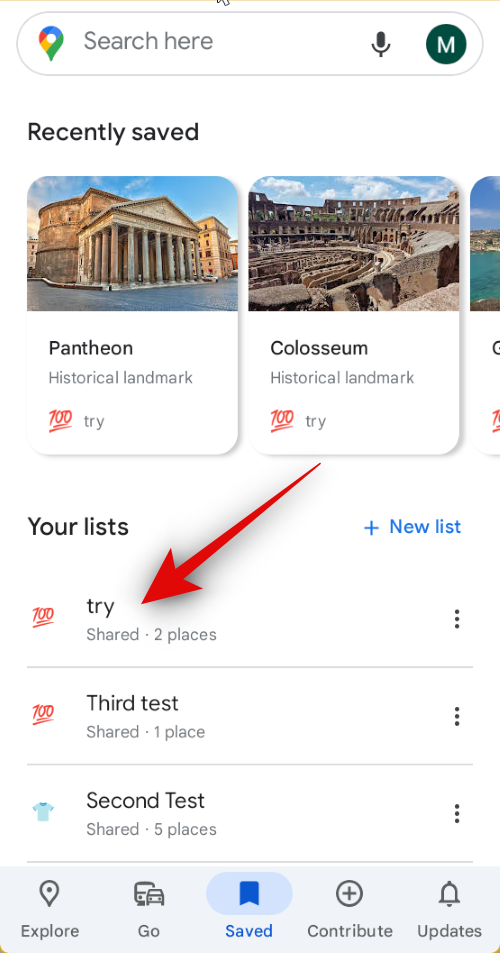
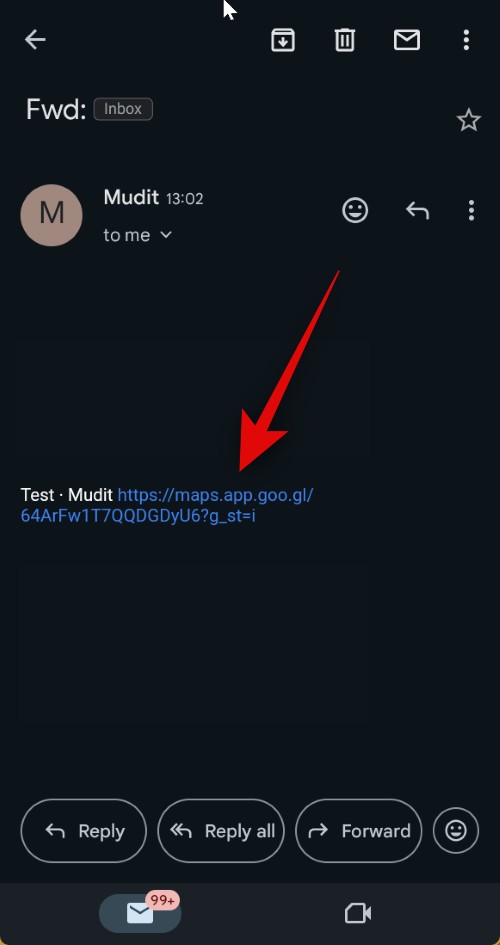
- Next, faucet on the collaborative checklist that was shared with you. In case, you haven’t accepted the invite but, faucet on the hyperlink that was shared with you.
-
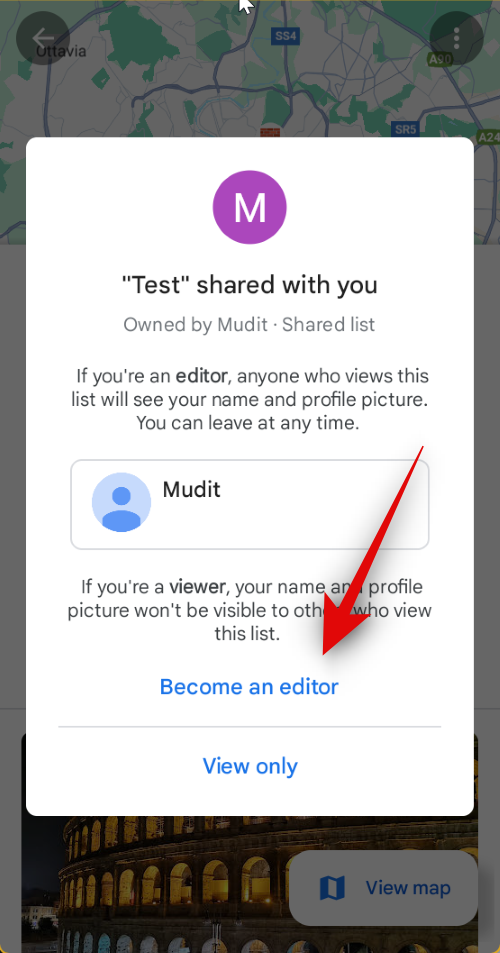
- The hyperlink will redirect you to Google Maps in your cellphone. Tap on Join after which faucet on Become an editor.
-
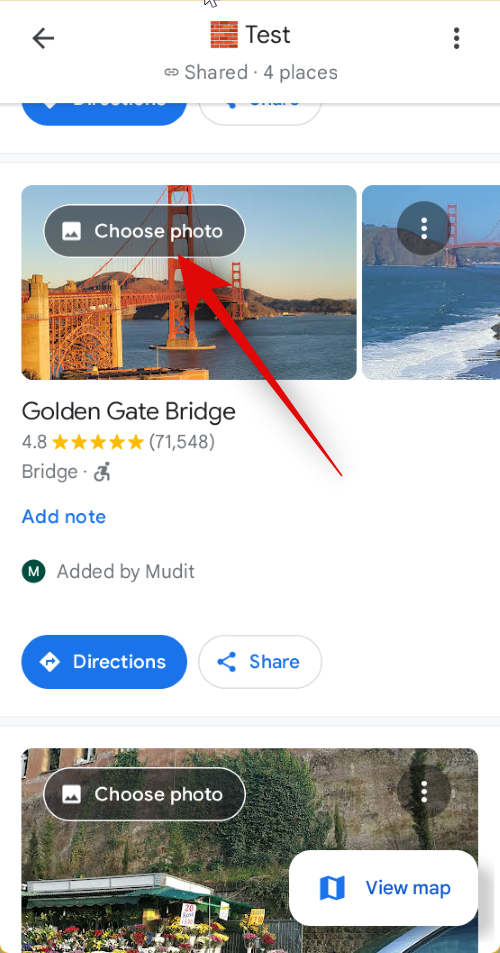
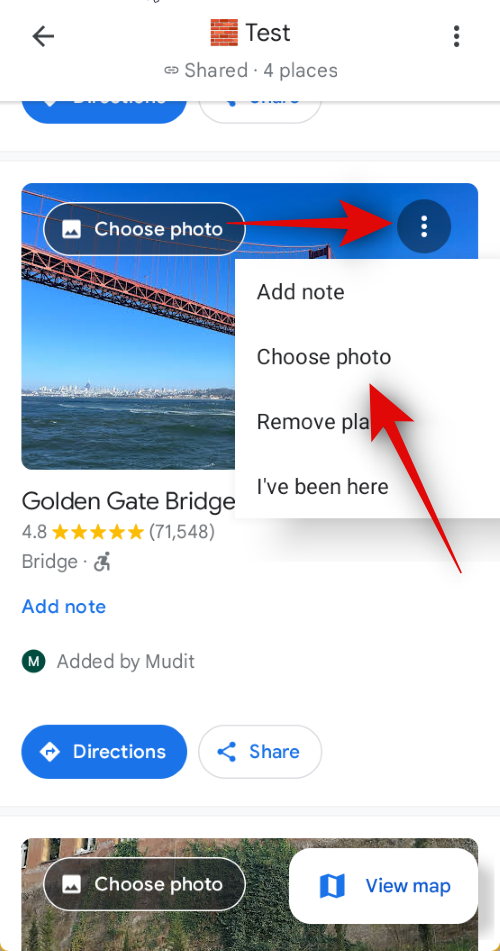
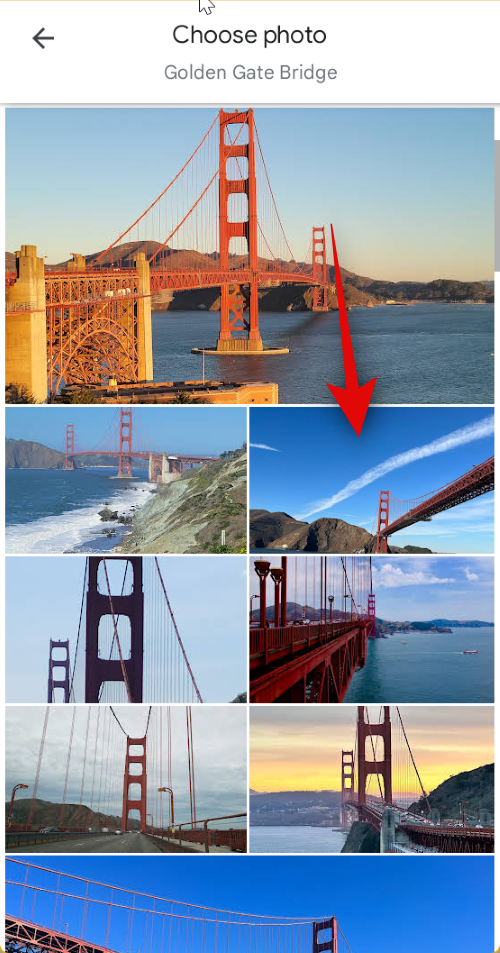
- You will now be added to the collaborative checklist. You can now assign a devoted photograph to any location. This can come in useful in case you’ve added an space or a broad location and want to go to a selected place or attraction related to it. To achieve this, faucet on Choose Photo. If this selection is unavailable, you’ll be able to faucet on the Ellipsis icon and choose Choose photograph.
-
- You will now be proven all of the photos added for the chosen location. Tap in your most popular photograph that you just want to assign for the placement. The chosen image will now be mechanically assigned to the placement.
-

And that’s it! You can now repeat the steps above to assign particular photos for different places within the checklist.
Can you select a photograph for a location in collaborative lists in Google Maps on iOS?
Unfortunately, it appears the choice to decide on a selected photograph for a location in collaborative lists in Google Maps on iOS is lacking for now. This can nonetheless change with future updates to the iOS app and Google might simply be ready to launch this function worldwide within the coming weeks.
However, there isn’t a official word from Google for now; that is simply hypothesis at best. If you’re using an iPhone, then we advocate using an Android device to assign a selected photograph for a location or asking a pal to take action in your behalf.
We hope this submit helped you simply assign a selected photograph for a location in collaborative lists in Google Maps. If you’ve gotten any more questions for us, be happy to succeed in out using the feedback part beneath.
Check out more article on – How-To tutorial and latest highlights on – Technical News