How do I Fix Pixelated Graphics in Photoshop.
Do you could have a low-resolution graphic that’s extraordinarily blurry or pixelated, and also you need to sharpen it?
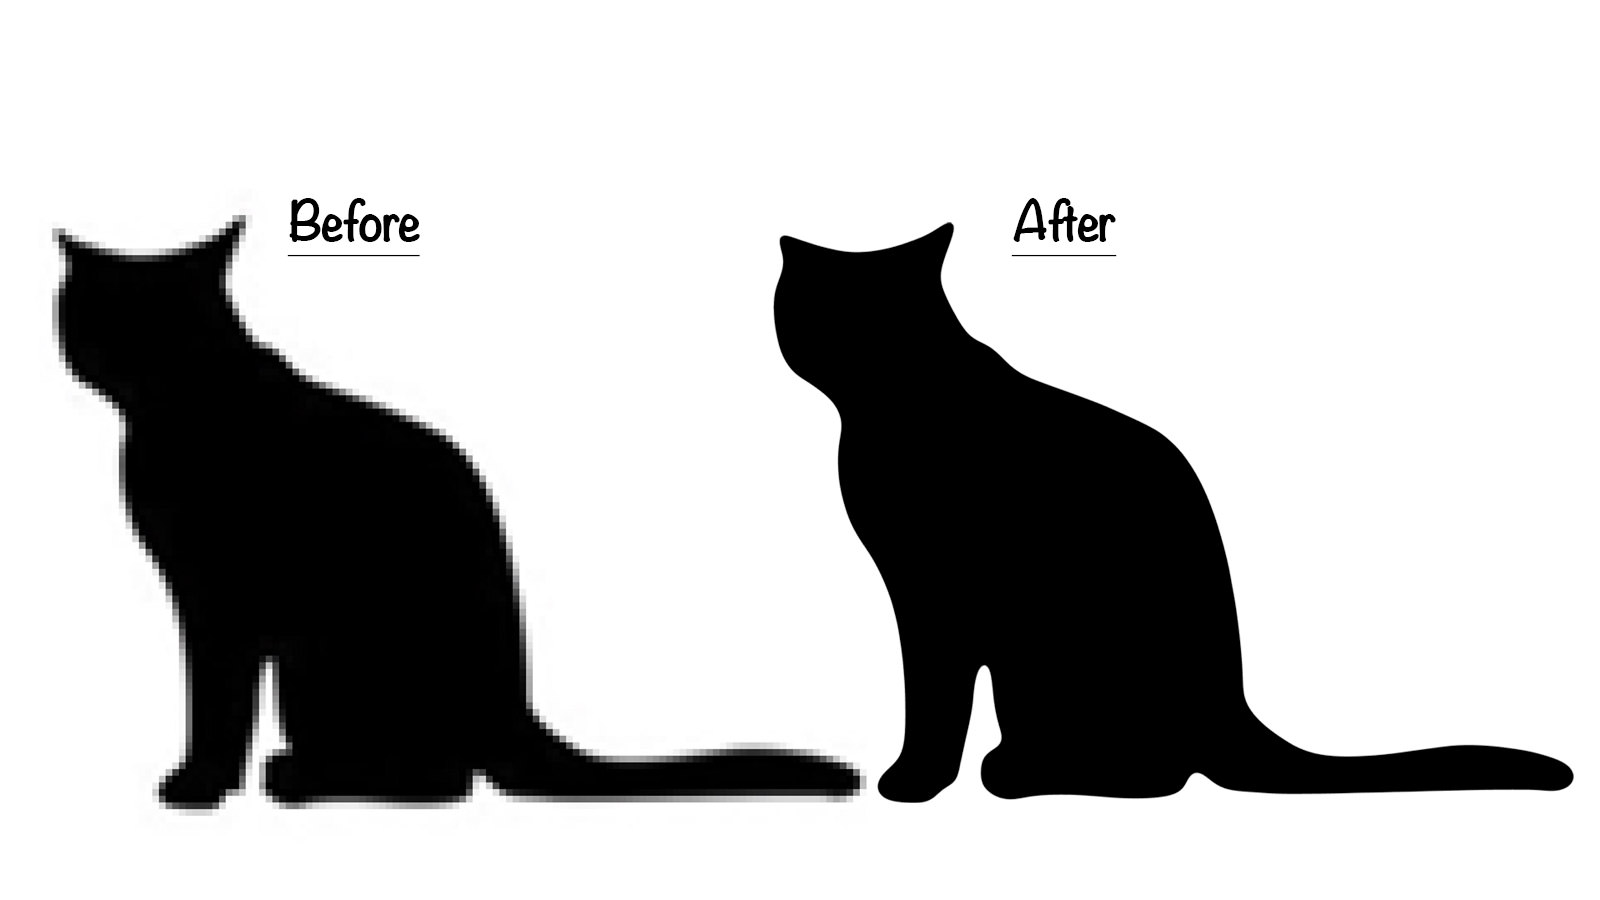
Well, there’s a simple Photoshop approach for image sharpening that may allow you to remodel a blurry and pixelated image into one thing sharper.
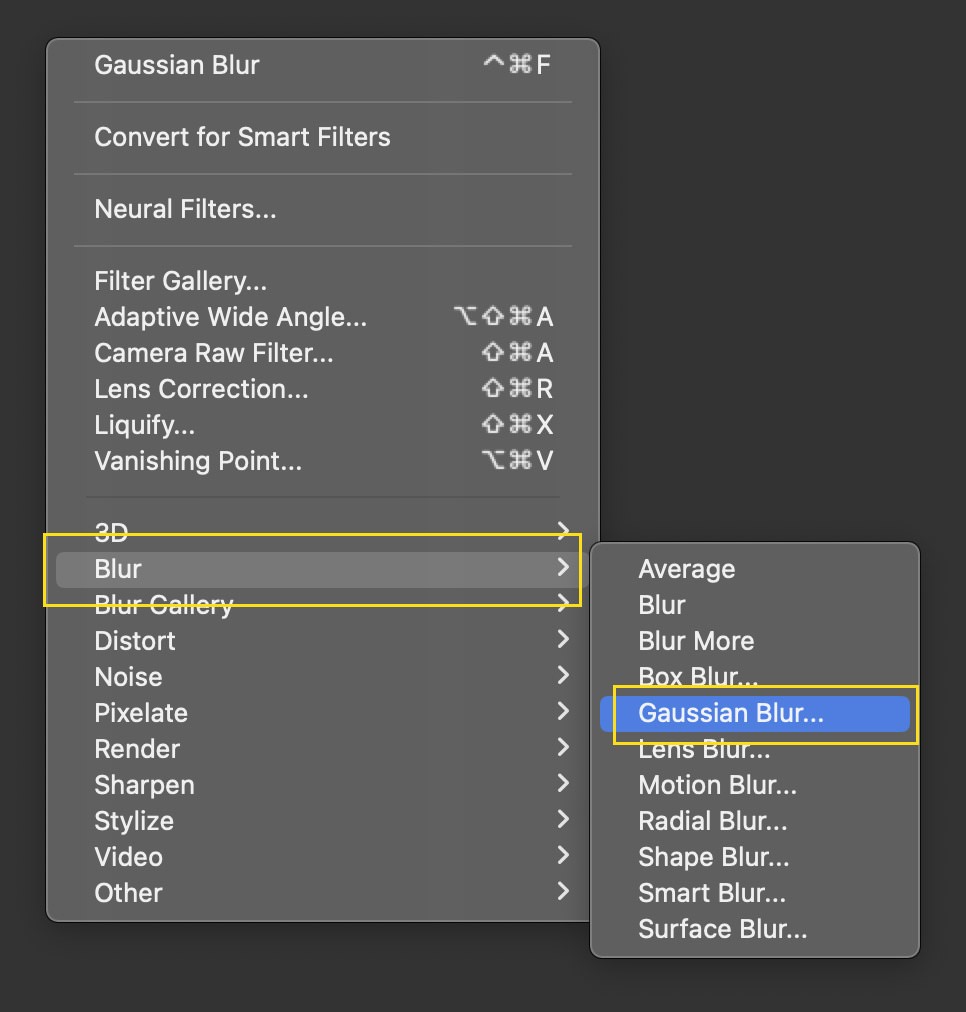
Step 1.
First, open your image in Photoshop, then navigate to Filter > Blur > Gaussian Blur.
Step 2.
Apply some Gaussian Blur to the image, like this:

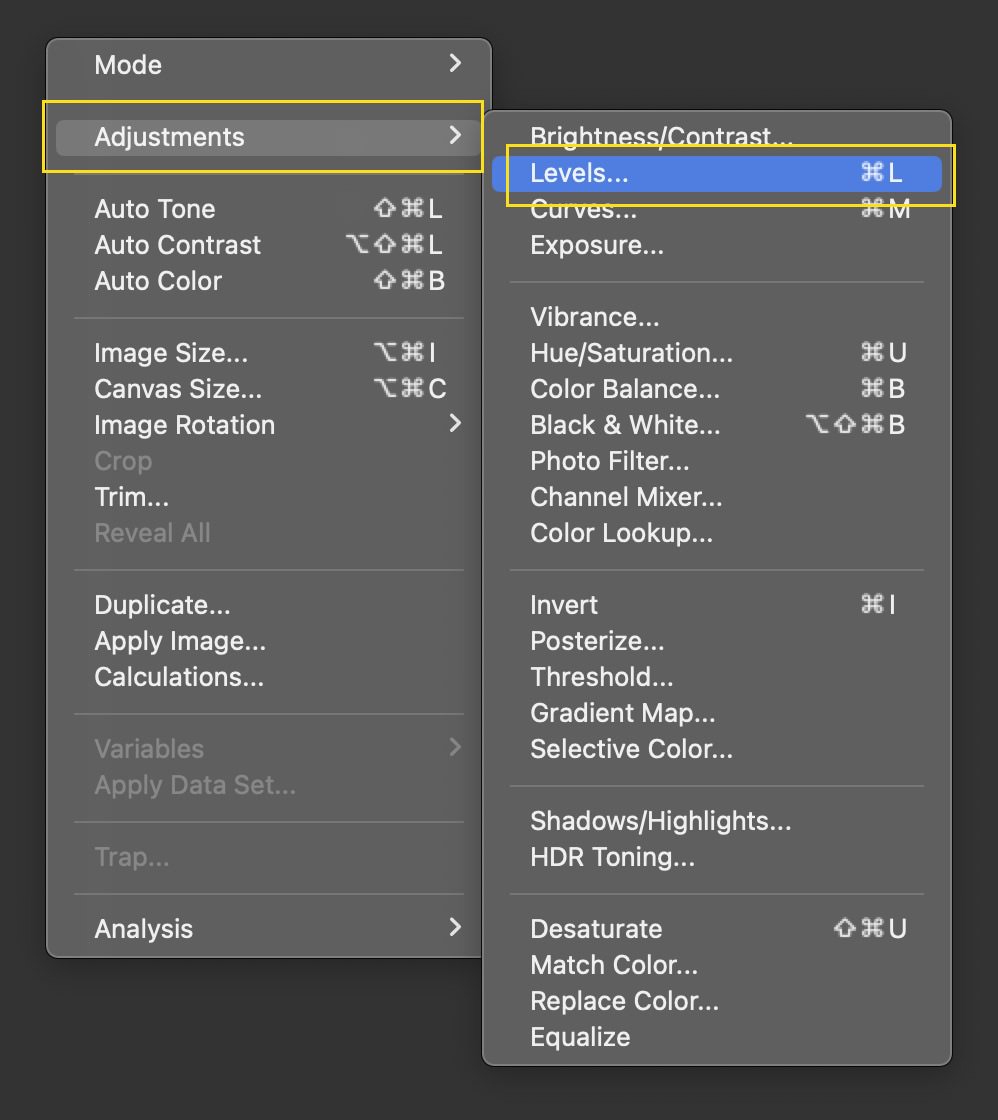
Step 3.
Next, go to Image > Adjustments > Levels.
Step 4.
In the Levels dialog field, slide each the left and proper markers in the direction of the middle.
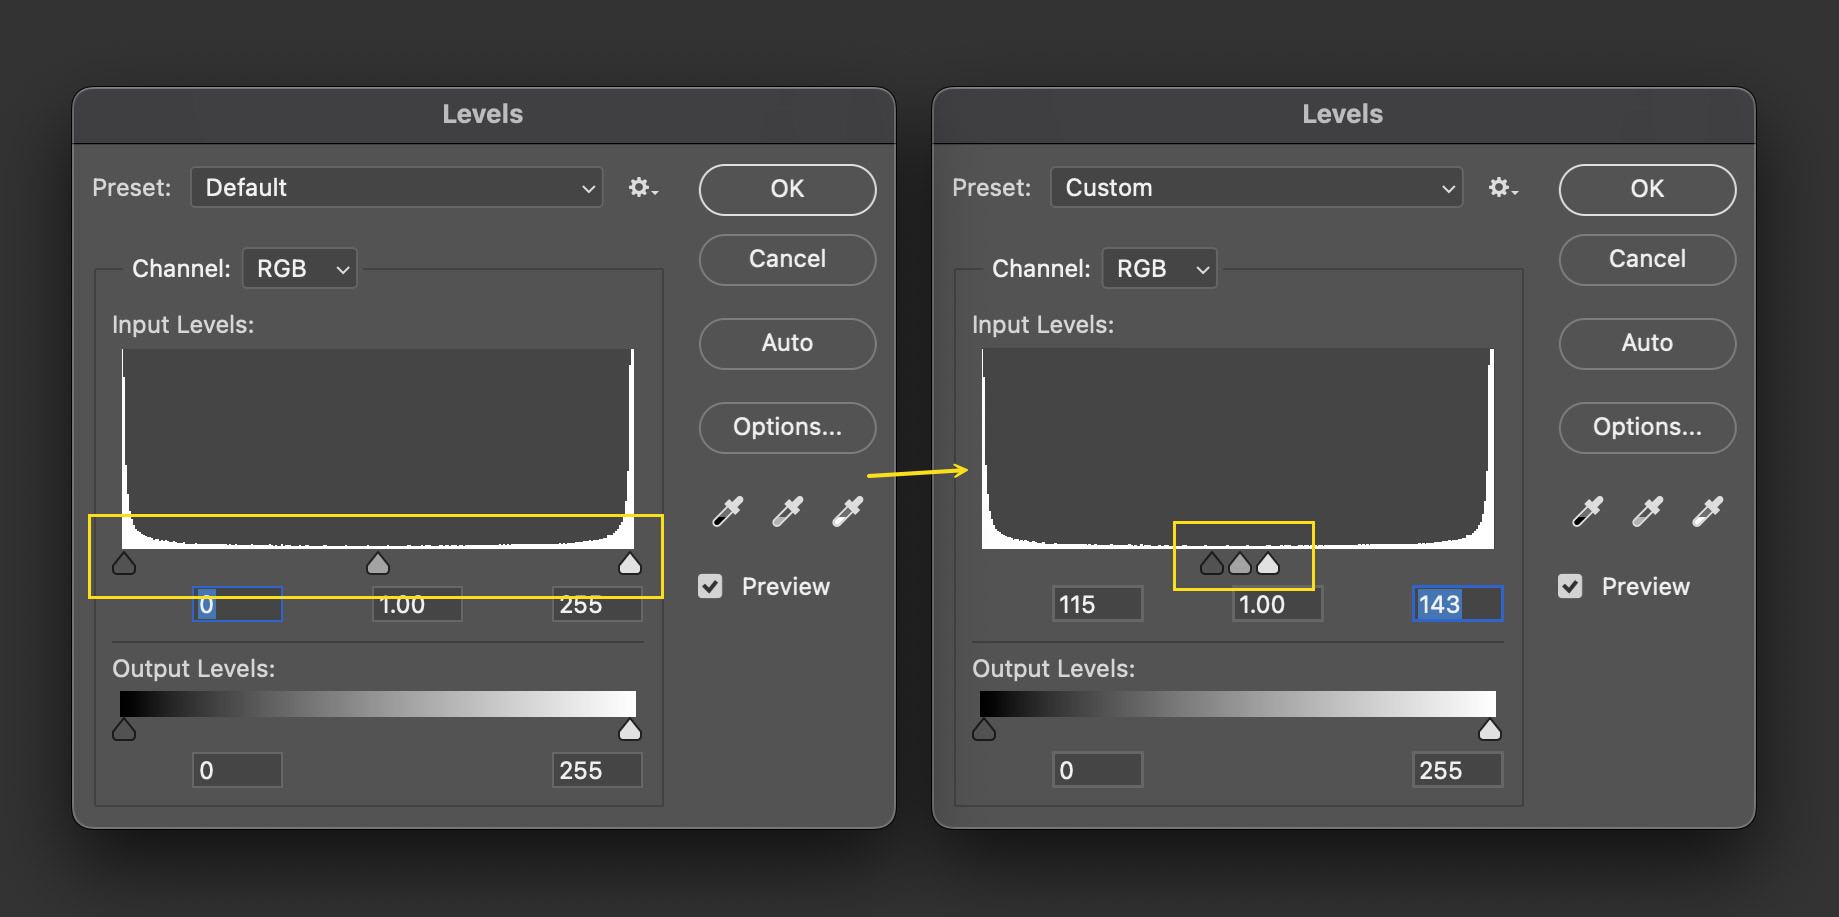
Step 5.
As you progress them, you’ll discover the image steadily turns into sharper.
Do be aware that this technique is only with two-tone graphics the place there’s a transparent shade distinction between the item and the background.
Check out more article on – How-To tutorial and latest highlights on – Technical News