How do I Back Up All Your iMessage History.
We all have cherished chats and recollections in our iMessage. But what occurs in the event that they all of a sudden disappear? While iCloud can save our chats, it’s not one of the best for digging up previous messages or photos. If you’ve ever spent ages looking for an previous dialog or image, you’re not alone. Thankfully, there are higher methods to save lots of and handle our iMessages.
In this submit, we’ll introduce you to 2 strategies: one using a third-party app and the opposite using the Mac’s Terminal. The latter technique is a bit technical, so it’ll require some know-how, however don’t fear, we’ll information you thru it!
Method 1: iMazing
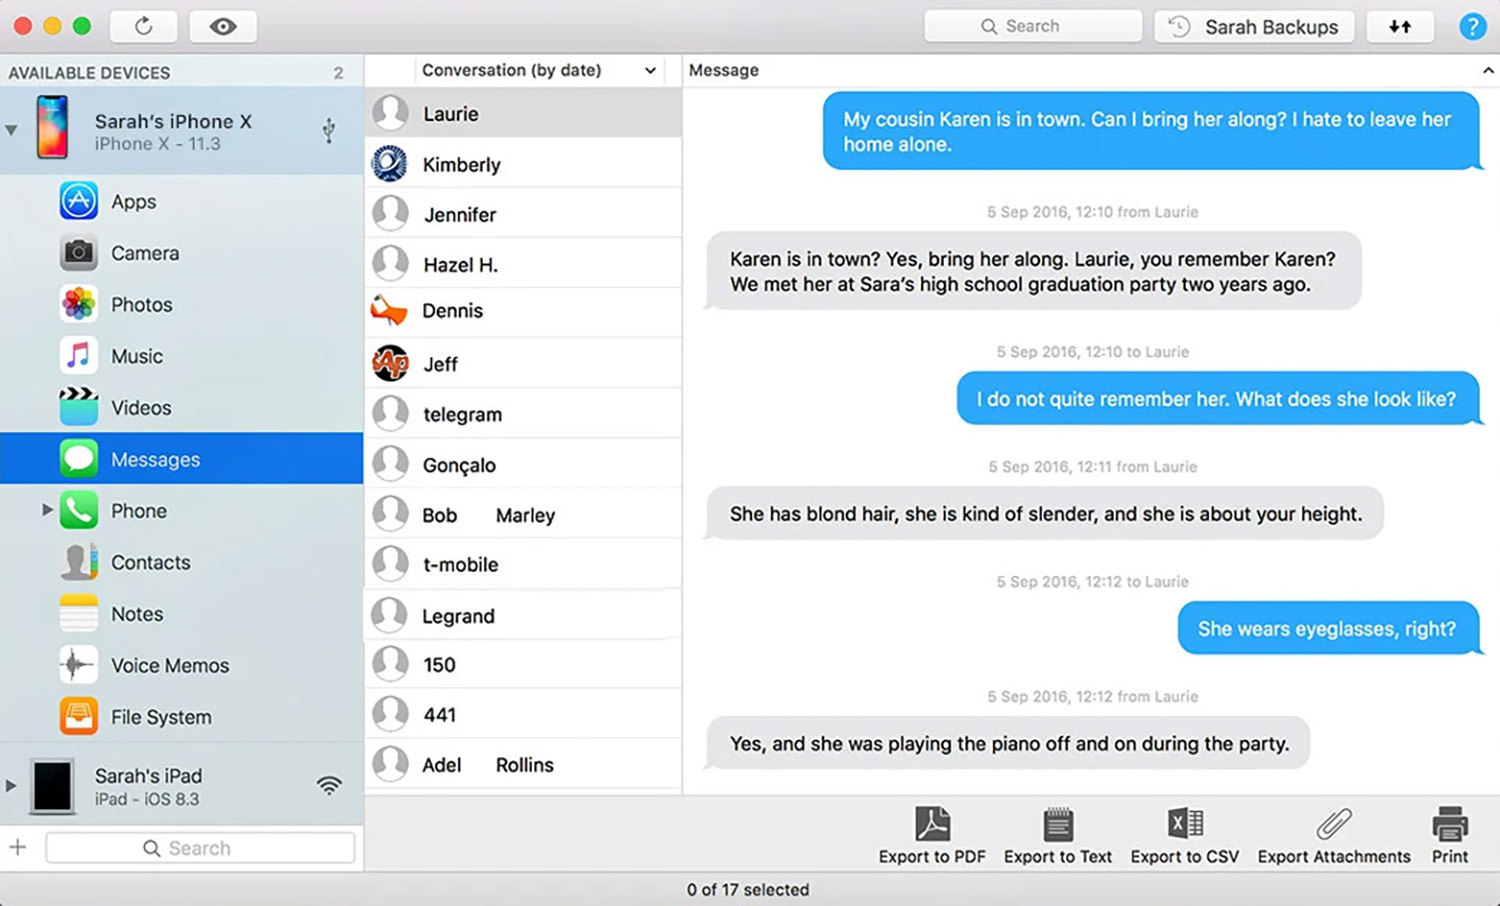
iMazing is a third-party app, and among the many strategies we’ll current, it affords the best option to back up your iMessage chat historical past. This app means that you can save your iPhone messages to your pc and even switch them to a brand new cellphone. But it’s not restricted to simply texts; it’s also possible to archive photos, movies, and different gadgets out of your chats.
What’s spectacular is you could view all of your messages – be they common texts, MMS, or iMessages – instantly in your pc, whether or not it’s a PC or a Mac. You’ll have the ability to see particulars resembling whether or not the message was despatched, delivered, or learn. If you’re transitioning to a brand new cellphone, iMazing can help in transferring all of your messages, together with these from apps like WhatsApp.
While the app is appropriate with each Windows and Mac, absolutely using its options comes at a value. Regarding the price, there are three choices: $33.99 for one device, $59.99 for 3 units, or $64.99 for an infinite variety of units. If you’re searching for an environment friendly option to handle your messages, iMazing may be value contemplating.
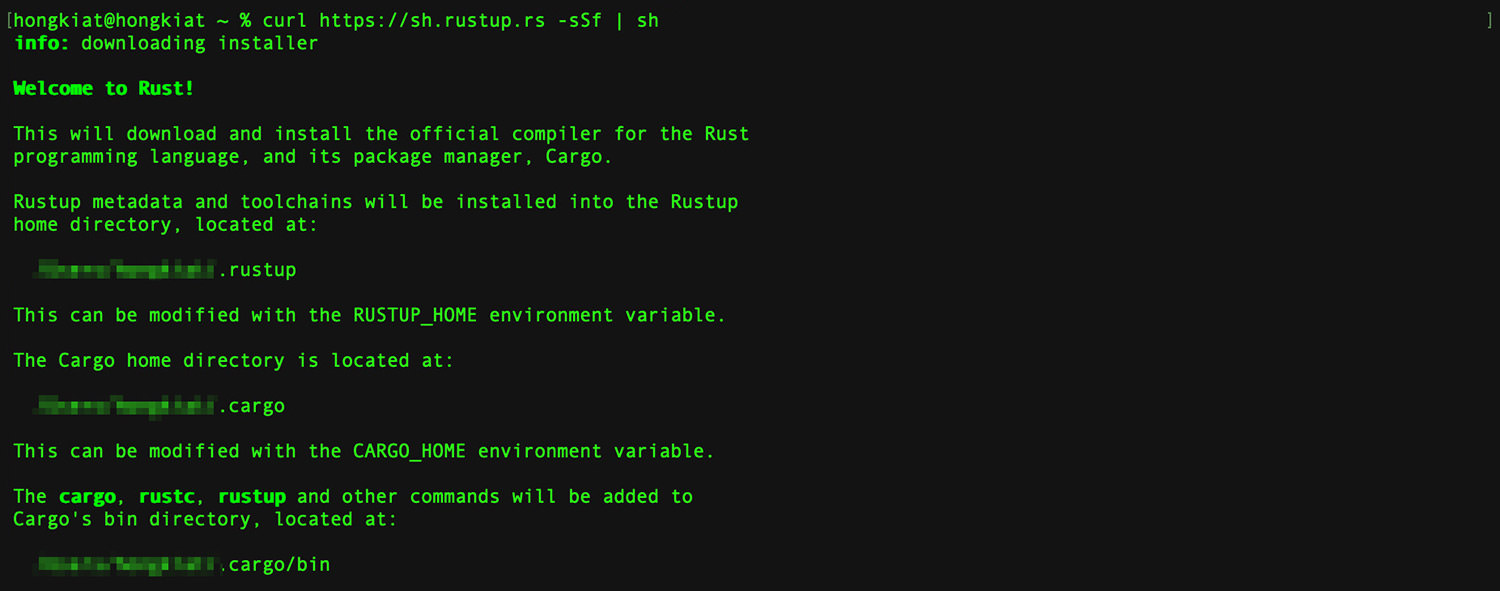
Method 2: iMessager Exporter

The second technique is free, but it surely requires some fundamental technical abilities in your Mac. This course of entails using the Terminal to put in a device named iMessage Exporter. Created by ReagentX, this device means that you can archive numerous iMessage information, together with audio messages, Apple Pay information, edited messages, replies, reactions, and more. While the device is user-friendly, the preliminary setup is usually a bit difficult.
Here’s a quick information on how to make use of “iMessage Exporter” to archive your iMessage conversations. For a more complete tutorial, check with our earlier submit about exporting iMessage historical past in your Mac.
- Open the Terminal in your Mac. To obtain Rust, enter the next command:
curl https://sh.rustup.rs -sSf | sh - After Rust has been downloaded, press ‘1‘ to proceed with the set up.
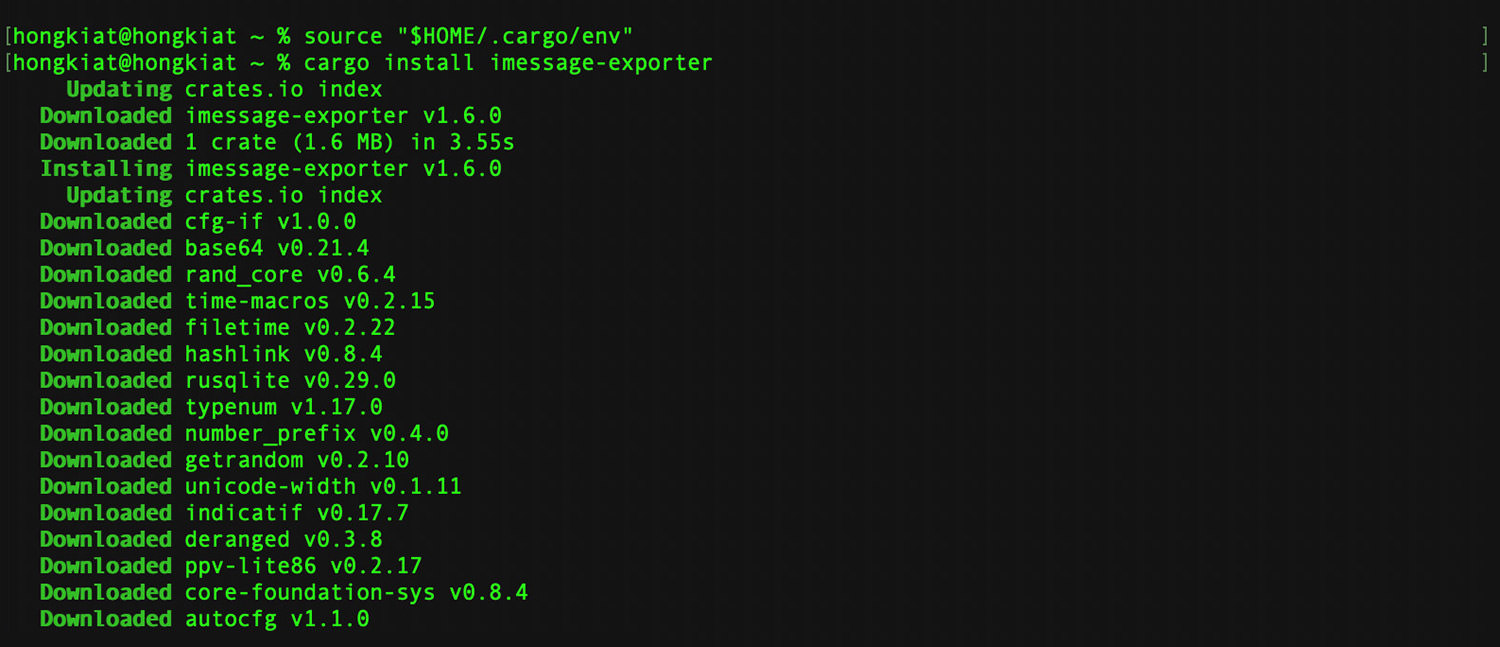
- Once the set up is completed, kind the command
supply "$HOME/.cargo/env"and press Enter. This will configure your present shell. - To set up iMessage Exporter, enter the command:
cargo set up imessage-exporter - For safety entry, navigate to System Preferences > Privacy & Security > Full Disk Access. Find ‘Terminal‘ within the record and allow it to grant full disk studying permissions.
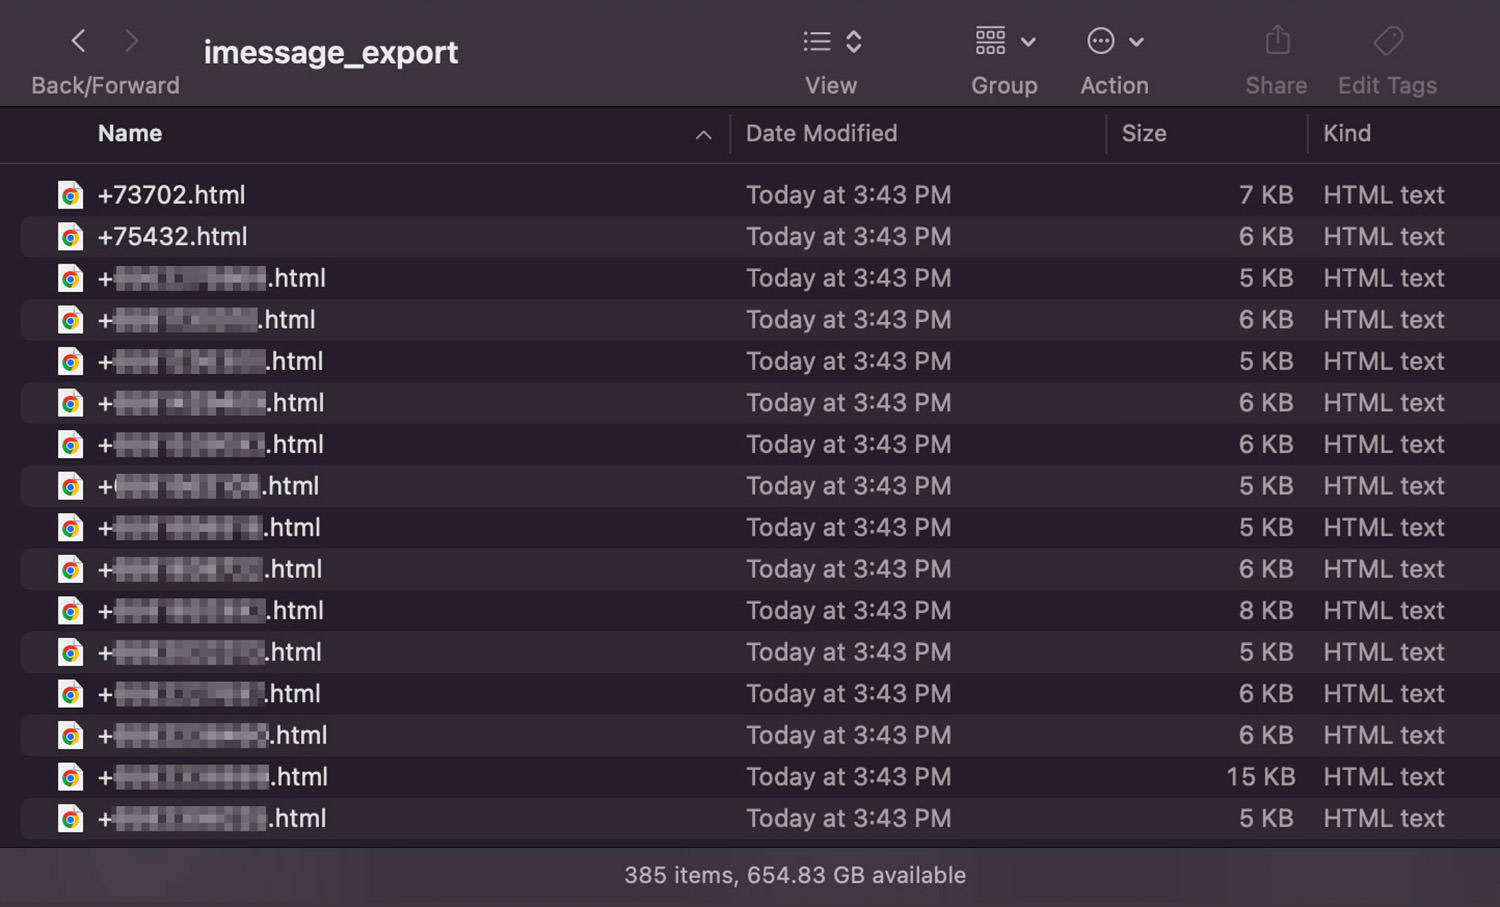
- Return to the Terminal and enter the command
imessage-exporter -f htmlto begin exporting your iMessage chats as HTML recordsdata. - After the export is full, open Finder. Use the shortcut Command + Shift + G and enter the trail
~/imessage_export. This will take you to the folder containing your exported iMessage chat histories.


Check out more article on – How-To tutorial and latest highlights on – Technical News