How do I Add a Custom Widget to Lock Screen on iOS 16.
Apple has made WidgetPackage publically obtainable to third-party builders which permits them to create widgets for their very own apps. But with the discharge of widgets back in iOS 14 this additionally meant that third-party apps can benefit from the WidgetPackage to make customized widgets. This characteristic is now obtainable for the lock display in iOS 16. Here’s how one can add a customized widget to your iPhone’s lock display operating iOS 16 (or newer).
How do I add customized widgets to your iPhone’s lock display with iOS 16
Custom Widgets to your lock display or house display can solely be created using third-party apps. We suggest using the three apps we’ve chosen beneath. However, relying in your preferences you’ll be able to go for Alternatives which have been talked about subsequently. Here’s how one can add customized widgets to your iOS 16 lock display.
Step 1: Create a widget
We will first must create our customized widget earlier than we will add it to our lock display. We suggest using both Widgetsmith, Color Widgets, or Widgy. These apps supply a whole lot of management over your customized widgets and have unique options to additional customise them as per your wants. Use both of the part beneath relying on the app you select that will help you with the method.
Method 1: For fundamental widgets (Widgetsmith)
Download and set up Widgetsmith in your iPhone using the hyperlink above. Once accomplished, launch the app and faucet and guarantee Widgets is chosen on the backside.
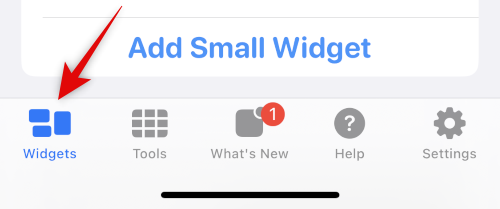
Tap Lock Screen on the high to modify to Lock Screen widgets.

You now have the choice to create three sorts of lock display widgets as talked about beneath.
- Text Widget
- Circular Widget
- Rectangular Widget
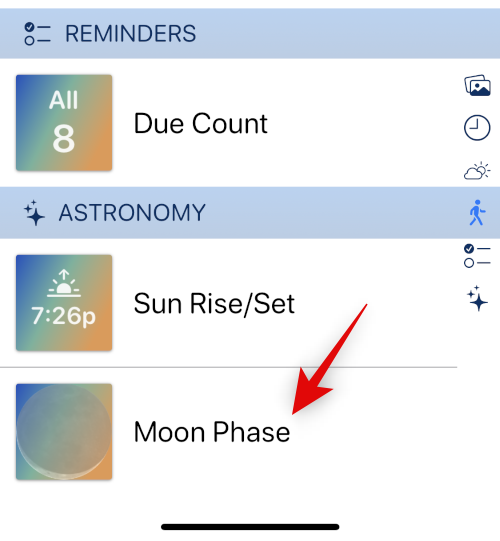
The Circular Widget and the Rectangular Widget might be added to the devoted widget space in your lock display. The Text Widget might be added to your lock display date. We will create a round widget on this instance. The course of shall be related when making a textual content or rectangular widget. Tap Add Circular Widget to get you began.

Scroll the listing and select a Widget kind you can be creating. We will create a Moon Phase widget for this information. Tap and select the Moon Phase widget on the backside of your display.
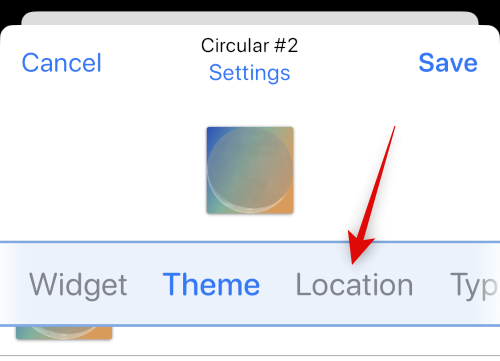
Now faucet Theme on the high and select the theme you want.

Tap Location on the high.
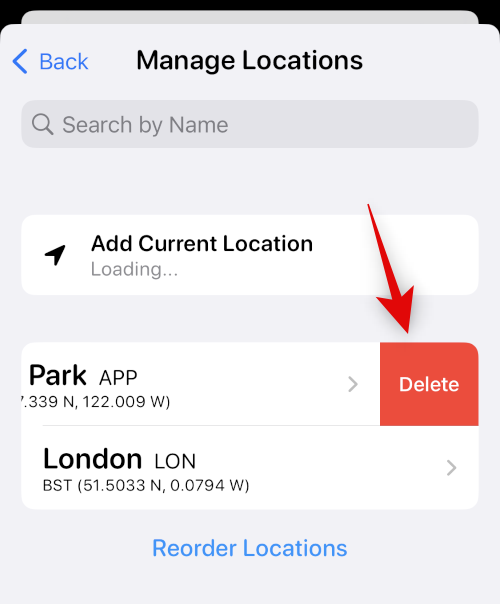
Now faucet Add or Edit Locations on the backside.

Use the search bar on the high to look your present metropolis. Tap and choose the identical as soon as it reveals up in your search outcomes.

Swipe left on the Apple Park location and faucet Delete.
Now faucet Back on the high.

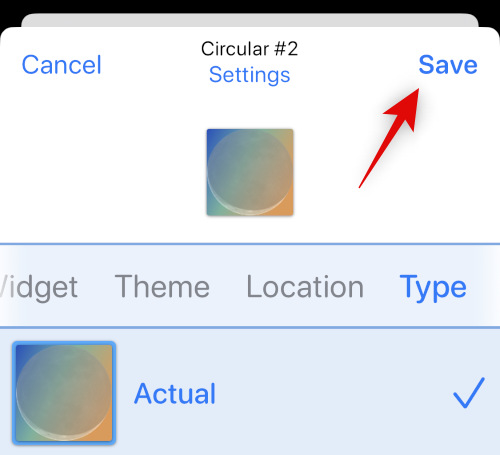
Tap the final Type part.

Note: This choice will solely be obtainable for sure widgets.
Tap and choose your most well-liked widget kind.

Once you’re pleased along with your widget, faucet Save.
You will now have created your first lock display widget. You can create more widgets and swap between them as wanted.
Method 2: For colourful and aesthetic widgets (Color Widgets)
Color Widgets is one other standard app that focuses more on Aesthetics and in addition gives a curated number of themes and icons. Here’s how one can create lock display widgets using Color Widgets.
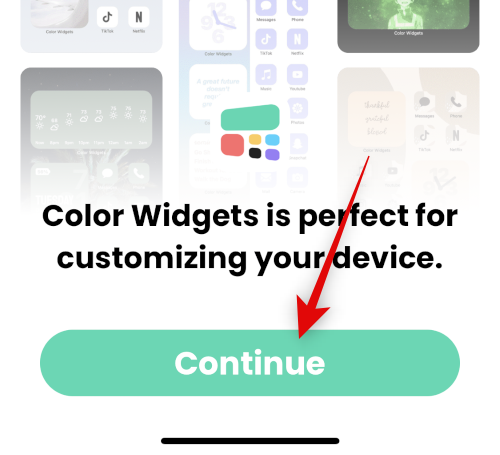
Download and set up Color Widgets in your iPhone. Now launch the app Continue.
Tap Skip.

Tap Continue once more.

Now faucet the X within the high proper nook.

You will now be proven previews for the three sizes of lock display widgets you’ll be able to customise below Your Lock Screen Widget. Tap on both option to customise and apply it to your lock display. Let’s customise the oblong widget for this information.

Tap and select your most well-liked background using the choices on the high below Background.
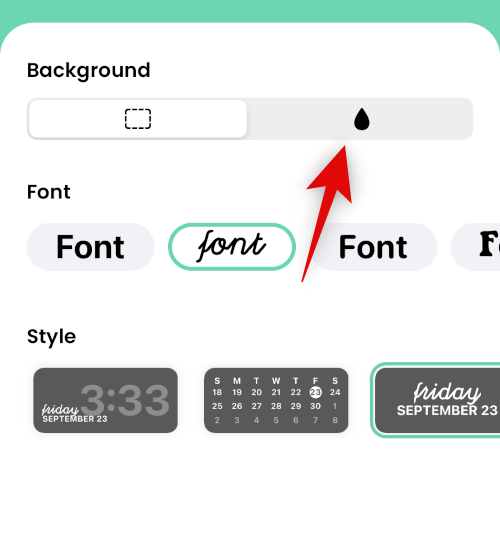
Now select your most well-liked font using the Font part.

You can now scroll the Style part to pick a most well-liked fashion.

Use the Image icon to set a customized image as your background.
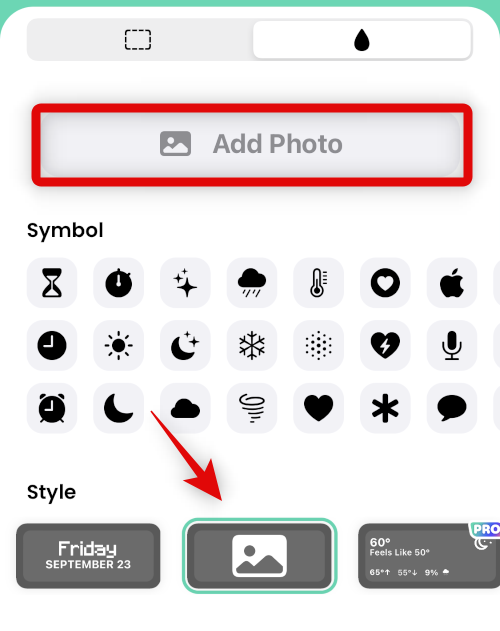
Some fashion choices will can help you use symbols in your widget. Tap and choose the specified Symbol you want so as to add it to your widget.

The Countdown fashion will even can help you select a date to which your widget will countdown.

Once you’re pleased along with your creation, faucet SET WIDGET on the backside.

You will now have created your first widget.

Use the + icon on the Color Widgets homepage to create more lock display widgets as wanted.

And that’s you’ll be able to create customized widgets in Color Widgets.
Method 3: For extremely personalized widgets (Widgy)
Widgy permits you to create some fairly cool widgets that provide a whole lot of customizable choices. Use the information beneath that will help you create a customized widget in Widgy.
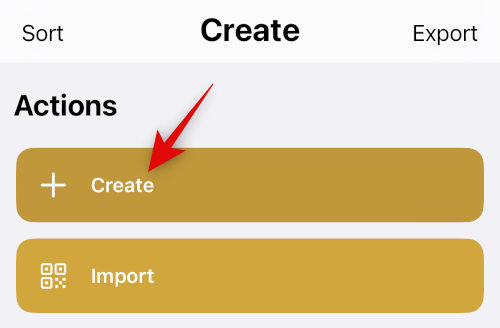
Download Widgy using the hyperlink above and launch the app. Tap and swap to Lock using the tablet on the backside.

Tap Create on the high.
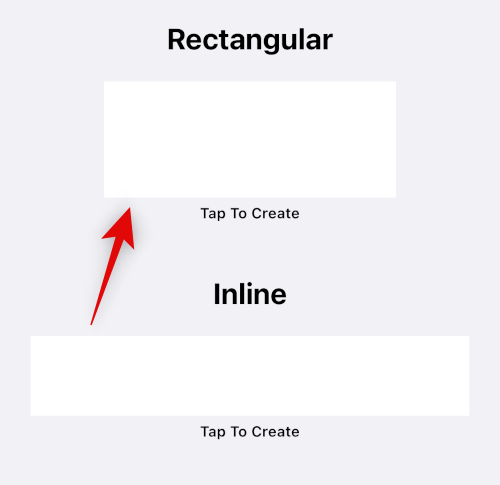
Tap and select your most well-liked form of the widget. Inline Widgets shall be added to your date. Let’s create an oblong widget for this instance.
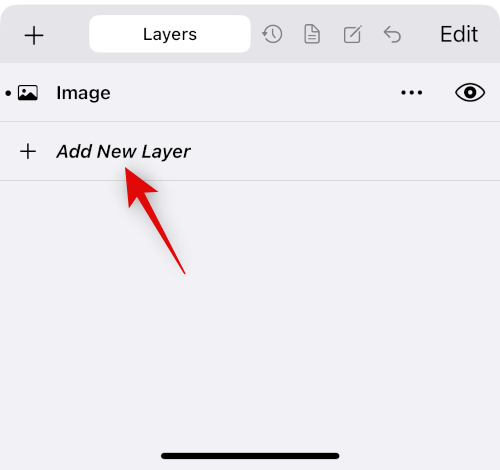
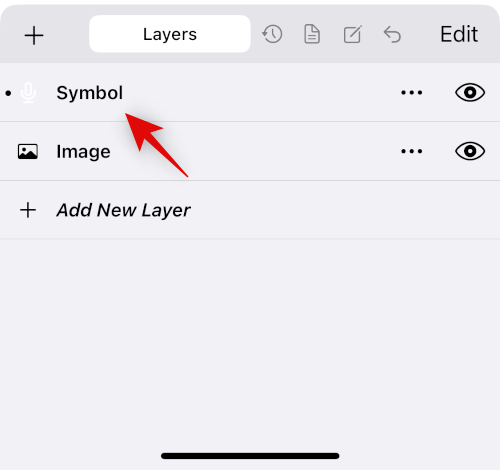
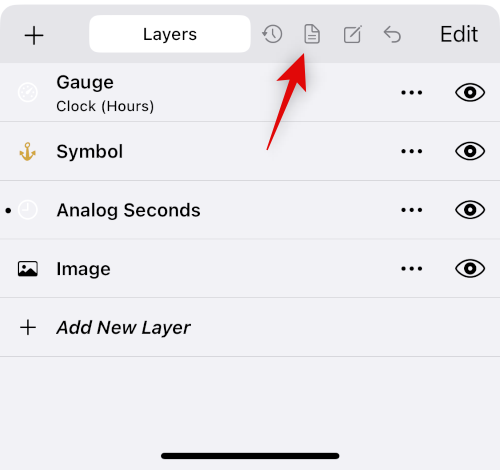
Tap Add New Layer.
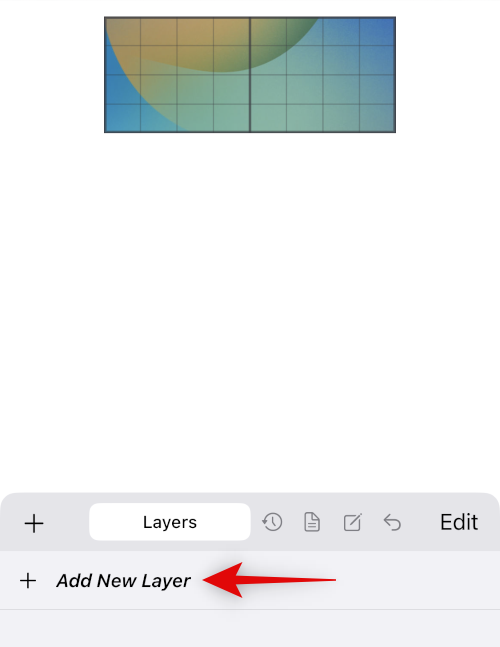
Let’s add a background first. Select Image.

Now faucet and swap to the Image tab.
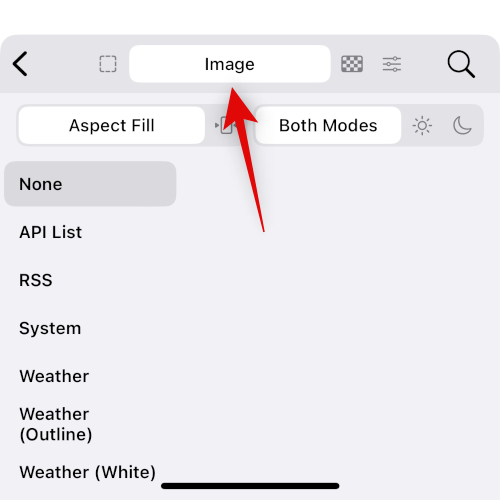
Change your Aspect Fill to fill horizontally.

Now use the choices in your left to decide on a supply to your image. You can supply images from the next areas.
- API List
- RSS Feeds
- System Storage
- Weather app (Normal, White and Outline)
- Web and Maps
- Widgy

Use the Widgy class to drive blurred backgrounds if you want. Use the System choice to decide on a photograph out of your device. Let’s select a sample background for now. Use the appropriate part to navigate to your required supply and choose your image.

Tap and select the sample you want.

Now swap to the Frame panel. You can now use the pinch and drag gesture to resize your image. For more exact management, you should use the icons on the backside of your display. Ensure that your background fills all the widget.

Now swap to the Effects panel.
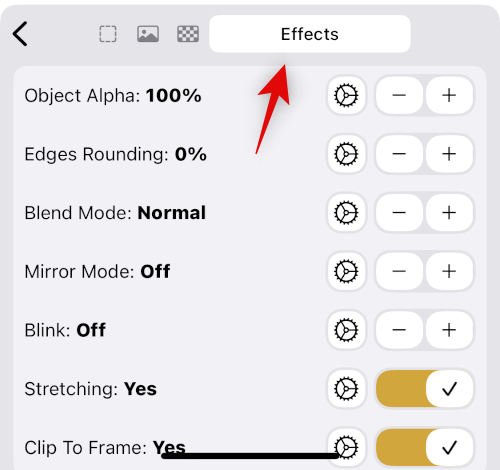
Note: You can set a background however because the image fills all the canvas, it doesn’t matter.
Now apply and modify the looks of your background to suit your preferences using the choices in your display.

Tap the back arrow so as to add a brand new layer.

Tap Add New Layer.
Tap and choose the kind of info or graphic you want to add to your widget. Let’s add a Symbol for now.

Now faucet the back arrow to regulate your layers and reposition them.
Tap Edit.
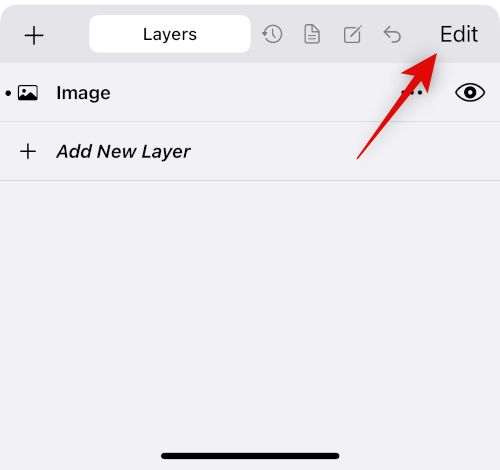
Tap and drag the Symbol layer above your Image layer.

Tap Done.

Now faucet the Symbol layer to edit it.
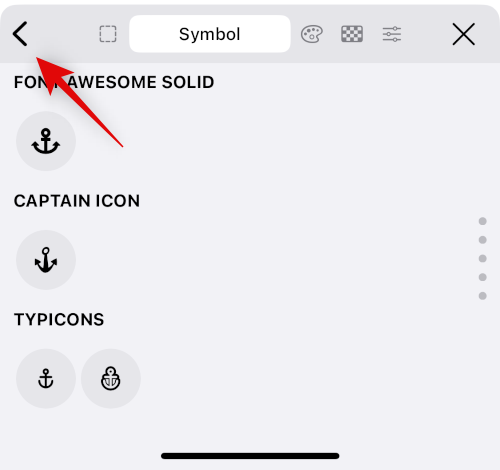
Before we place or resize the image, let’s choose the image we want to use. Tap the Symbol icon on the high.
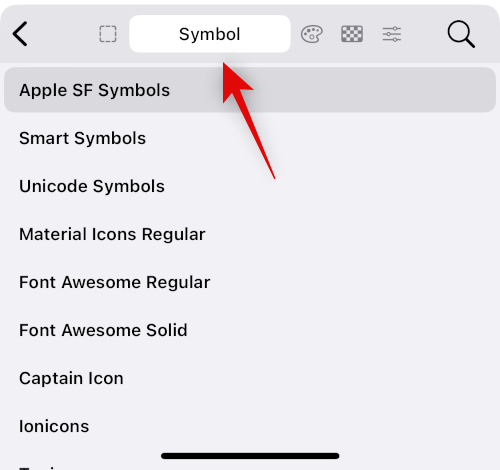
Tap and choose your most well-liked Symbol class.
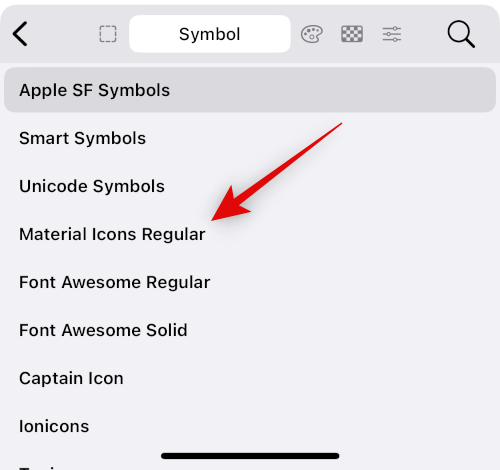
Now faucet and choose your most well-liked image.

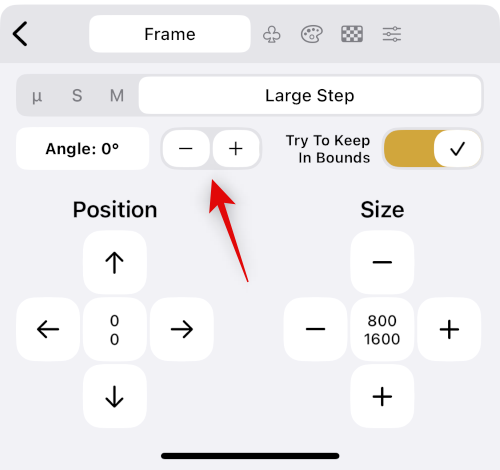
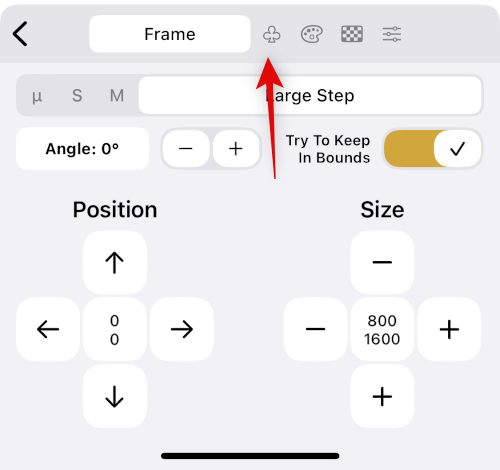
Tap the Frame icon to regulate the dimensions and place of the image.

You can modify the dimensions of your layer by utilizing the pinch gesture. You may also modify its place by dragging it round. If you’d like more precision, use the Position arrows to position your image. Adjust the Size using the + and – respectively.
If you want to fine-tune these values, swap the step dimension by sliding on the choices on the high.

Use Angle to rotate your image as wanted.
Once you’re pleased with the preview, faucet the Palette icon.
Use the choices on the high to decide on your coloration palette. You have the next choices at your disposal.
- System
- Material
- Palettes
- Dynamic Colors
- Gradients
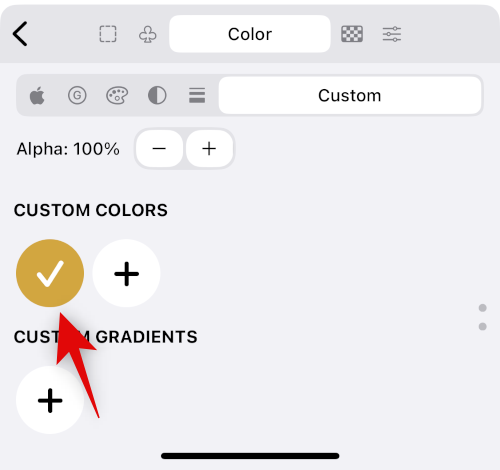
- Custom
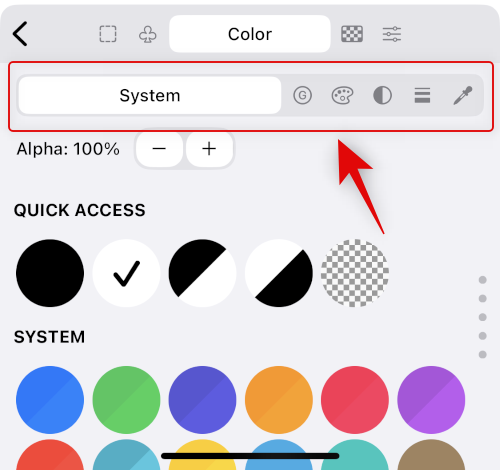
Now faucet and select your most well-liked coloration.
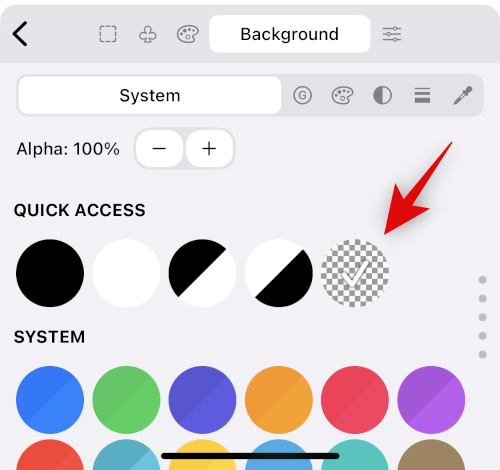
Switch to the Background tab in case you want to add a background.

Tap and select your most well-liked background coloration.
Finally use the final panel to regulate Effects added to your image.

Adjust your Symbol’s impact primarily based in your preferences.
Now faucet the back arrow.

Add more layers to your widget as wanted to create and customise all of it you need. Once you’re pleased along with your widget, faucet and swap to the Document tab.
Edit your widget’s title and different particulars as you like.

Now faucet the back arrow within the high left nook of your display.

Tap Confirm.
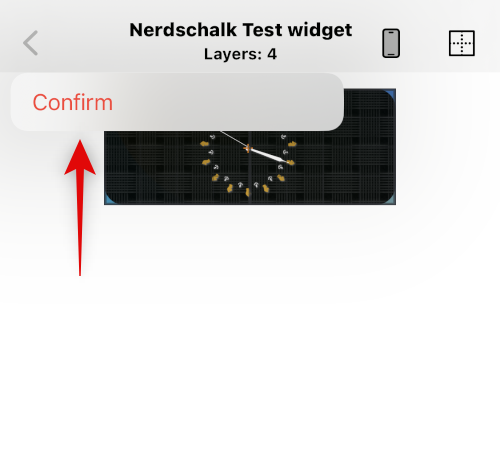
Your widget will now be saved.

Tap and swap to the Manage tab.

Now faucet your first rectangular widget slot.

Tap and choose the widget we created.

Your widget will now be assigned to the primary slot. Only the primary slot is free when using Widgy with out a premium buy. Widgy is an excellent app for creating widgets. This information solely covers the fundamentals. We suggest you discover all of the choices to create the proper widget to suit your wants. You can now use the following part so as to add the widget to your lock display.
Step 2: Add the customized widget to your lock display
To add a customized widget to your private home display comply with the directions beneath.
Tap and maintain on to your iPhone’s lock display to enter the enhancing mode. Now faucet Customize.

Tap and choose your lock display widget space or date space relying on the sort you want to add.

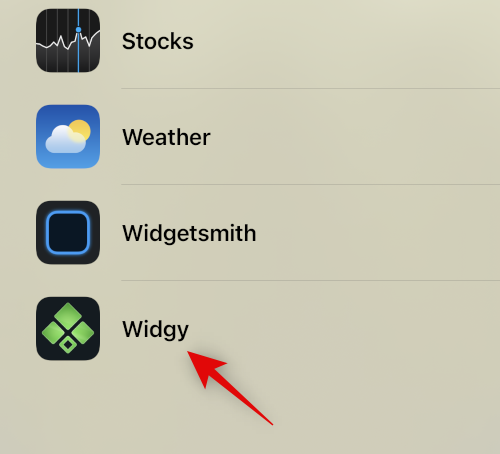
Now scroll by means of the app listing and choose your third-party app.
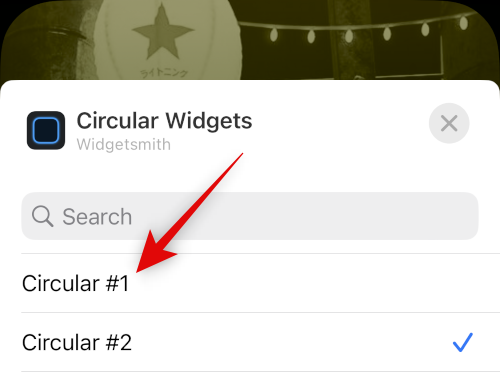
Tap and choose the dimensions of the widget you created.

Tap your widget and select your customized widget if required by the app.
Tap Done to cease enhancing your lock display.

And that’s it! Your customized widget will now be added to your lock display.
Alternative apps to create customized widgets
Here are a couple of various customized widget apps that may match your most well-liked aesthetic higher.
We hope this submit helped you simply create and place a customized widget in your lock display on iOS 16. If you face any points be at liberty to succeed in out using the feedback beneath.
Check out more article on – How-To tutorial and latest highlights on – Technical News