How To Update BIOS Without CPU.
Most mid-range and better motherboards assist the BIOS Flashback characteristic. This means that you can update the BIOS with out the CPU or some other elements.
Using BIOS Flashback could be very easy:
- Prepare a FAT32 USB drive with the specified BIOS file.
- Connect this USB drive to the BIOS Flashback port.
- Press the Flash BIOS button and wait 5 minutes or so.
It is essential that you just get a number of issues proper, although. This consists of verifying that your board doesn’t want a CPU for BIOS Flashback. Or, getting the right BIOS model in your board.
Verify BIOS Flashback Support
For starters, your motherboard will need to have a BIOS Flashback port. Different producers title this port like so:
Besides this apparent requirement, listed here are some more issues to remember:
- Sometimes, the Flashback port gained’t be bodily labeled (like with our ASRock X570 AQUA). It’ll solely be indicated within the guide.

- Some boards don’t assist BIOS Flashback with out a suitable CPU. This was the case with our ASUS ROG STRIX B550-I GAMING board.

- Generally, the 24-pin ATX connector is the one mandatory energy supply. But some boards (e.g., Gigabyte’s AORUS lineup) require you to attach the 8-pin CPU connector as nicely.
- Check your person guide to confirm all of those necessities in your motherboard earlier than continuing.


I’ll update the BIOS with out a CPU on my MSI MAG B550M MORTAR system to reveal the remainder of the method.
Note: If you want a suitable AMD CPU to make use of BIOS Flashback, verify in case you’re eligible for his or her CPU loaner program. This manner, you gained’t need to spend further on a restore heart go to or the like.
Download the Correct BIOS File
On one other system, go to your motherboard’s assist web page. Keep the next factors in thoughts when downloading the BIOS file from there:
- Ensure you’re on the web page for the proper motherboard revision.

- Ideally, it is best to know your present BIOS model earlier than updating. Manufacturers like ASUS and ASRock keep a sticker on the motherboard to point the manufacturing unit BIOS model.

- Go to the Drivers & Downloads part. You’ll discover the BIOS recordsdata there. The latest steady BIOS model is often the best choice.
- Check all of the changelogs beginning out of your present BIOS model to the one you need to flash now. The description typically accommodates necessary data and directions (e.g., whether or not incremental updates are mandatory).

- Finally, obtain the BIOS file and extract the archive.


Move BIOS File to USB
For BIOS Flashback, you want to rename the BIOS file as specified by your producer. Only the extension is constant amongst totally different manufacturers:
- MSI:
.ROM - ASUS:
.CAP - Gigabyte:
.BIN - ASRock:
.rom
The full title will depend on the model and board mannequin. For instance, you want to rename the file to MSI.ROM for many MSI boards.

But ASUS supplies a Rename utility, so every file will likely be named otherwise.
As there’s a whole lot of variation, I like to recommend you verify the person guide and the BIOS Flashback information out of your board producer.
After renaming the file, format a USB drive to FAT32 and transfer the file there.
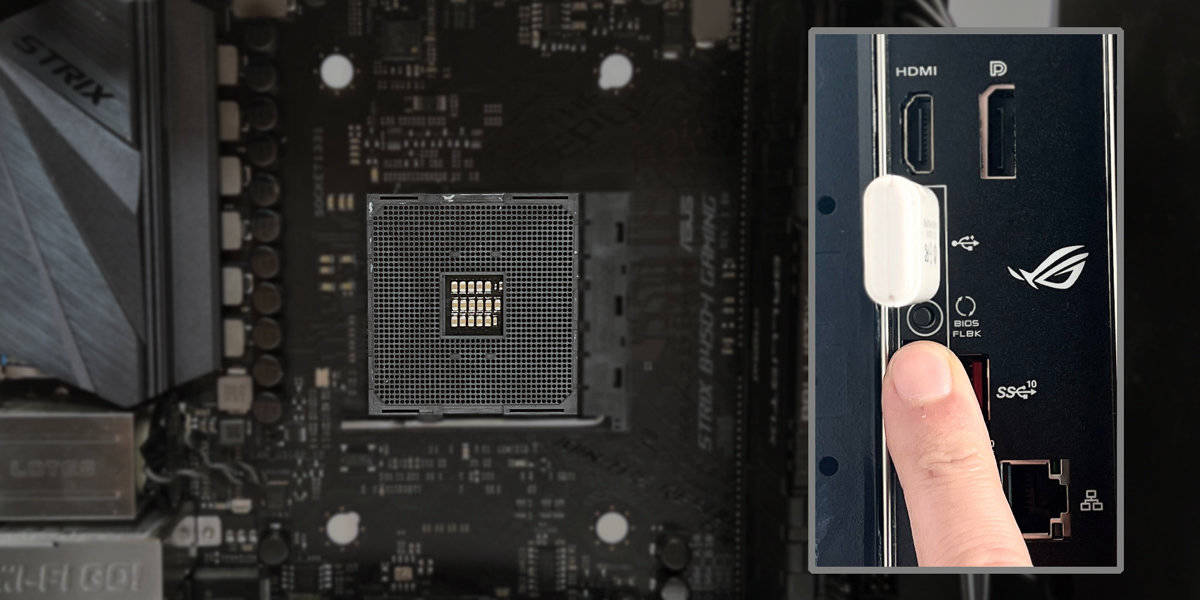
Use BIOS Flashback
Connect the USB drive to the BIOS Flashback port in your motherboard’s I/O Panel.
- As I discussed earlier, the 24-pin energy connector is obligatory. The 8-pin CPU connector could be mandatory relying on the board. Refer to the primary part in case you’re not sure about this.

- Ideally, you also needs to have an influence backup like a UPS to make sure that the BIOS update isn’t interrupted.
- Besides these, the opposite {hardware} is irrelevant.

Now, to make use of BIOS Flashback, merely press the adjoining button for round 5 seconds.

The Flashback LED ought to begin blinking. If your USB drive has an LED, it’ll do the identical. This will proceed for round 5-10 minutes.
Once the Flashback LED stops blinking, the BIOS update is full.
What If the BIOS Update Fails
When the BIOS update fails through commonplace strategies, your board can’t boot in any respect on account of a NO POST problem. BIOS Flashback is usually used to recuperate your board in such conditions.
As lengthy as you observe the right process (FAT32 USB, right BIOS file and title, and so forth., it ought to full easily. But if the BIOS Flashback fails regardless of this, attempt these fast fixes:
- Flash a distinct BIOS model. This is particularly necessary in case you tried to flash a beta model earlier.
- Convert the USB drive to MBR.
- Try one other USB drive. Ideally, the second drive ought to be a distinct USB model (e.g., USB 2.0 as an alternative of three.0).
- Clear the CMOS and check out flashing the BIOS once more.
If these don’t assist, try our information on recovering from a failed BIOS update. It particulars superior strategies like reprogramming the BIOS and changing the BIOS chip.
Check out more article on – How-To tutorial and latest highlights on – Gaming News