How To Troubleshoot ASRock Dr. Debug Error Codes.
Some high-end ASRock motherboards use Dr. Debug codes as a substitute of beeps or LED sparkles to indicate POST errors or codes. When the pc begins up, you’ll usually see the motherboard going by means of a number of Dr. Debug codes.
However, if it will get caught in the identical code for a very long time or cycles by means of a couple of distinctive codes, a number of of your {hardware} parts on the PC will not be working correctly.
I had as soon as encountered the 00 Dr. Debug code, which often represents a CPU drawback, on my ASRock x370 Taichi motherboard that was working high-quality the day gone by. The CPU truly labored fairly nicely in one other laptop.
After a little bit of troubleshooting, I noticed that the brand new graphics card I had simply put in was drawing an excessive amount of energy from the PSU and the CPU was not getting sufficient voltage. I upgraded my PSU, which lastly resolved the problem.
What Are the Dr. Debug Codes on ASRock?
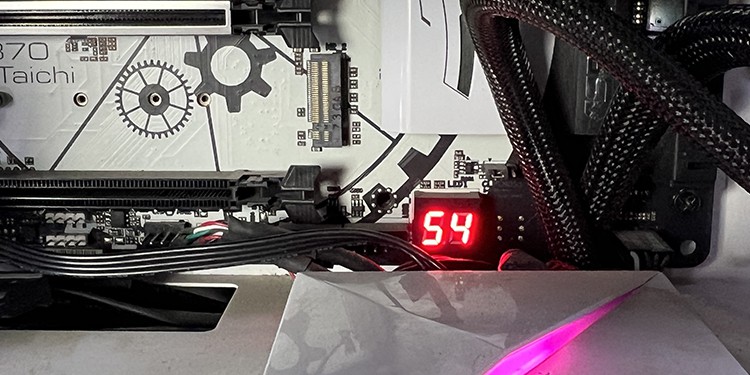
Dr. Debug codes are the hexadecimal codes that you just see on the 7-segment show on some ASRock motherboards.
Whenever the BIOS or UEFI firmware on ASRock performs the POST course of, the Dr. Debug LEDs present varied codes that correspond to the steps within the course of. If the show will get caught with a quantity or code, it signifies that the POST couldn’t full on account of points with a {hardware} element.
So the Dr. Debug code exhibits precisely which element isn’t working. After determining the parts, you possibly can carry out the mandatory troubleshooting measures to examine and resolve their points.
What Do Individual Dr. Debug Codes Mean?
Many of the Dr. Debug codes correspond to transition POST steps and you’ll not get them for any {hardware} points. So listed here are some widespread Dr. Debug codes which you could truly encounter:
| 00 | Problem with the CPU |
| 0D | Problem with USB, PCIe (together with Video Card) or RAM units. |
| 01 – 55 5A – 60 |
Problem with the reminiscence (RAM) |
| 61 – 91 | Can’t initialize the chipset |
| 92 – 99 | Problem with PCIe units (together with Video Card) |
| 9A – 9D | Problem with USB units |
| A0 – A7 | Problem associated to IDE or SATA units |
| B0, B7 | Problem with the reminiscence (RAM) |
| B2 | Problem with the Video Card |
| B4 | Problem with USB units |
| D0 – D3 | Problem with the CPU |
| D6 | Can’t acknowledge the Video Card |
| D7 | Can’t acknowledge or discover keyboard and mouse |
| FF | Problem with the CPU |
If you see one other Dr. Debug code that isn’t on this checklist, it’s higher to examine the consumer handbook of your motherboard mannequin. Also, generally the motherboard’s show flashes by means of the identical bunch of codes in succession. It’s best to contact ASRock help personnel in each of those conditions.
How to Troubleshoot the Dr. Debug Codes?
After figuring out the corresponding device, you possibly can go to the related sections under to troubleshoot your problem.
Most of your {hardware} parts are interdependent. So even when the BIOS detects an error on one device, its underlying trigger could also be in one other device. If merely following the troubleshooting steps for one element doesn’t work, it’s higher to examine different units as nicely.
Chipset Error
If the problem is along with your motherboard chipset, then the one factor you are able to do is to clear the CMOS and reset the BIOS settings. If any improper BIOS settings had been inflicting the problem, clearing the CMOS will resolve it.
You can take away the CMOS battery after which insert it once more or quick the CMOS jumpers on the motherboard to hold out this process.
If clearing the CMOS doesn’t assist, your chipset is probably going broken. You might must exchange your entire motherboard in such instances.
CPU Error
POST errors associated to CPUs don’t mechanically imply that the CPU has failed. You can encounter it if the pins on the CPU or the CPU socket are bent or the thermal paste has spilled contained in the socket.
CPU-related Dr. Debug errors may also happen if the PSU doesn’t present sufficient energy to the CPU and diverts many of the wattage to different parts. This problem often occurs after constructing a PC or upgrading your GPU or coolers if the PSU doesn’t present sufficient wattage to help all of the put in parts.
- Try clearing the CMOS to reset the BIOS settings. It will care for any improper CPU voltage settings which may be inflicting the problem.
- You also needs to examine if the CPU is receiving sufficient voltage by utilizing a multimeter on the CPU’s energy connector. You can examine the image under to know what voltage to look out for by which pins.

- Check in case your CPU is put in correctly. You may also reinstall it whereas guaranteeing that no pins are bent. Also, ensure to correctly clear the thermal paste and reapply it whereas reinstalling the CPU.
- If relevant, you possibly can attempt using the CPU in one other laptop and see if it really works.
- If the CPU doesn’t work anyplace, it’s possible useless. You might want to exchange it in such instances.
- If you’ve gotten carried out all of the options above however are nonetheless getting the error even when the CPU works elsewhere, it signifies points along with your CPU socket or motherboard. If so, it’s possible you’ll want to switch the motherboard.

RAM Error
Issues with RAM often point out that the RAM stick or slot is flawed. However, CPUs additionally include built-in reminiscence controllers and the motherboard can mistakenly symbolize any points with this element as a RAM error within the Dr. Debug code.
Other than these, improper RAM voltage or different settings on the BIOS may also cease it from working and will even harm the RAM sticks.
- You ought to first reseat the RAM correctly. Try altering the RAM slots as nicely.

- If you’re using a couple of RAM stick, use solely separately to examine if considered one of them is defective.
- It’s higher to clear the CMOS to reset the RAM associated BIOS settings as nicely.
- If relevant, you may also attempt inserting the RAM in one other PC or use other-compatible RAMs in your PC to examine if the RAMs are practical. You may also attempt operating RAM diagnostic software program on the opposite PC.
- If the RAM doesn’t work anyplace or the diagnostic reveals some errors, it’s possible you’ll must exchange it.
- Try changing your CPU if the RAM sticks and slots are working correctly to account for points with its reminiscence controller.

Other Device (PCIe, Video Card, SATA/IDE, USB) Error
While the totally different classes of units correspond to totally different Dr. Debug codes, the process to troubleshoot them is identical. So I’ve grouped all of them collectively. Depending in your problem and device, please perform the troubleshooting measures accordingly.
Note: If you’re including extra PCIe units in your PC, be sure that your motherboard has sufficient PCIe lanes to help them.
For instance, in case your CPU + motherboard chipset help a complete of 24 PCIe lanes (16+8), the lanes can be divided amongst all of the units. So if your whole PCIe units like your graphics card, NVMe SSDs, WiFi card, and so forth want a complete of 32 lanes, a number of of the units might not work.
- If the Dr. Debug code corresponds to a selected device, ensure you have truly related the device to the pc.
- Then, attempt eradicating the respective units on the PC and reinstall/reinsert them once more. You must reinstall all of the units within the class (USB peripherals, PCIe units, and so on).

- You may also take away all of the pointless units within the class and examine for those who nonetheless get the identical Dr. Debug code. If you don’t encounter the identical problem, you possibly can join them one after the other and examine to slender down which element is inflicting the problem.
- Try connecting the units to a different PC if relevant. On the identical observe, in case you have extra units, you may also use them on the PC as a substitute. If the device is defective, you have to to switch it.
- You also needs to clear the CMOS and reset your BIOS/UEFI settings.
- If you’ve gotten simply put in the PCIe or USB device in your PC and also you don’t have the newest BIOS model, your BIOS might not help these units. You can attempt updating the BIOS/UEFI and see if it resolves the compatibility problem.

If you continue to can’t resolve your problem, you need to search assist from ASRock help personnel. If it isn’t coated by ASRock’s help, you may also go to native {hardware} professionals and have them take a look at the issue.
Check out more article on – How-To tutorial and latest highlights on – Gaming News