
How To Fix It “Unable To Access Online Services” On Warzone.
Before shifting on to the options to the issue, it’s best to know that you simply get the error when the server is out. You may additionally get the problem in case your laptop has a tough time connecting to the web or the server.
Now that we all know the trigger let’s take a look at the options under.
Check Server Status
Before altering settings in your system, you’ll be able to verify if the Warzone servers are on-line or not. You can go to Activision’s assist web site and verify if the servers are working.

Once you’re on the assist web page, browse the drop-down menu on the correct and choose Call of Duty Warzone. You can then see if the servers are on-line on all platforms.
If the servers are offline, you’ll have to wait till they’re back on. But if they’re working and you continue to face the error, you’ll be able to transfer on to the subsequent course of.
Restart Devices
Preliminary fixes embody all the straightforward and small steps that you are able to do to take away the potential of minor bugs. You can restart your PC, recreation, and router to eradicate the bugs or glitches that may seem throughout startup.
Close Background Apps

Additionally, you can too shut the background apps that may hog up your web connectivity, reminiscent of Google Chrome or different web browsers. You can head over to the Task Manager and kill the processes in order that they don’t run within the background.
Switch To LAN
If you’re related over WiFi, switching to a LAN connection is advisable if attainable. Wired connections provide you with more steady web connectivity than WiFi. However, if switching to LAN shouldn’t be attainable, attempt to transfer as shut as you’ll be able to to the router. You also can strive disconnecting different units on the identical network in order that you don’t share bandwidth with them.
Troubleshoot Your Internet Connection
If you appear to have hassle connecting to the web solely in your device, you’ll be able to strive the troubleshoot choice of Windows:
- Open Search.
- Type Troubleshoot Settings and hit Enter.
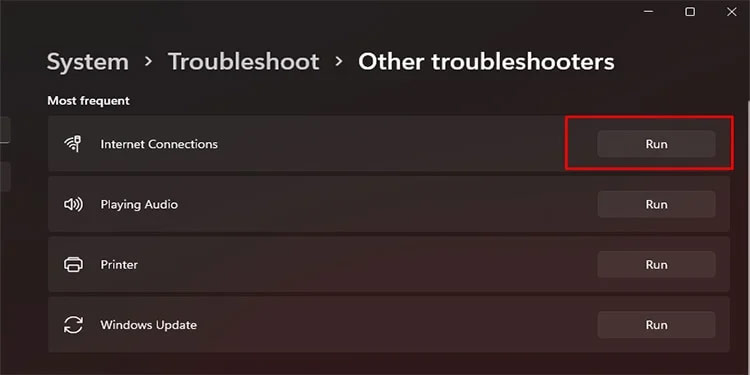
- Go to Other troubleshooters.
- Hit the Run button next to Internet Connection.
- Follow the popup Window to finish the troubleshooting course of.
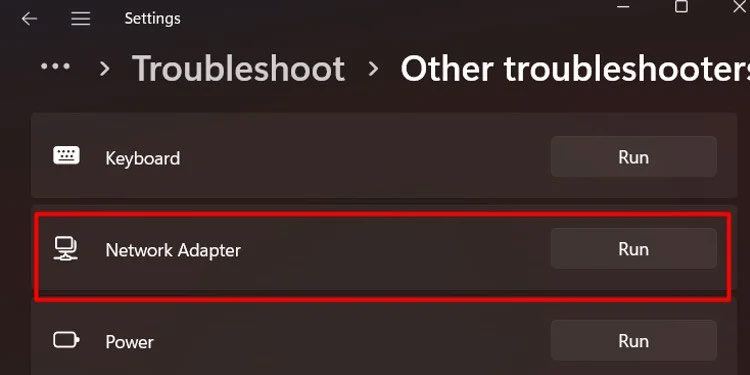
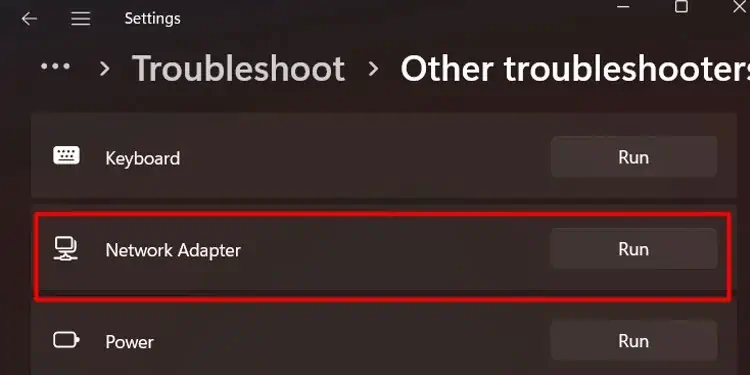
- Now, within the listing of different troubleshooters, discover Network adapters.
- Hit the Run button next to it.
- Follow the troubleshooting wizard to finish the method

Link Activison And Blizzard Accounts
It is best to keep in mind that you would possibly get the problem when you have not linked your Activision and Blizzard accounts. If you fall in the identical class, you’ll be able to head to Activision’s web site and log in, go to profile, and choose Account Linking. You can then hyperlink your Blizzard account and verify if the issue persists.
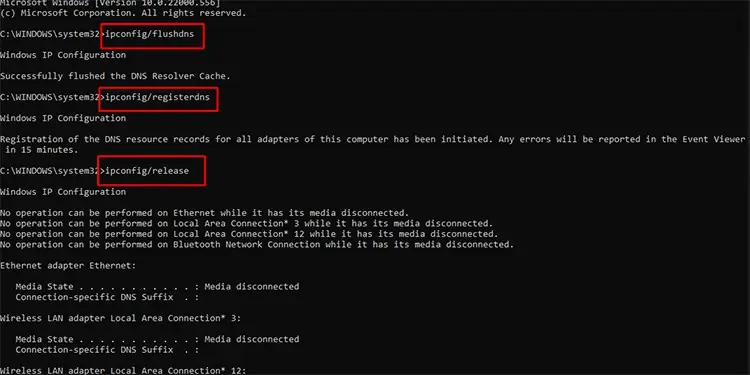
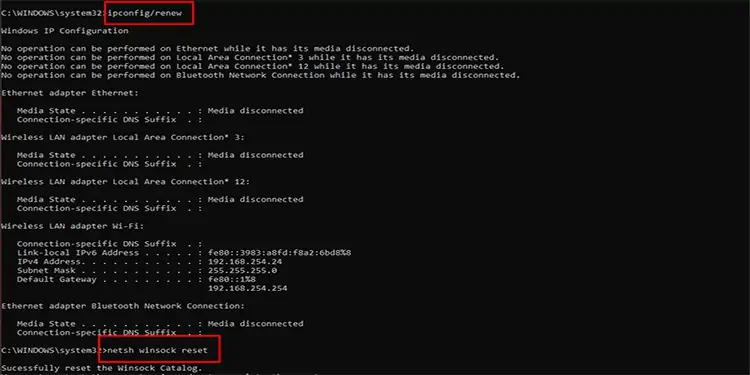
Flush DNS Cache
Flushing the DNS cache can clear up the web cache out of your PC and refresh your web connection.
- Run Command Prompt by way of search as administrator.
- Type the next instructions one by one and hit Enter.

ipconfig/flushdnsipconfig/registerdnsipconfig/launchipconfig/renewnetsh winsock reset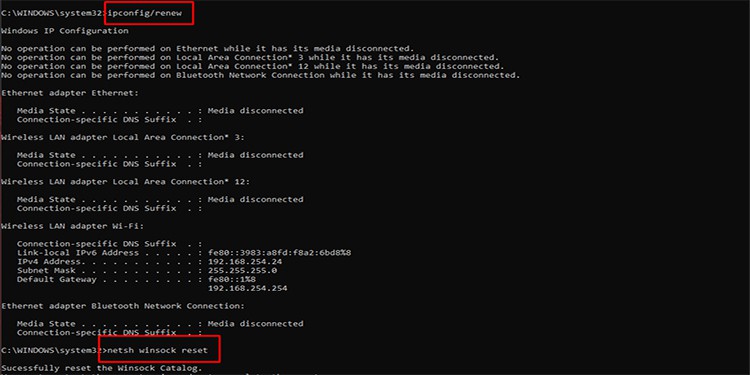
- Restart your PC.
Change DNS
In layman’s phrases, altering your DNS adjustments the place you get data from. It has a number of advantages, reminiscent of dashing up downloads and providing you with a dependable connection.
- Open Search, sort Control Panel at press Enter.
- Go to Network and Internet.
- Now, steer in the direction of Network and Sharing Center.

- Select the Change adapter settings positioned on the left.
- Find the connection you’re using and open it.
- Next, head over to Properties within the popup window.
- Find and choose Internet Protocol Version 4 (TCP/IPv4).
- Click on Properties.

- Select the use following DNS server addresses positioned on the backside.
- Add the next servers within the packing containers.

Preferred DNS Server: 8.8.8.8
Alternate DNS Server: 8.8.4.4 - Press OK to avoid wasting the adjustments.

Change DNS on PS4
Since Warzone can also be accessible on PlayStation, you’ll be able to change the DNS on the console using the next steps.
- Go to Settings from the menu.
- Browse Network and steer in the direction of View Connection Status.
- Copy the IP Address, Default Gateway, and the Subnet Mask.
- Now, head back to the Network Settings and browse Set Up Internet Connection.

- Once you choose your web, choose Set Up Internet Connection.
- On the display that follows, go to Custom.
- Then, head to IP Address Settings and choose Manual.
- Enter the beforehand copied IP Address, Subnet Mask, and the Default Gateway within the respective areas.
- Change the DNS to the next values.
Primary DNS: 8.8.8.8
Secondary DNS 8.8.4.4 - Press on Next.
- When the system prompts you, choose Automatic for MTU settings and Not to Use for Proxy Server.
- Test the connection to see if it really works effectively.
- Launch the sport and see if the issue persists.

Talk to Activision Support
If nothing labored up to now, you’ll be able to go to Activision assist and submit a ticket. Doping so may be your best step to sort out the issue. Please ensure to say your drawback intimately and likewise the options you’ve tried up to now. This can pace up your course of, and the assist may help you simply.

However, it’s best to needless to say this course of might take a while. Although the assist will attain out to you as quickly as attainable, it’d take one or two days or longer.
Hopefully, you fastened your problem simply and may now recreation easily with none errors disrupting your gameplay.
Check out more article on – How-To tutorial and latest highlights on – Gaming News