How To Enable Or Disable Secure Boot On ASRock Motherboard.
The Secure Boot safety function in your ASRock motherboard prevents booting from any gadgets that don’t comprise legitimate digital signatures.
In essence, solely signed system degree drivers can run if this function is enabled. If any drivers on the working system or the bootable drives are unsigned or infected-with malware, the UEFI or BIOS firmware received’t select it as a boot device.
You can allow or disable this setting from inside the Security tab of the UEFI or BIOS interface in your ASRock motherboard.
How to Disable Secure Boot on ASRock Motherboard
While Secure Boot is a safety function that protects your laptop from exterior threats and entry, chances are you’ll must disable it in a number of conditions.
For instance, I’ve each Windows and Linux as twin boot choices on my laptop. If I modify the {hardware} elements or the Linux kernel, the drivers or kernel on my Linux system could not have the required digital signature. It is feasible to re-sign the software program elements. But because it’s tiring to do on every change, I normally keep Secure Boot disabled.
However, I additionally undertake all of the preventive measures to forestall any types of malware or different threats on my system. If you aren’t positive that you are able to do the identical, it’s best to depart it on.
Regardless, right here’s how one can disable this function.
- Restart or energy up your laptop.
- As quickly as you see the ASRock emblem on the display, press F2 or Del keys to get to the UEFI setup.

- If you might be within the EZ mode interface, press F6 to get to Advanced Mode.

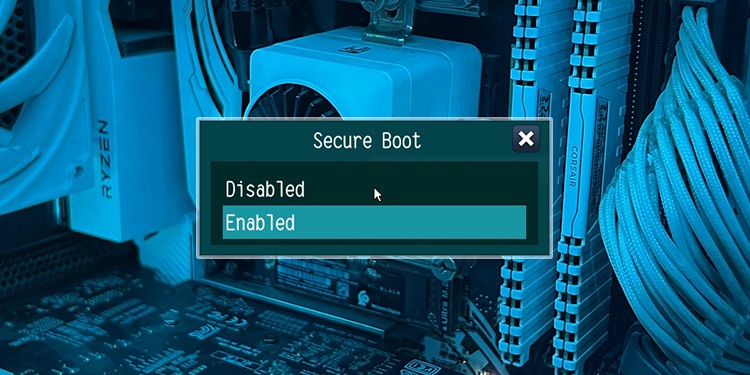
- Head over to the Security tab and choose Secure Boot.

- Select Secure Boot, set it to Disabled and press Enter.

- Press F10 and click on Yes to avoid wasting the adjustments and exit the UEFI/BIOS.


You may take away the keys altogether to disable Secure Boot in a more damaging method. I don’t suggest doing so particularly if you’re using customized generated Secure Boot keys and have their backup. Regardless, right here’s how you are able to do it:
- Go to the Security tab within the UEFI Advanced Mode.
- Select Secure Boot and set Secure Boot Mode to Custom.

- Then click on on Clear Secure Boot Keys.

- Choose Yes to substantiate.
- Press F10 and click on Yes to avoid wasting the adjustments and exit the UEFI/BIOS.


How to Enable Secure Boot on ASRock Motherboard
The course of to allow Secure Boot is much like that of disabling this function. However, you will want to carry out extra steps in case your UEFI not accommodates the Secure Boot Keys.
Note:
If you want to allow safe boot to be able to improve to or set up Windows 11, your firmware additionally must be in UEFI mode.
So you need to disable CSM, which carries legacy assist. Also, when you’ve got an MBR partition disk as an alternative of a GPT one, you will want to transform it to GPT so that you could allow UEFI mode.
Depending in your motherboard’s BIOS model, chances are you’ll want to alter these settings in different conditions as effectively.
- Power up or restart your laptop.
- Press F2 or Del on the startup once you see the producer’s emblem. If you’ve got enabled quick boot, it’s higher to press the important thing repeatedly to get the timing proper.
- If you might be within the EZ mode interface, press F6 to get to Advanced Mode.
- Navigate to the Security tab and go inside Secure Boot.
- Choose Secure Boot and set it to Enabled.

- If you don’t encounter any points, press F10 and click on Yes to avoid wasting the adjustments and exit the BIOS/UEFI.

If you get the “Secure Boot can be enabled when System is in User Mode. Repeat operation after enrolling Platform Key(PK)” or the same error, it signifies that your laptop doesn’t have the required Secure Boot keys.
Use one of many three strategies beneath to generate the keys on this situation.
- You set the Secure Boot Mode to Standard to have the ability to get the default Secure Boot keys.

- You may set the mode to Custom, select Install Secure Boot keys and ensure with Yes for a similar function.

- Or when you’ve got an exterior USB media with separate Secure Boot keys, you should use the steps beneath to import them:


Then, allow Secure Boot using the above steps. You may have to avoid wasting the adjustments, restart your system after which get to the UEFI once more to take action.
In some conditions, your system could present that Secure boot isn’t lively even when it’s enabled within the BIOS. You might want to carry out a BIOS update to resolve this problem.
Check out more article on – How-To tutorial and latest highlights on – Gaming News