How To Enable Or Disable CSM On ASUS?.
The CSM function on ASUS motherboards and laptops allows legacy BIOS comptability. It permits your ASUS system as well and set up older working programs that don’t natively help UEFI.
However, there’s a sure trade-off as launching it might deactivate sure UEFI-based security measures.
You’ll discover the CSM choice within the ‘Boot‘ section of your ASUS BIOS. Here, you can set the mode to Enabled, Disabled, or Auto. Don’t neglect to save earlier than you exit or else the adjustments gained’t be utilized.
While the method appears straightforward, the setting was unconfigurable on my NX580VD laptop computer. If one thing like that occurs to you, I counsel disabling the Secure Boot choice first, which is strictly how I used to be capable of remedy my drawback. Let me information you thru the step-by-step course of.
Access UEFI BIOS Utility
CSM, a function throughout the UEFI settings can add backward compatibility to sure legacy elements.
But don’t get confused–it is not going to fully change your BIOS to Legacy mode. Instead, it’s simply going to create an emulation of the Legacy atmosphere.
Having mentioned that, step one in direction of tweaking CSM settings in ASUS (or some other motherboard) is reaching the UEFI interface:
- Start or restart your laptop.
- Wait till you see an ASUS brand on the startup display, just like the one proven beneath (that is totally different for each motherboard sequence).

- As acknowledged, press the Del or F2 to enter the UEFI BIOS Utility.

Tweak CSM Settings
Now that you just’re on the UEFI display, the subsequent step is to search out the devoted CSM settings web page and configure your required adjustments.
If you allow CSM, most fashionable ASUS motherboards allow you to handle extra boot choices. These embody managing storage/network/PCI-E growth gadgets and setting boot precedence.
Note that disabling CSM may result in booting points in case your PCIe-based storage gadgets don’t include a Microsoft-signed UEFI driver. You’ll even get a associated discover if you happen to’re using a latest AMI BIOS model.
In brief, allow CSM if you happen to’re searching for legacy compatibility and go away it disabled for full help of UEFI security measures.
Also, you could go for Auto, which routinely detects the legacy/UEFI state of your gadgets and units the CSM help accordingly.
- In the UEFI display, change to the Advanced tab using the F7 key (if you happen to’re in EZ mode).
- Then, get to the Boot tab.

- Select CSM (Compatibility Support Module).

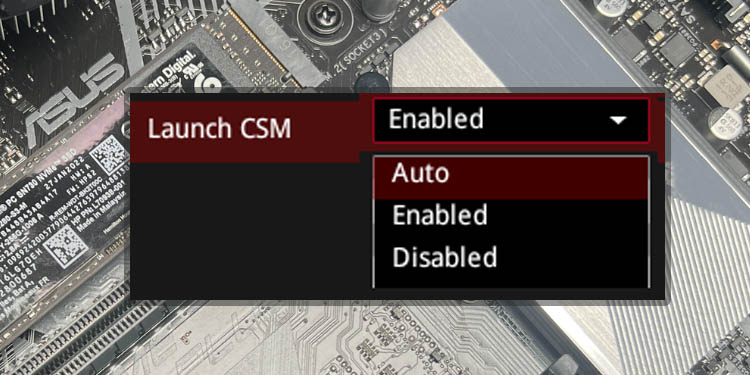
- Now, select Enabled, Disabled, or Auto from the Launch CSM drop-down.

- If you have got enabled CSM, you could now configure these extra choices as effectively–Boot Device Control, Boot from network gadgets, Boot from storage gadgets, and Boot from PCI-E Expansion Devices.


Additional Tip: Turning on ReSize Bar Support makes use of the complete functionality of your GPU reminiscence. If you wish to do that, get to the dedication choice within the standing menu bar (close to the Search button).
However, this function will routinely disable CSM. Also, the choice isn’t obtainable on each ASUS mannequin.
A a lot faster solution to configure CSM settings is through the use of the Search performance. You can execute the next directions even on the EZ Mode:
- Click on the Search button from the highest (next to the standing bar). Otherwise, immediately press F9 in your keyboard.
- Once the Search dialogue field pops up, sort CSM and hit Ok.

- The associated setting will now seem beneath. Proceed to allow, disable, or just set the choice to Auto.

Disable Secure Boot [Optional]
Note: Skip this step in case your CSM choice isn’t greyed out.
If the CSM choice is non-configurable (greyed-out), it could actually point out two issues–both your motherboard/laptop computer doesn’t help it or it’s essential make modifications on the {hardware} or firmware degree.
In most ASUS laptops, you possibly can repair this by disabling the Secure Boot choice. Since it is likely one of the superior safety functionalities, your UEFI firmware is probably going proscribing you to configure the CSM choice.
Warning: Disabling Secure Boot will stop your working system’s digital signature to be checked. So, you is perhaps weak to malware and unauthorized entry to the device.
- Enter the Advanced Mode by urgent F7.
- Get to the Security part.
- Here, choose Secure Boot.

- Next, develop Secure Boot Control drop-down and decide Disabled.

- Now, get back to the Boot tab and also you’ll discover that the CSM Support turns into obtainable. Expand the drop-down and decide Enabled.


However, this isn’t at all times the case. I used to be capable of allow the Secure Boot choice even when my BIOS mode was set to CSM. With most fashionable ASUS motherboards, this is perhaps doable.
In case the above directions didn’t assist, I like to recommend analyzing your motherboard’s consumer handbook. Identify whether or not the CSM might be configured with the built-in graphics card. If not, it’s essential use an add-on graphics card that helps UEFI VBIOS.
Save Changes and Verify
After configuring CSM mode to Enabled/Disabled/Auto, don’t neglect to avoid wasting the adjustments earlier than you exit from BIOS. As a closing step, be sure you confirm the adjustments as mentioned beneath:
- Navigate to the Exit tab.
- Then, choose Save Changes & Reset.

- In the ‘Save & reset’ immediate, hit Ok.

- Wait to your laptop to reboot.
- If you had enabled the CSM, test whether or not your storage drives at the moment are detected. And if you happen to had disabled it, make sure you’re ready to make use of superior UEFI options.


Check out more article on – How-To tutorial and latest highlights on – Gaming News