How do I Hide an App on iPhone With the iOS 18 Update.
What to know
- iOS 18 enables you to hide apps in your iPhone.
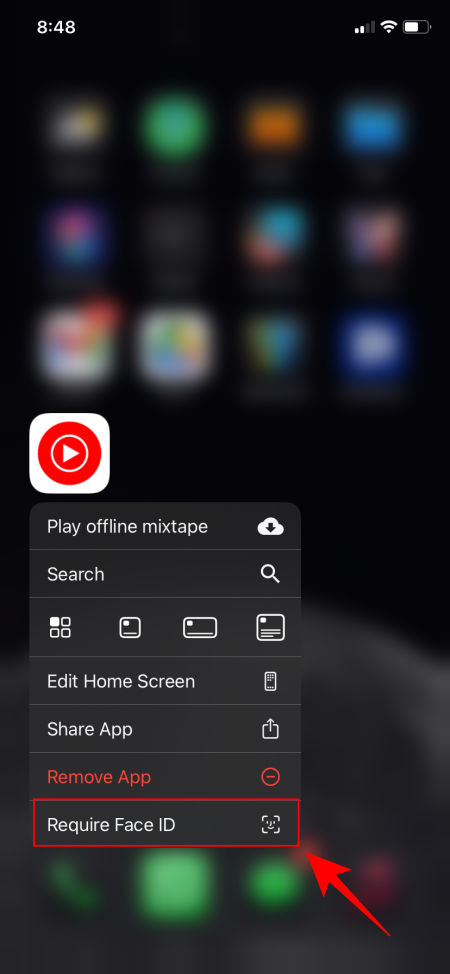
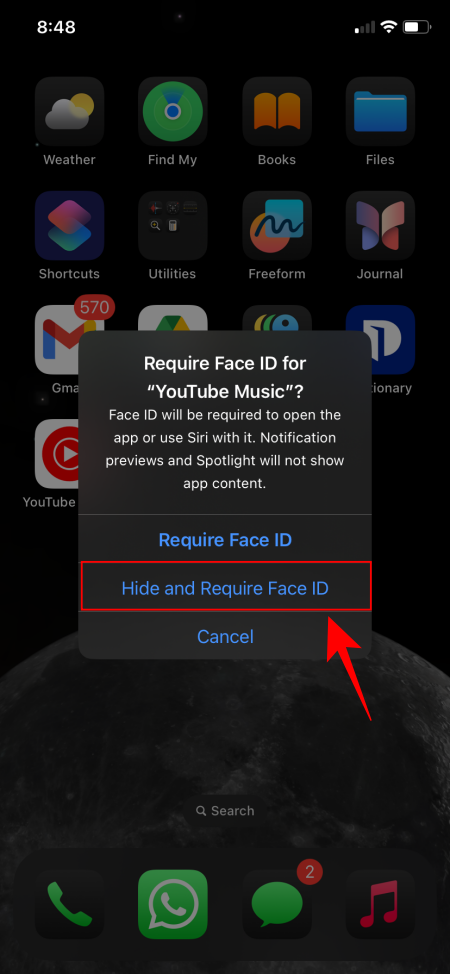
- Long press on an app > choose Require Face ID > choose Hide and Require Face ID.
- Hidden apps are faraway from the Home Screen and added to the ‘Hidden’ folder within the App Library. Face ID authentication is required to open the Hidden folder in addition to the hidden apps.
iOS 18 has a number of new options to guard your non-public data from others. A brand new choice now enables you to lock and conceal apps in order that its contents stay utterly hidden and can’t be seen by others, even unintentionally. Here’s how to cover an app on iOS 18 in your iPhone.
How do I hide an app on iOS 18 on iPhone
When you hide an app, its notifications and contents are hidden throughout the system except you authorize and unlock it using your Face ID. Here’s how to cover an app:
- Tap and maintain on the app that you just wish to hide and choose Require Face ID. Then choose Hide and Require Face ID.
-
- When prompted, faucet Hide App. The app will now be faraway from the Home display and added contained in the Hidden folder on the backside of the App Library.
-
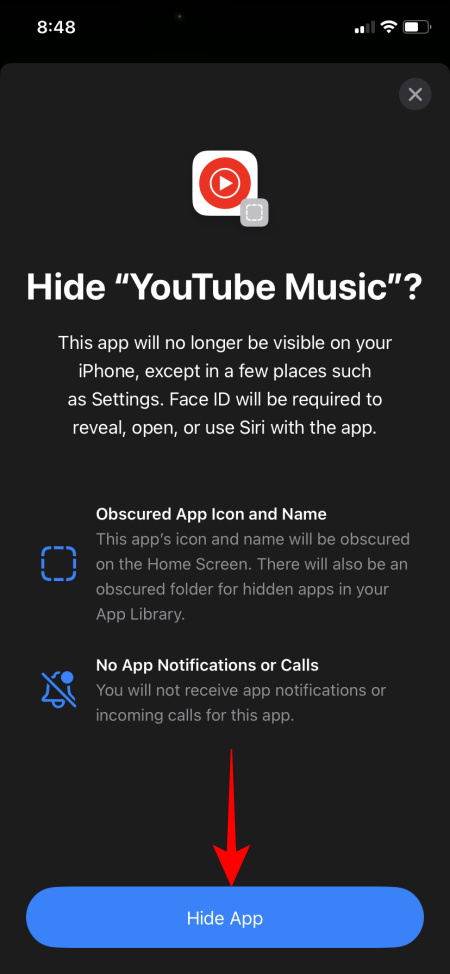
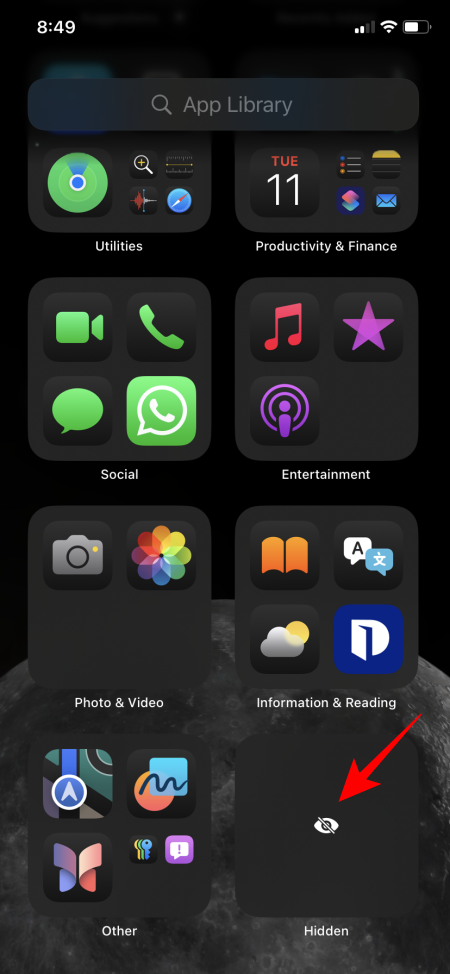
Once the app is hidden, you will have your Face ID authentication to open the Hidden folder in addition to to open the app.
FAQ
Let’s take into account a number of generally requested questions on hiding apps on iOS 18 on iPhone.
Can I permit notifications from hidden apps?
Yes. Even although the default setting for hidden apps prevents notifications, you may permit Notifications for a hidden app from Settings > Apps > Hidden Apps > (app identify) > Notifications > Allow notifications.
How do I unhide an app on iOS 18?
To unhide an app on iOS 18, lengthy press on the app throughout the Hidden folder and choose ‘Don’t Require Face ID’. Refer to our information on How do I Unhide an App on iOS 18 on iPhone for detailed directions.
We hope this information helped you hide apps from others in your iPhone. Until next time!
Check out more article on – How-To tutorial and latest highlights on – Technical News